Stripe is an American payment gateway that allows e-commerce sites to receive payments on their sales website. It is the best software platform for doing business on the internet. This software is processing billions of dollars every year for businesses around the world. Below is a guide on connecting Stripe as a payment gateway for your online store. This article will walk you through how to connect your Stripe account to ShopBase store.
In this section
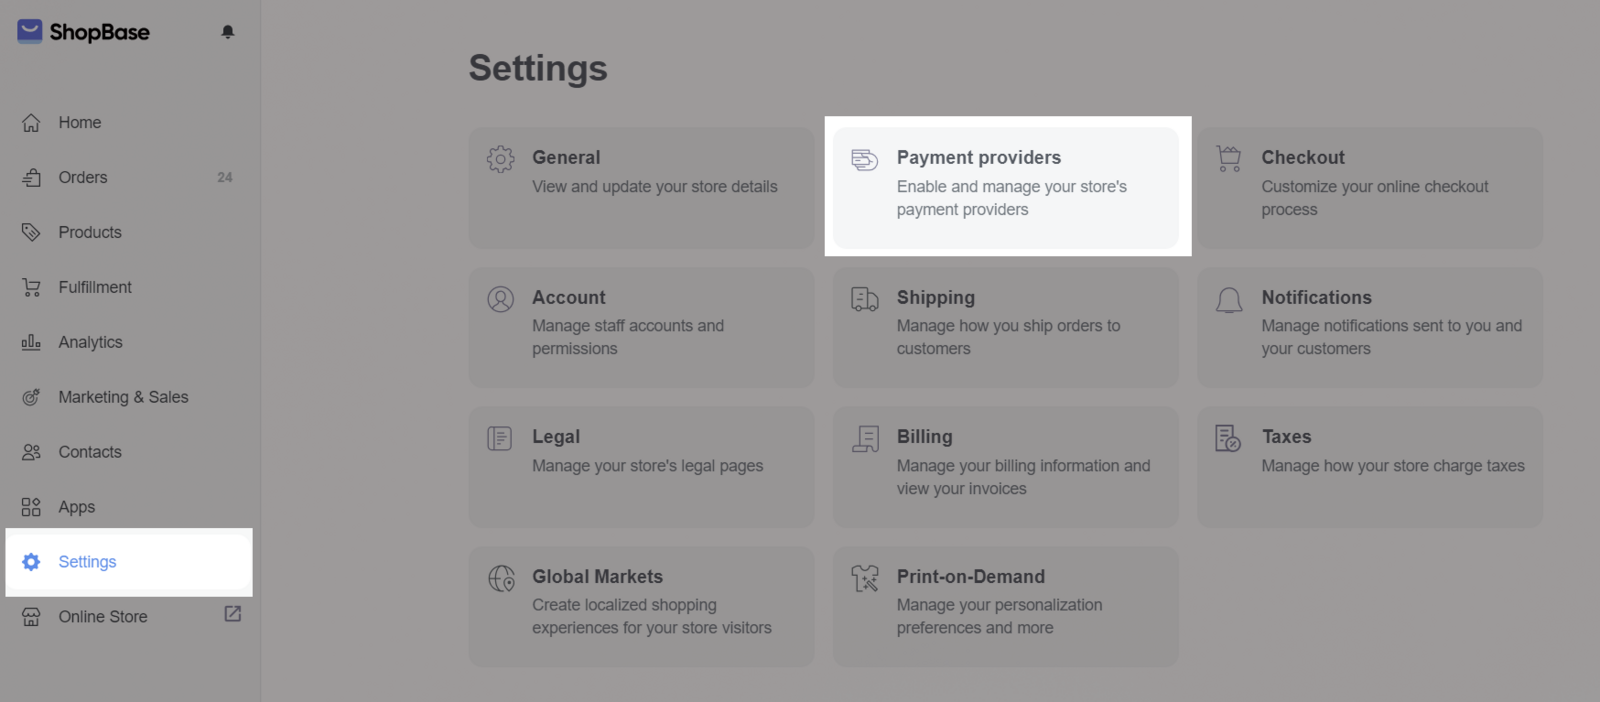
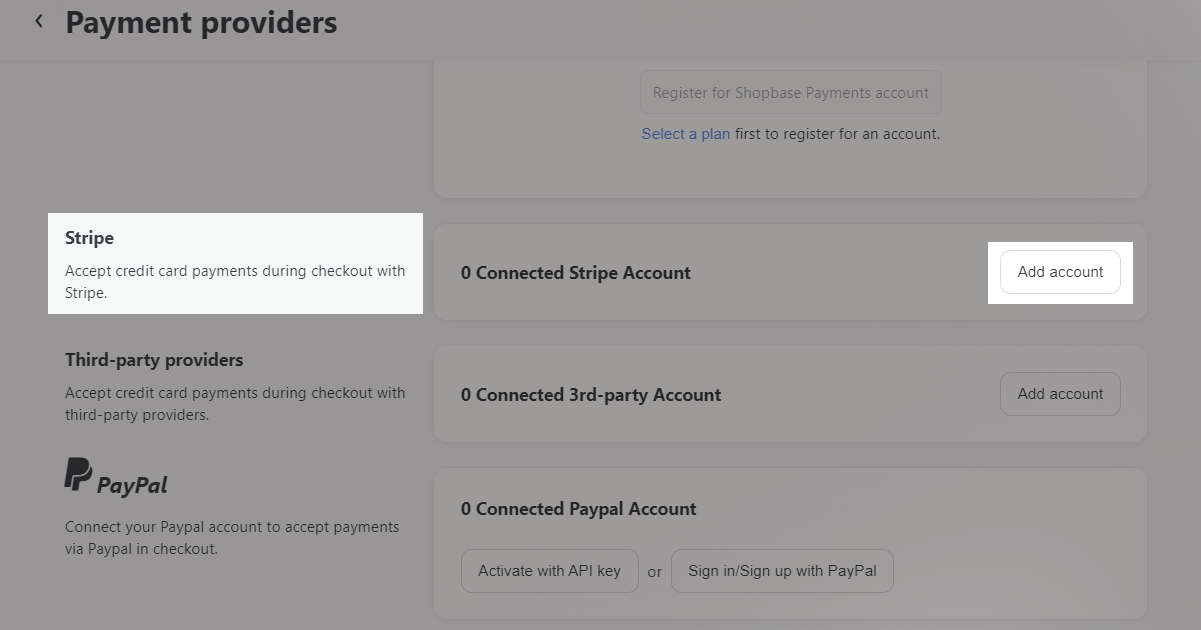
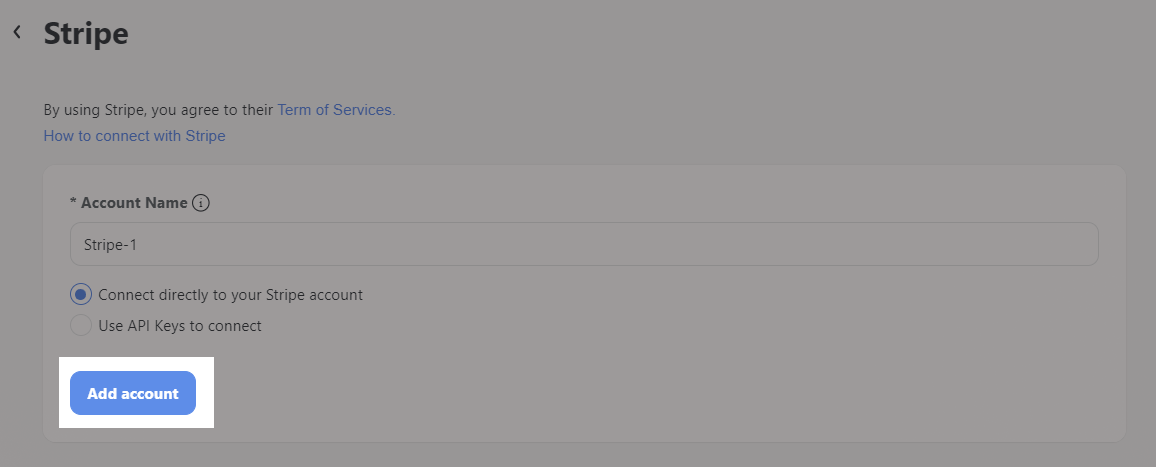
B. Connect Stripe Account by Open Authorization
C. Deactivate your Stripe account
A. Set up your Stripe account
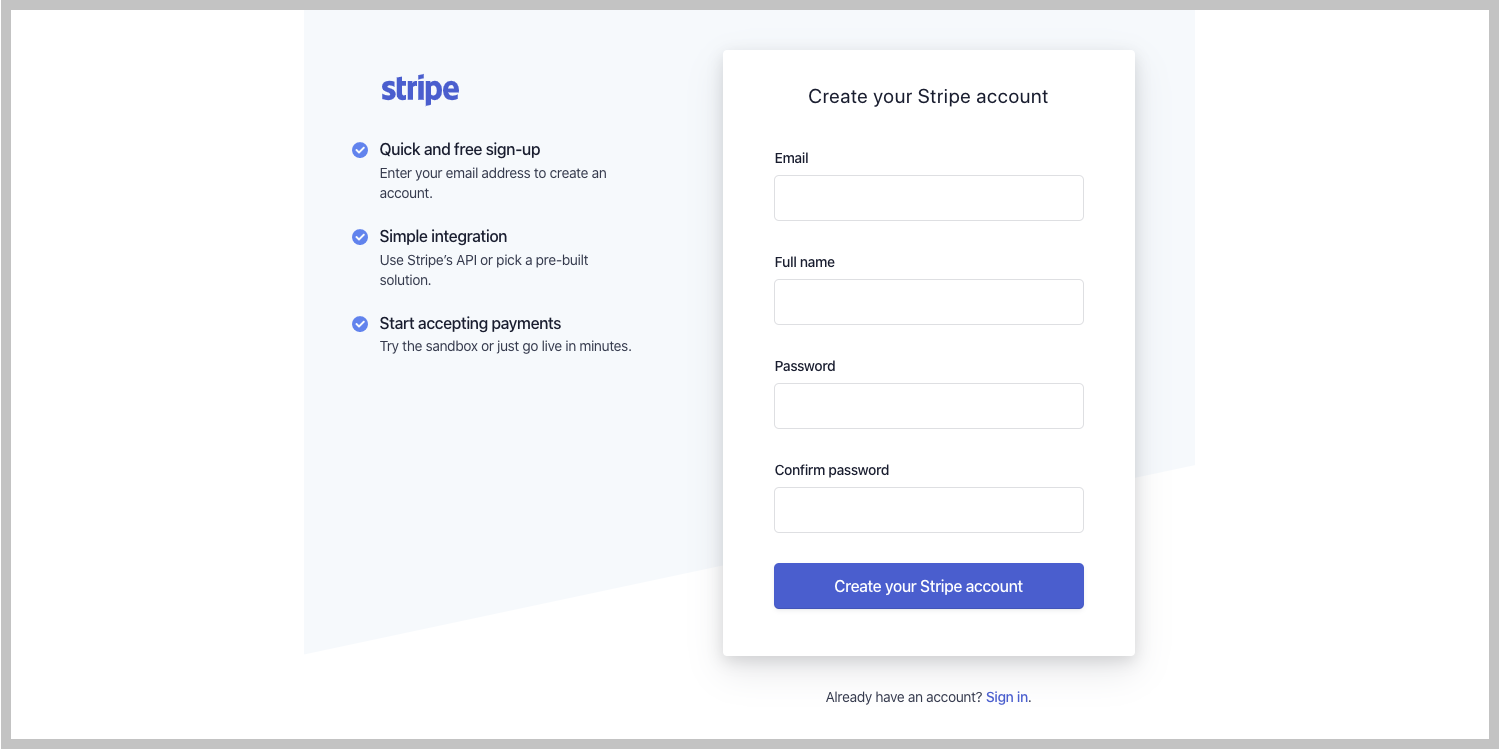
1. Create your Stripe account
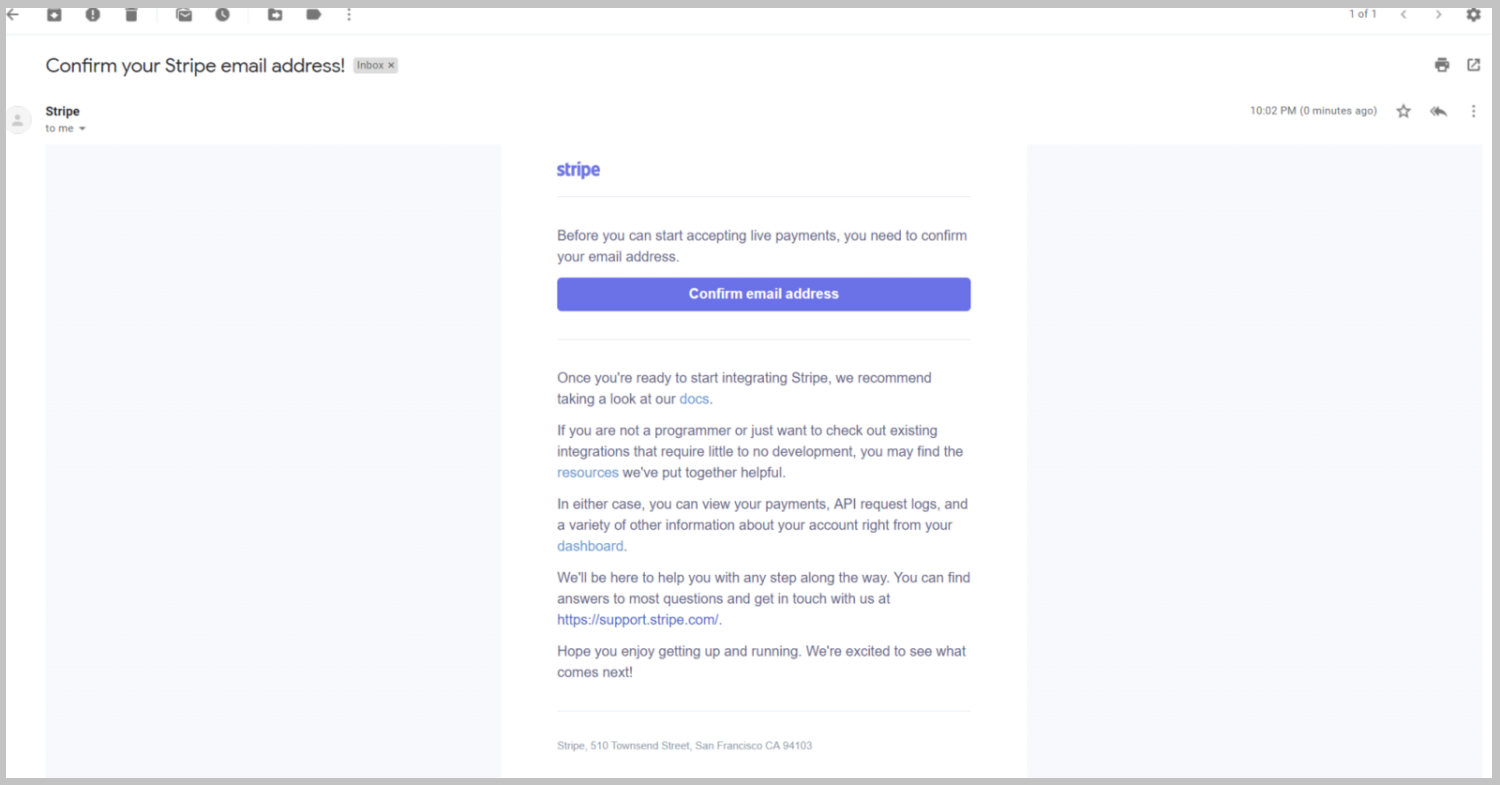
2. Confirm your Stripe account
To confirm your Stripe email and account:
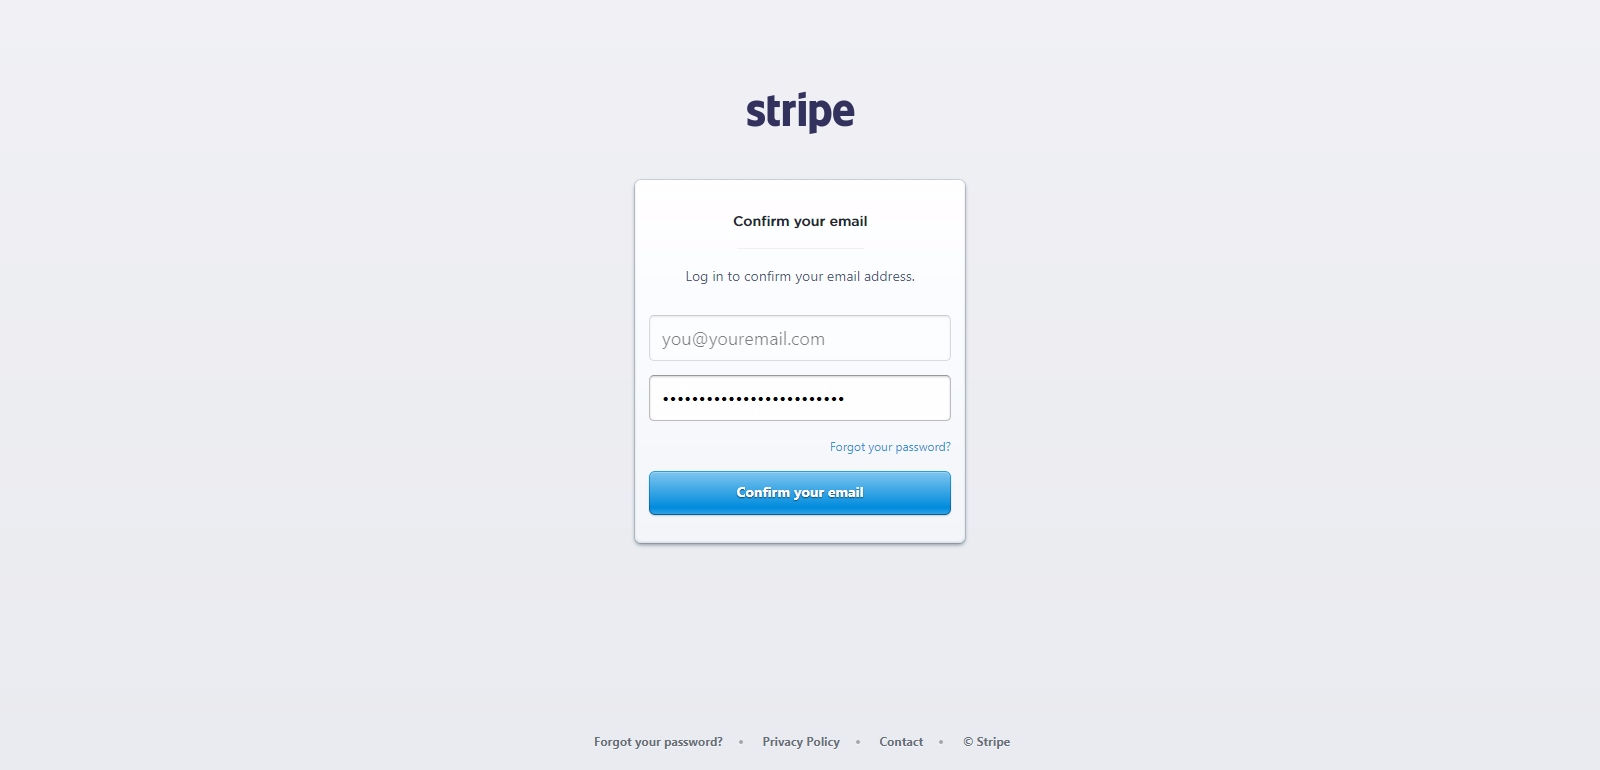
Your Stripe account is now confirmed. You should now activate it to be able to receive money via this Stripe account.
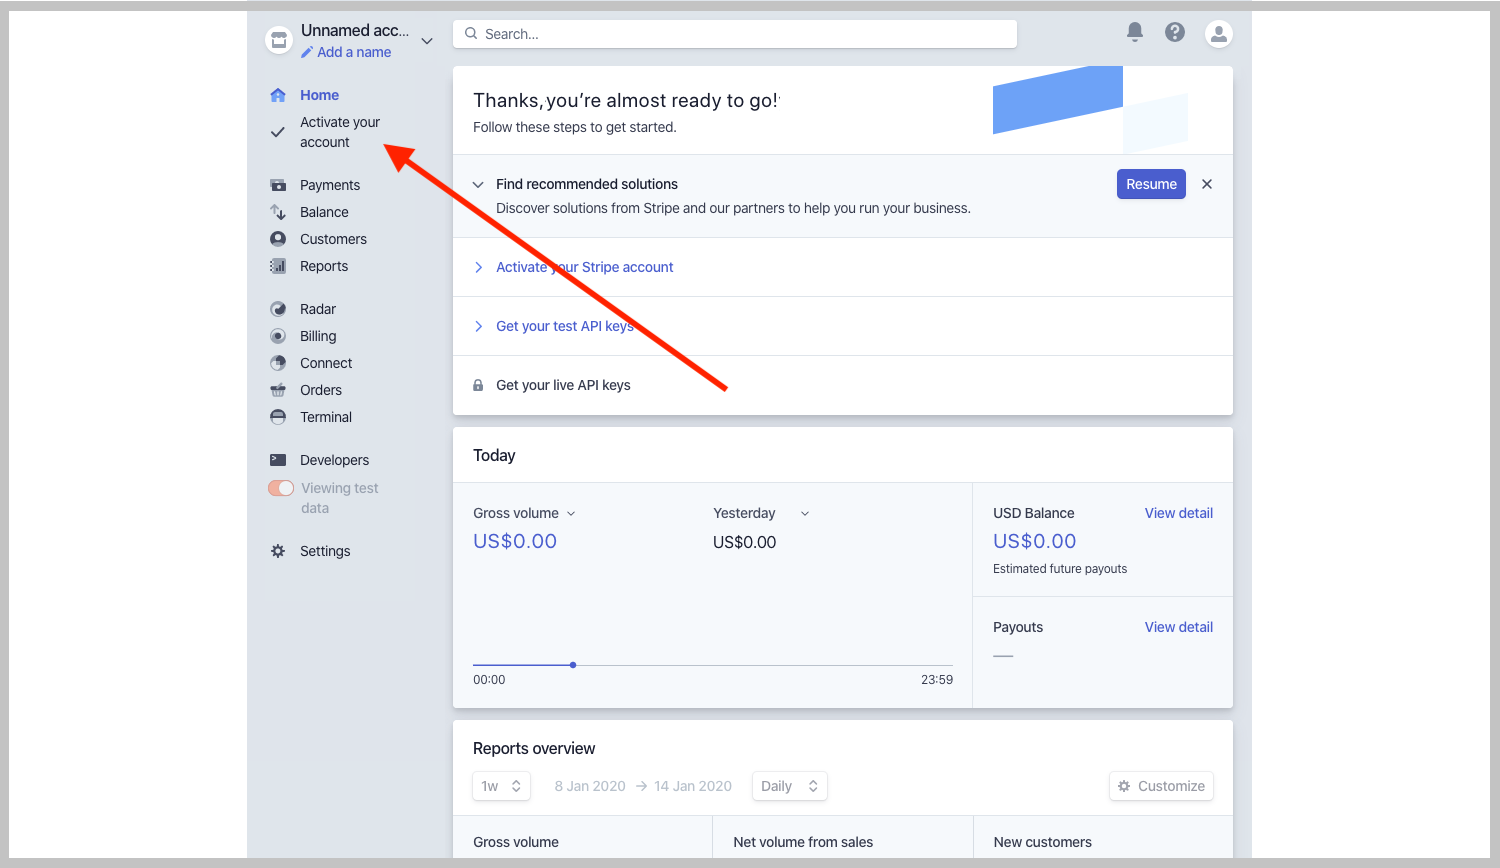
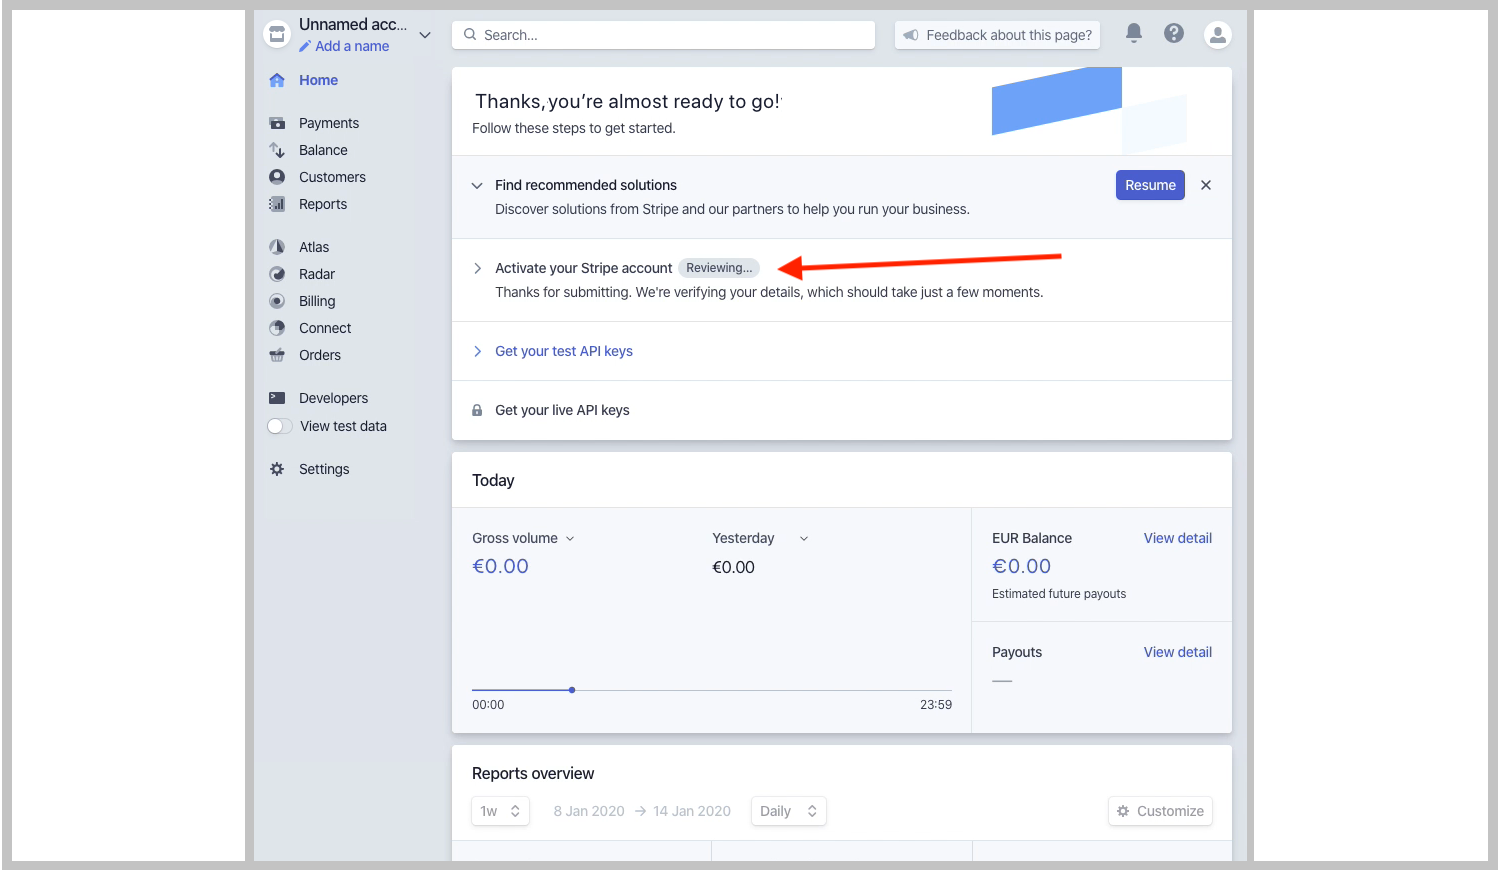
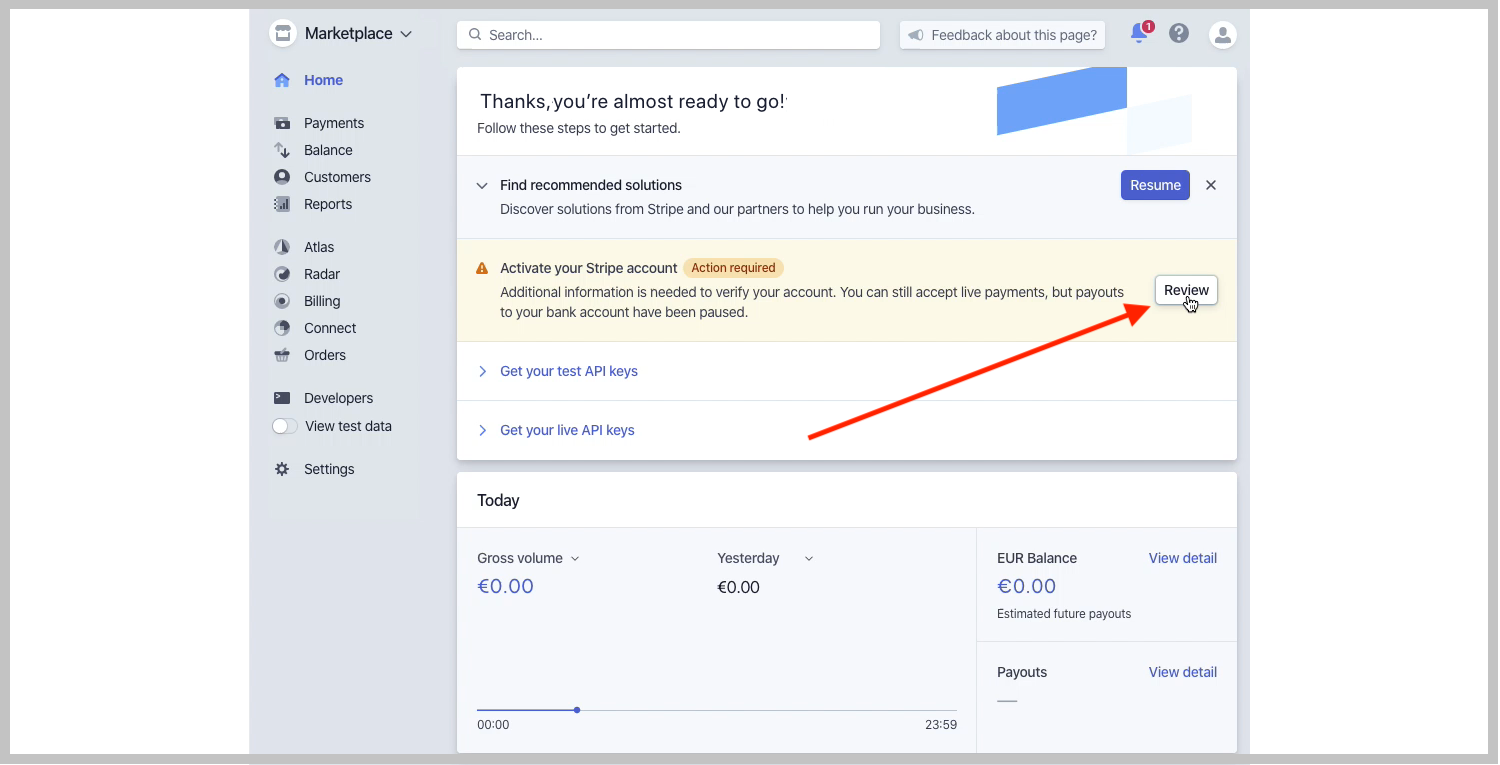
3. Activate your Stripe account
To receive payments from your customer, you have to provide some details , such as your address and your bank account. This data is secured by Stripe and won't be shared with anyone.
To activate your Stripe account:
B. Connect Stripe Account by Open Authorization
When connecting Stripe from non-supported-by-Stripe countries (such as Vietnam and China), you must use IPs and change proxy to USA location via VPN. After the connection is finished, you can use your IP as normal. You can check here if your country is supported.
C. Deactivate your Stripe account
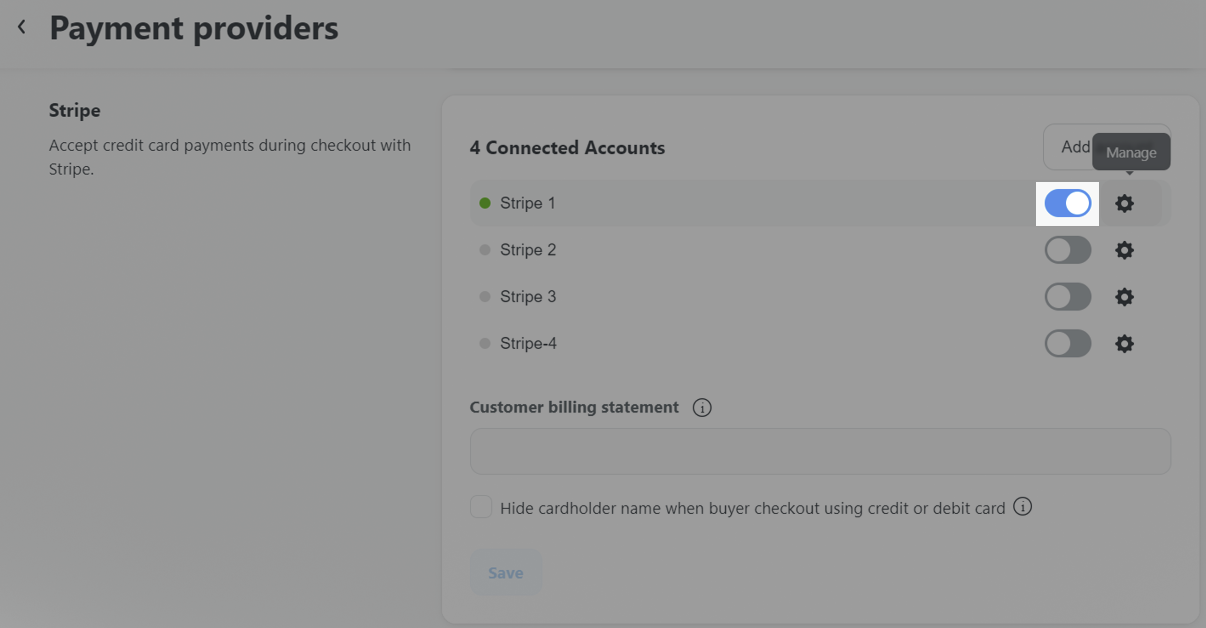
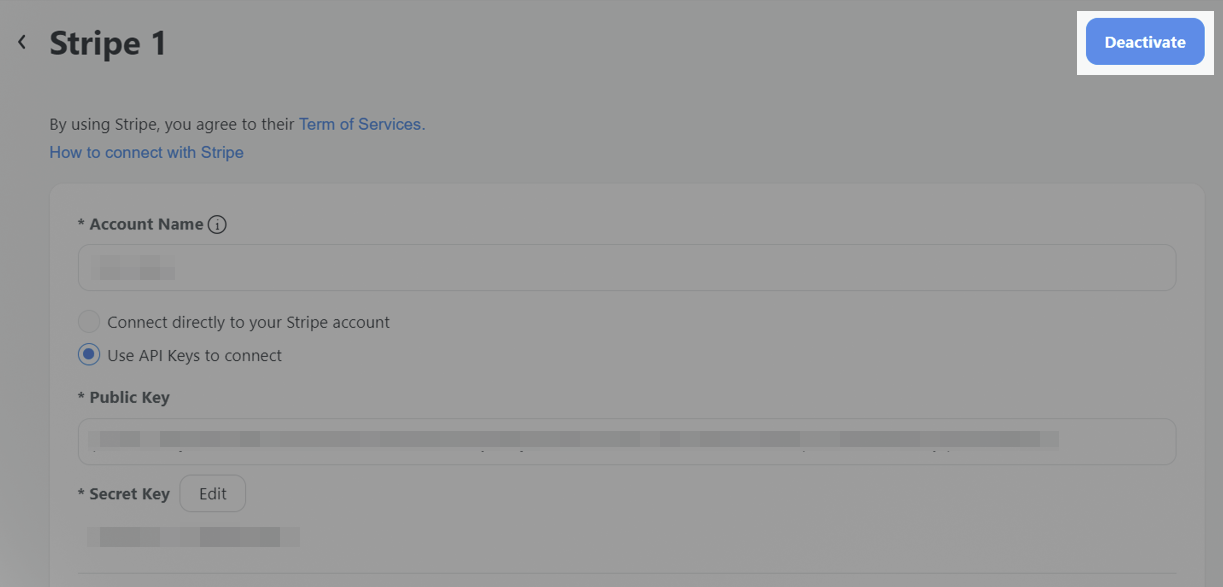
After connecting your Stripe account to the store, you can deactivate it anytime in 2 ways and still be able to re-activate it later.
By default, the cardholder's name is not displayed in the checkout form when using a credit or debit card. However, to allow buyers to input their Cardholder name during checkout, you may modify the checkout form settings in the Website Builder.
