On ShopBase, you can create a collection and select each item to be included in the collection manually. This gives you extensive control over which items are included in the collection. However, if the collection has too many items, manual handling takes a lot of time. You can also refer to this article on how to create automatic collections. In this article, we will show you how to create manual collections.
In this article
A. Manually create a collection
B. Create a manual collection for the campaign using the Bulk Duplicate feature
C. Create a manual collection when importing campaigns via a CSV file
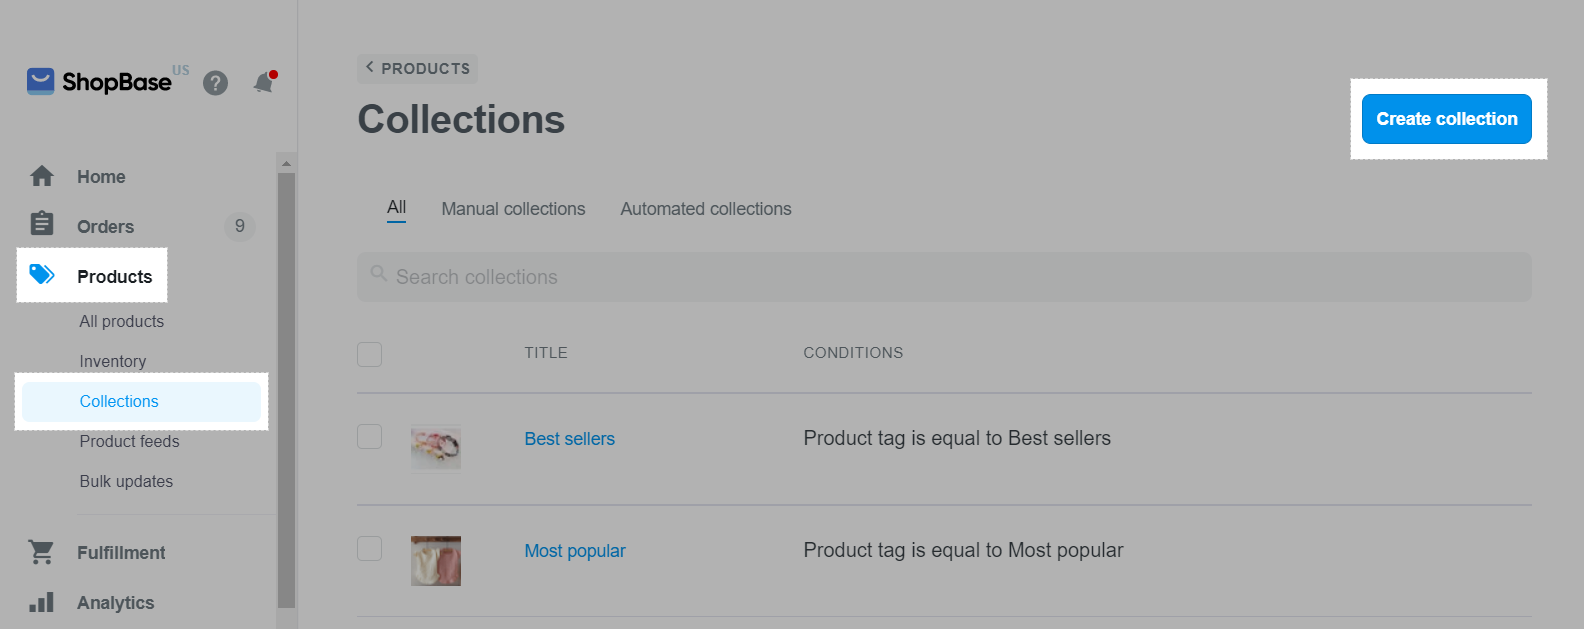
A. Manually create a collection.
In which:
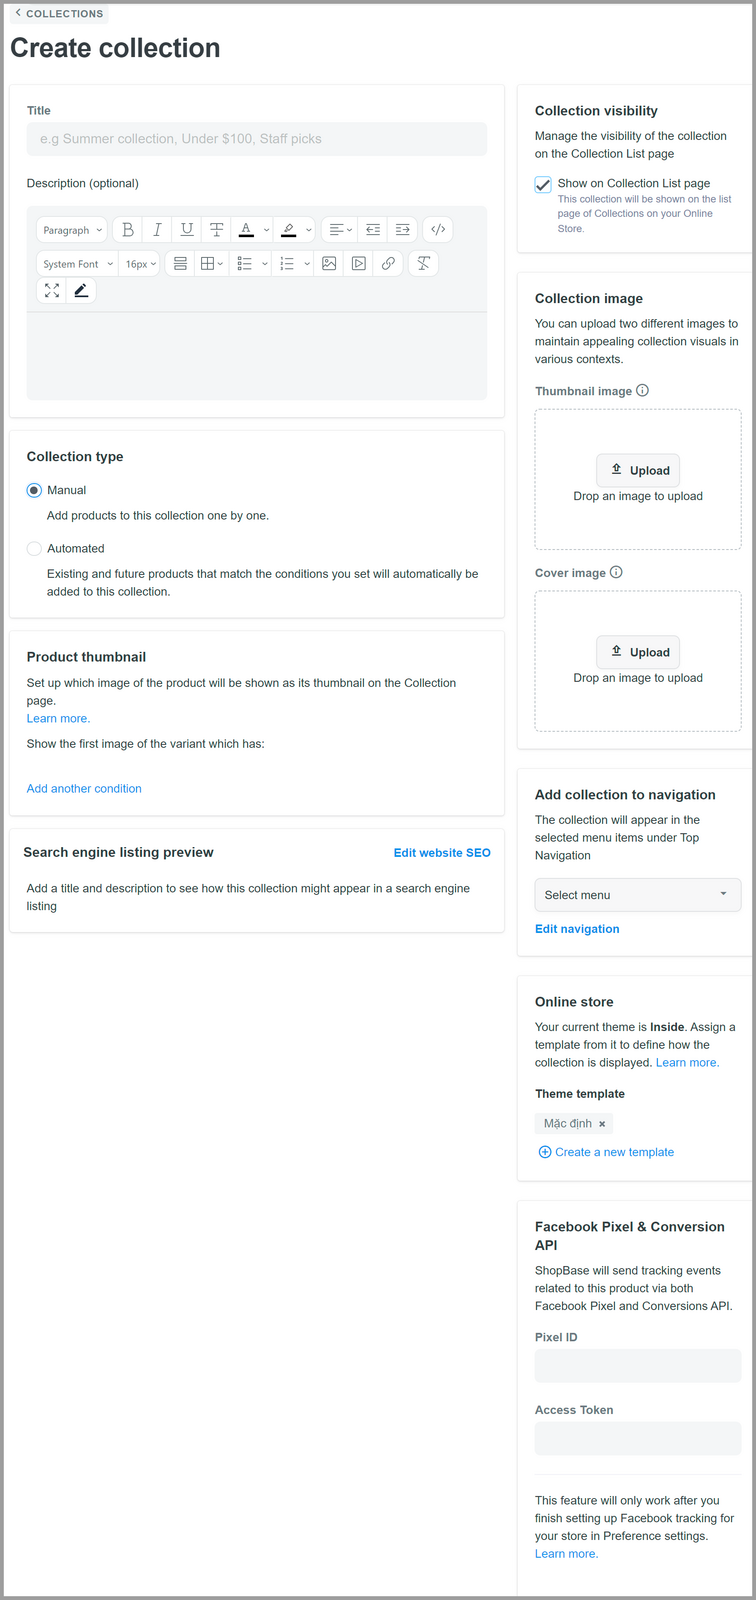
Upload button or dragging the photo from your device and dropping it into the Drop an image to upload box. Thumbnail image is a smaller picture serving as a visual summary for quick identification within a collection and symbolizing the collection on a list page. Cover image is a prominent image designed to represent and visually define the entire collection. To display a cover image, insert an image block in Website Builder and choose the cover image from the data source. You can take a look at this article to set up blocks on Website Builder.
After creating a manual collection, you can't change its type from manual to an automatic one.
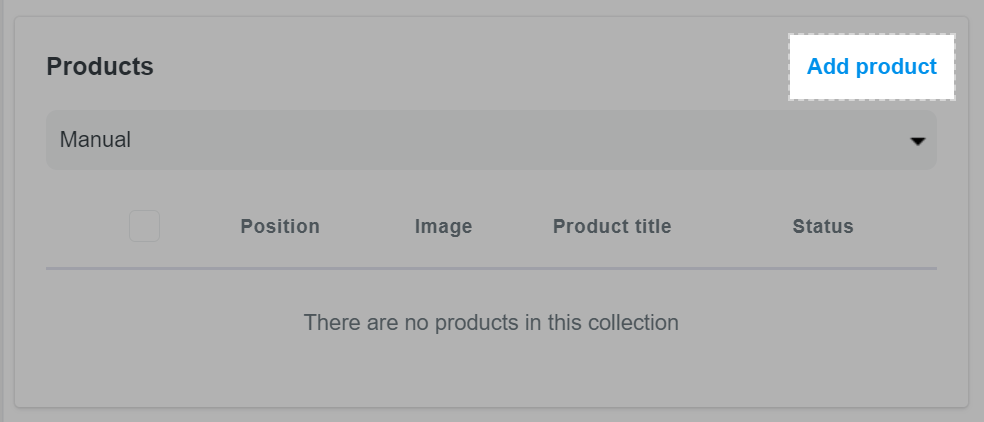
You can sort the display order of the products in the collection by clicking Product title A-Z and select the order in which the products in the collection will appear: Product title A-Z, Product title Z-A, Highest price, Lowest price, Newest, Oldest, Manual.
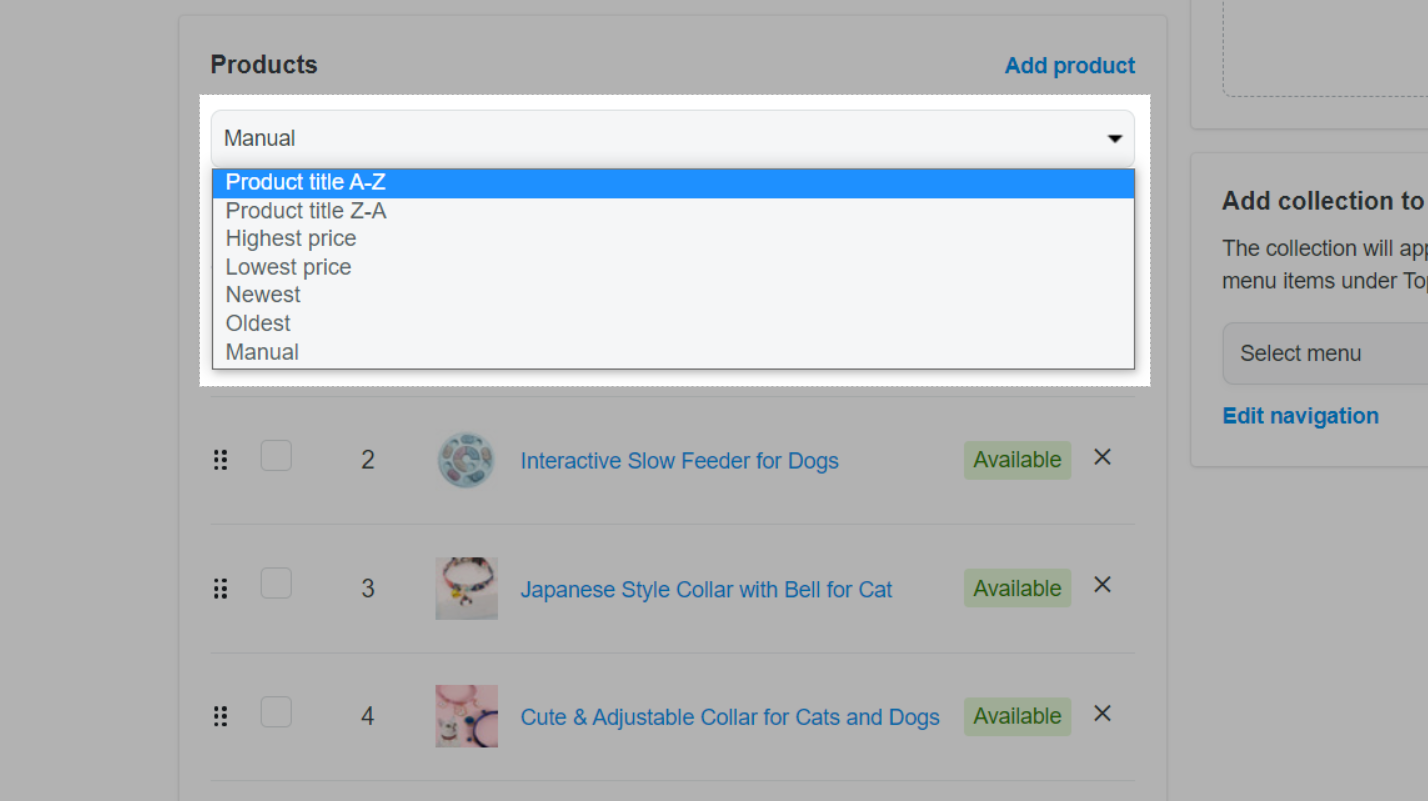
In Manual, you can click and drag the products to freely rearrange its order.
There is no limit to adding products to a collection; however, for smooth store operation, a maximum of 10,000 products can be displayed in the storefront collection.
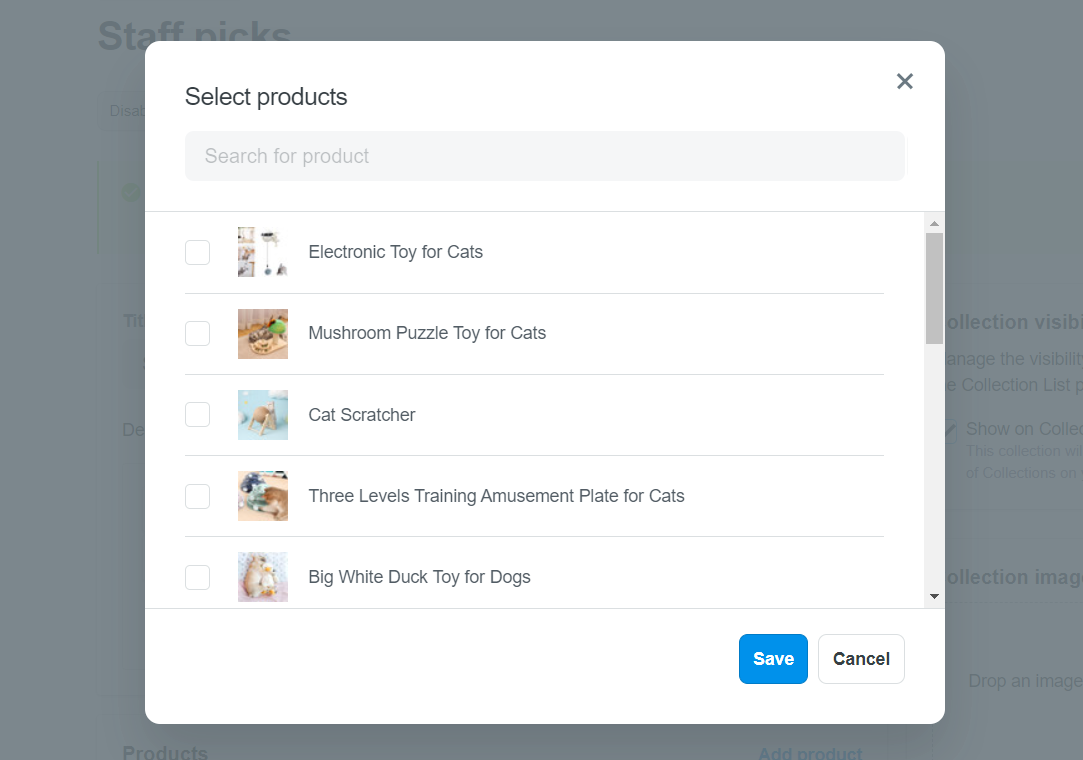
To ensure that a product appear on the Collection page, please select the Product availability on Online store listing pages option on the Product detail page.
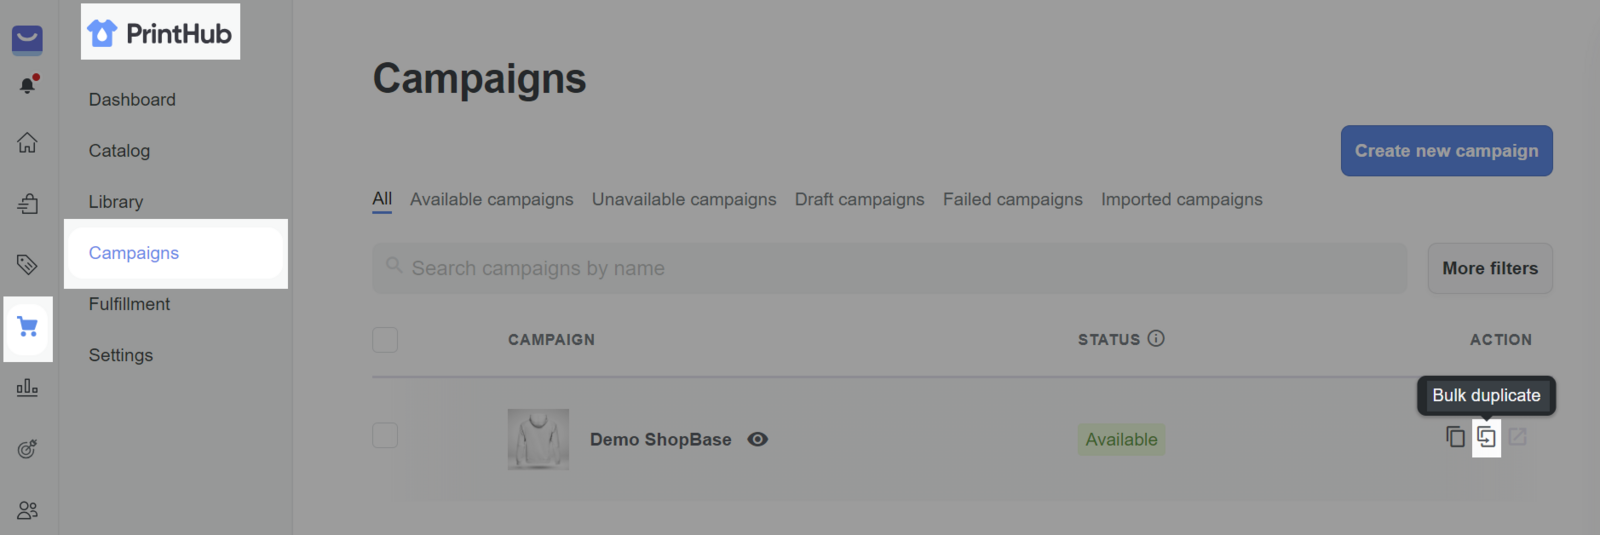
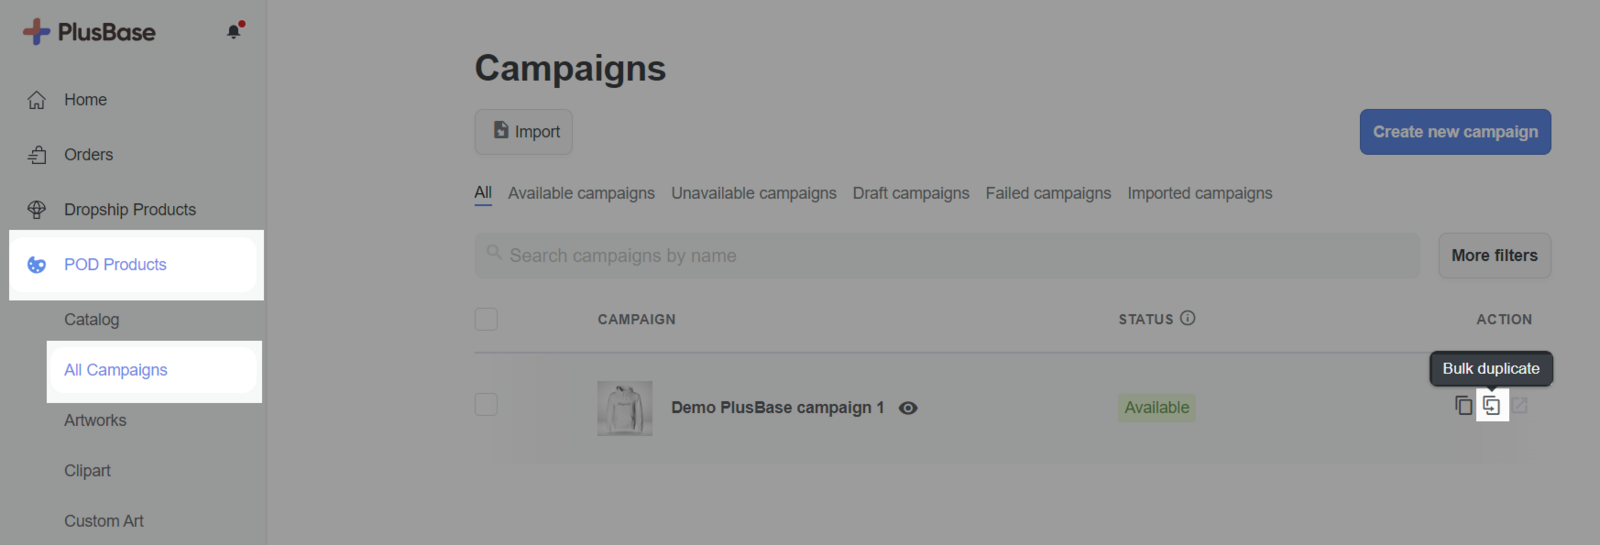
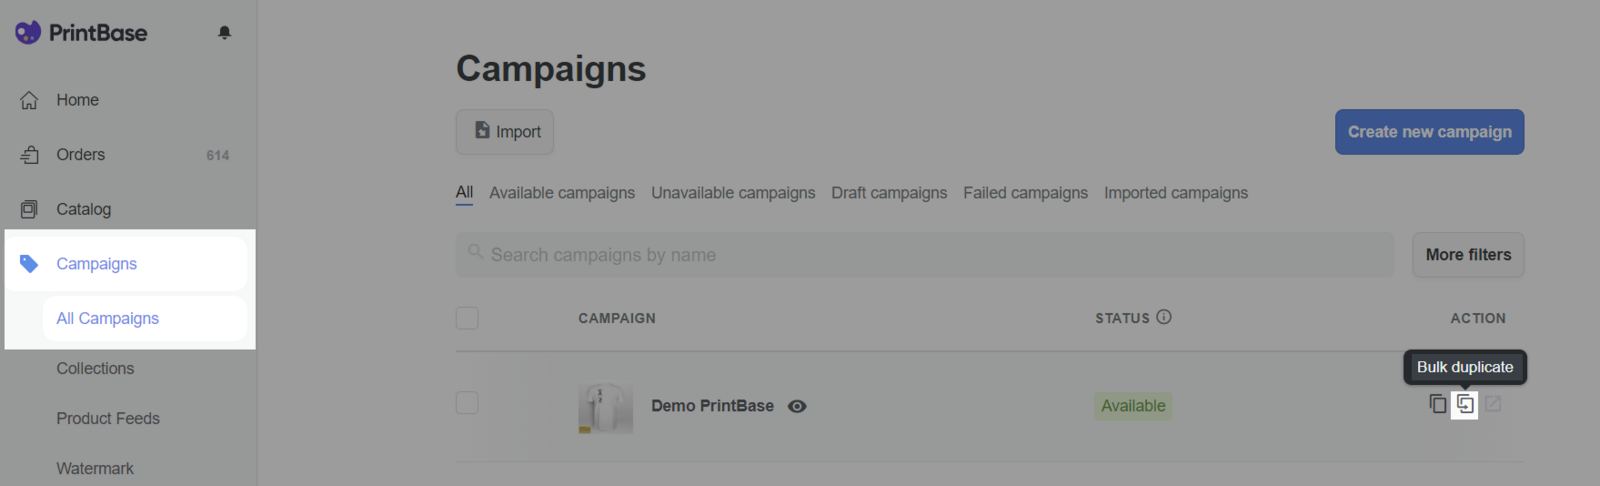
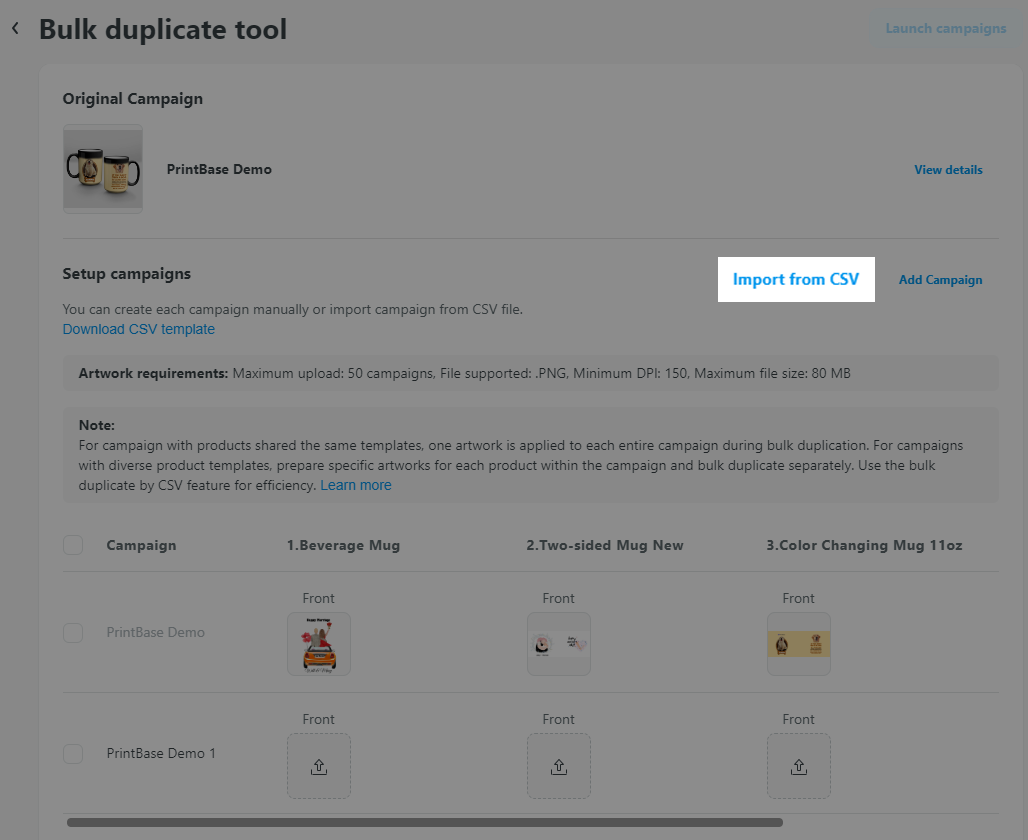
B. Create a manual collection for the campaign using the Bulk Duplicate feature
Navigate to the campaign you want to bulk duplicate and click on Bulk Duplicate.
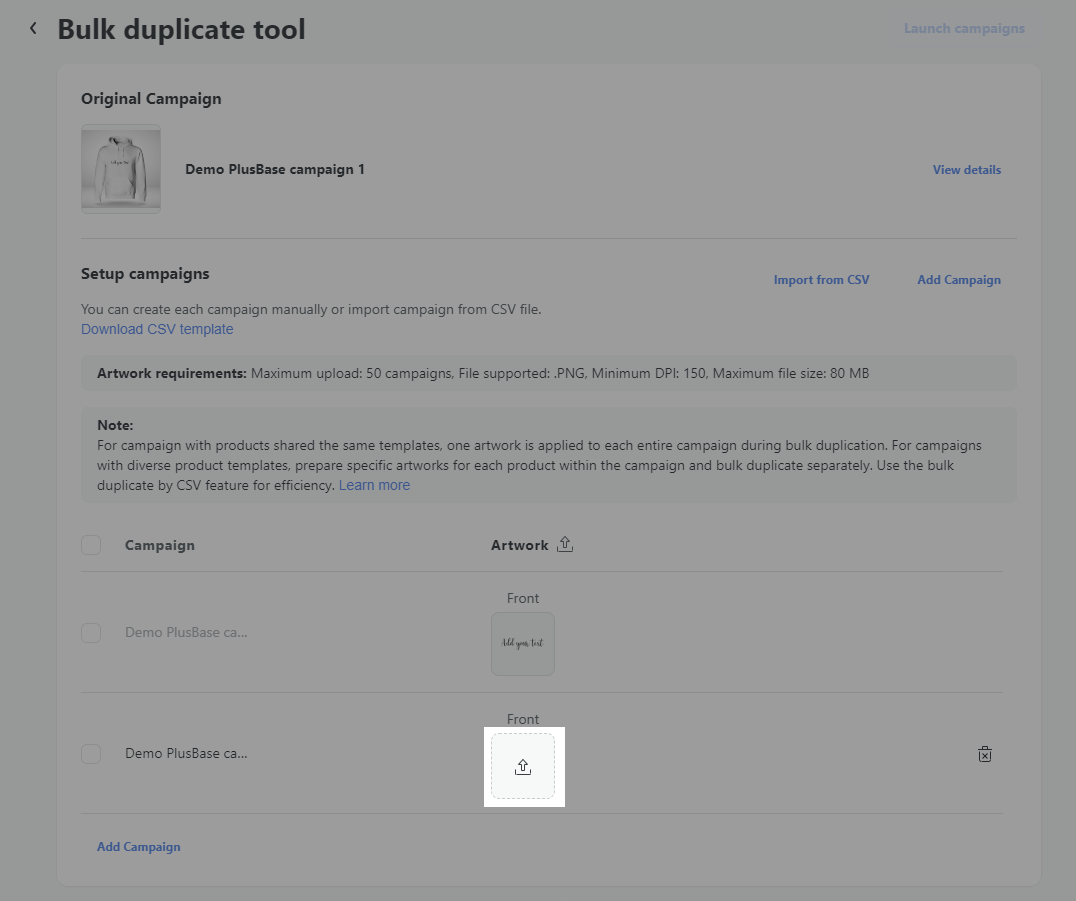
Quickly create a collection while manually uploading artwork
During the process of uploading your artwork, you have the option to create a manual collection based on the image file names. Please refer to this article for more details on how to manually upload artwork for bulk duplicating campaigns.
[Collection_ABC]Demo.png, the system will automatically generate a manual collection named ABC. Additionally, the duplicated campaign named Demo will be included in this collection.[Collection_PlusBase]Demo.png, a manual collection named PlusBase will be created (provided no existing PlusBase collection in the store), and the campaign will be titled Demo.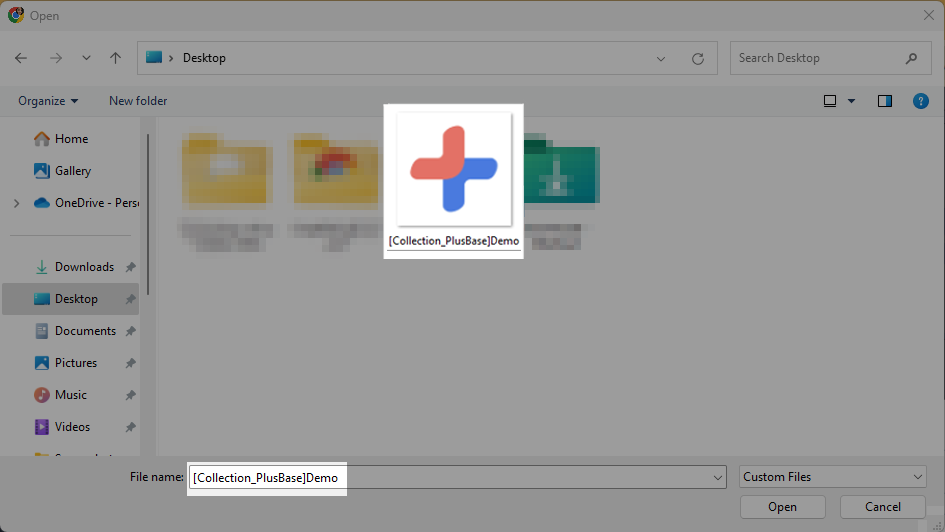
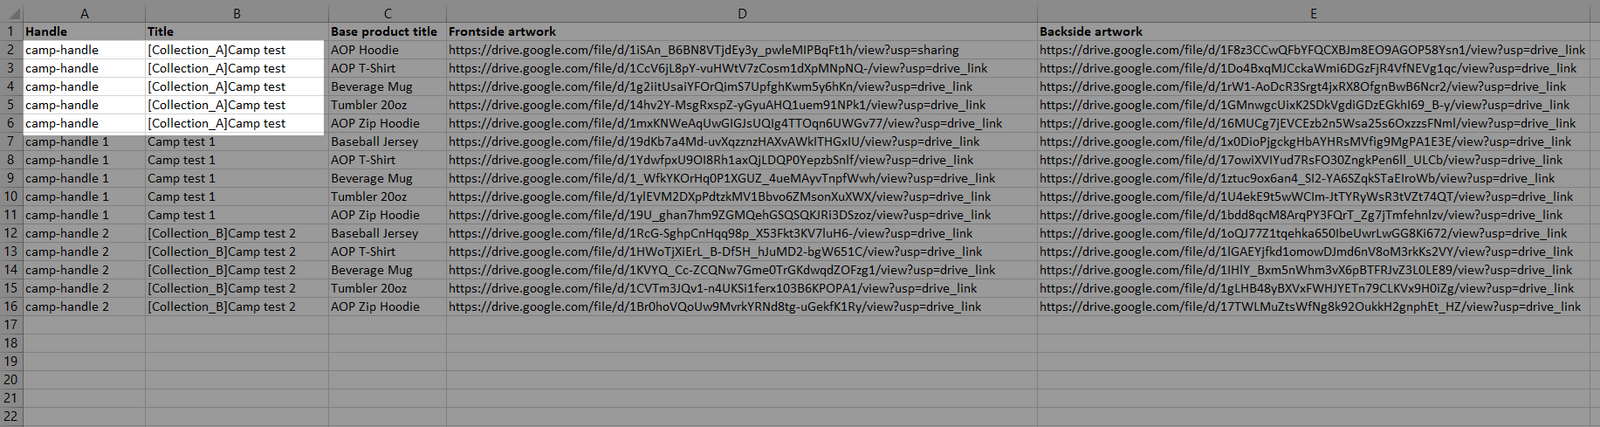
Quickly create a collection while importing artwork through a CSV file
Use the Collection field in the CSV file as a template to speed up the collection creation process. Click here for more details on bulk duplication via CSV file, including file template.
[Collection_ABC]Demo.png, the system will automatically generate a manual collection named ABC. Additionally, the duplicated campaign named Demo will be included in this collection.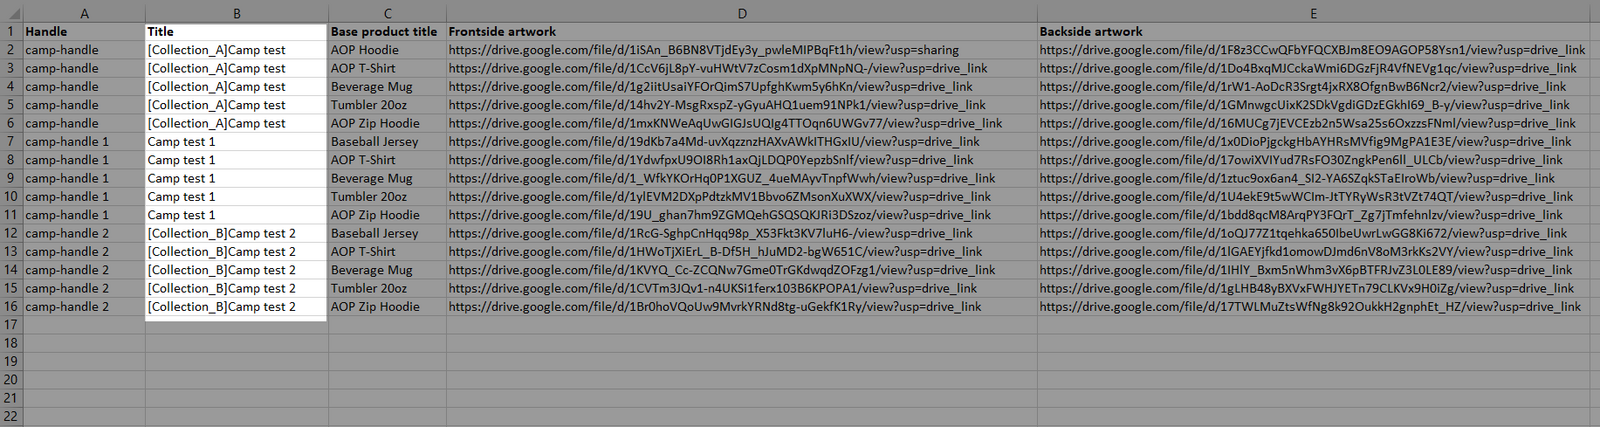
For the same campaign (same handle & title), ensure that all lines must be filled with the same collection name.
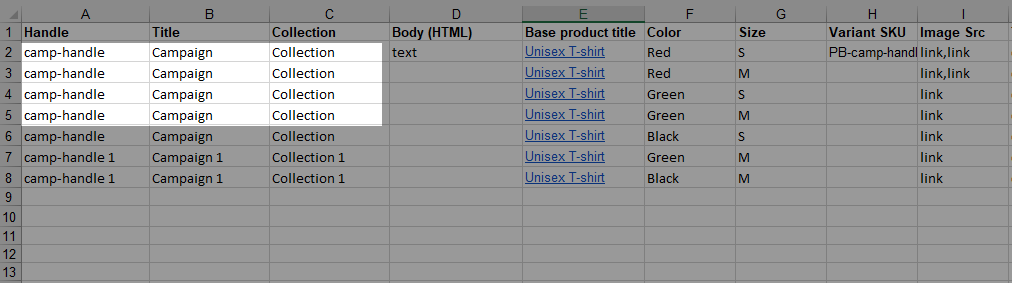
C. Create a manual collection when import campaigns by a CSV file
You can also generate a manual collection while importing campaigns using a CSV file. For more information about the campaign import process, please visit this article.
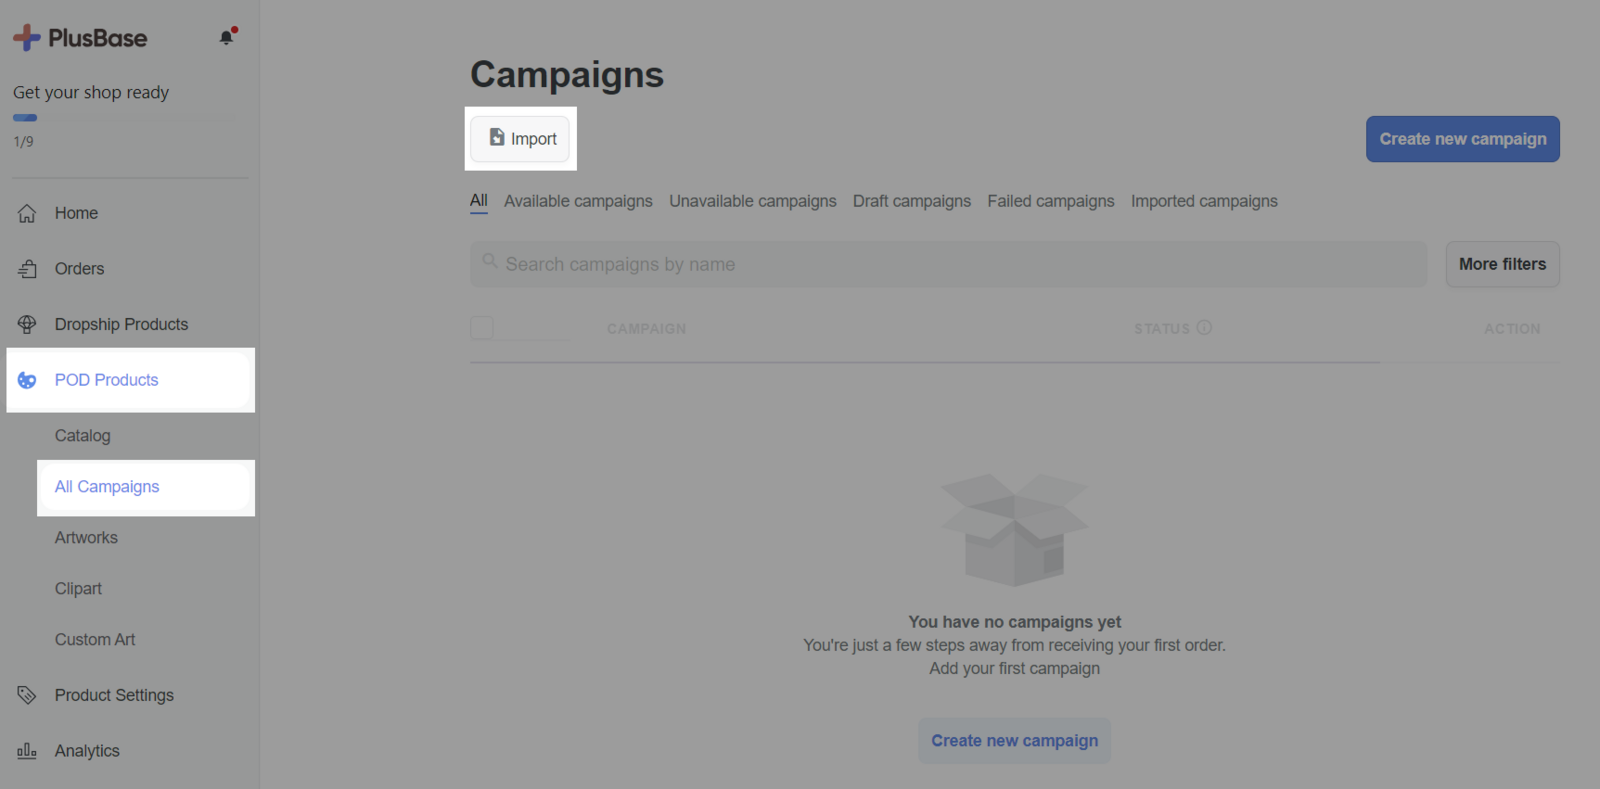
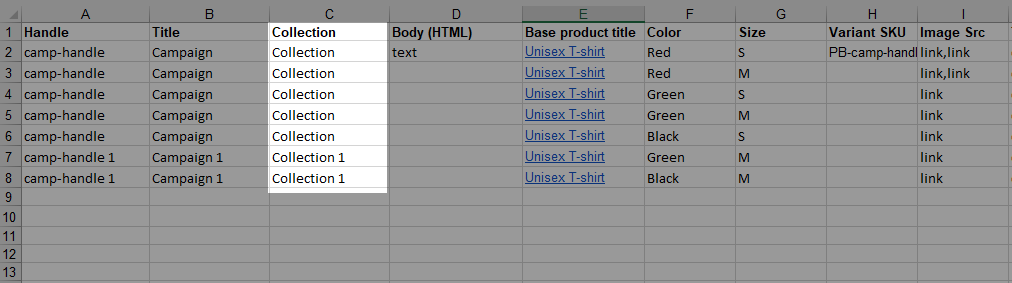
For the same campaign (same handle & title), ensure that all lines must be filled with the same collection name.