Adding UTM parameters to your message links allows you to collect information about your customers’ originated sources. This article will show you how to set up UTM tracking parameters on Klaviyo.
Step by Step Tutorial
Visit Klaviyo homepage, create a Klaviyo account or log in to your account.
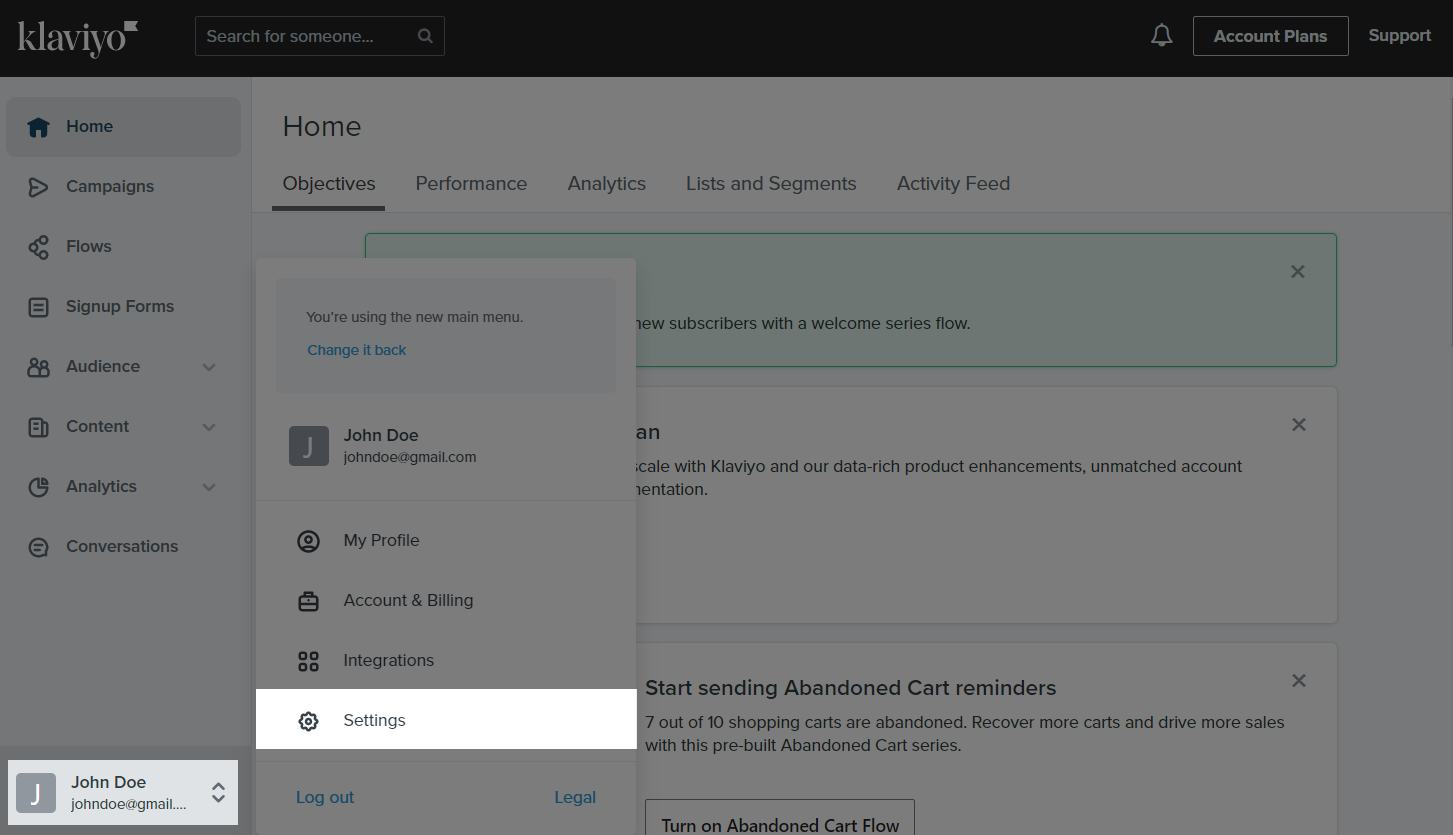
In your Klaviyo main menu, go to Account > Settings.
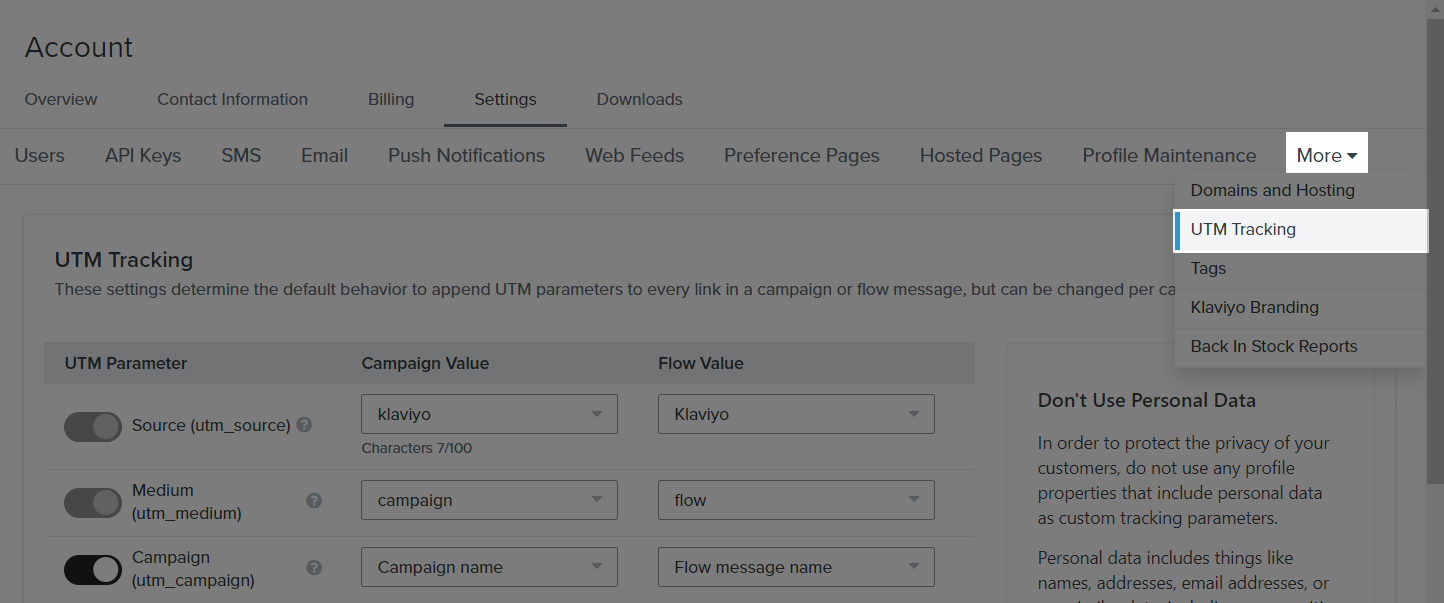
Click on More > UTM Tracking.
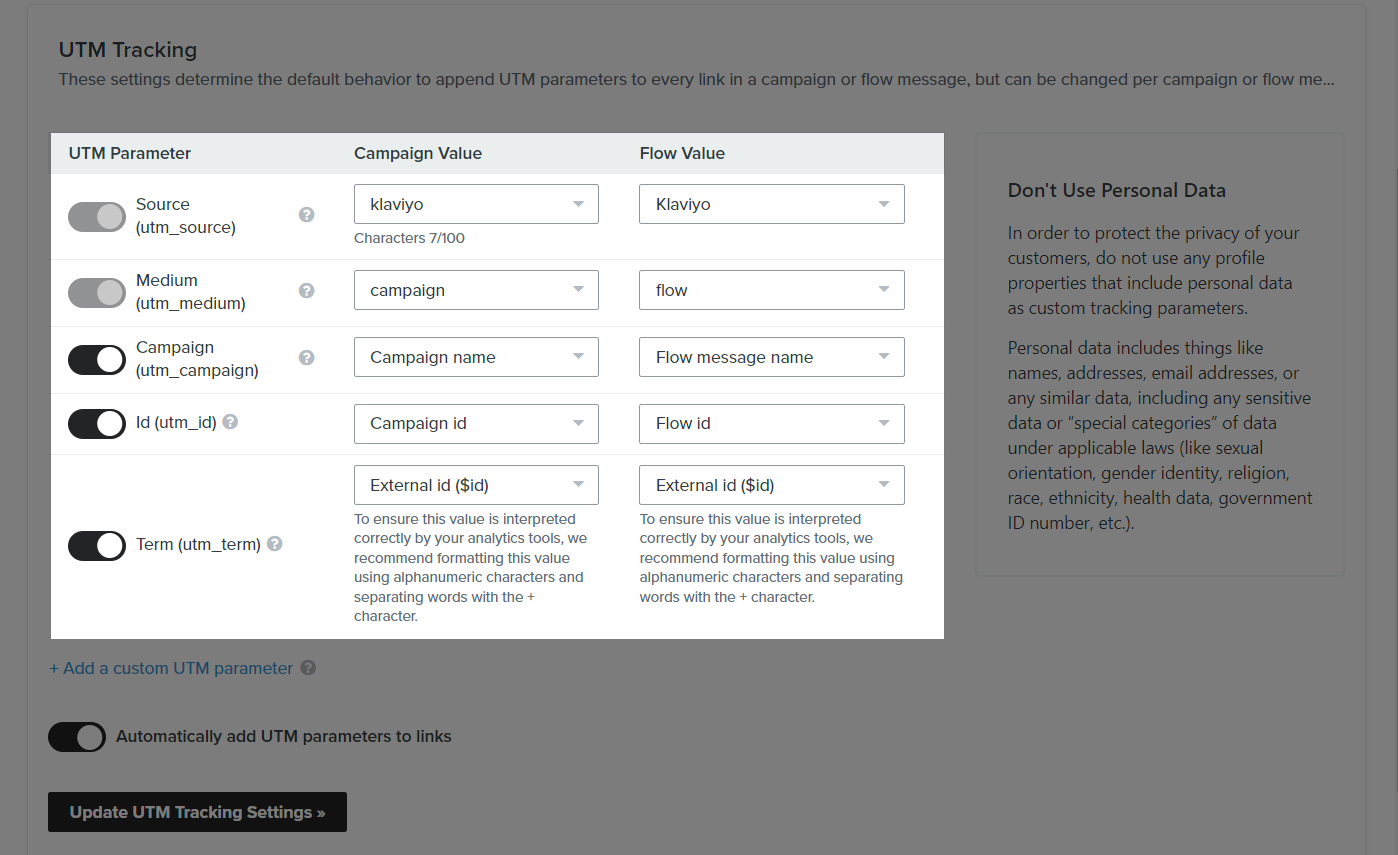
Toggle any parameters you want to include on your links. Here you can adjust the Campaign Value and Flow Value fields to match your needs.
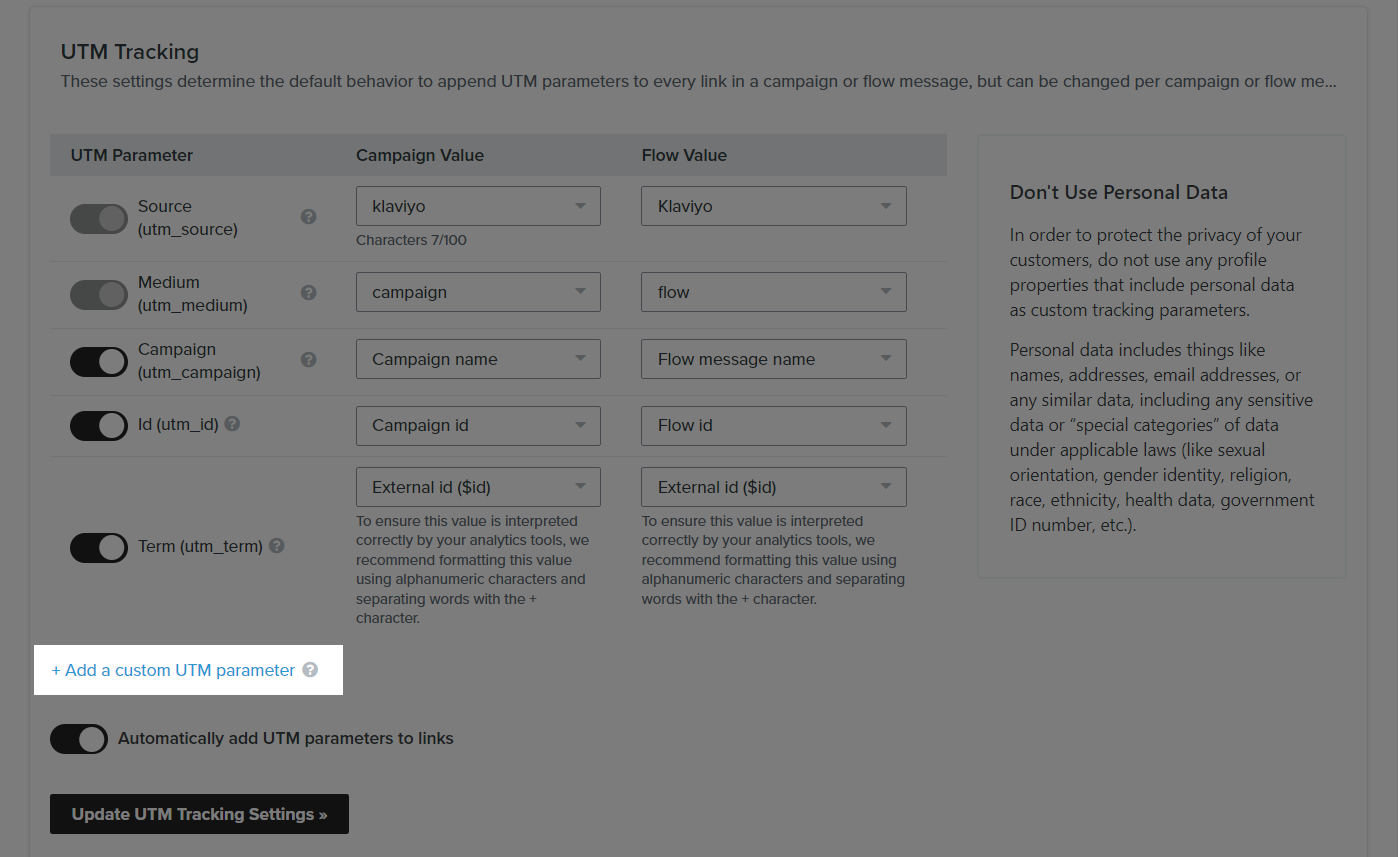
Select Add a custom UTM parameter, then enter the new parameter
utm_klv_profile_id and map to:Campaign Value = Klaviyo profile id.
Flow Value = Klaviyo profile id.
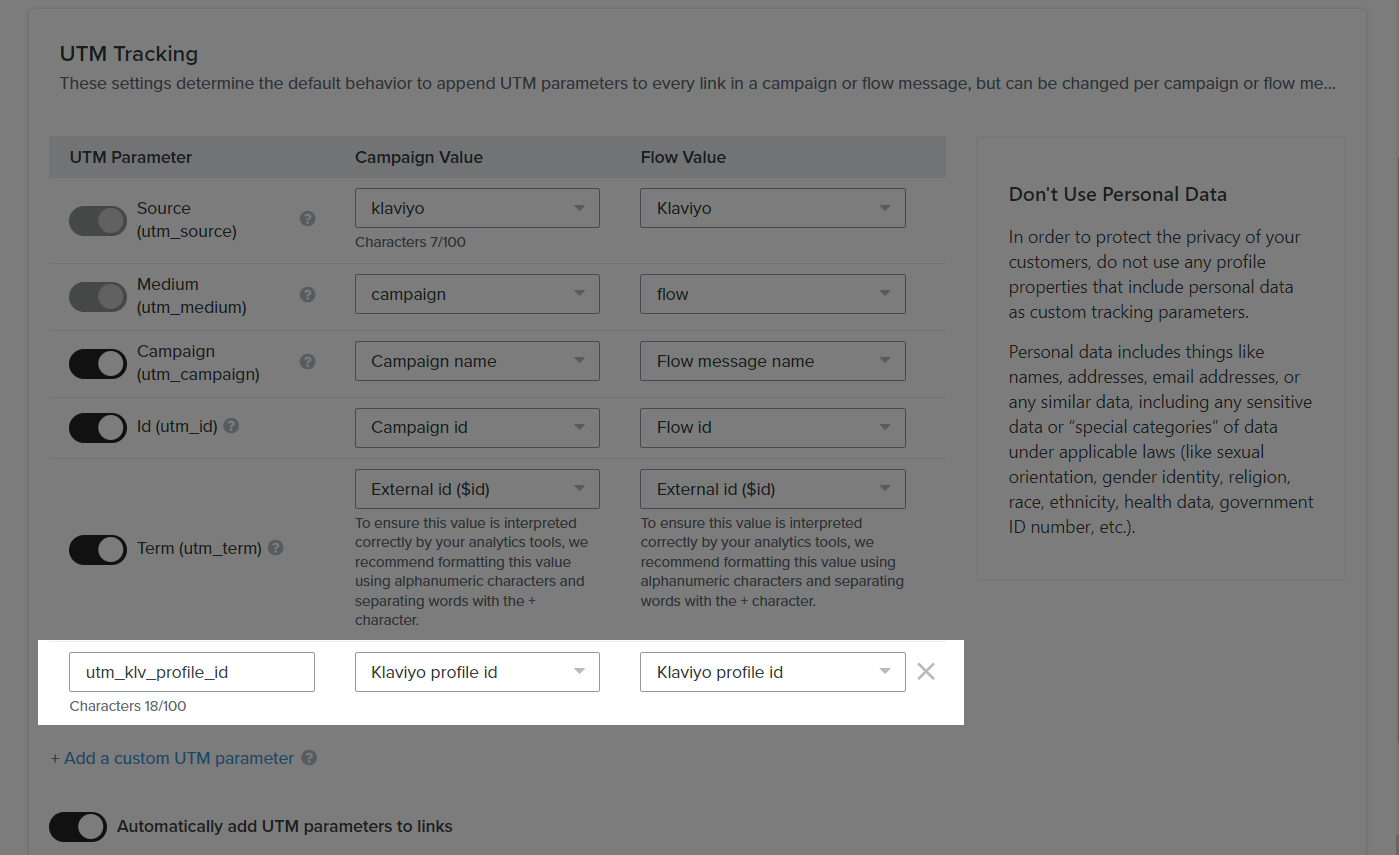
When a customer visits your store via a Klaviyo message link with UTM, this parameter allows ShopBase to match the customer with an existing Klaviyo profile and send tracking information accordingly.
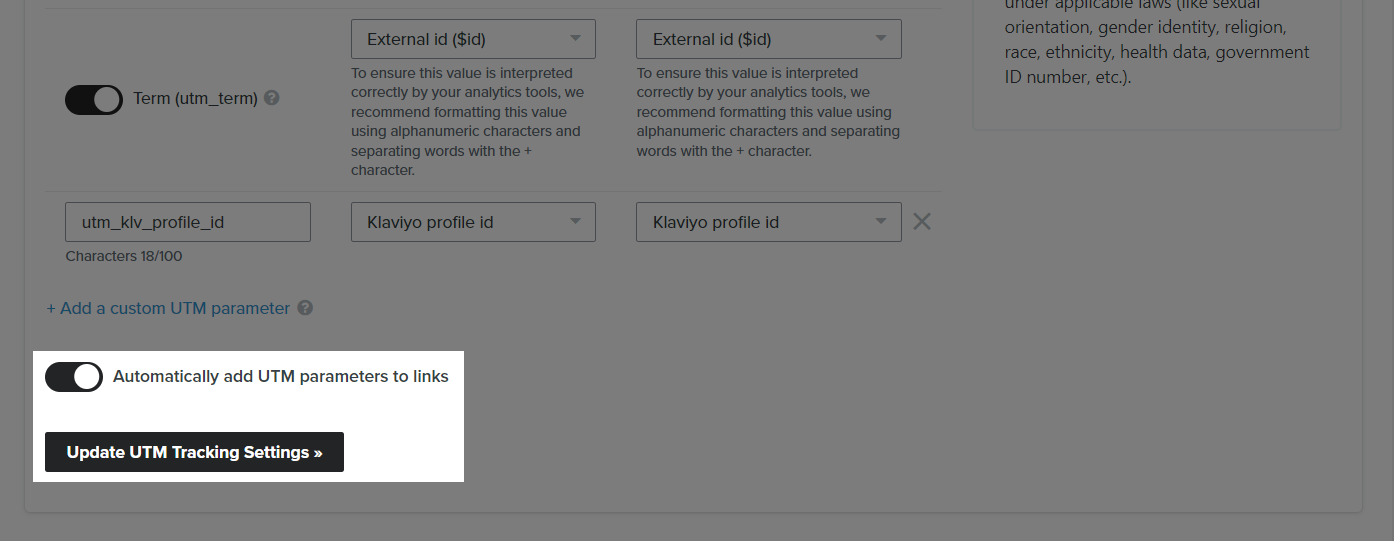
Enable Automatically add UTM parameters to links and click Update UTM Tracking Settings to save your changes.
Please refer to this article on how to enable UTM tracking for a flow message.
Please refer to this article on how to enable UTM tracking for a campaign message.
Please refer to this article from Klaviyo on how to add UTM tracking to Klaviyo messages.
Updated 9 months ago