In a personalized campaign, your customers can customize products according to their preferences such as rewrite texts, upload or choose images using custom options. Each custom option type allows your customers to provide specific information for their orders. Currently, we support 7 types: Text field, Text area, Image, Picture choice, Radio, Droplist, and Checkbox. Additionally, you have the option to set up an extra fee for customizations.

In this article
A. Types of personalized campaigns that are supported
B. Create custom options for your campaign
C. Types of custom options
A. Types of personalized campaigns that are supported
Please refer to this article on supported concepts for personalized campaigns for more information.
B. Create custom options for your campaign
Make sure that your design follows the dimension and template of your desired products.
After you have selected your base products, upload your designs (the .PSD file in the resource package), and make changes to them as instructed in
section B and C of this article.
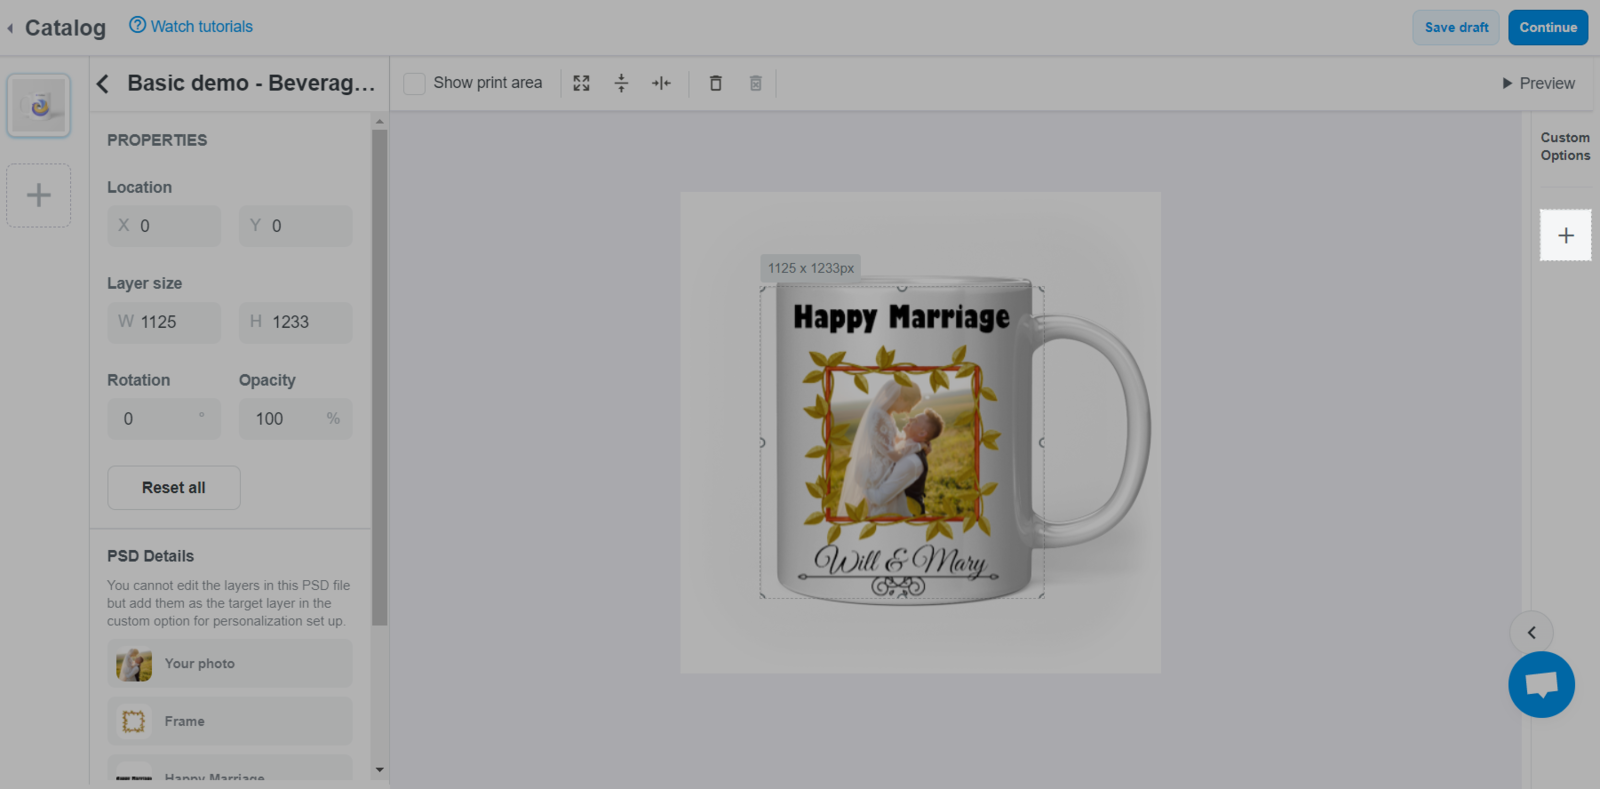
In Custom Options, click + to add a new custom option.

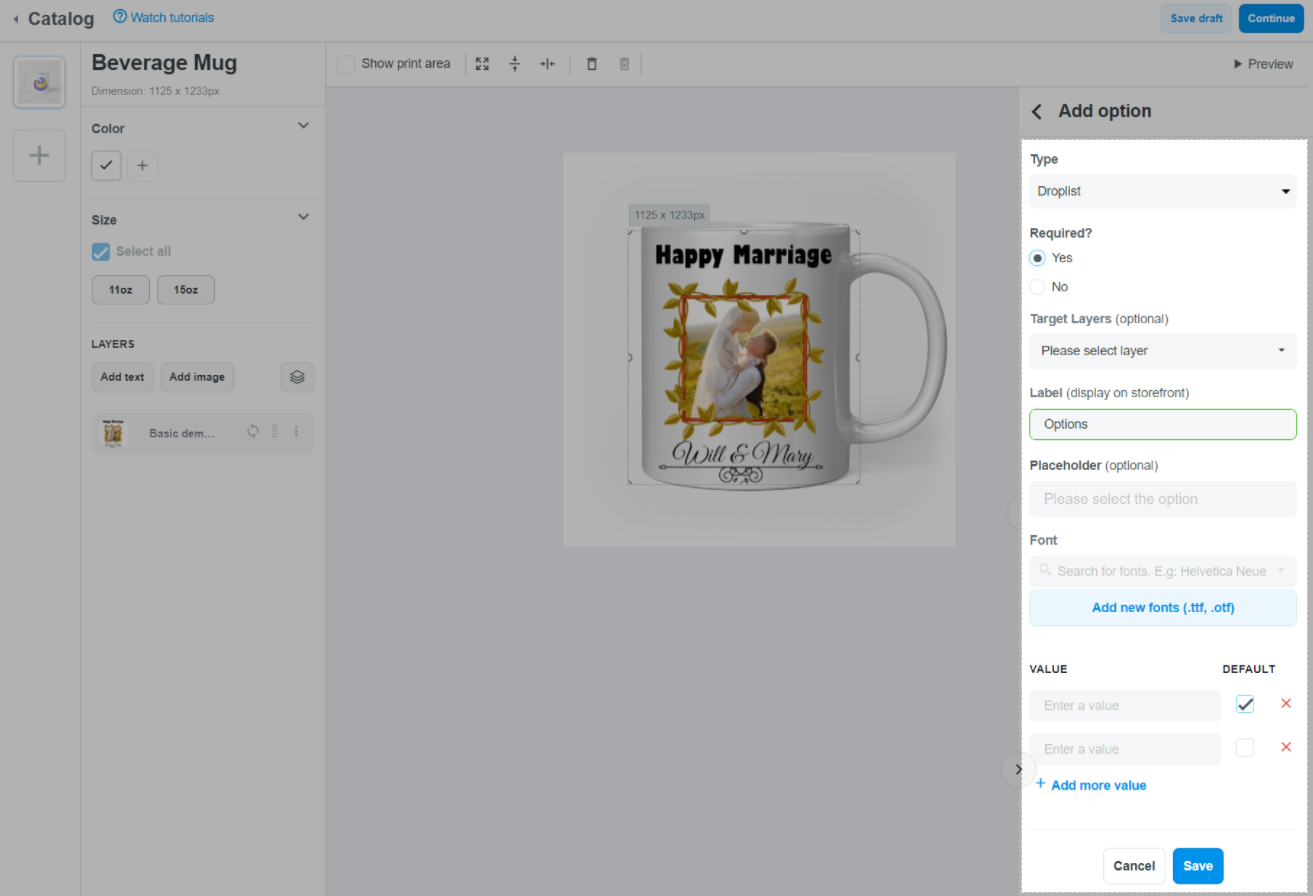
In Add Option menu, select the type of custom option, and all the required information corresponding to it will be displayed. Please refer to section C of this article on how to fill in all information for each type of custom option.

To add an extra fee for a custom option, navigate to the section labeled Charge fee for this custom option. Enter the desired value as the extra fee, use the dot (.) if you wish to include a decimal value. The currency of the extra fee corresponds to the store's currency.

Click the < button next to Add Option, you will see the custom option you just created listed in the column Custom Options. Hover over the option, you will see the display of two choices: + Add option above and + Add option below, click either to add a new custom option for products.

Repeat steps 3 and 4 to create all of your custom options for the campaign.
Select Customize Layer if you want to customize layer.


After you complete your setups, click Save.
C. Types of custom options
1. Text field and Text area
Text field: allows customers to add a maximum of 30 characters.
Text area: allows customers to add a maximum of 140 characters. A new line is accepted.

Required?: You can choose Yes if customers must add/change characters in order to checkout. Choose No if this is not required.
Target layers: Text layers will be displayed among the layers that you uploaded, allowing you to choose which layer the customer can add/change/edit.
Label (display on storefront): You can change the title of the custom option displayed on the storefront for customers to fill in (see the photo below for more details).
Font: You can choose the font for the text to be edited/changed/added.
Placeholder (optional): The grey text that acts as a hint for customers to fill in their contents.
Max length: The maximum characters for customers to fill in.
Default value (prefill on storefront): You can leave the default characters pre-populated for the text you need to change here. Customers need to delete these characters to fill their own in the box.
Allow the following characters: The allowed characters for use. Please refer to section A for the full list of characters that are supported.

2. Image
Image: allows customers to upload their personal images to the product's design.

Required?: You can choose Yes if customers must upload image(s) in order to checkout. Choose No if this is not required.
Target layers: Image layers will be displayed among the layers that you uploaded, allowing you to choose which layer the customer can add/change/edit.
Label (display on storefront): You can change the title of the personalized feature information field displayed on the storefront for customers to fill in.
Help text (optional): The grey text displayed inside the photo upload section (displayed on the product page) to guide customers what to fill in.
3. Picture choice
Picture choice: allows customers to select the favorite picture option printed on their product from a selection of cliparts provided by you, instead of manually adding by themselves. Please refer to this article for more information about cliparts.

Required?: You can choose Yes if customers must select image(s) in order to checkout. Choose No if this is not required.
Target layers: Image layers will be displayed among the layers that you uploaded, allowing you to choose which layer the customer can add/change/edit.
Label (display on storefront): You can change the title of the personalized feature information field displayed on the storefront for customers to fill in.
Cliparts: You can choose between
Show all cliparts in a clipart Folder or
Show a droplist of clipart Group to let buyer choose first. For more details on these settings, please refer to
this article about cliparts.
How to show cliparts: You can choose between Show with Thumbnail images if you want customers to see the cliparts or Show a droplist with Clipart names if you only want to show their names.
4. Radio
Radio: provides options that customers can choose for their product, displayed in the form of radio buttons.

Required?: You can choose Yes if customers must select an option in order to checkout. Choose No if this is not required.
Target layers: Text layers will be displayed among the layers that you uploaded, allowing you to choose which layer the customer can add/change/edit.
Label (display on storefront): You can change the title of the personalized feature information field displayed on the storefront for customers to fill in.
Value: You can enter the options that customers can choose for their product.
5. Droplist
Droplist: provides options that customers can choose for their product, displayed in the form of droplist.

Required?: You can choose Yes if customers must select an option in order to checkout. Choose No if this is not required.
Target layers: Text layers will be displayed among the layers that you uploaded, allowing you to choose which layer the customer can add/change/edit.
Label (display on storefront): You can change the title of the personalized feature information field displayed on the storefront for customers to fill in.
Value: You can enter the options that customers can choose for their product.
6. Checkbox
Check box: provides options that customers can choose for their product, displayed in the form of check box. This can be used to show or hide certain layers in your product's design.

Required?: You can choose Yes if customers must select an option in order to checkout. Choose No if this is not required.
Target layers: Both Text layers and Image layers will be displayed among the layers that you uploaded, allowing you to choose which layer the customer can add/change/edit.
Label (display on storefront): You can change the title of the personalized feature information field displayed on the storefront for customers to fill in.
Value: Once the target layer is chosen, you can choose between When it is checked, the target layer will be shown on the design or When it is unchecked, the target layer will be hidden from the design as the default option on the storefront.
Related articles


