With our built-in features, creating print-on-demand products with PrintBase, ShopBase (PrintHub), and PlusBase has become faster and more convenient. Before we get to that point, let's figure out how to successfully launch new campaigns with PrintBase, ShopBase (PrintHub), and PlusBase.
Please visit this link to see our demo campaign
In this article
A. Prepare all necessary files
D. Create a personalized campaign
E. Edit name, price and display of campaign
A. Prepare all necessary files
Before creating a campaign, you should prepare all necessary artwork files that will be printed on the product. We allow sellers to create product designs by uploading multiple image files (image layers), and adding multiple layers of texts (text layers).
Supported image file formats: .PNG, .JPG, .JPEG, and .PSD. Supported color mode: RGB.
Please visit this link to download our resource package for a simple personalized campaign. In this resource package, you could find the sample assets as following: a .PSD file for the template artwork used in this article, Font files for text personalization, and .PNG files to picture choice personalization.
Please be aware that when using artwork with a transparent background layer, areas without pixels may be automatically trimmed, resulting in a smaller size compared to the actual dimensions when launching the campaign.
For example, the original artwork have dimensions of 2900px x 2900px, due to the transparent background, the uploaded version to the store have smaller dimensions, such as 1910px x 1602px.
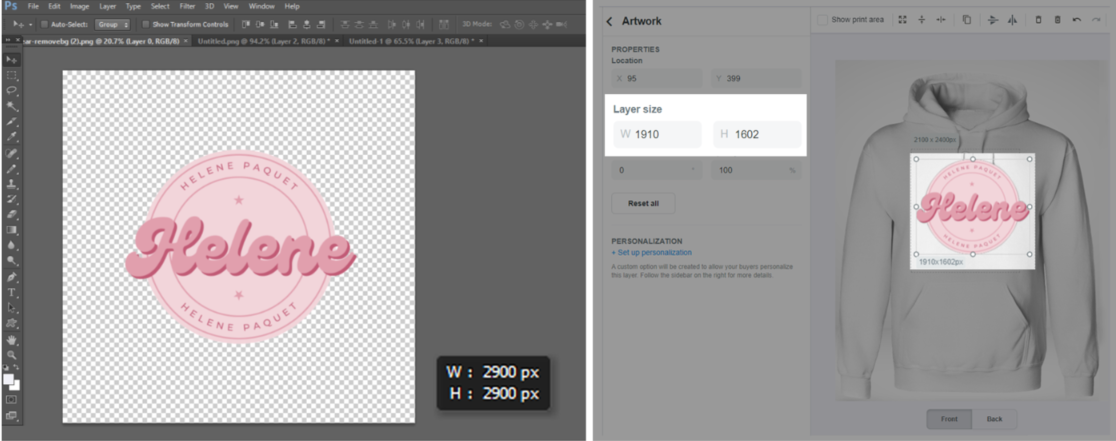
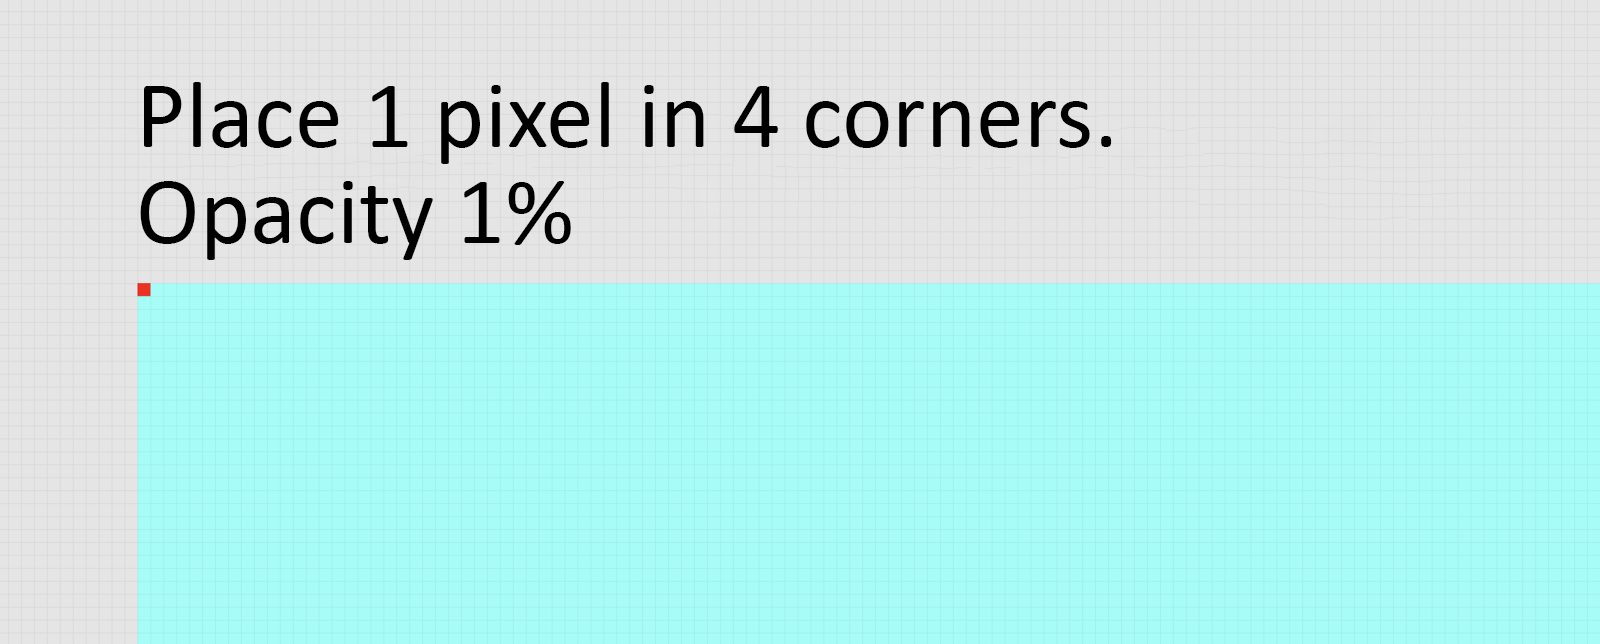
To prevent this, it is recommended to place four points (each point representing 1px) in the four corners of the layer during the design phase. This ensures that the image is displayed in the correct position and size as specified in the design.
B. Choose the base product
Our base products are divided into many categories such as All Over Print, Apparel, Home & Living, etc. Find your desired base products in the corresponding category. To have an overview of all product’s specifications, please visit our catalog page.
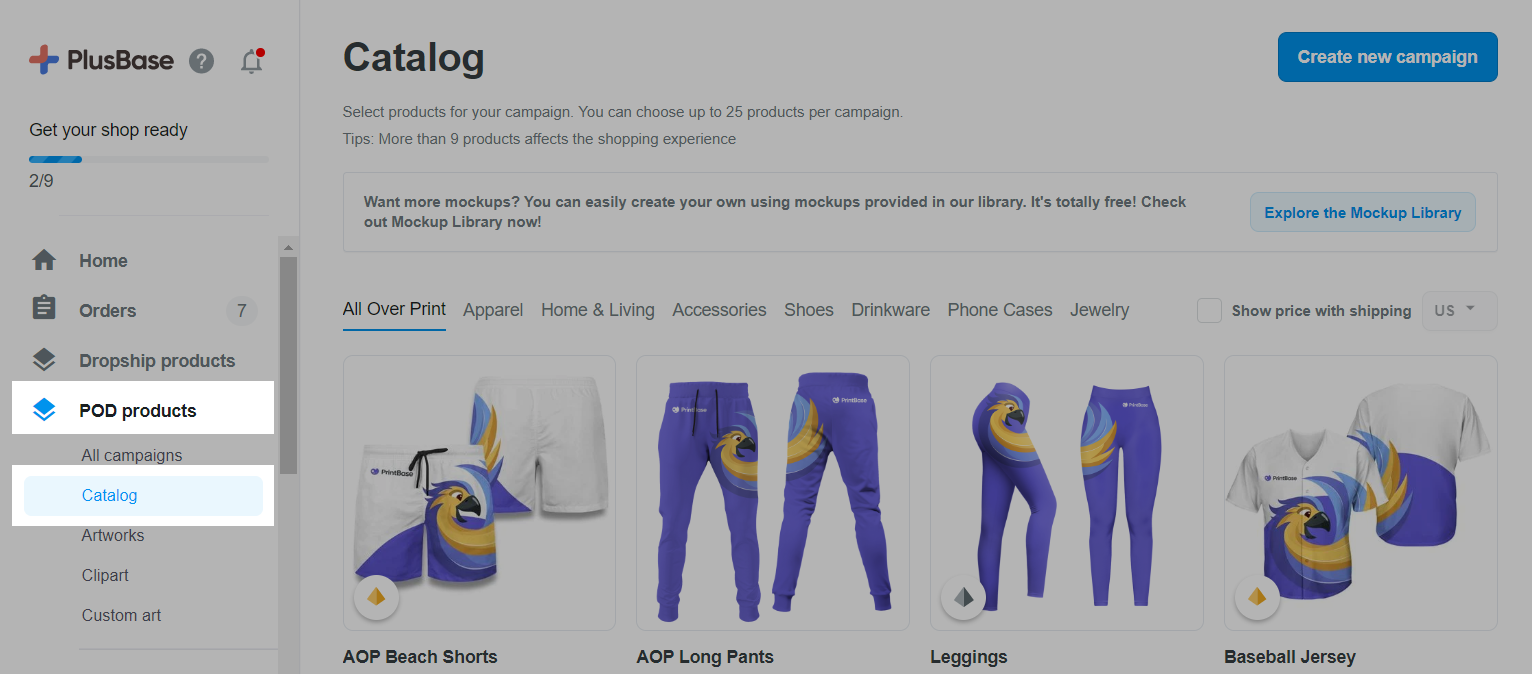
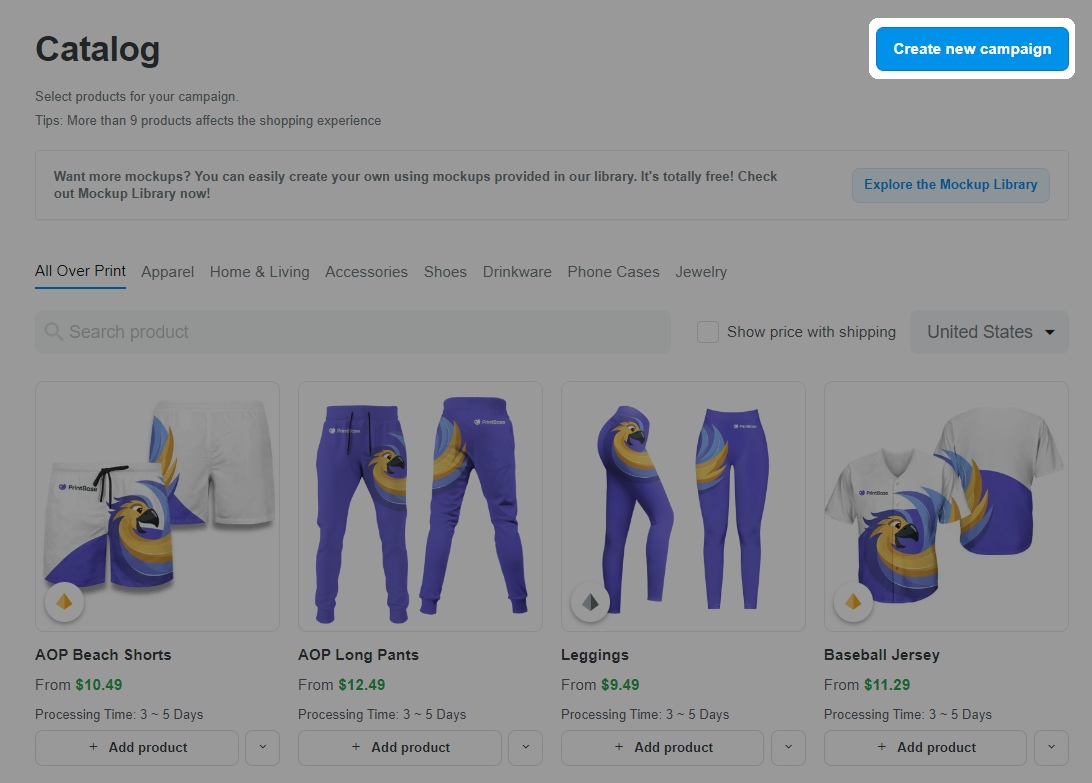
You can select up to 25 products at a time but be aware that more than 9 products will affect the shopping experience of customers.
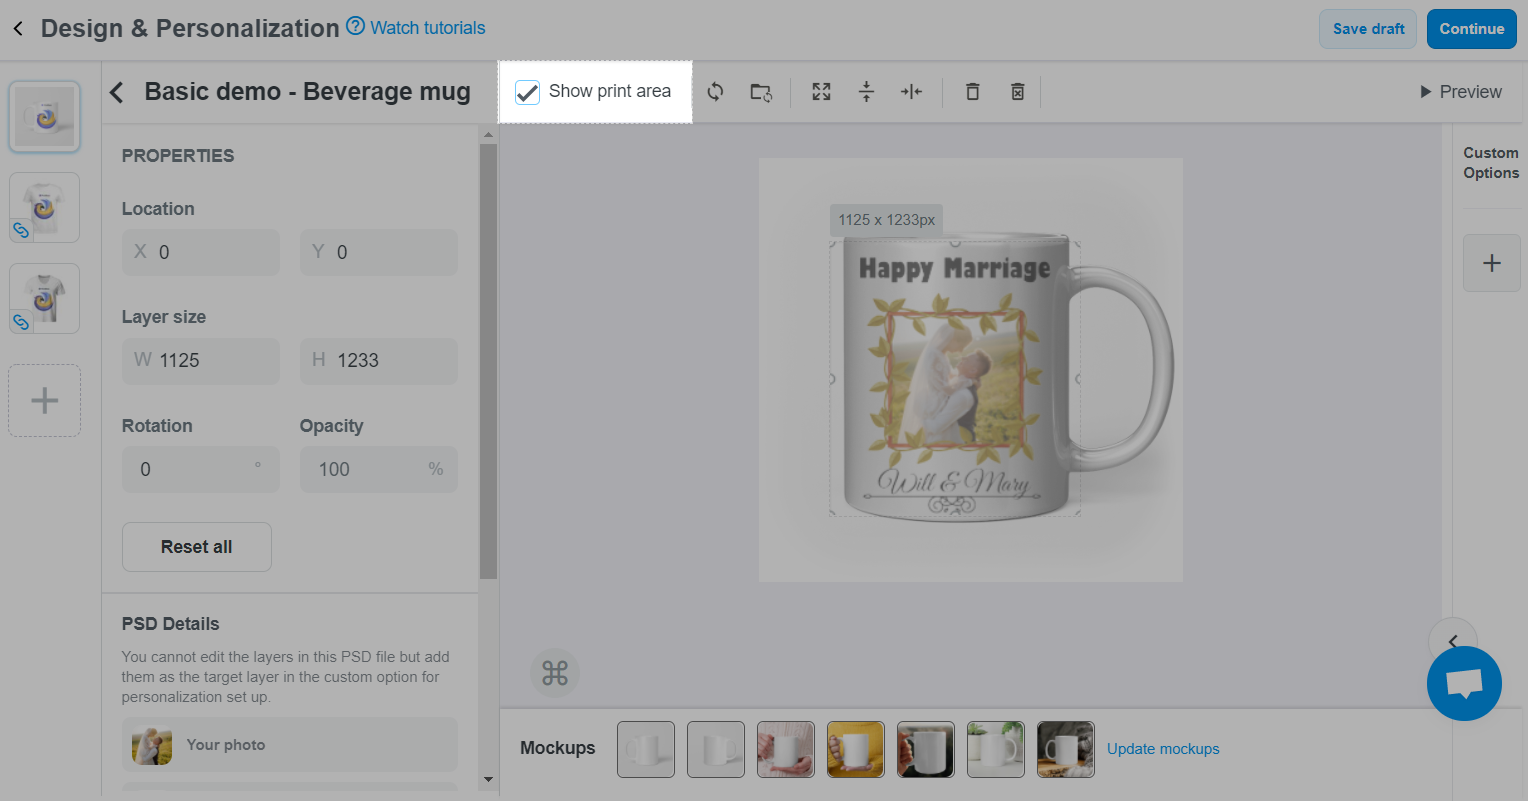
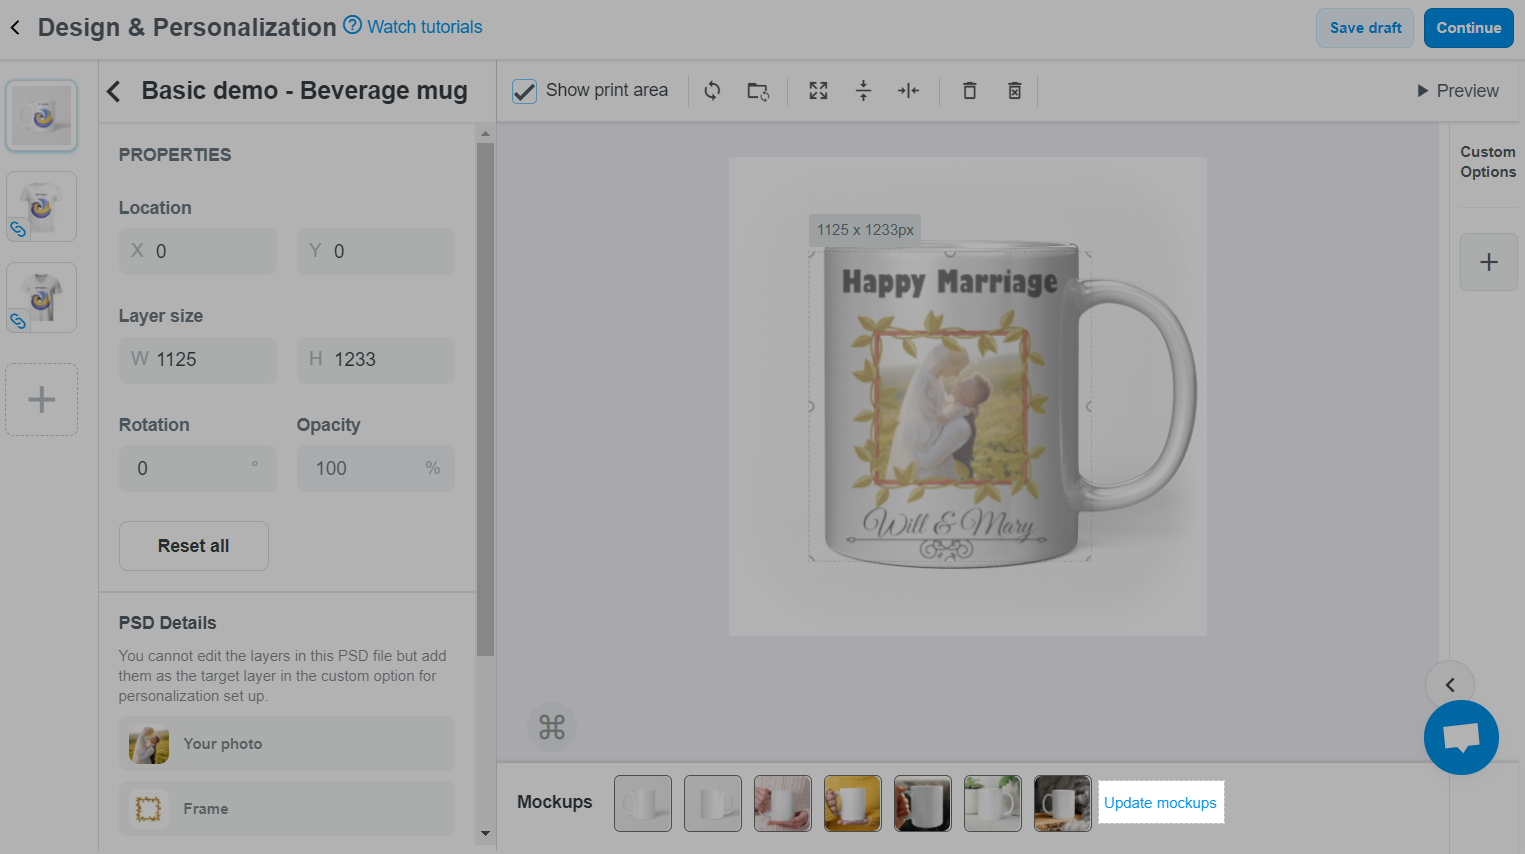
C. Edit your campaign design
+ button in the Color section. You can preview products with the respective colors by hovering over the color boxes. Feel free to tick or untick the colors you want for your products.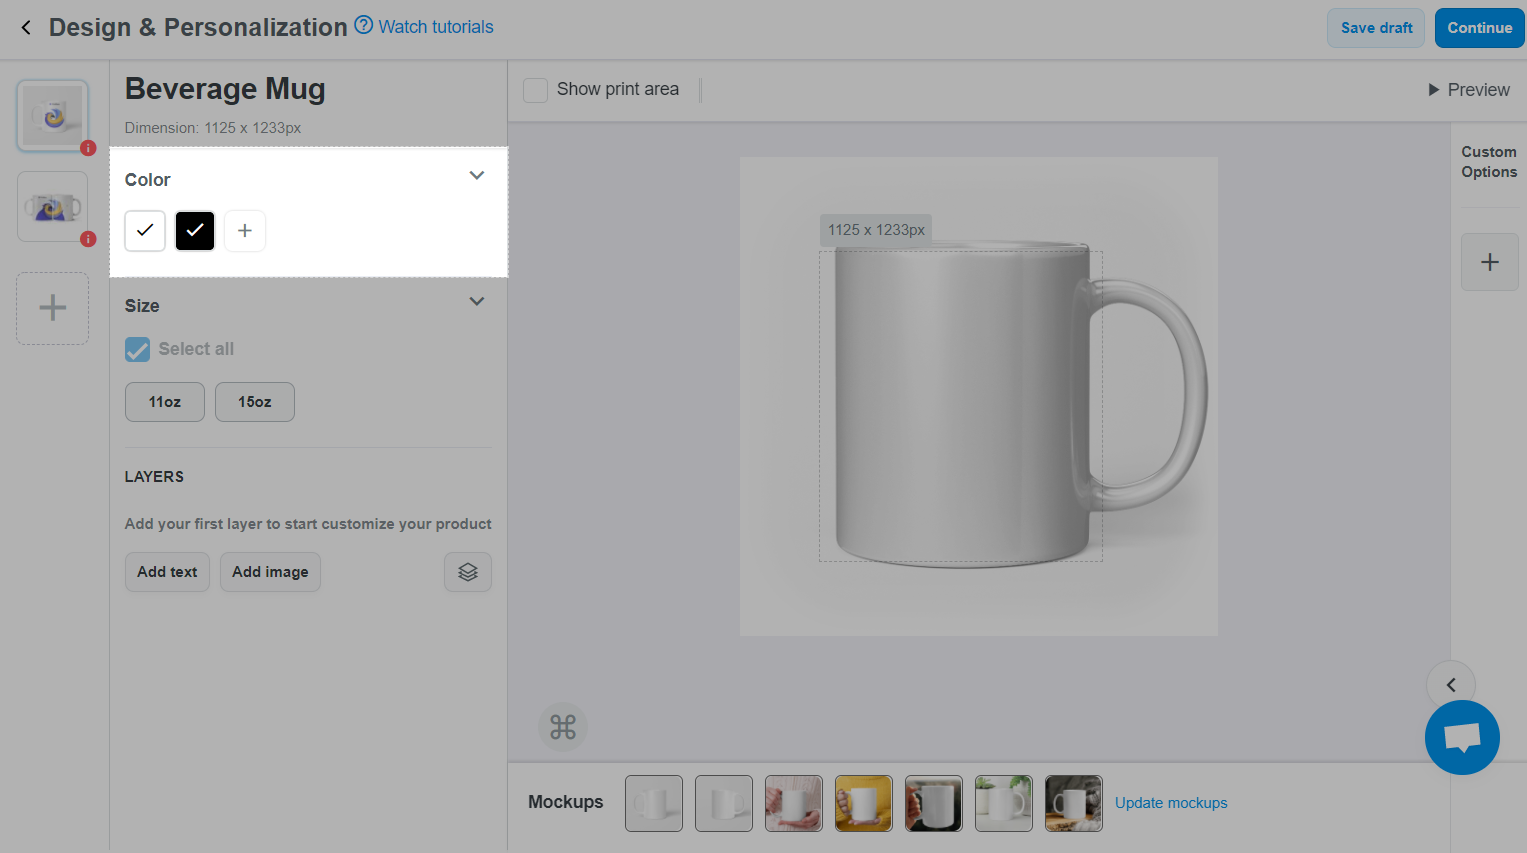
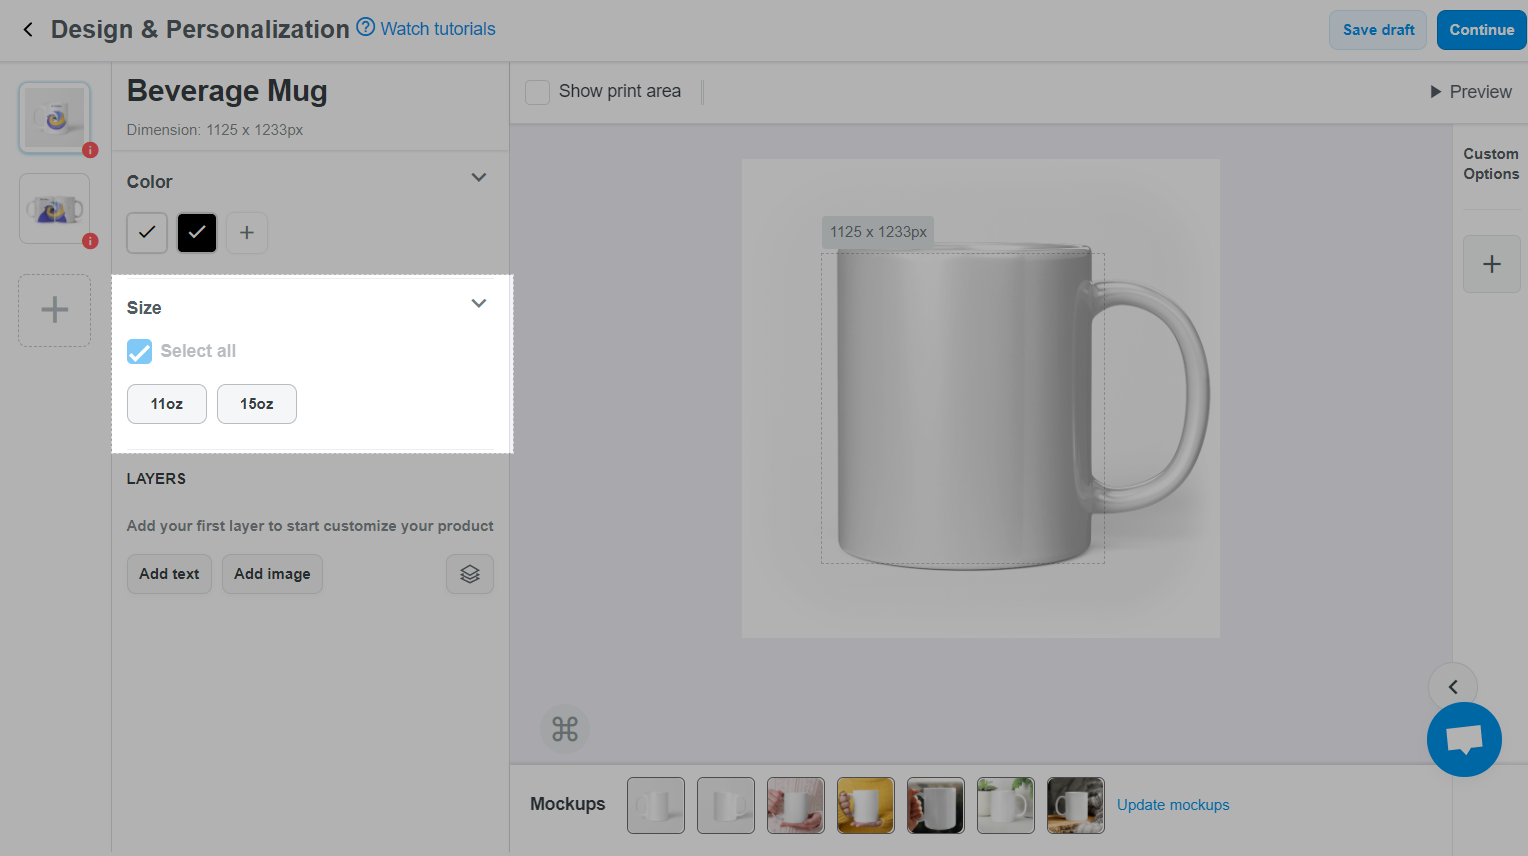
Designs need to follow the dimension and template of your desired products.
You can combine layers into different groups to easily organize and manage them, as well as to create campaigns with multiple design versions for your customers to choose from. Please refer to this article for more information about layer groups.
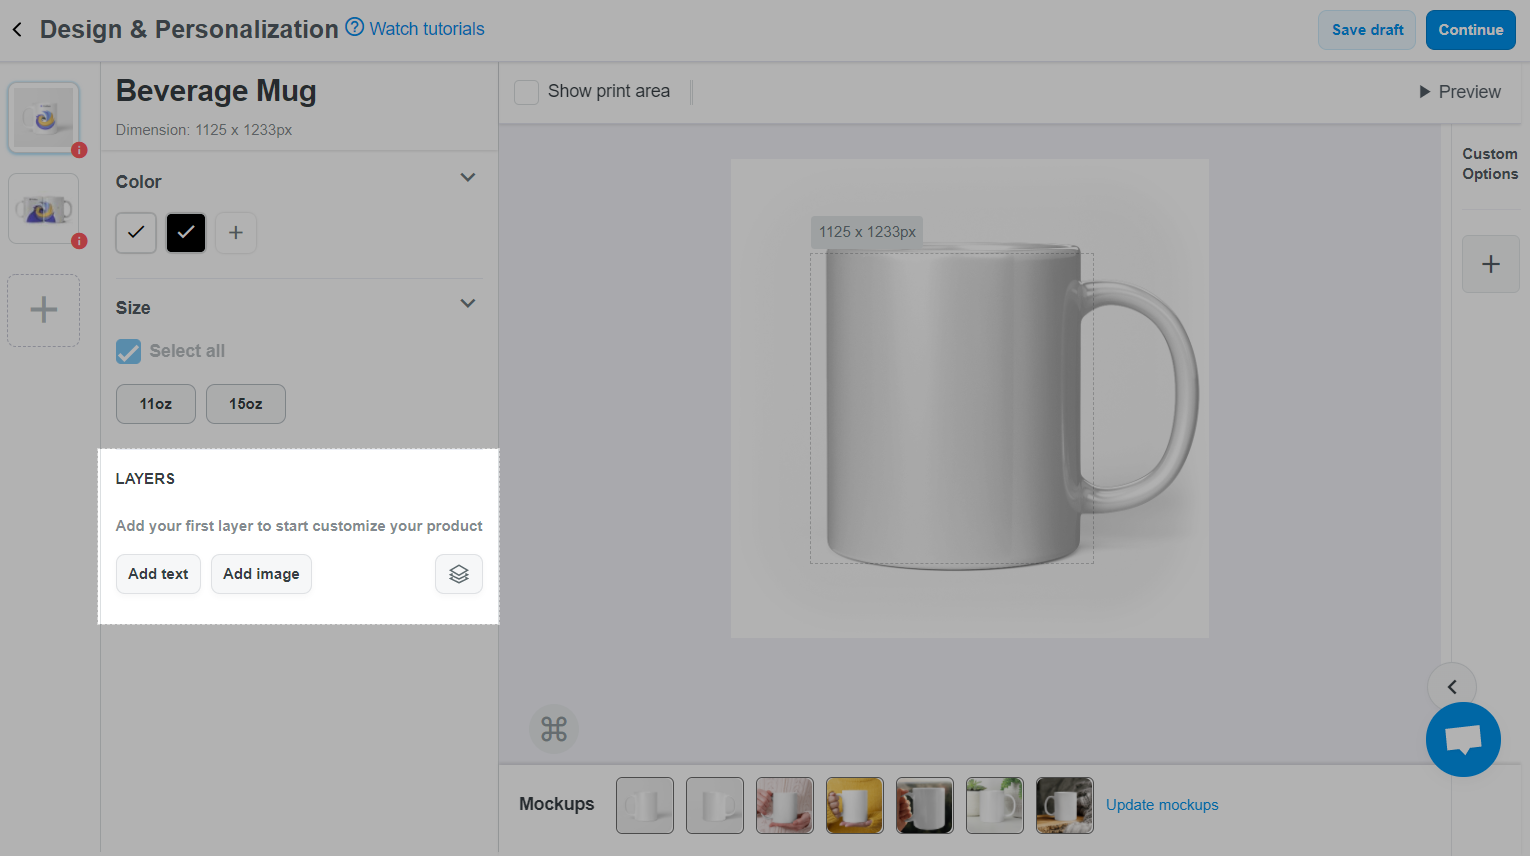
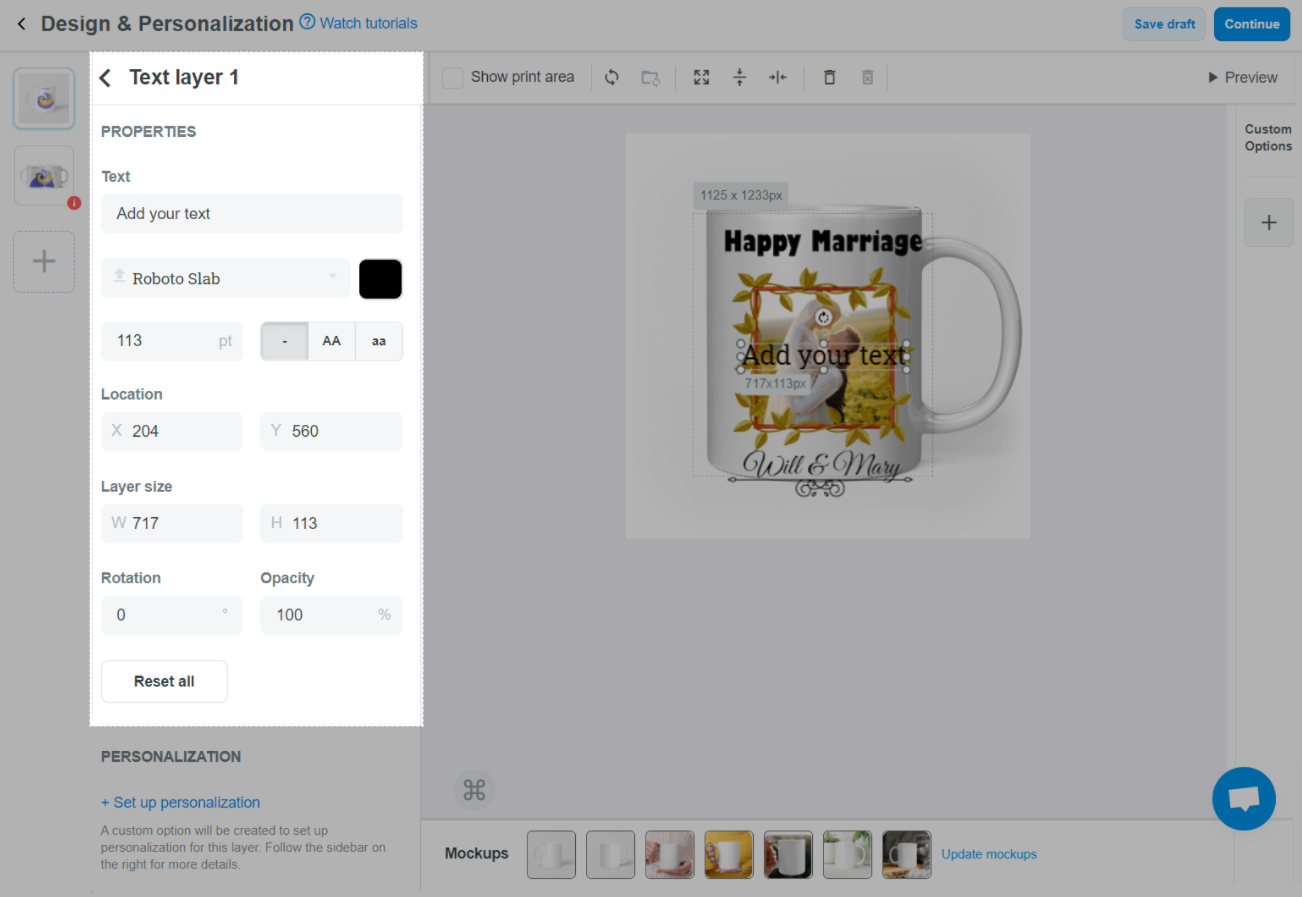
Click the Text layer to edit Text, Font, Size, Color, Letter case, Location, Rotation, Opacity.

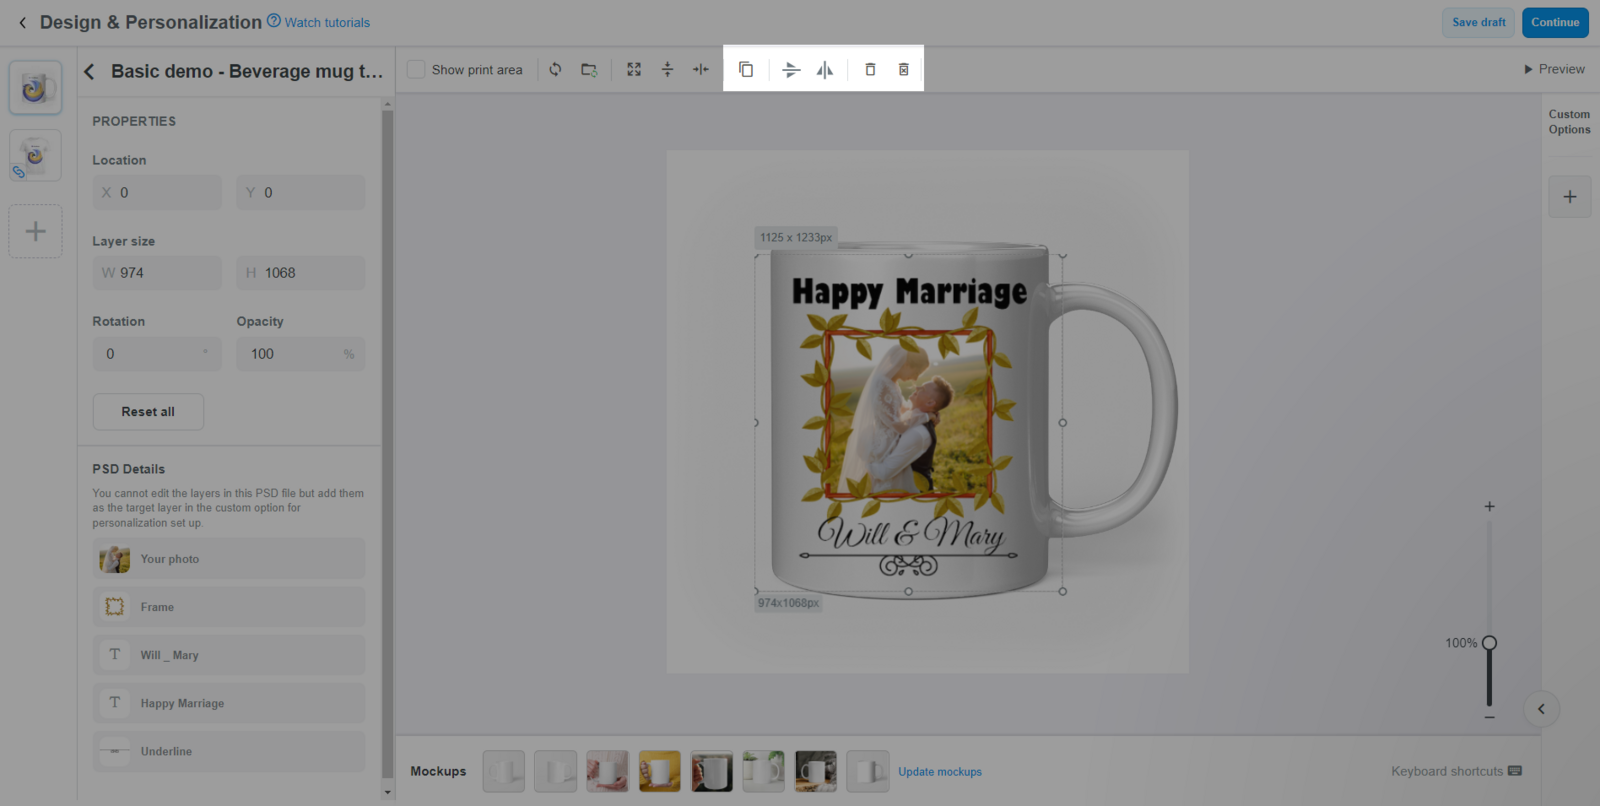
You can flip the image even if the image is rotated.
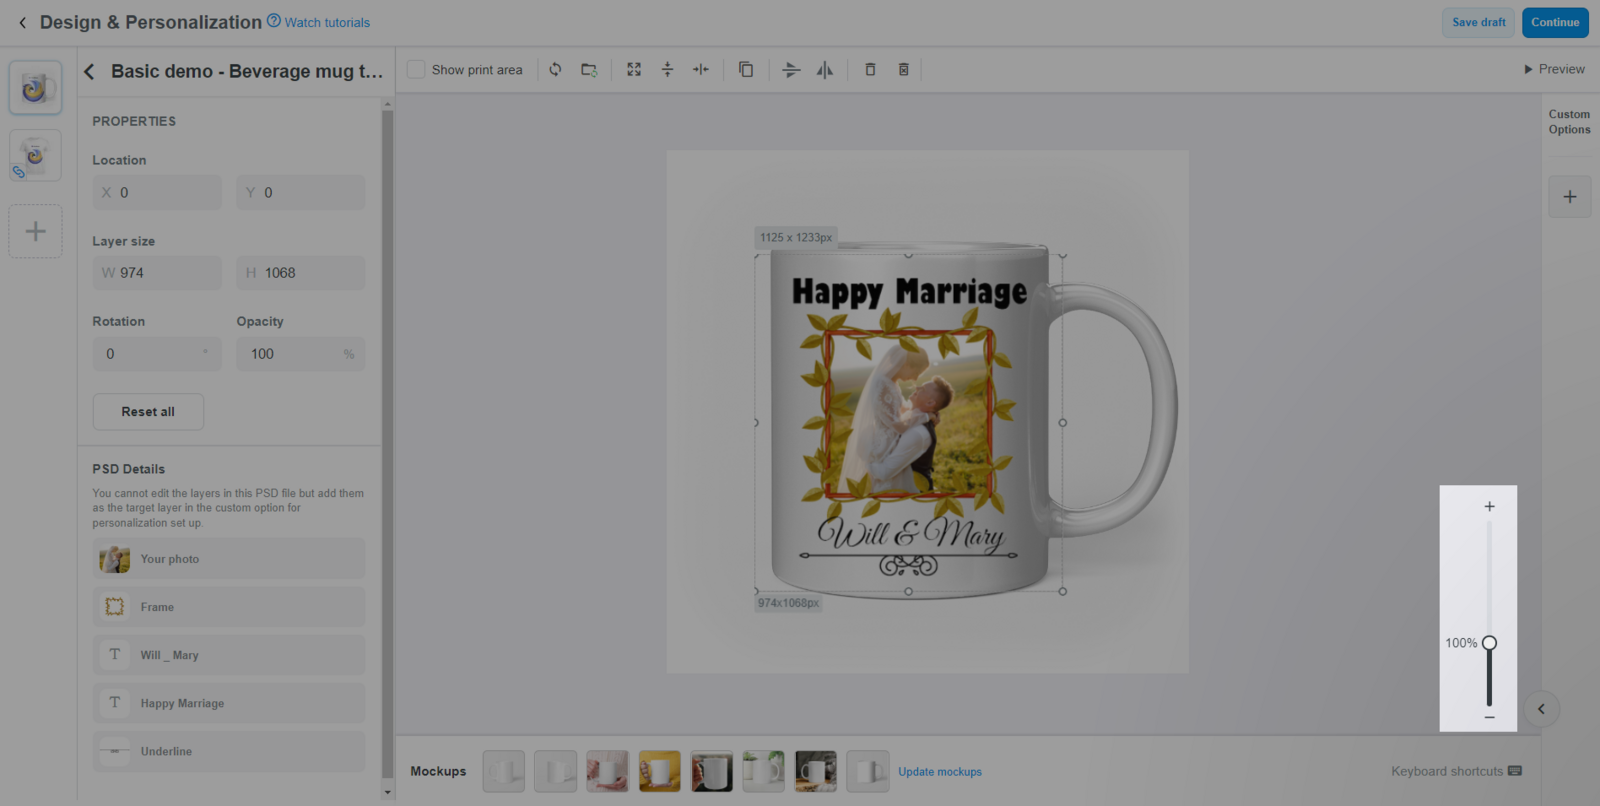
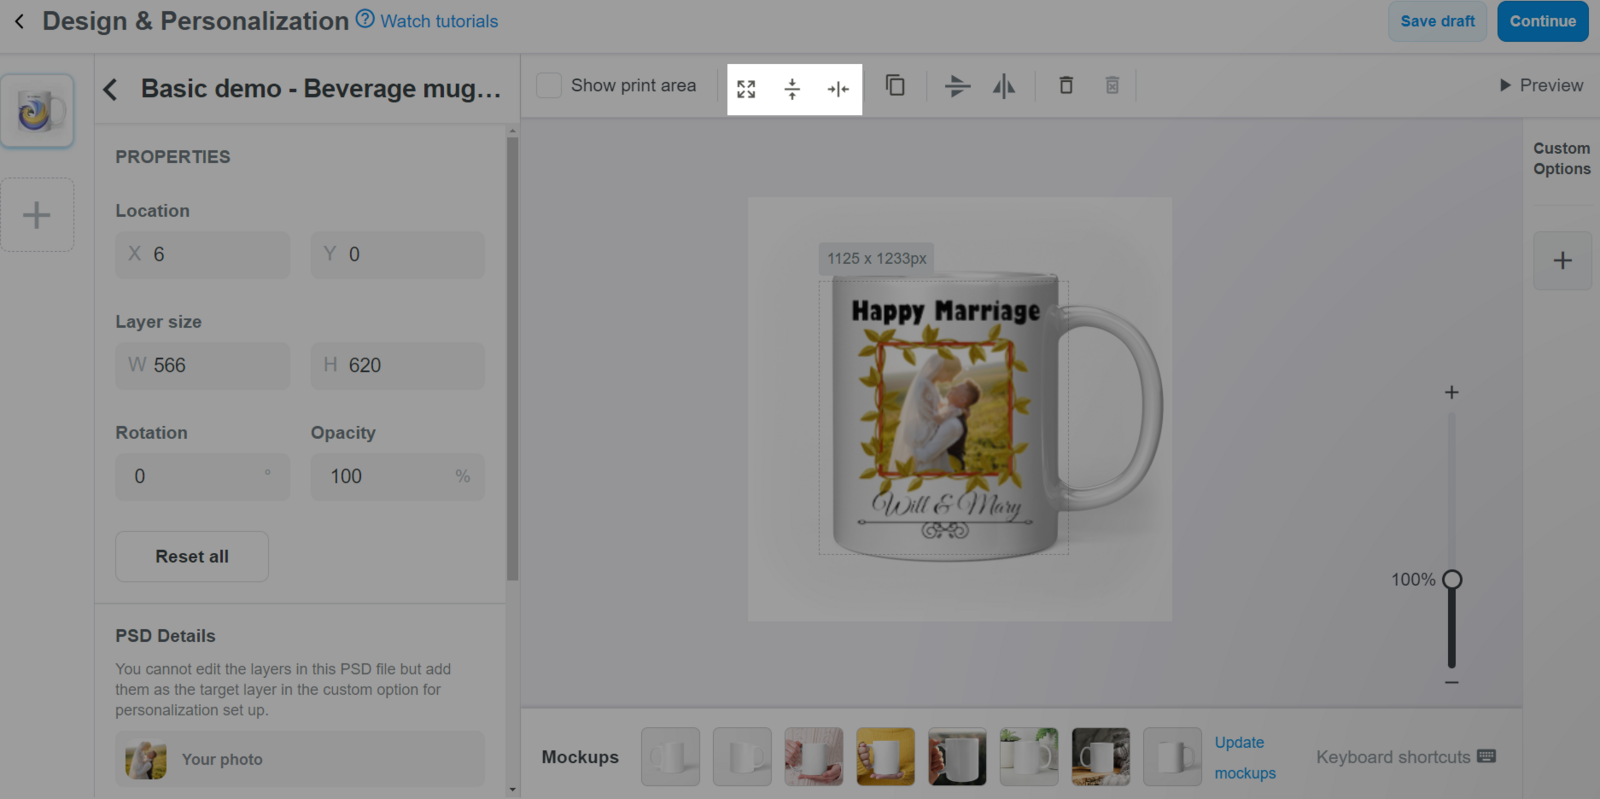
+/- button to zoom in/out by 10% per click. The maximum zoom level is 200% and the maximum zoom level is 50%.+ button to increase to 200%, double click the - button to decrease it to 50% immediately.
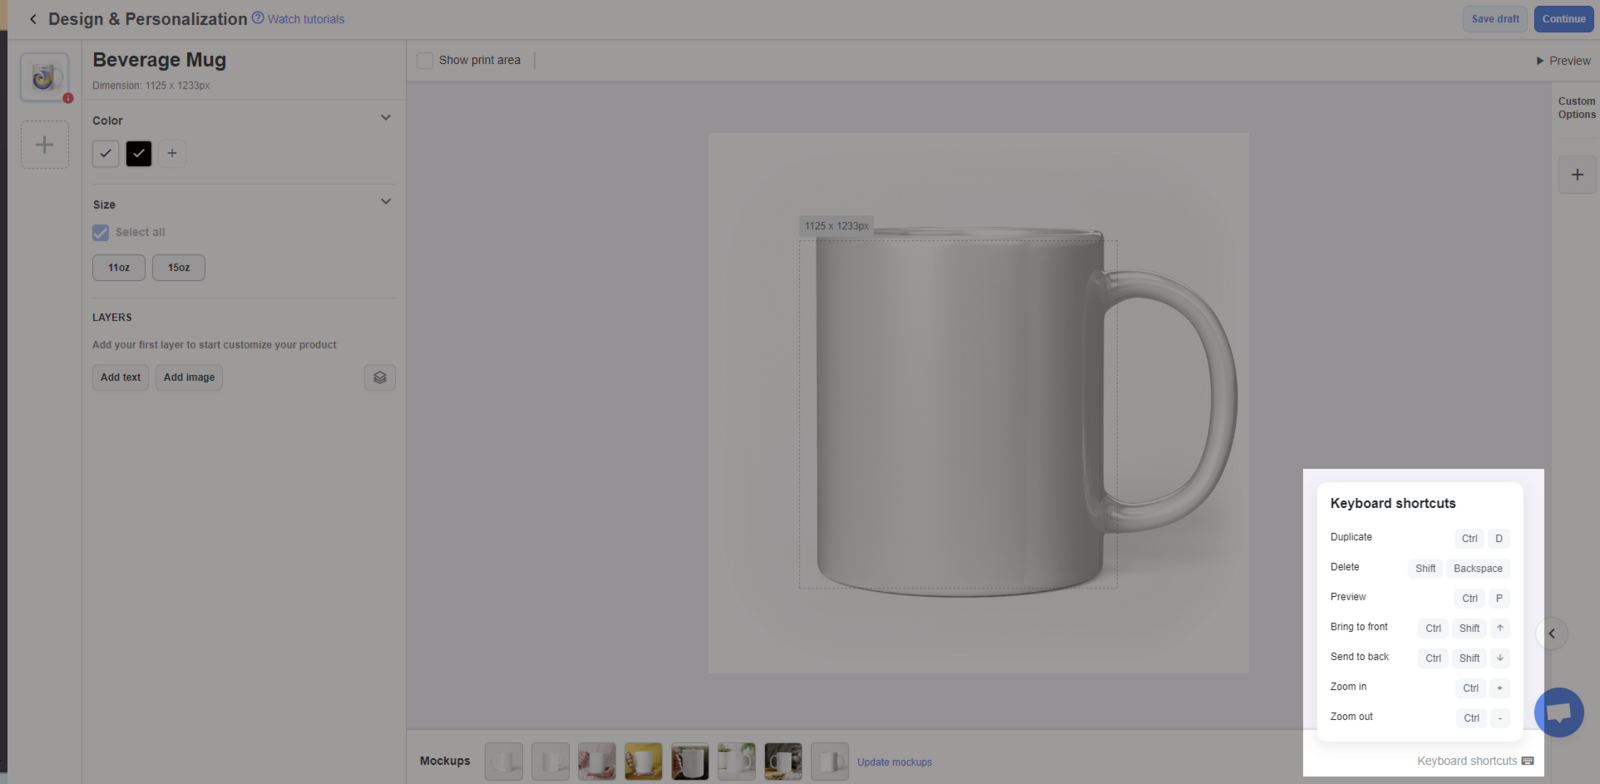
| Keyboard shortcuts in Windows | Keyboard shortcuts in Mac | Action |
|---|---|---|
| Ctrl + D | Cmd + D | Duplicate layer |
| Shift + Backspace | Shift + Delete | Delete current selected layer |
| Ctrl + P | Cmd + P | Preview |
| Ctrl + Shift + ↑ | Cmd + Shift + ↑ | Bring selected layer to front |
| Ctrl + Shift + ↓ | Cmd + Shift + ↓ | Bring selected layer to back |
Ctrl + =
|
Cmd + =
|
Zoom in 10%. If the current zoom is 200%, this keyboard shortcut cannot be performed. |
Ctrl + -
|
Cmd + -
|
Zoom out 10%. If the current zoom is 50%, this keyboard shortcut cannot be performed. |
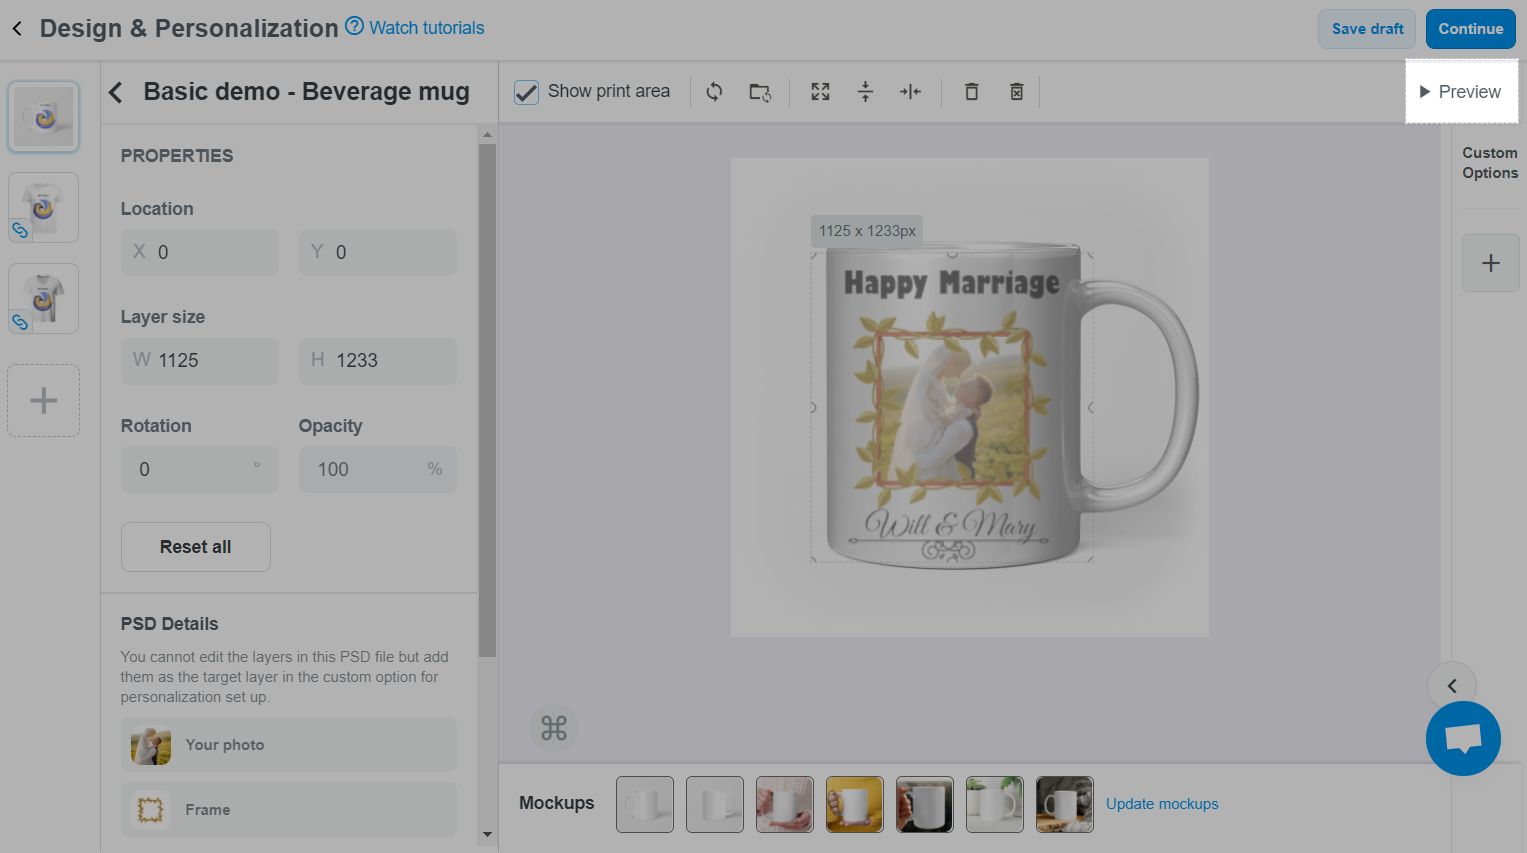
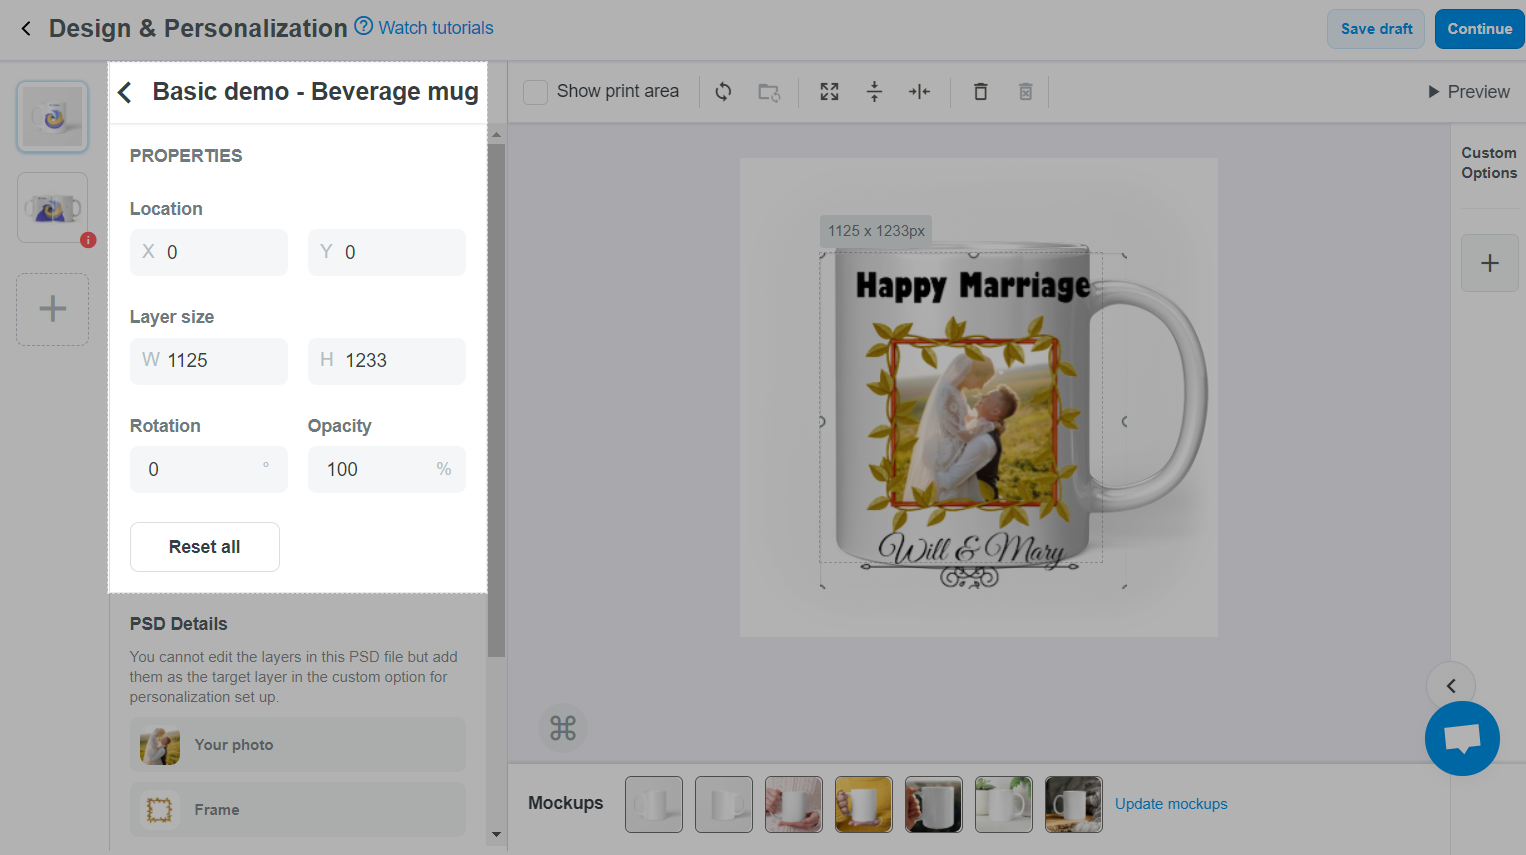
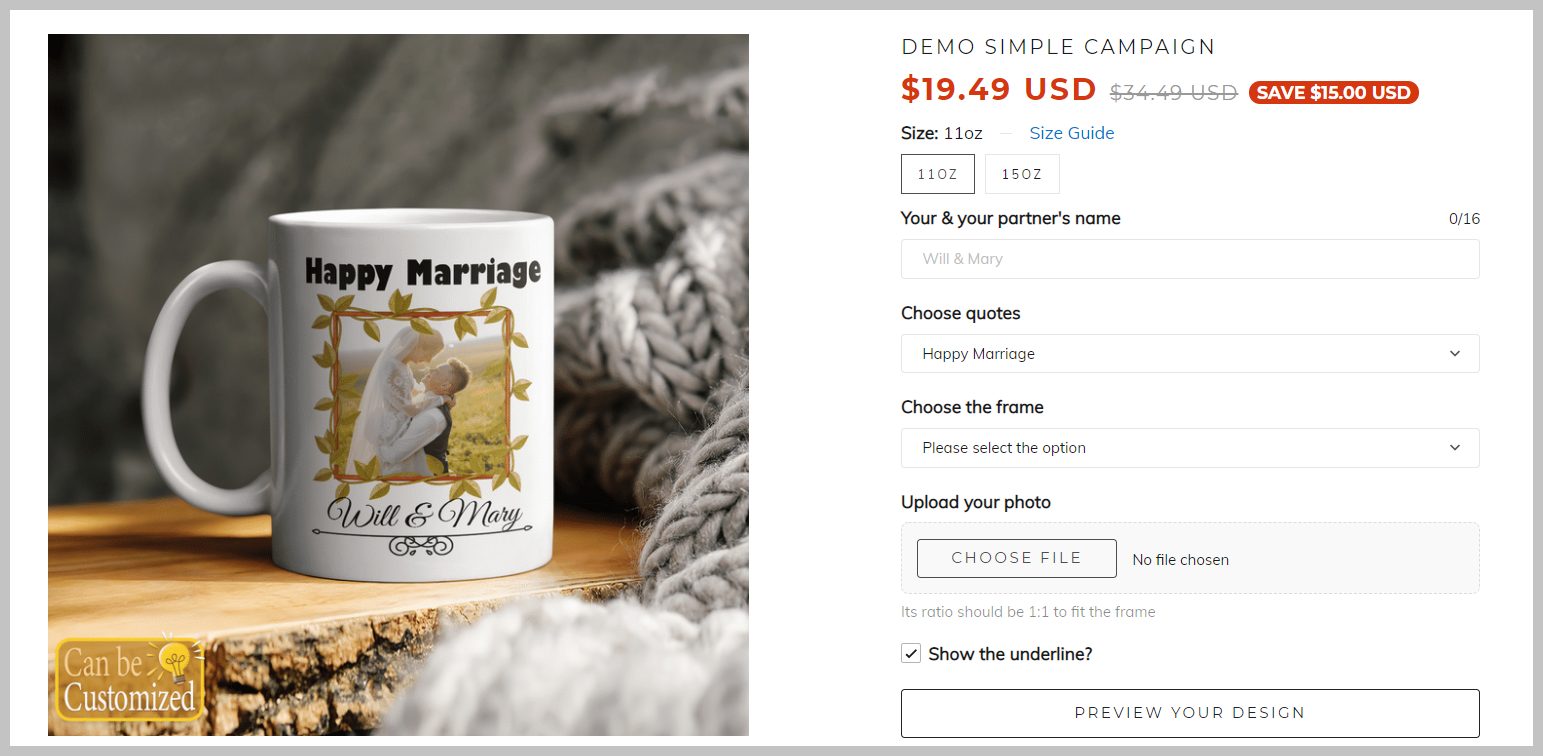
D. Create a personalized campaign
You can add personalization to designs on products. This feature will allow buyers to add/select/change text and images upon their wish to print on the product. If you do not add this feature to your campaign, please go to part E to edit name, price, display of campaign, then part F to launch campaign.
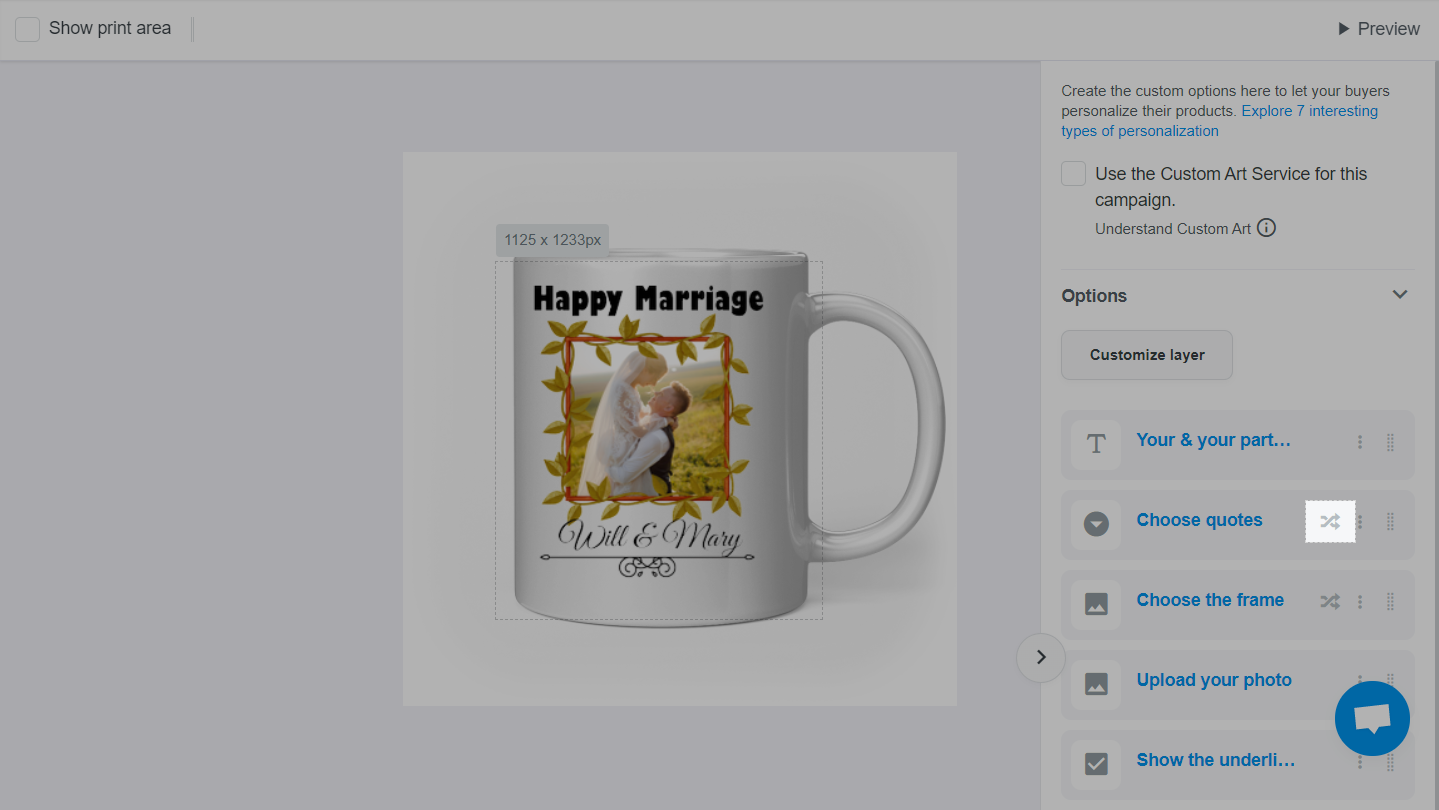
You can read this article for a step-by-step guide on how to create personalization in your campaign: Step-by-step Guide: Create a personalized couple campaign with advanced custom options such as Text, Picture choice, Droplist, and Checkbox, along with conditional logic for some options.
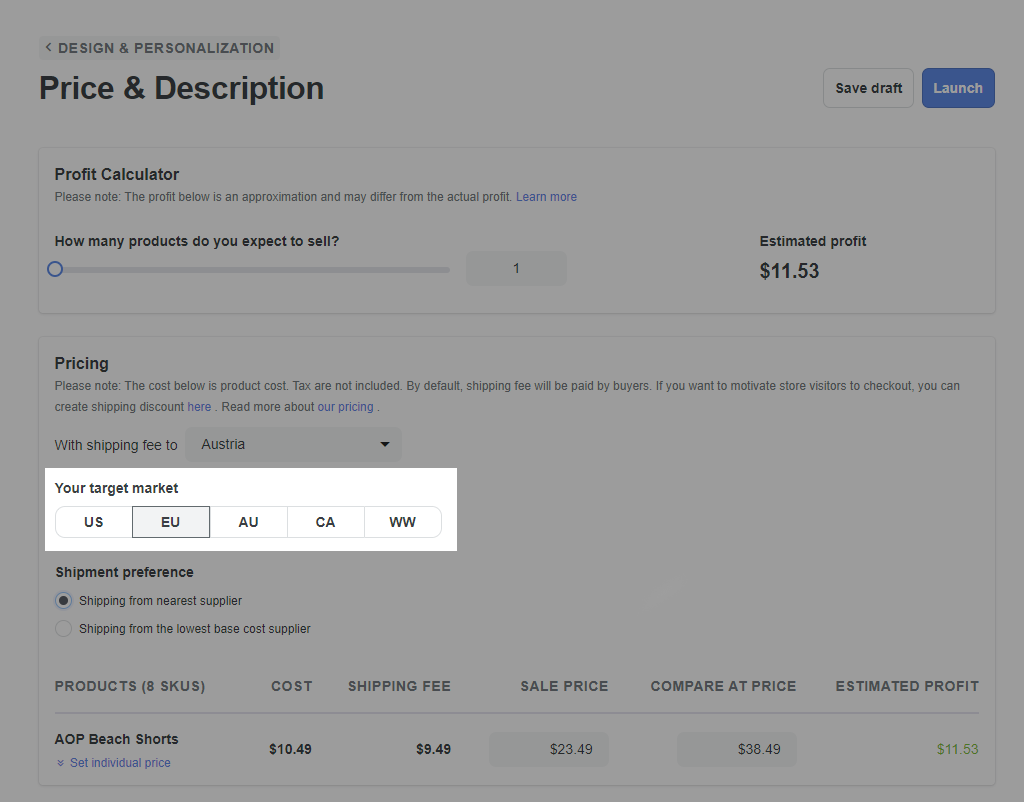
E. Edit name, price and display of campaign
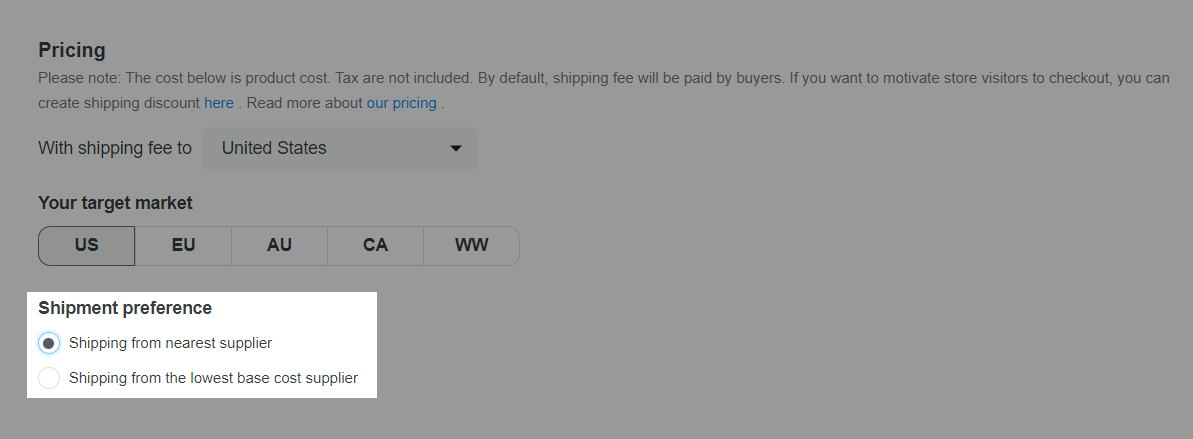
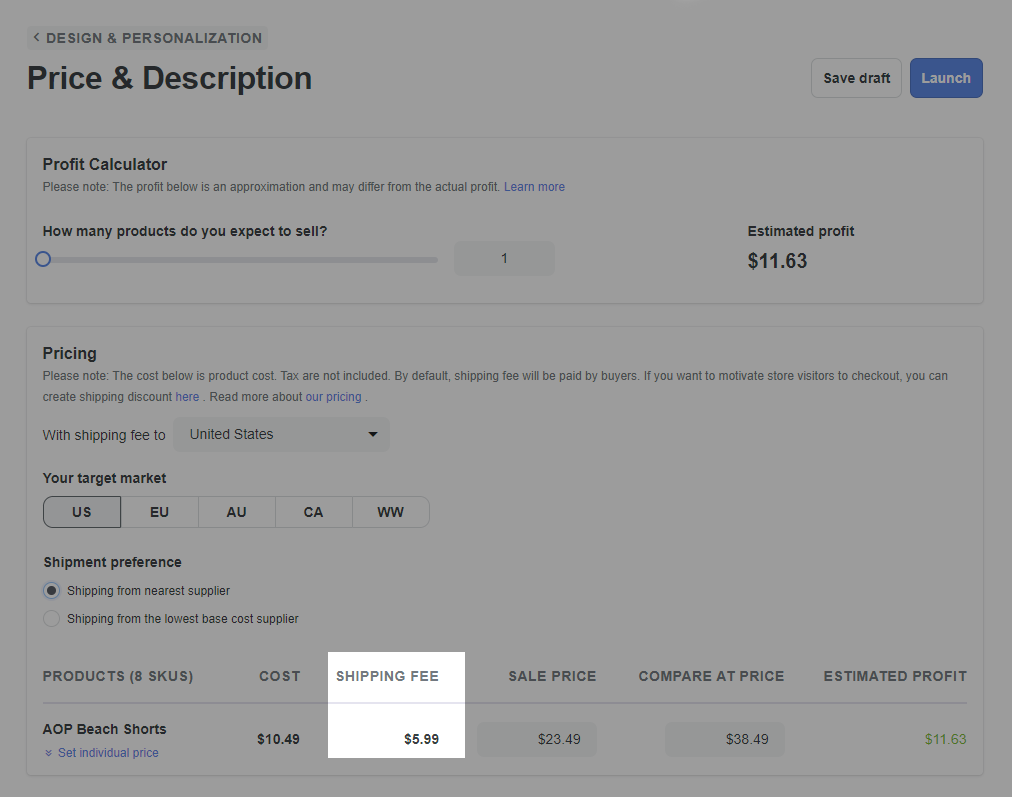
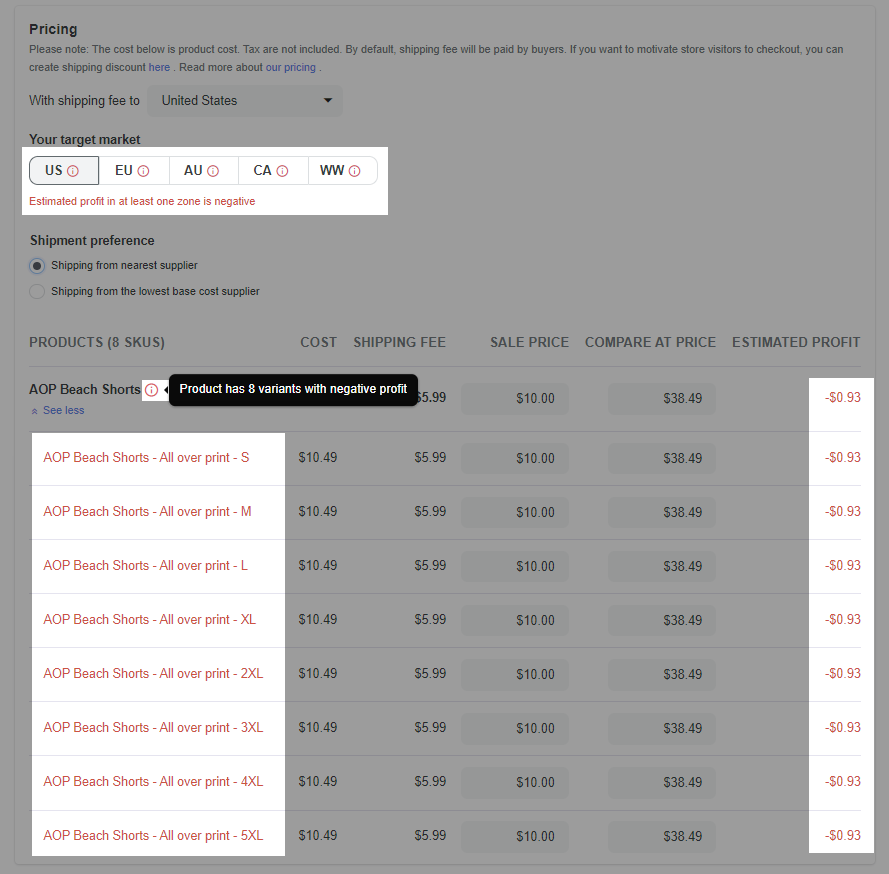
After editing the artwork to fit your design (and create custom options for your personalized campaign), click Continue. Here, you can add the description, adjust the sale price, modify the title and tag, and select your preferred shipment preference, among other customization options.
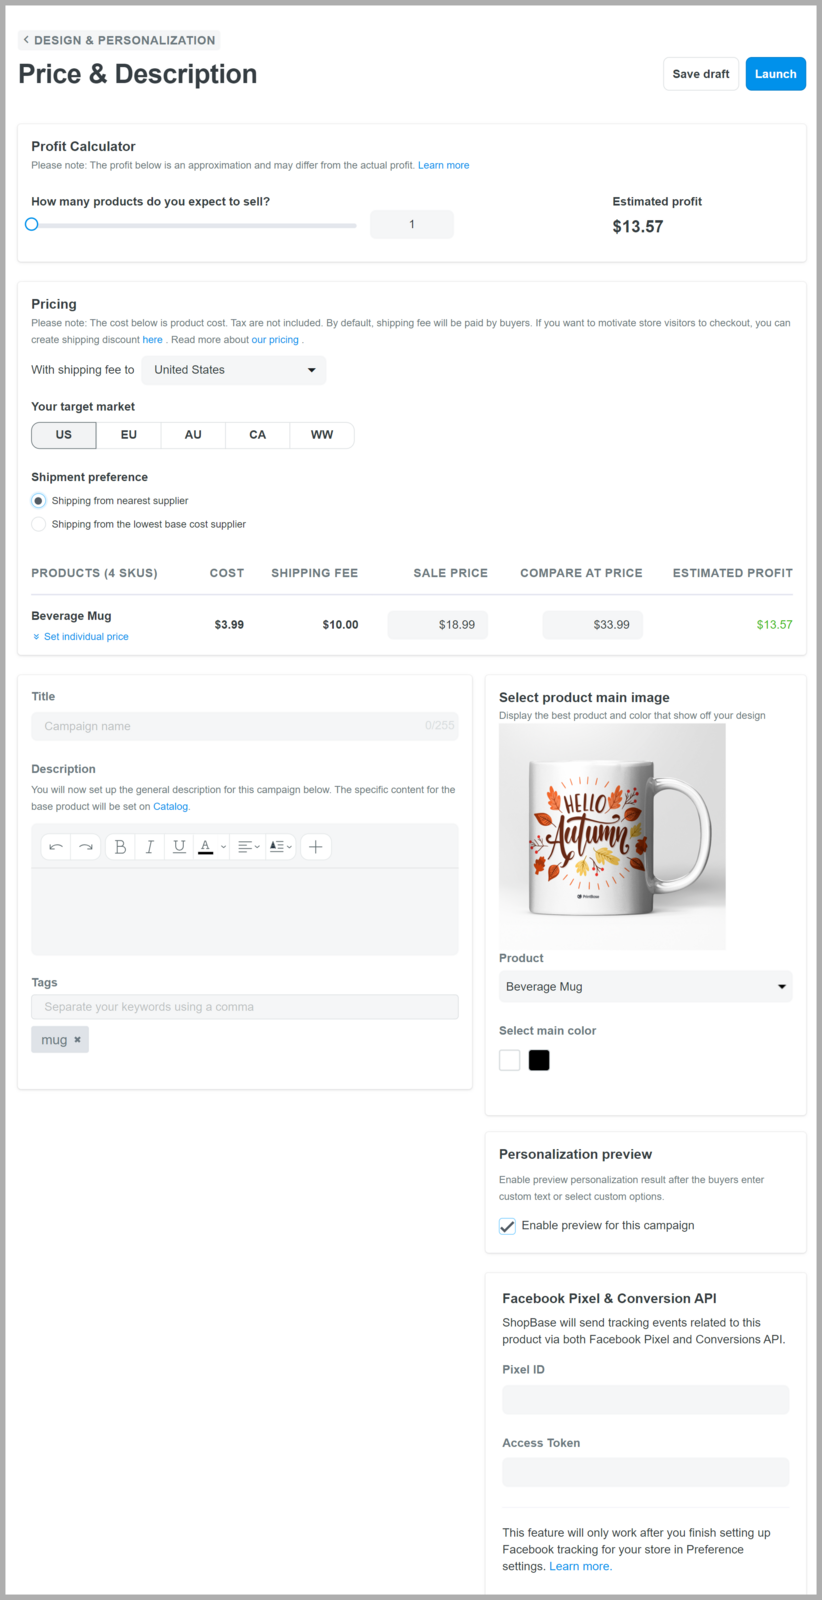
This estimated profit is an approximation and may differ from the actual profit. Please refer to this article on how your POD order profit is calculated.

PrintBase will automatically exchange price on PrintBase to your store's currency by using current exchange rate.
F. Launch campaign
When you have finished section E, press Launch to officially launch the campaign to the store.
Campaigns will be launched and available with first images of each variant, along with other campaign's information (such as title, description, sale prices, etc.), for you to start selling first. Other images will be launched afterwards.
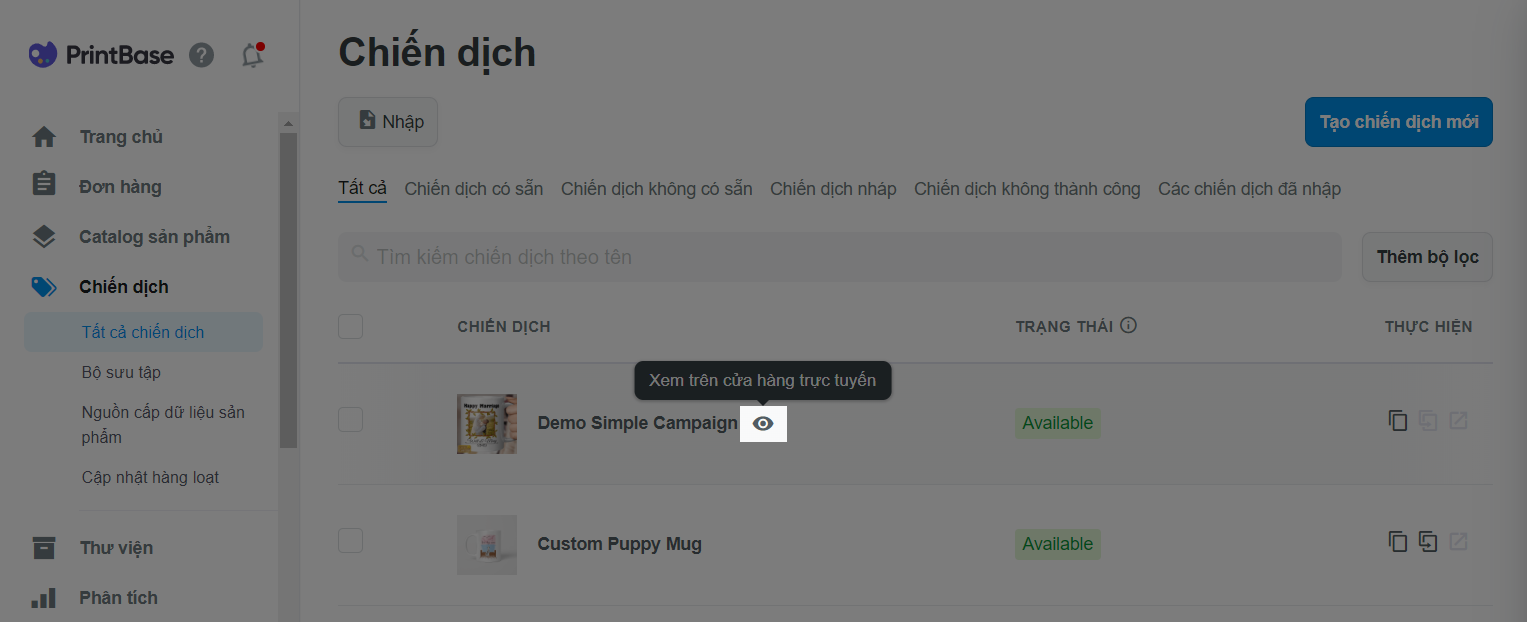
You can view your campaign on storefront by clicking View on Online Store according to campaign name in the All campaigns page.
G. Campaign status
Please visit this article for a guide on different campaign statuses.
To ensure seamless operation of your stores, limitation will be set for campaigns created, duplicated and bulk duplicated daily on a store. Please refer to this article for more information.