ShopBase's Web Base library is a tool designed to help users easily create and share their templates that can be reused across websites. In this article, we will give you an overview of library and how to use it effectively on the store using Website Builder
In this article
A. Understand Web Base Library
B. Create a new library
C. Edit a library
D. Delete a library
A. Understand Web Base Library
By default, the Web Base Library is available for all ShopBase / PlusBase / PrintBase websites. This library contains all of the templates carefully curated and designed by our team. Each template serves a different purpose and can be used to launch your web page right away. You cannot edit or add templates into the Web Base Library.
To access the Web Base Library:
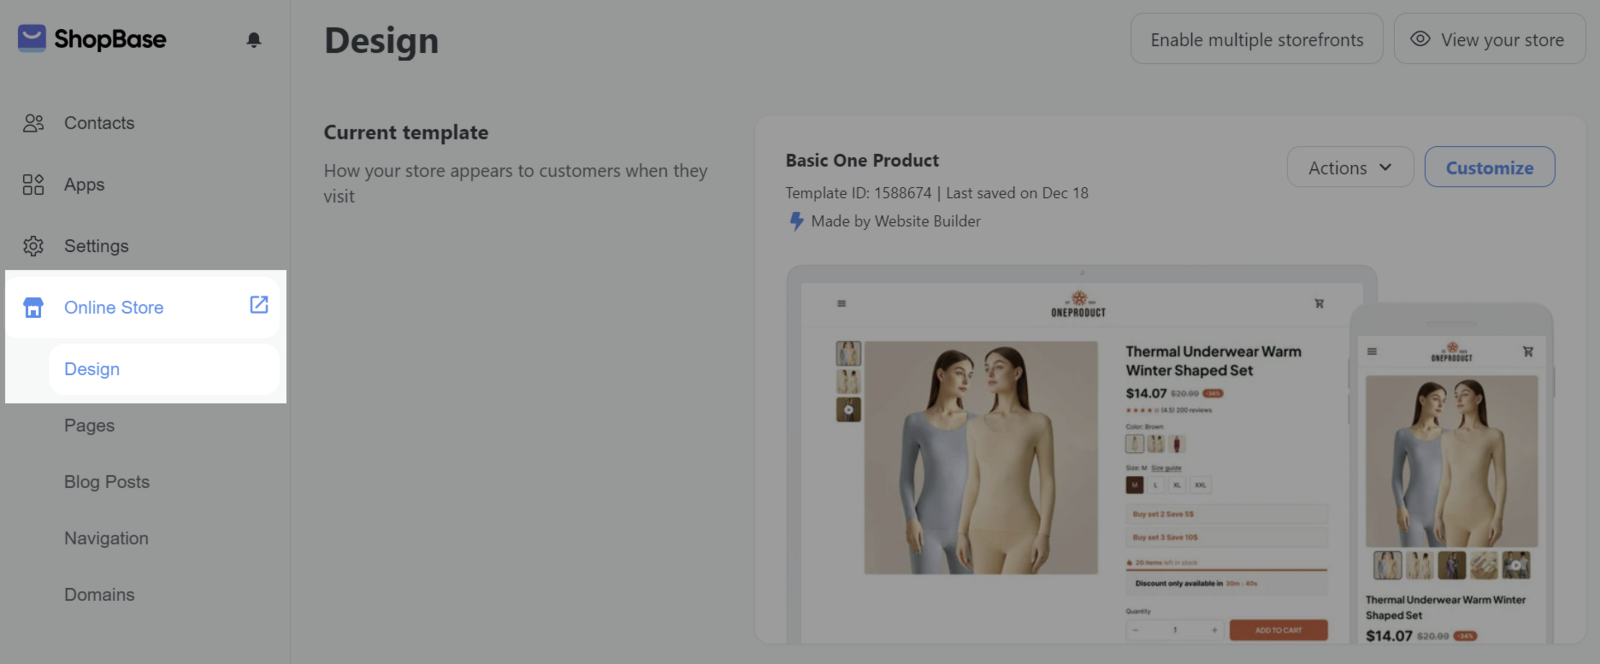
From your admin dashboard, go to Online Store > Design.

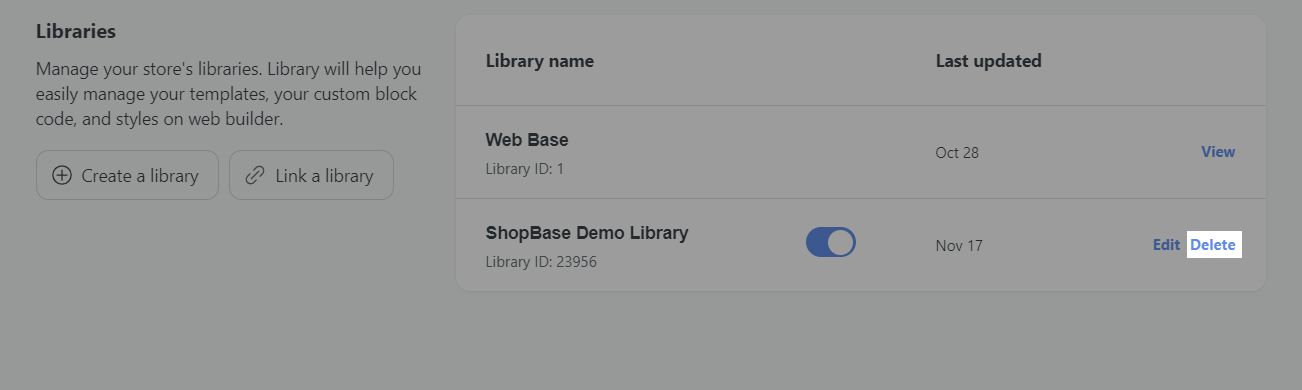
The Web Base Library will be displayed in the Libraries section, you can click to view its details.

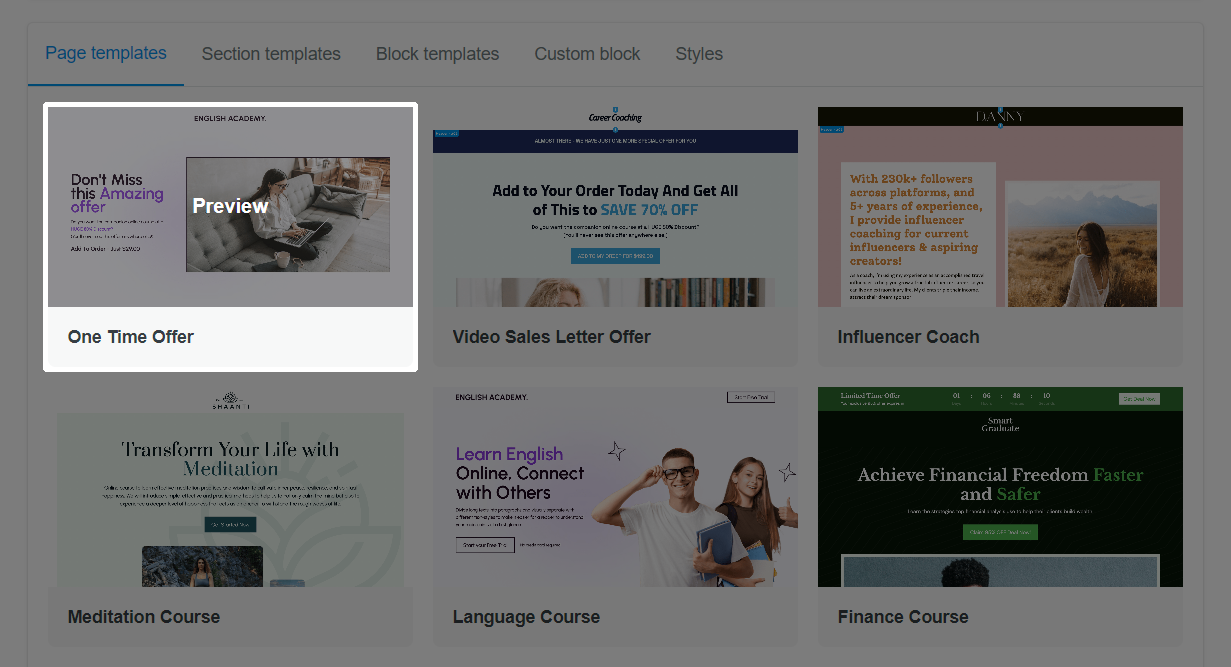
Here, you can view all details and templates of the Web Base Library, including the page templates, section templates, block templates, custom blocks, and styles.
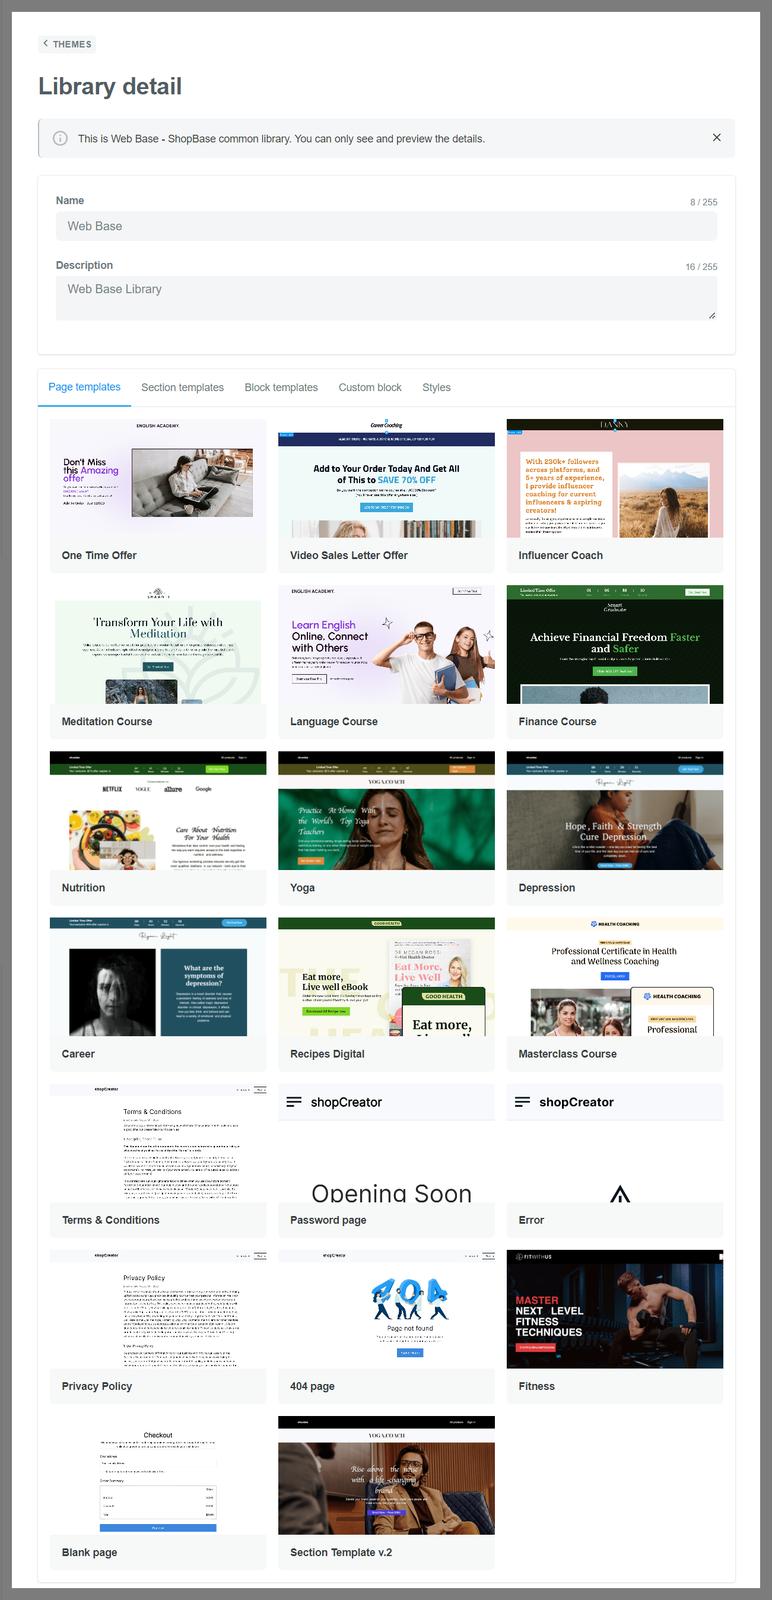
For Web Base Library's page templates, you can click to preview it before using it on your website.
B. Create a new library
If you have plenty of website designs that you want to save as templates and reuse them across different websites, you must first create a library where you can store your templates into.
From your admin dashboard, go to Online Store > Design.

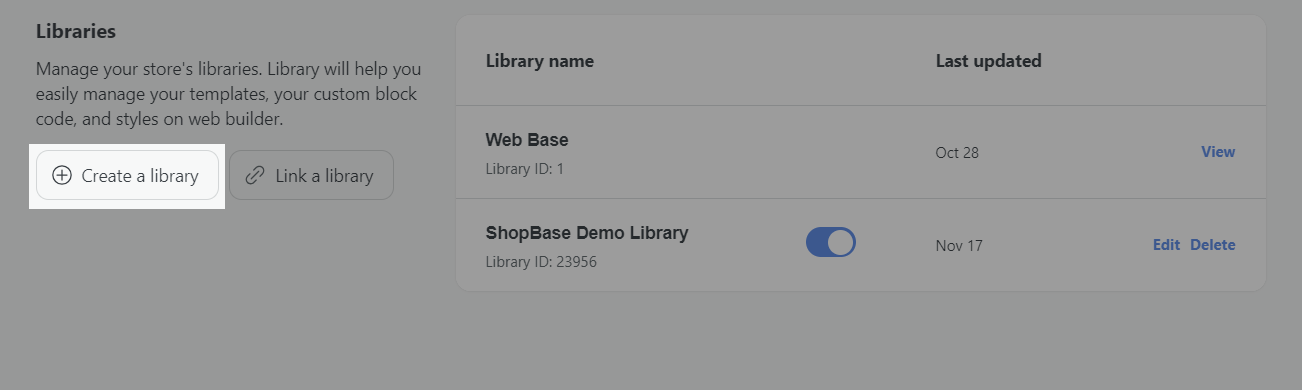
Under Libraries, click Create a library.
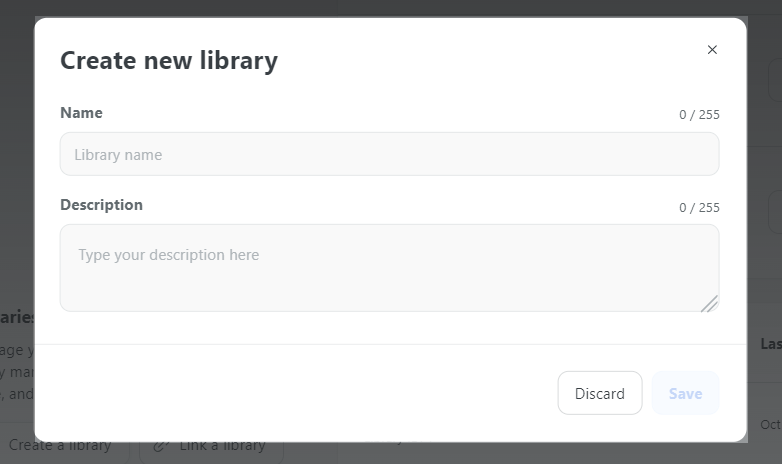
In the dialog, enter a name and short description for your library. Then, click Save.
After your library is created, it will be listed in the Libraries section as below:
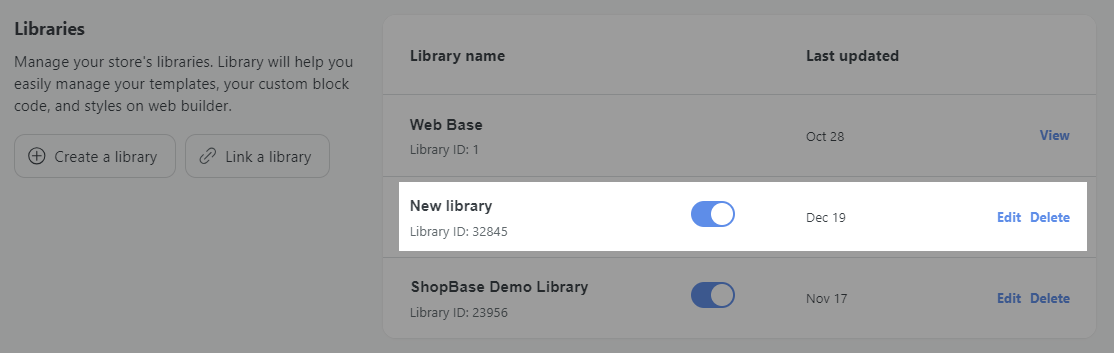
C. Edit a library
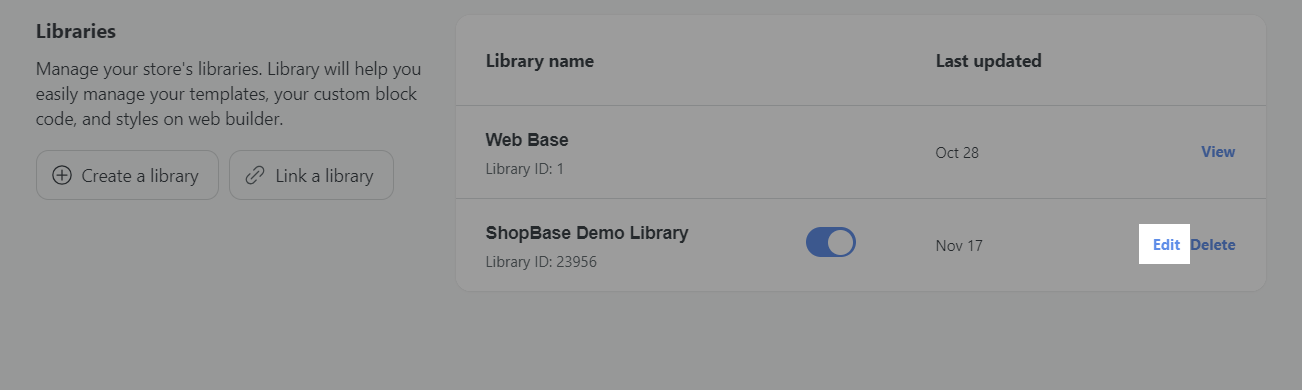
From your admin dashboard, go to Online Store > Design.

In Libraries, click Edit next to the library you want to edit.
Here, you can view all details and templates of your library.
Name: Your template's name.
Description: Your template's description.
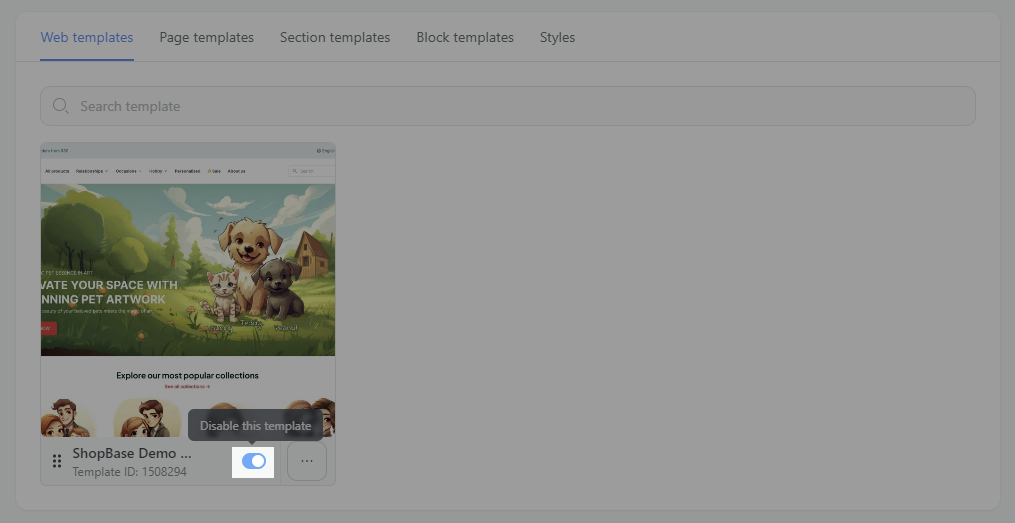
Web templates: includes all of your saved web templates that are sorted into this library.
Page templates: includes all of your saved
page templates that are sorted into this library.
Section templates: includes all of your saved
section templates that are sorted into this library.
Block templates: includes all of your saved
block templates that are sorted into this library.
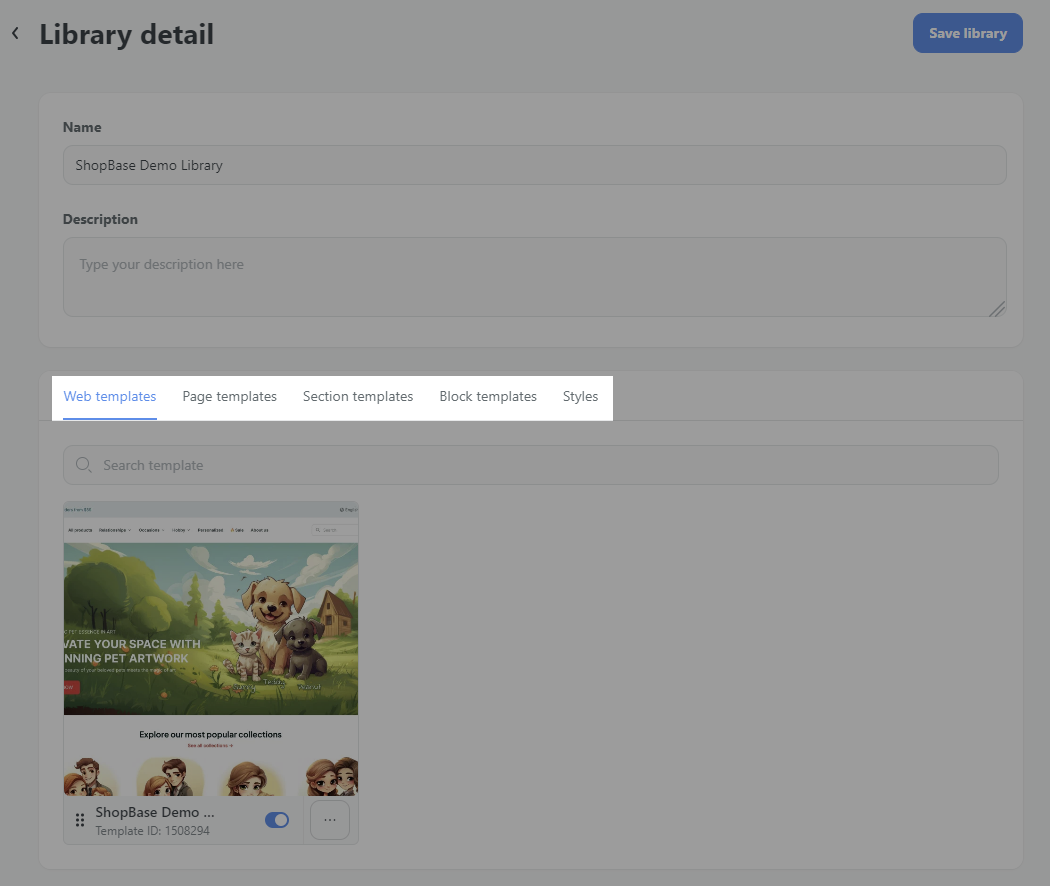
You can enable/disable templates as needed. When a template is disabled, it is no longer available for use on any website to which this library is linked, but it is not deleted and can be enabled again for future use.
You can also edit the template's name, or delete it by clicking on the Action button and select the respective buttons.
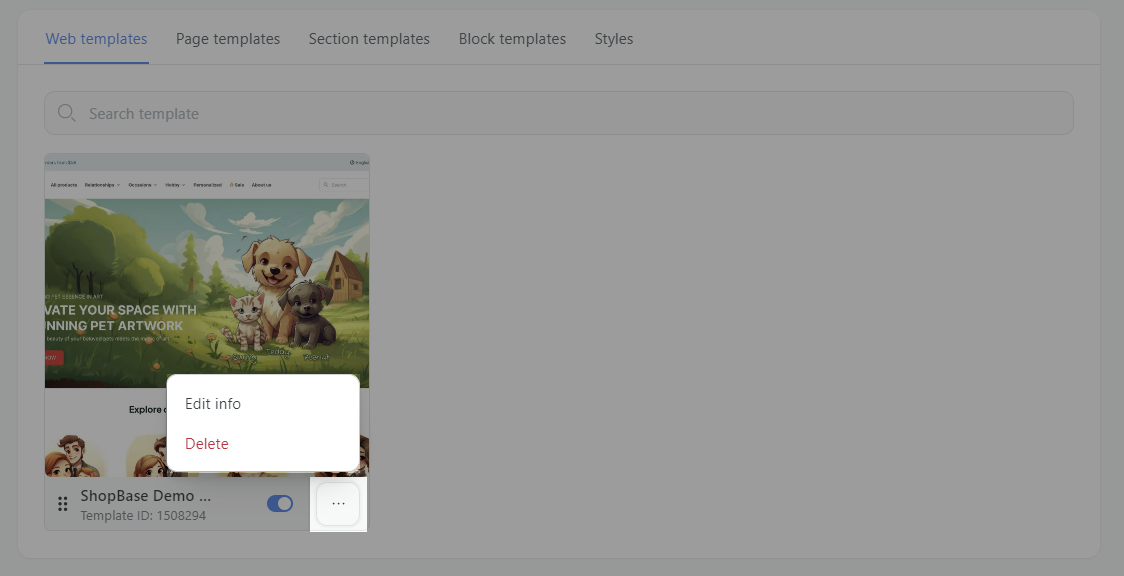
Once finished, click Save template.
D. Delete a library
From your admin dashboard, go to Online Store > Design.
In Libraries, click Delete next to the library you want to delete.
After deleting a library, you will no longer be able to use the templates saved to that library. Any templates that were in use prior to the delete are unaffected.
Updated 4 months ago