AI-Personalized Campaign is a feature that helps you quickly create personalized campaigns from a design file. The tool automatically analyzes the design and generates personalization options, significantly reducing the time required compared to creating campaigns manually.
This article explains how to create an AI-Personalized campaign on stores within the ShopBase ecosystem.
Artwork Requirements
Your uploaded design must meet the following requirements:
File formats: PNG, JPG, JPEG
File size: 2 MB – 20 MB
Aspect ratios: 1:1, 3:4, or 4:3
❌ Do not use:
Real-life photos
Designs containing more than 7 customizable characters in total
Designs with vertical text or text that is difficult to read
Blurry, low-quality, or unclear images
If you do not want the design background to appear on the product, please use an artwork file with a transparent background.
How to create an AI-personalized campaign
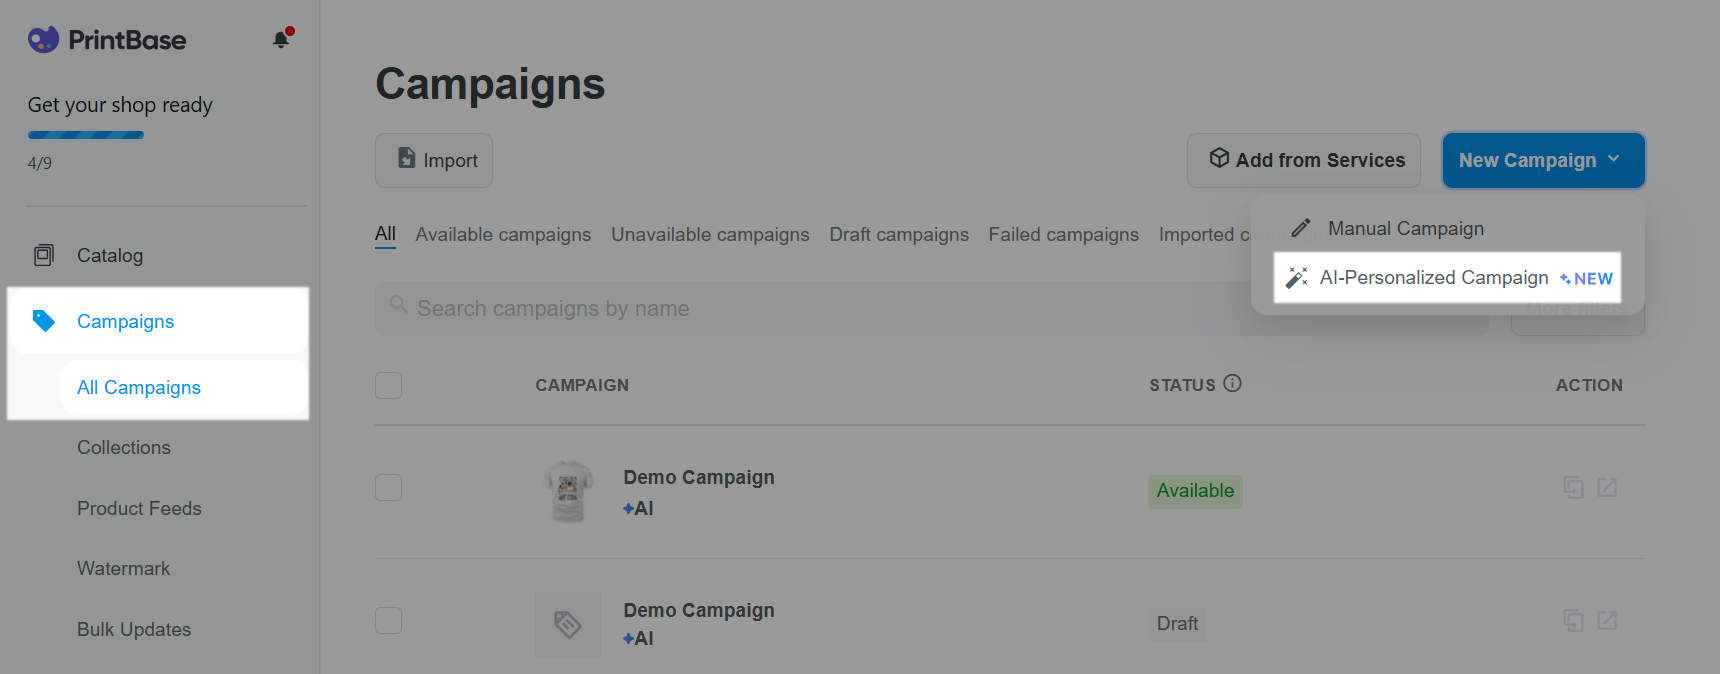
Go to All Campaigns > New Campaign > AI-Personalized Campaign.
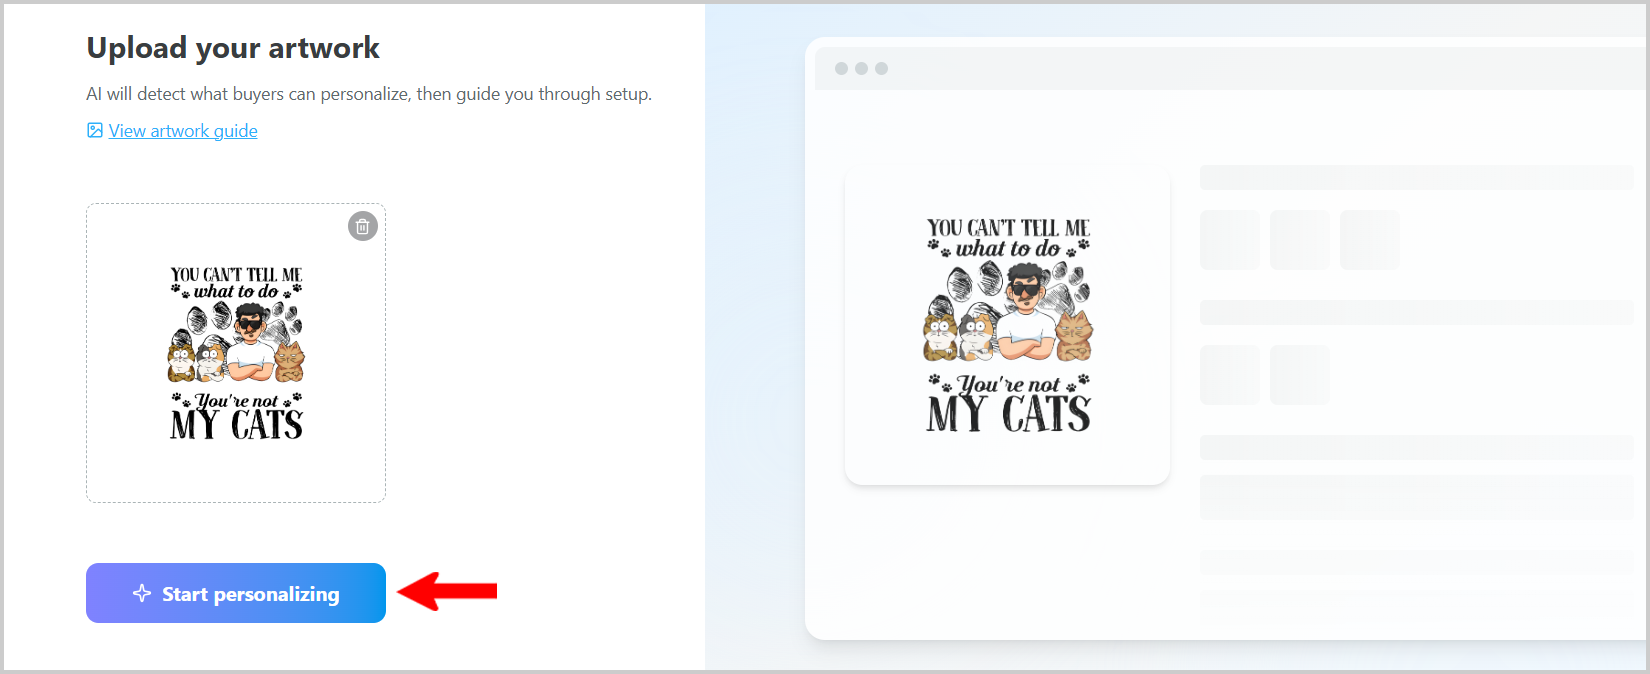
Click Upload Artwork or drag and drop your design file. Then click Start personalizing.
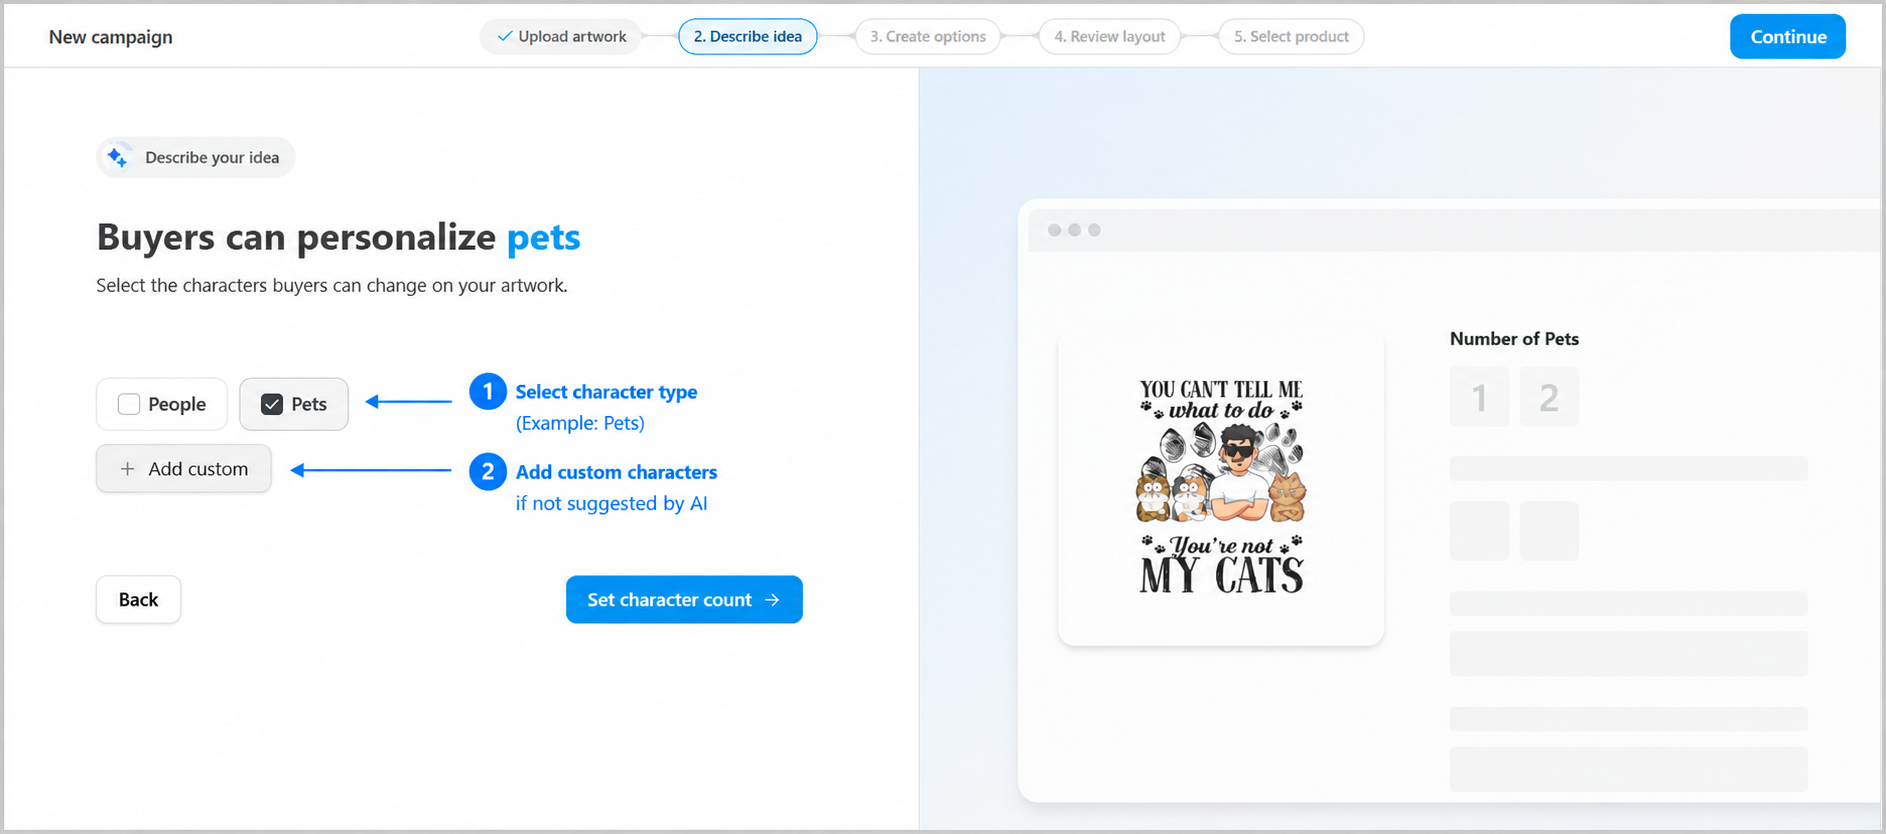
Select the characters you want to personalize. If the character you need is not included in the AI suggestions, click Add Custom and create your own character type.
Click Set character count. The AI will analyze the design and generate suitable personalization options in the next step.
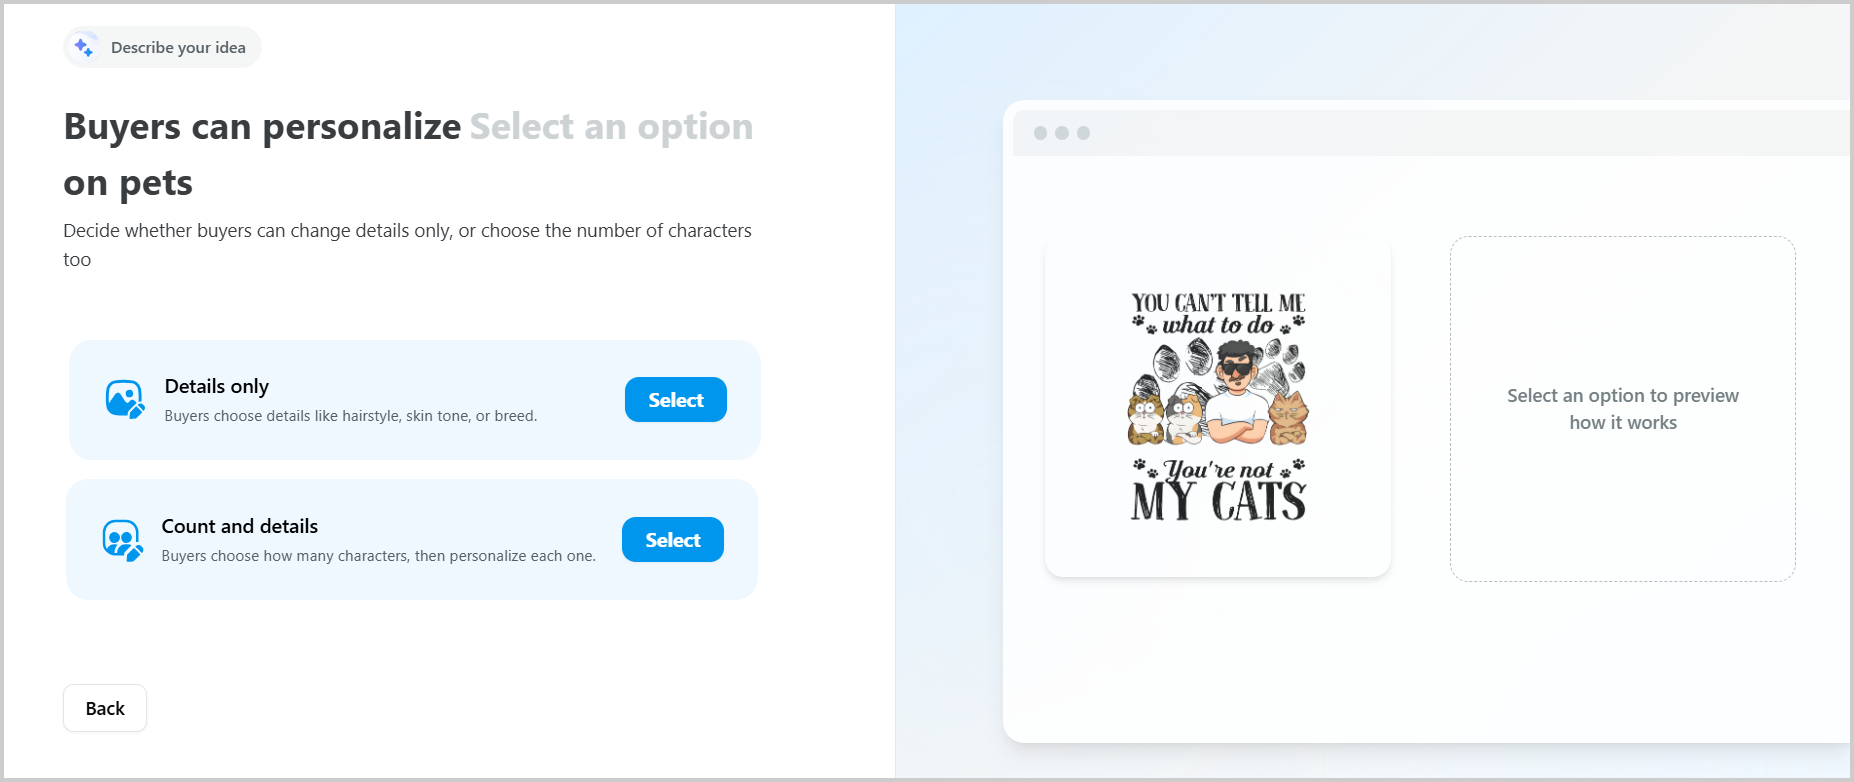
Choose a personalization method:
-
Details only: Buyers can customize character attributes such as hairstyles, skin tones, pet breeds, and more.
With this option, all characters of the same type share the same personalization settings and cannot be customized individually. For example, if the design contains two people, buyers cannot select different skin tones, hairstyles, or outfits for each person. The selected options will apply to both characters.
-
Count and details: Buyers can choose the number of characters displayed and customize each character individually, with a maximum of 7 characters per design. For example, buyers can choose to display 2 pets, 3 pets, and so on.
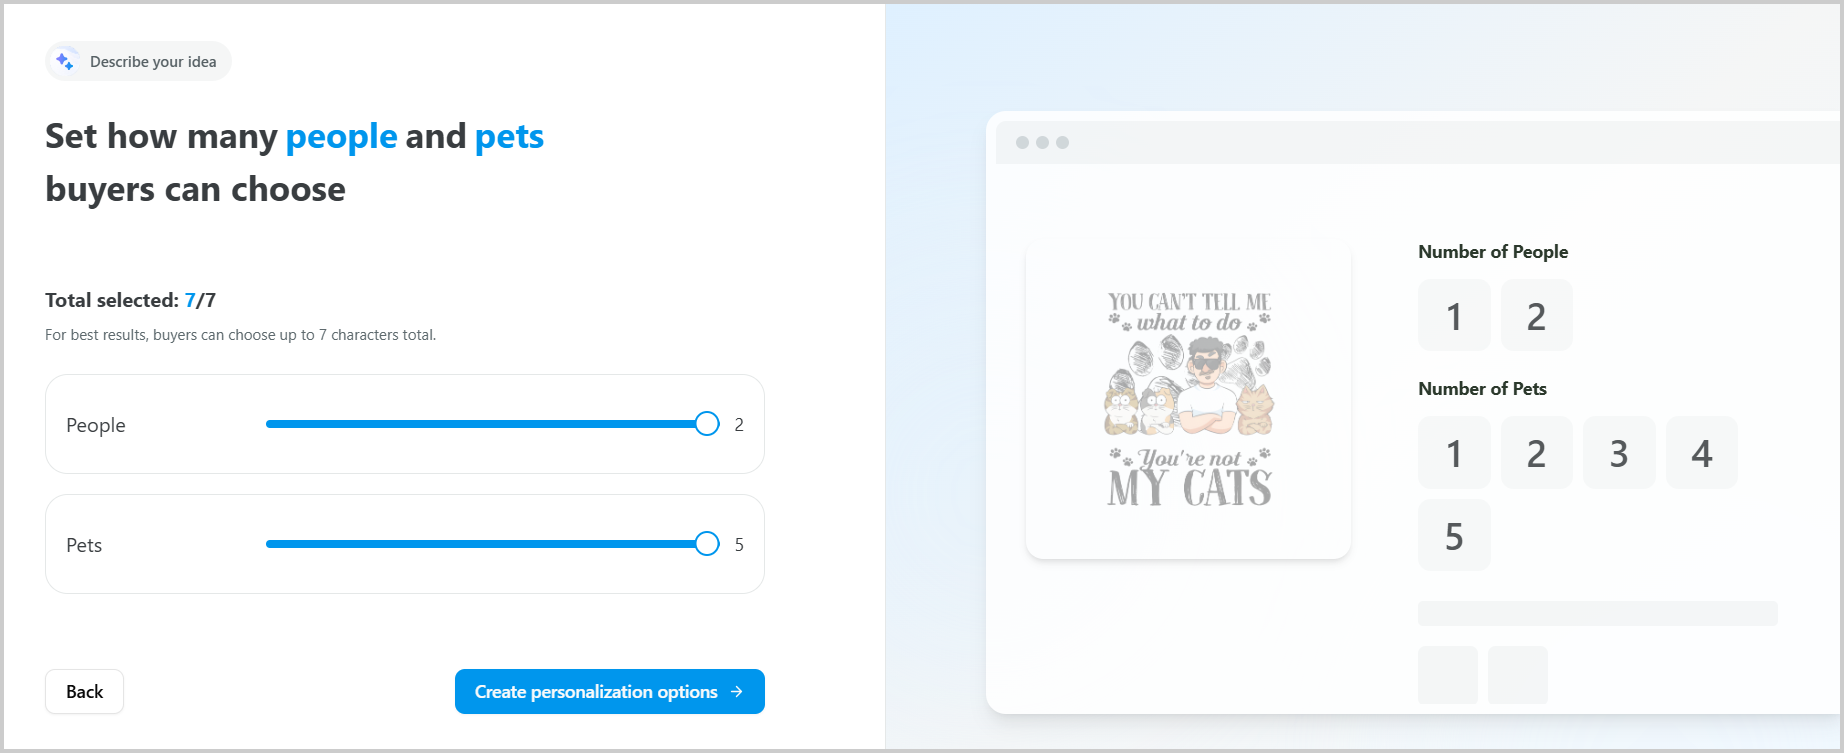
If you select Count and details, define the maximum quantity for each character type in the next step. The total number of characters across the campaign cannot exceed 7. Then click Create personalization options.
Configure personalization options:
Edit existing options or create new ones by clicking Add Option.

-
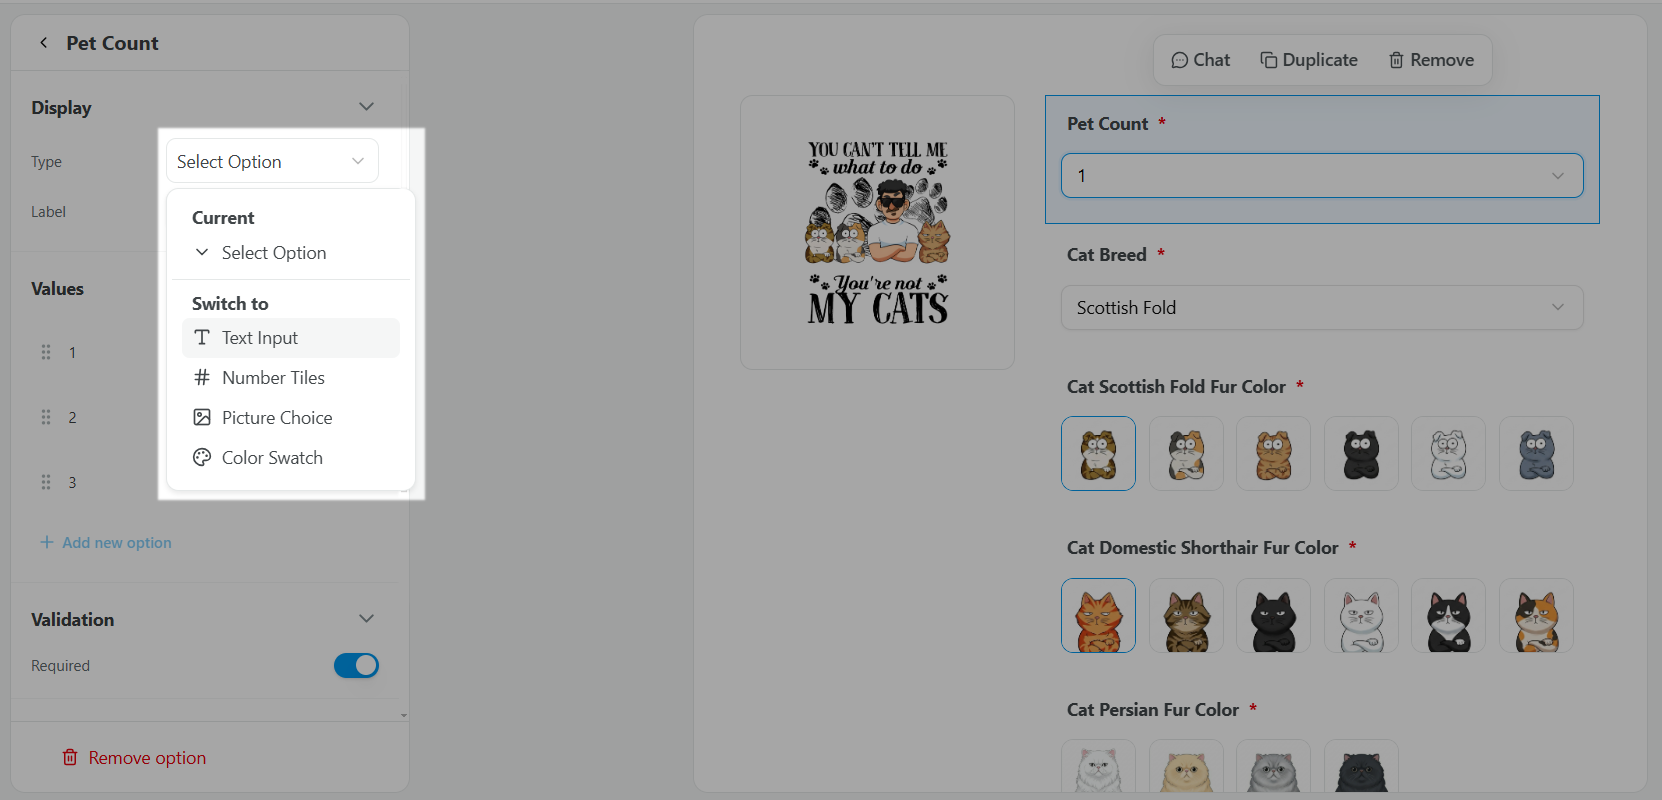
Select the appropriate option type:
Select Option: Choose from a predefined list.
Text Input: Enter custom text.
Number Tiles: Select a quantity.
Picture Choice: Choose from images.
Color Swatch: Choose colors.
-
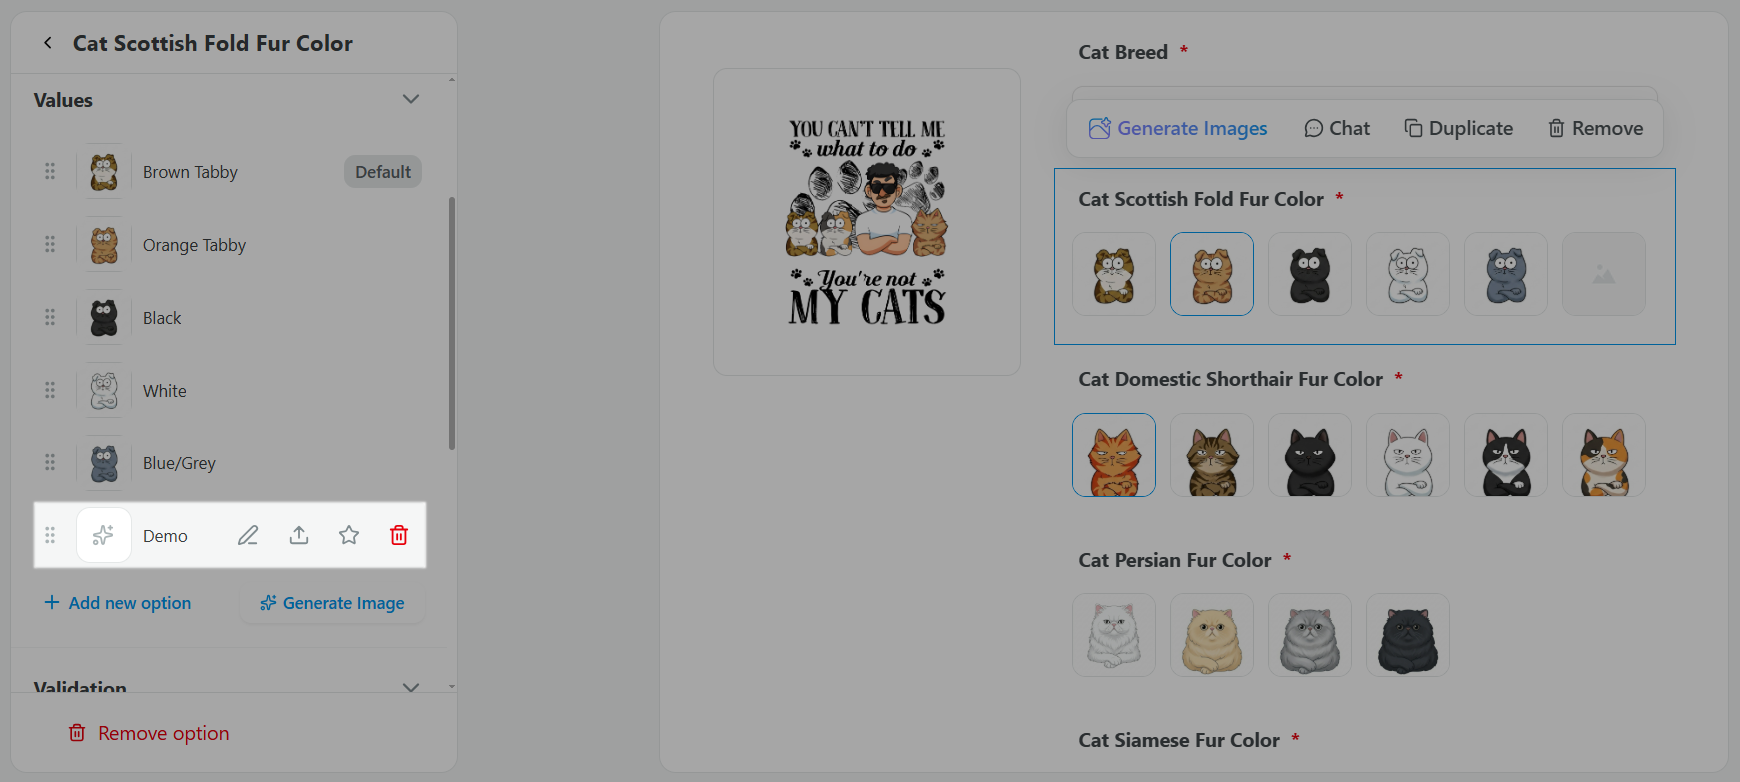
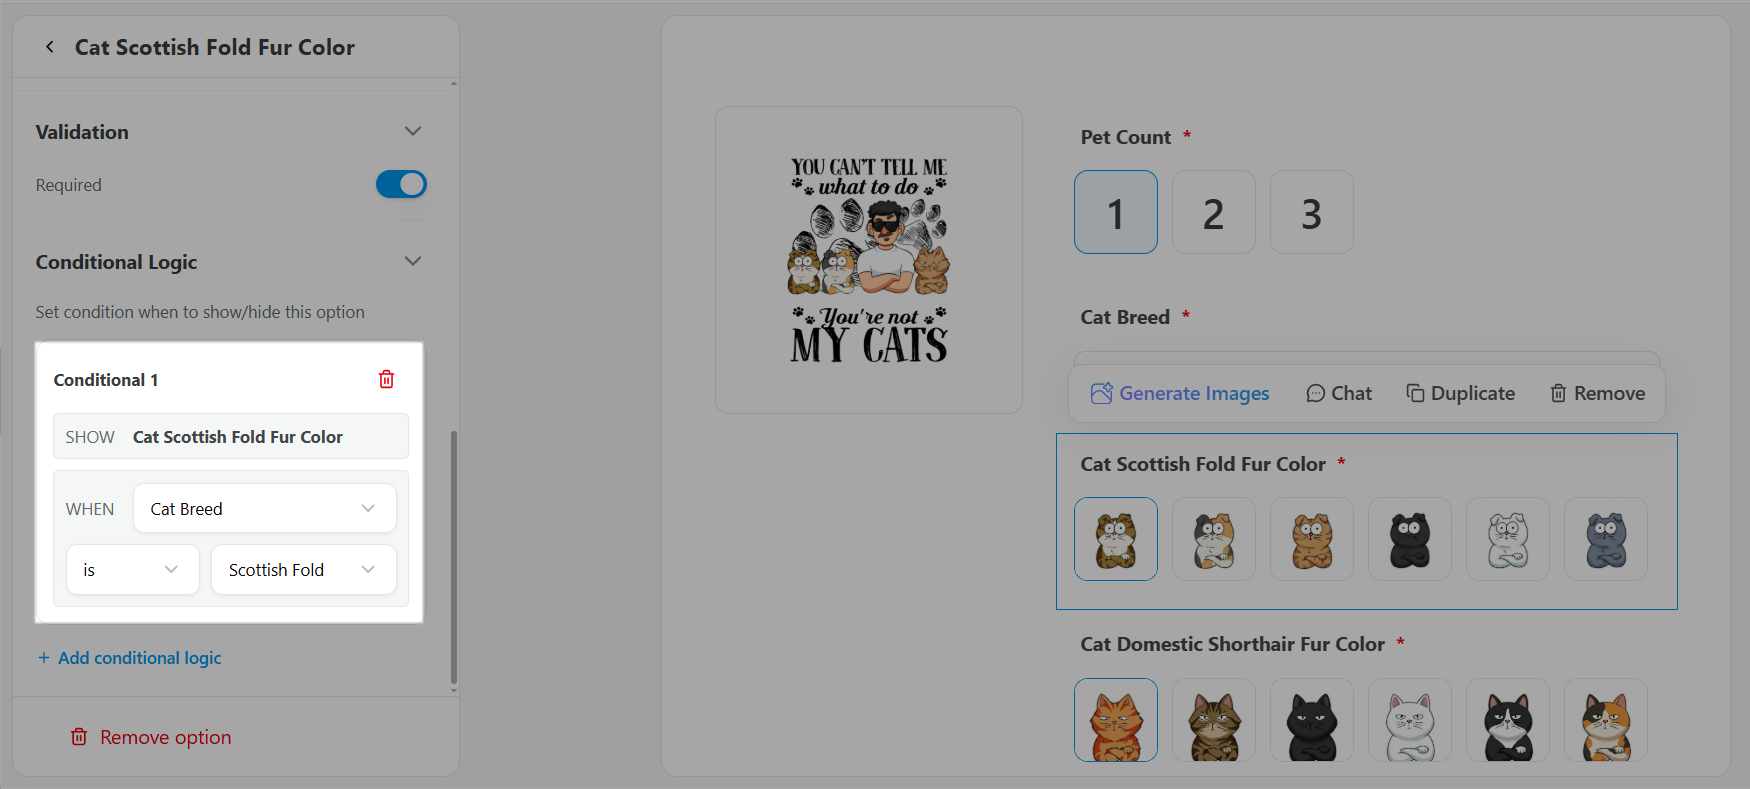
After selecting the option type, configure the corresponding values. You can reorder values, edit names, upload clipart, generate images with AI, duplicate values, or delete values.
-
Use Conditional Logic to display options based on specific conditions. For example, when a buyer selects a cat breed, only the fur colors available for that breed will be displayed.
Click Continue to review and confirm the layout.
-
Edit mode: Edit the layout, positioning, display settings, and composition.
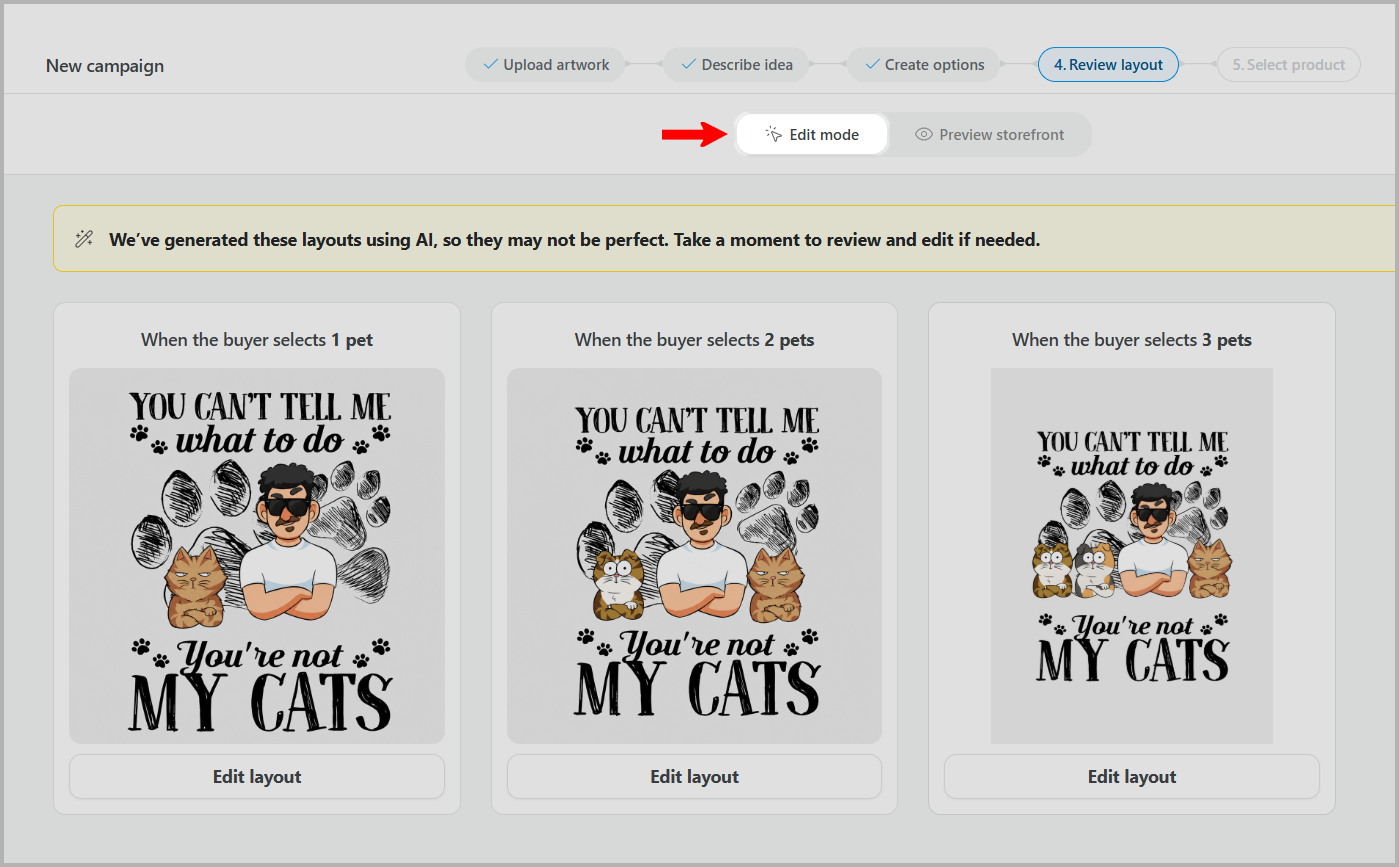
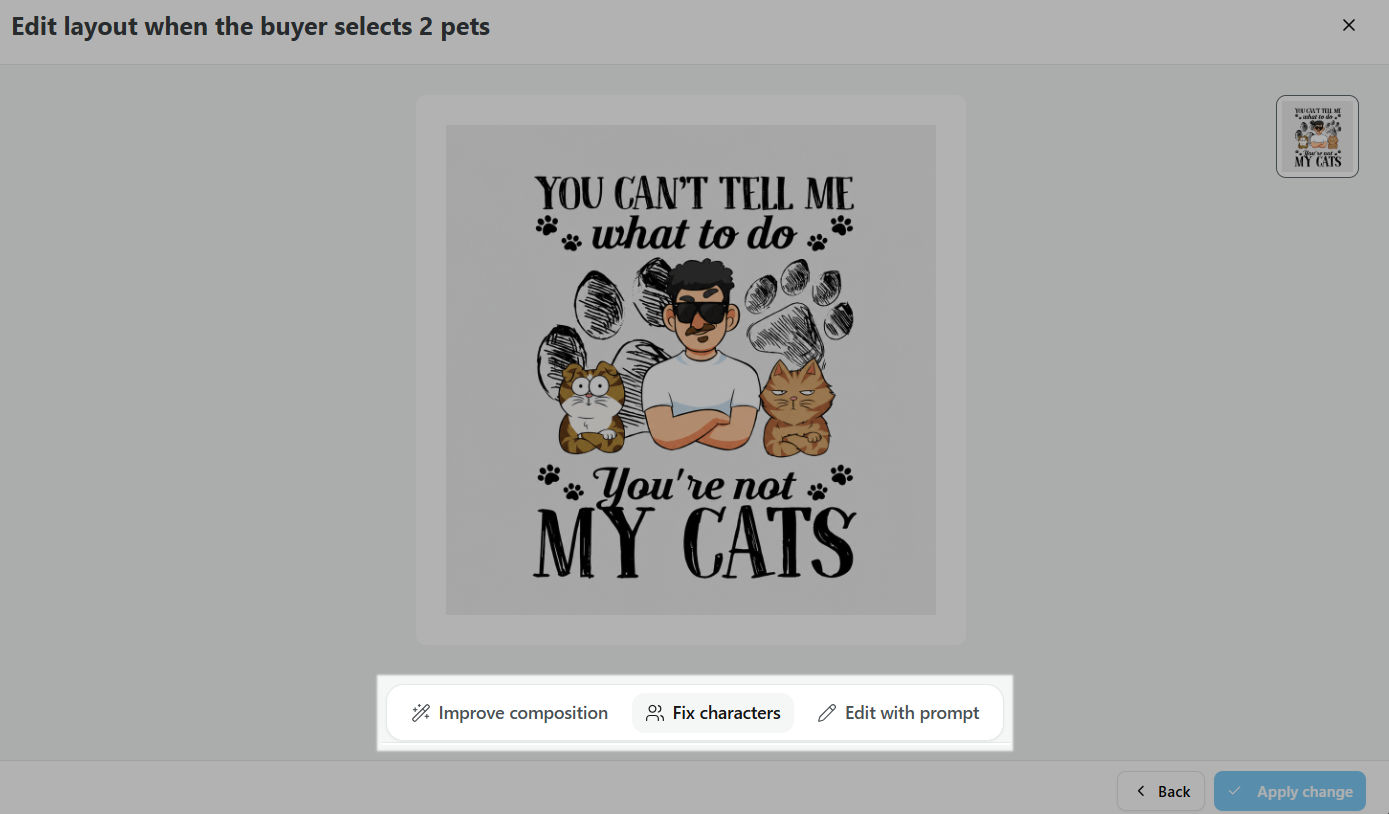
Click Edit layout to make changes:
Composition: Automatically adjusts the layout to create a more balanced and visually appealing design.
Fix Characters: Updates the design to match the correct number of characters.
Edit with prompt: Describe the changes you want, and AI will automatically update the design based on your instructions.
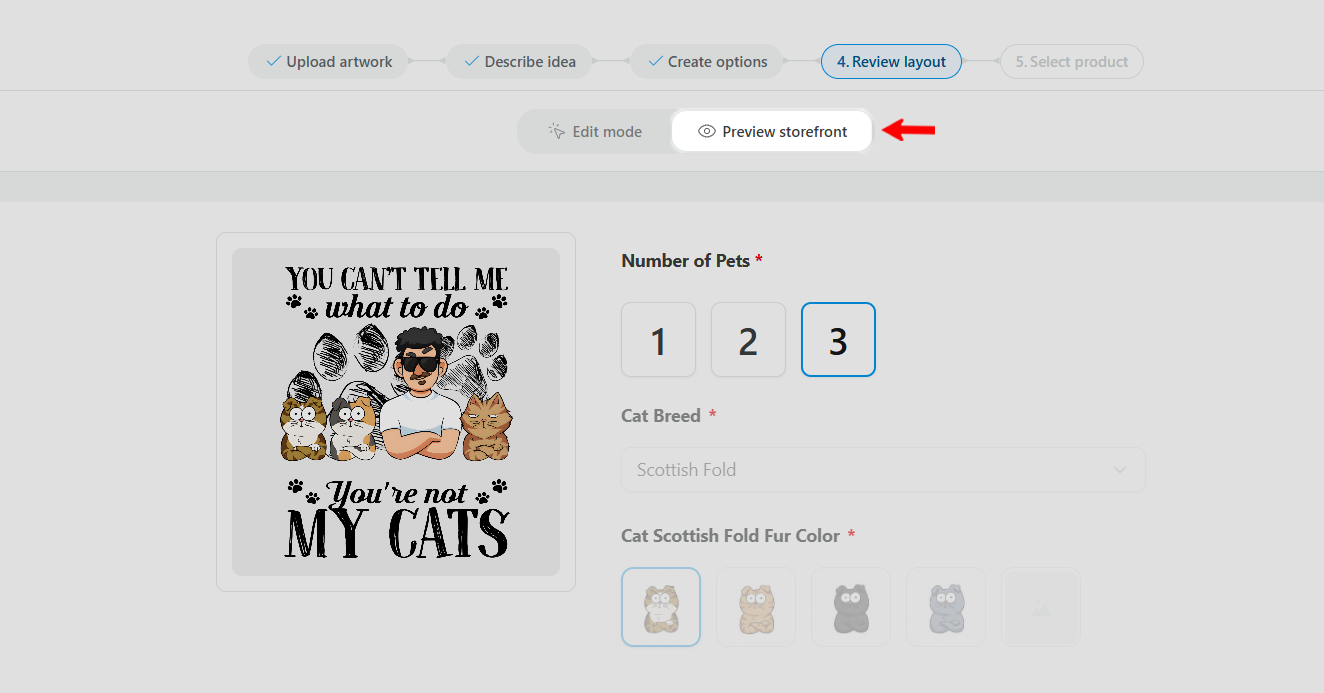
Preview storefront: Preview how the campaign will appear on your storefront.
Once you have finished editing, click Continue. Select the base product you want to use for the campaign, then click Continue.
Choose the desired product variants (such as size and color), select the print area (front, back), choose mockup images, and rearrange their display order by dragging and dropping them.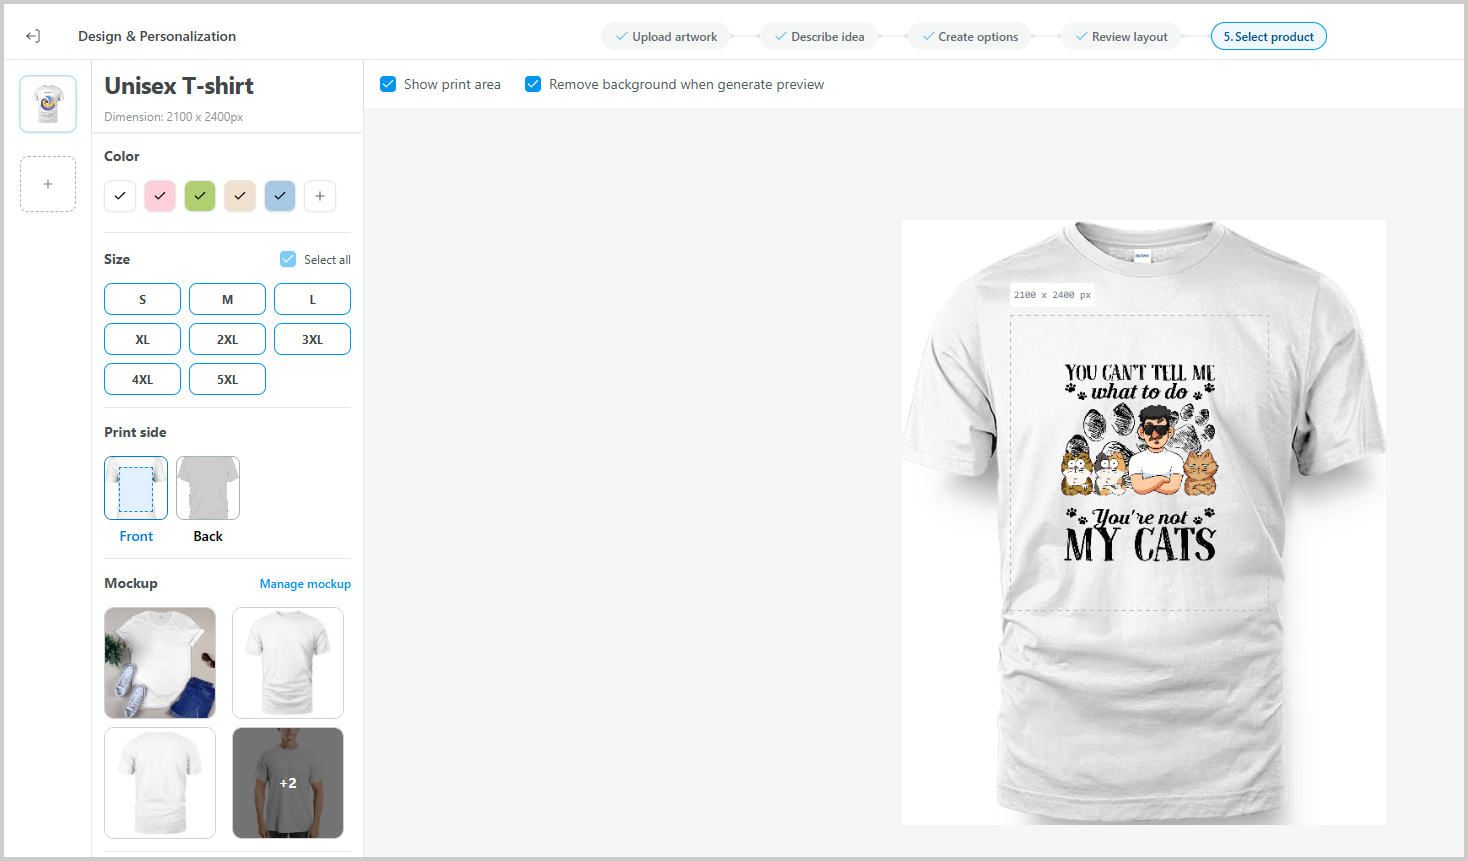
Enable Remove background when generate preview if you want the system to automatically remove the artwork background when generating live preview images. This setting only applies to preview images.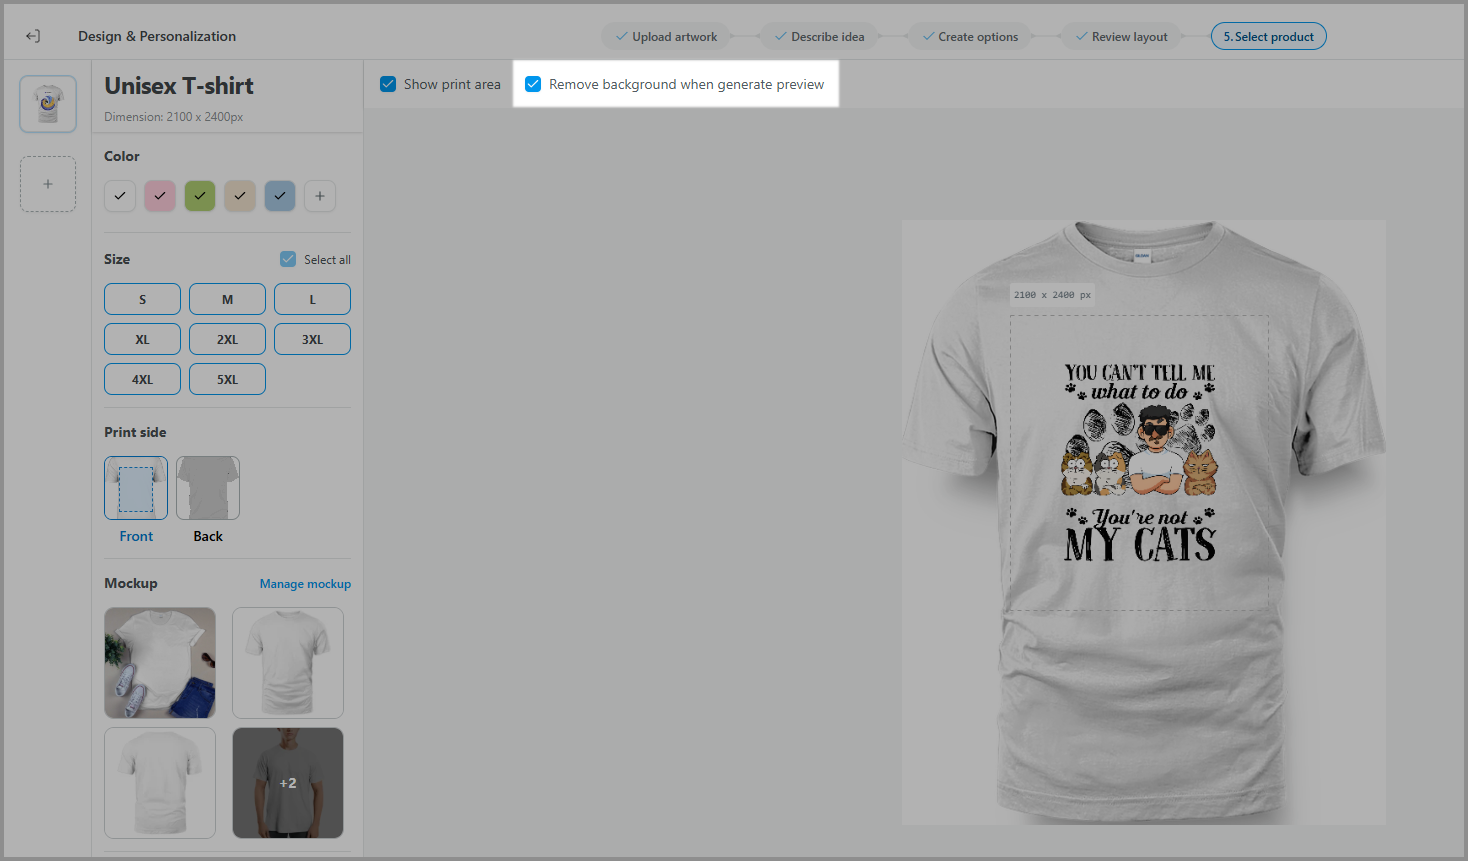
After completing the configuration, click Continue.
Update the product price and add the product title, description, tags, and supplier information.
Click Save Draft to save the campaign as a draft or Publish to launch the campaign. After publishing successfully, you can view the campaign on your storefront by clicking the eye icon.

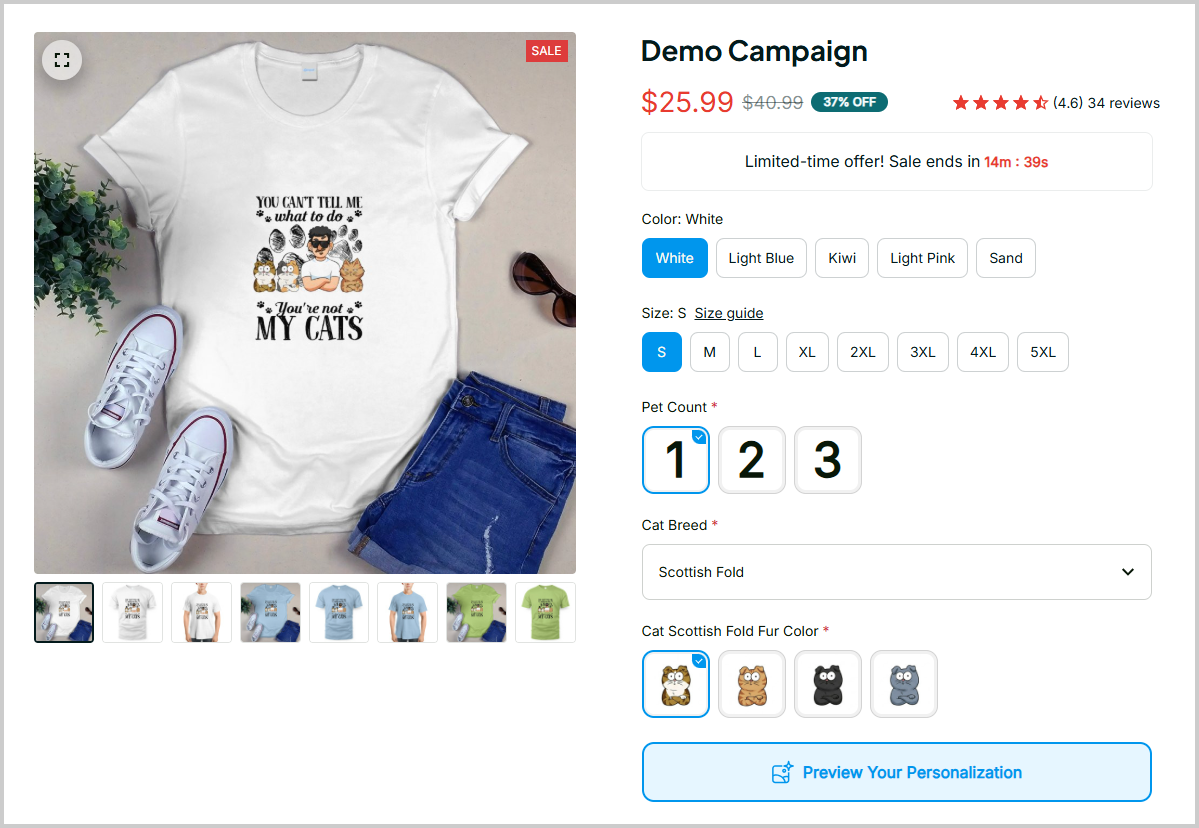
The campaign will initially display the first image of each variant along with the product information. Additional images will be generated and updated afterward. Please refer to the related article about campaign statuses for more information.
Pricing
Seller Fees
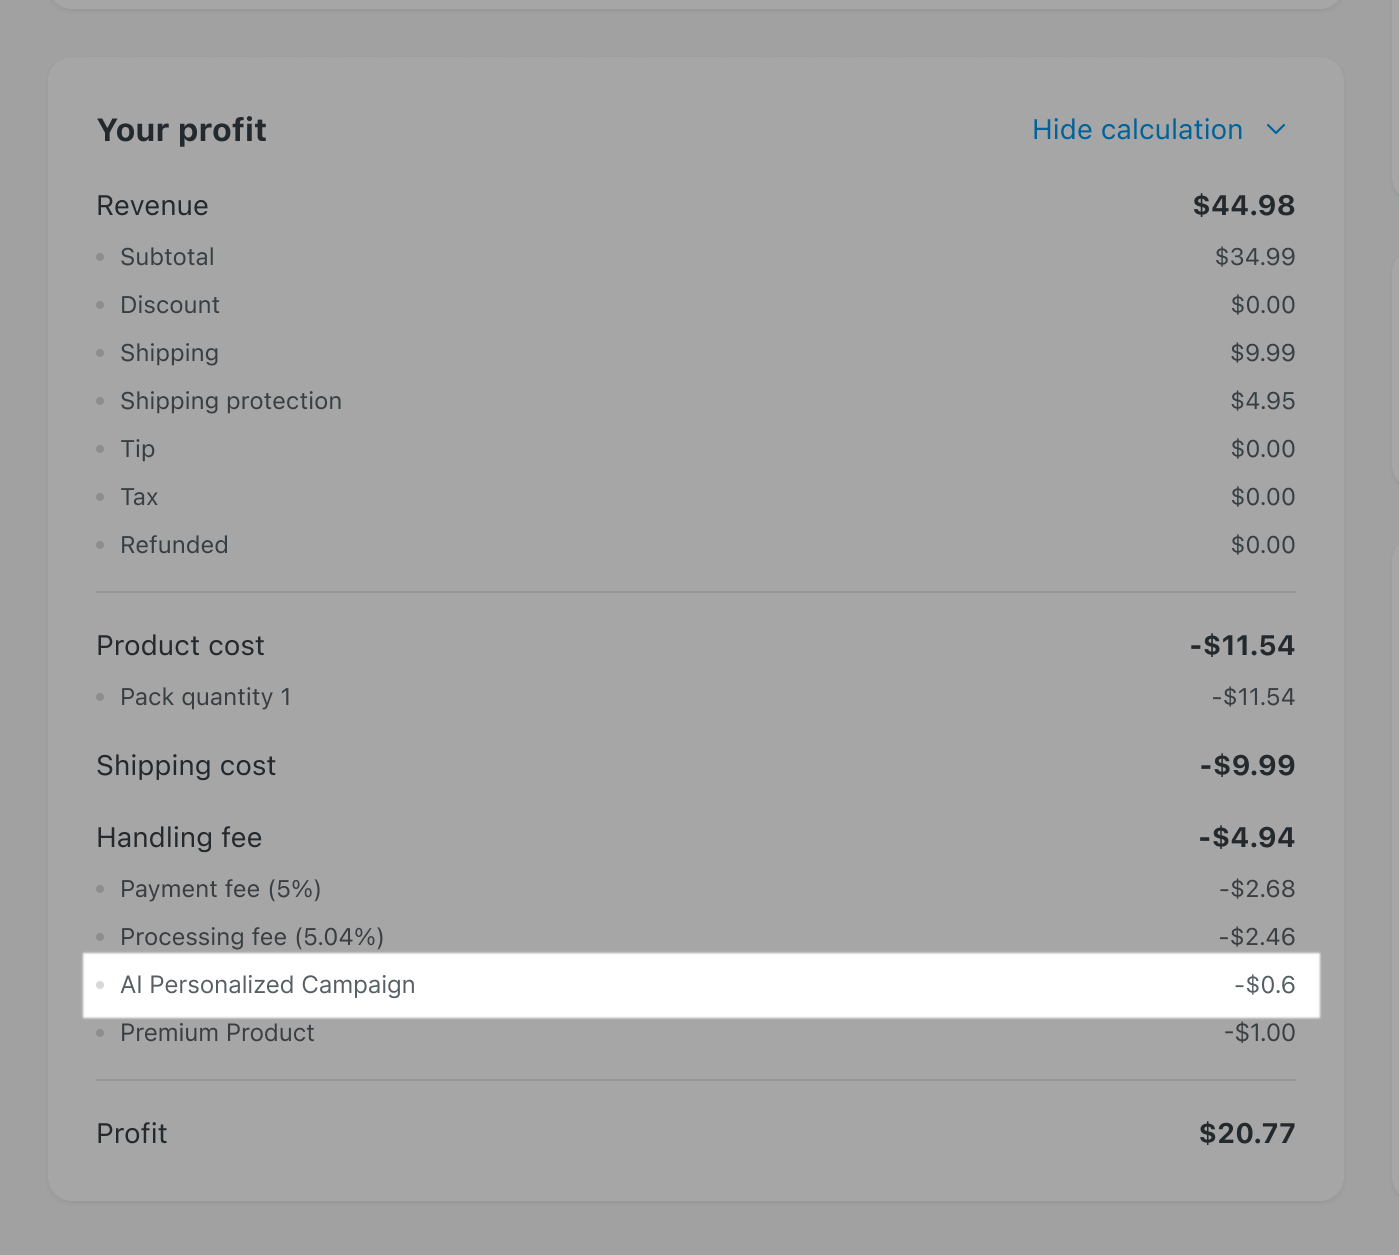
A fee of $0.60 applies to each line item in AI-generated campaigns.
To review this fee for a specific order, go to the order details page and check the Handling Fee section.
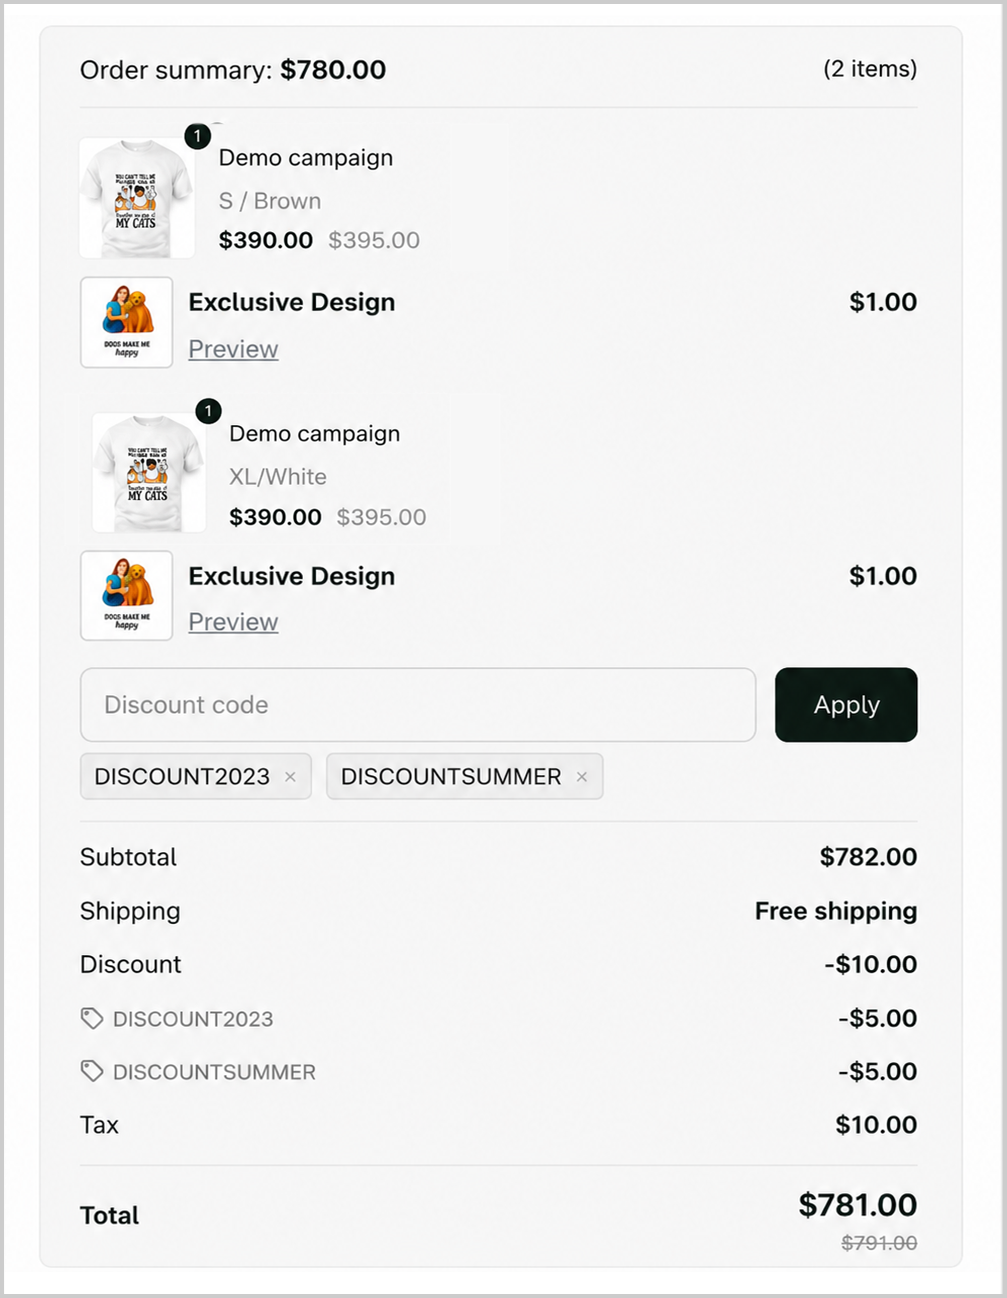
Buyer Fees
For each design purchased from an AI-personalized campaign, buyers are charged an additional $1.00 per design to support order processing.
-
This fee is automatically added to the order for each design and displayed to buyers during checkout.