Before creating a campaign, you should prepare all necessary artwork files that will be printed on the product. PrintBase, PlusBase, and ShopBase (PrintHub) allow sellers to create product designs by uploading multiple image files (image layers), and adding multiple layers of texts (text layers).
All steps below are performed in the Layers section of the Campaign Editor.
Create fixed layers in all design versions. In this demo campaign, you should create 1 image layer for the background as in the photo below.
Create group layers for different design versions of your campaign.
Create layer group for 1 dog:
Create an image layer for Dog#1.
Create a text layer for Dog#1 name: Name#1. Here, you can upload the Austina font from our resource package.
Create a layer group named 1 dog.
Click and drag these two layers (Dog#1 and Name#1) in the 1 dog group.
Create layer group for 2 dogs:
Duplicate 1 dog group and change its name to 2 dogs.
Hide 1 dog group.
Adjust the size and position of the Dog#1 image layer and Name#1 text layer to fit.
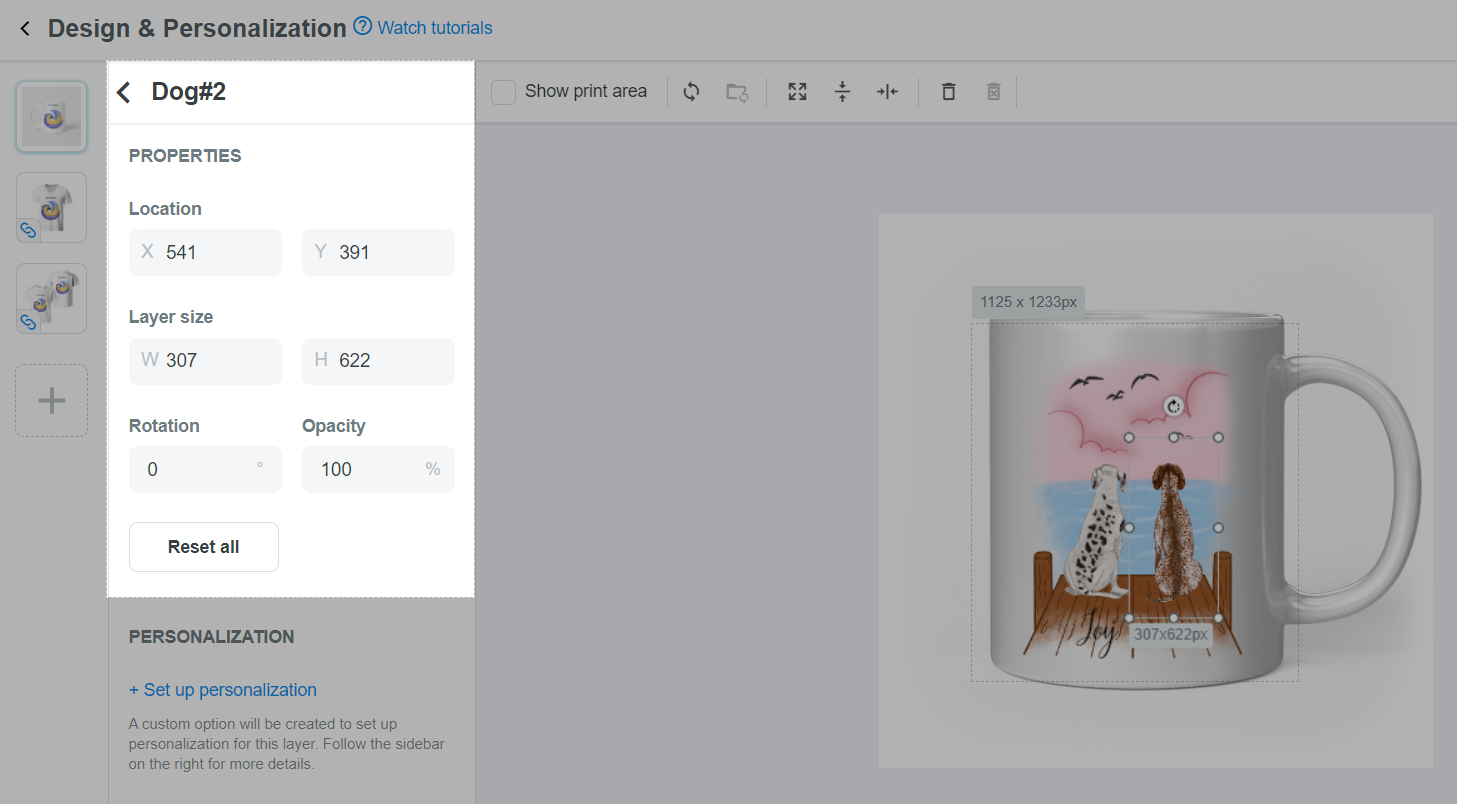
Create an image layer for Dog#2.
Create a text layer for Dog#2 name: Name#2. Here, you can select the Austina font uploaded in the previous step.
Click and drag these two layers (Dog#2 and Name#2) in the 2 dogs group.
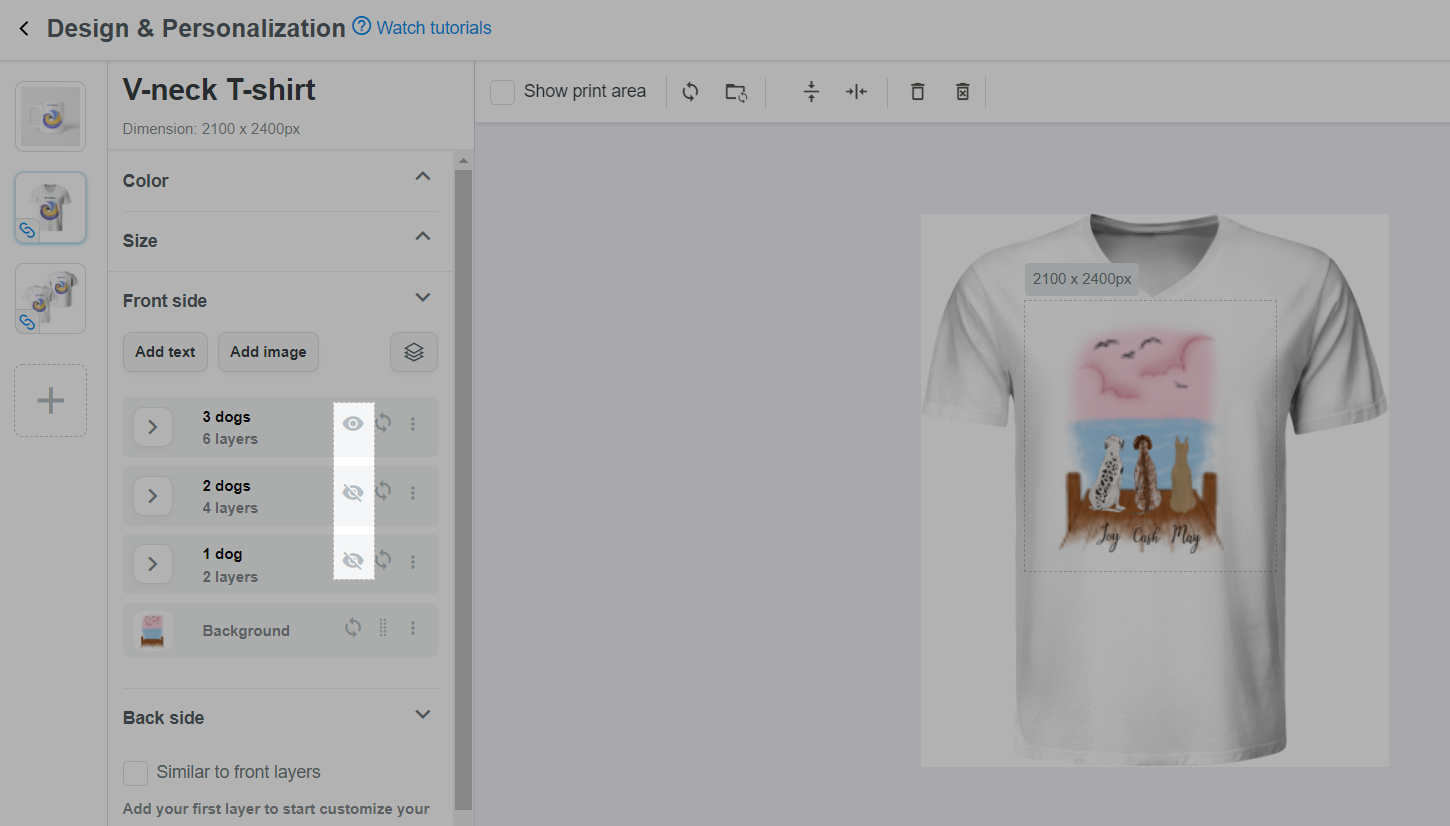
Create layer group for 3 dogs:
Duplicate 2 dogs group.
Repeat the same steps to create image and text layers for Dog#3 (Dog#3 and Name#3) and add these two layers in the 3 dogs group. You should adjust the sizes and positions of each image and text layer to fit all 3 dogs in the artwork.
Click the sync icon to sync your layers or layer groups to all base products.
Click on each base product to edit the artwork. Here, you can:
Click the eye icon to hide layers that you don't need to work with yet.
Click on the group to select all layers in that group.
Make changes to each layer, such as reposition by clicking and dragging them, edit sizes, rotate, etc.
E. Create custom options to customize layer group
In the Campaign Editor window, click the < button in Custom Options section.
When there are more than 2 layer groups, the Customize groups button will become available. Click this button and set up the conditions to customize your group.
In this demo campaign, set up your custom option as follow.
Display option as: Select Droplist.
Label: Enter Select number of dogs.
Values: Click and drag to reorder the values in the following order: 1 dog > 2 dogs > 3 dogs.
Default Group to show on the Mockup: Select 3 dogs.
Once finished, click Save.
F. Create custom options for layers
Create a custom option to customize the artwork's background. In the custom option list, click Customize layer and fill in the conditions. Then, click Save.
Type: Select Picture choice.
Required?: Select Yes.
Target Layers: Tick Select a shared layer in all products and choose Background layer.
Label: Enter Select background.
Cliparts: Click Show all cliparts in a clipart Folder > Add a clipart folder and create a Background clipart folder using the 3 files for background images in our resource package.
How to show cliparts: Click Show with thumbnail images.
Click and drag the Select background custom option above the Select number of dogs custom option.
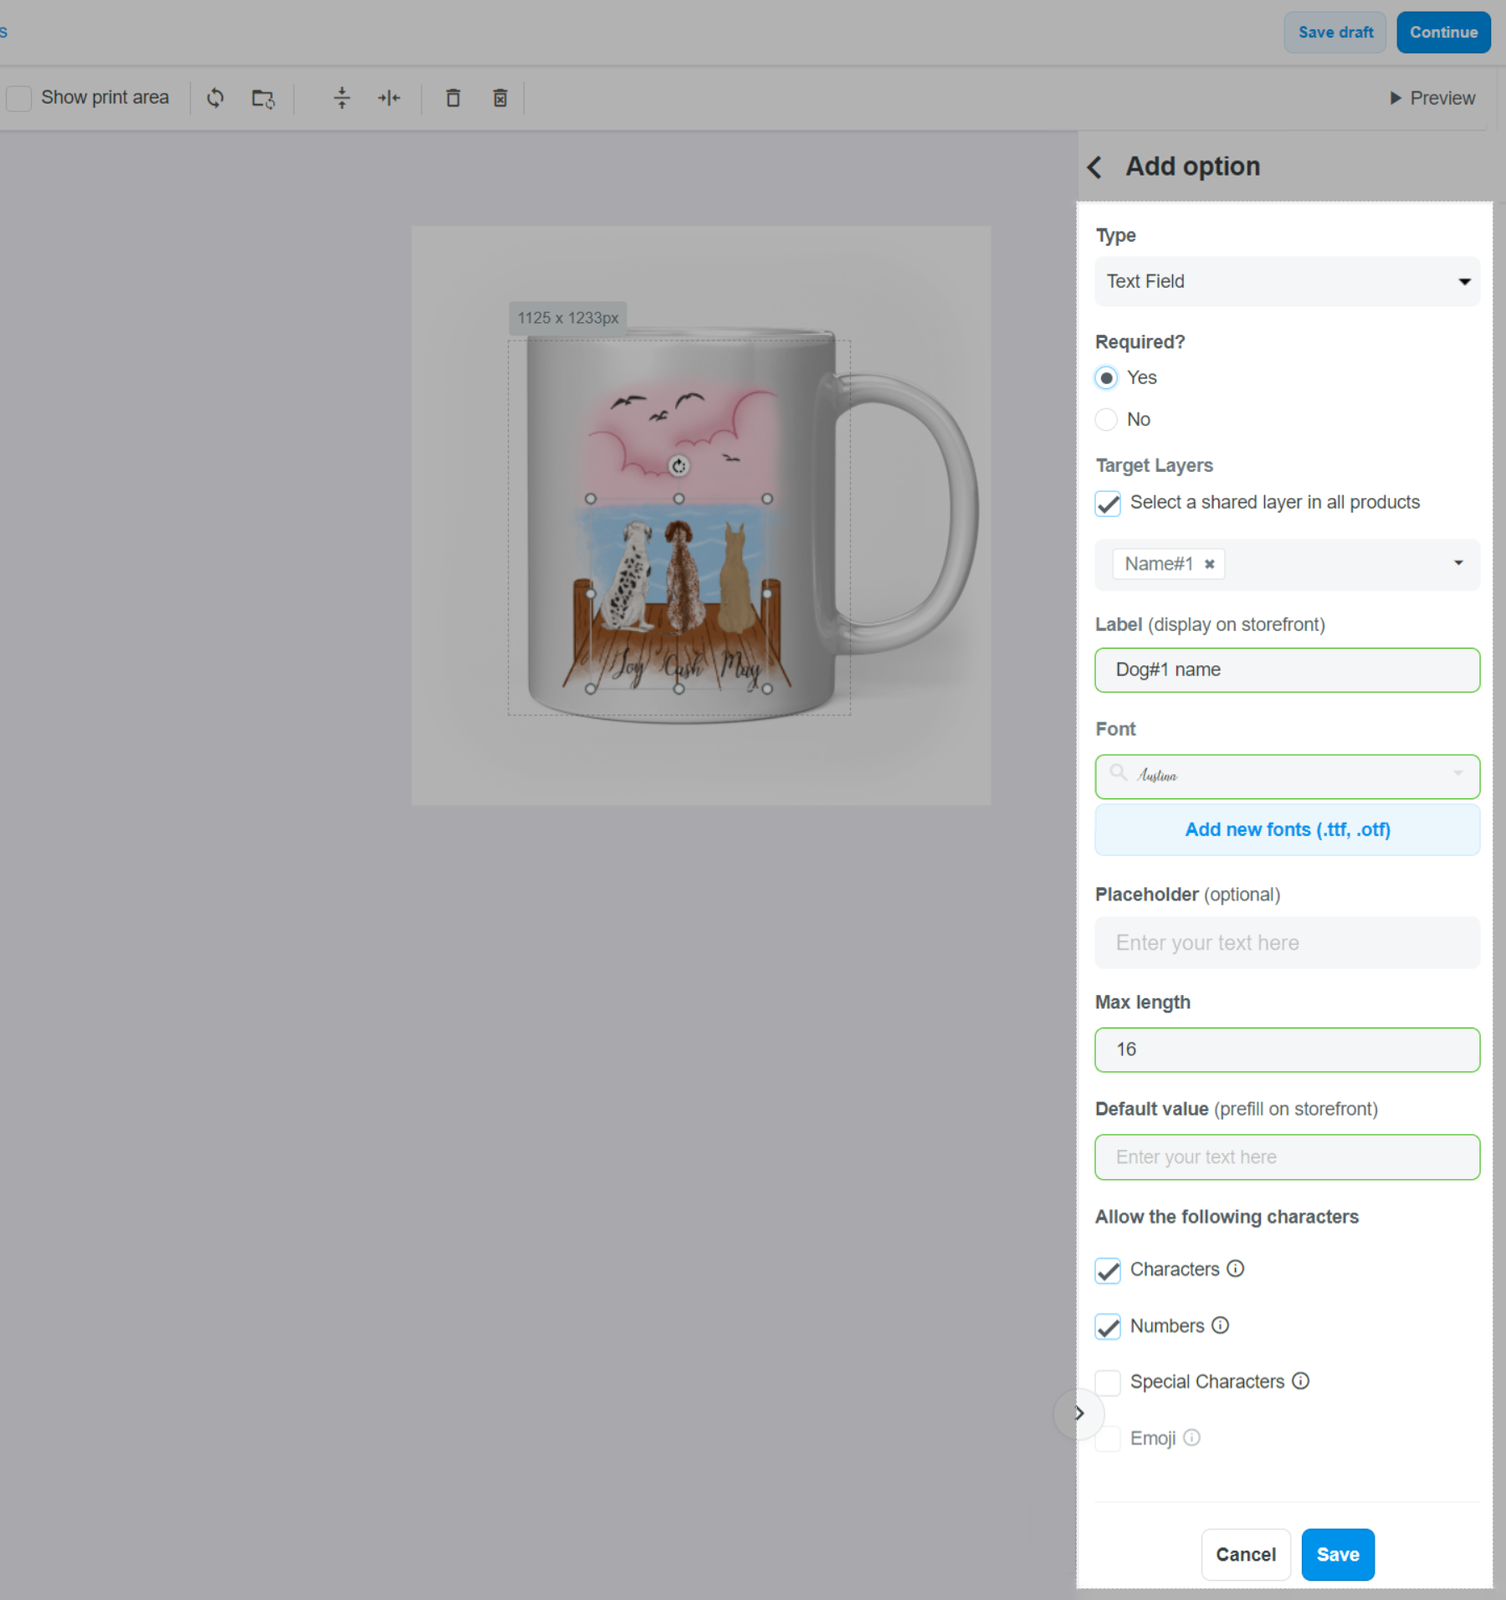
Create a custom option to customize the Dog#1 name. In the custom option list, click Add option below and fill in the conditions. Then, click Save.
Type: Select Text Field.
Required?: Select Yes.
Target Layers: Tick Select a shared layer in all products and choose Name#1 layer.
Label: Enter Dog#1 name.
Font: The Austina font that you uploaded when creating the Name#1 layer will be automatically selected.
Max length: Enter 16.
Allow the following characters: Select Characters and Numbers.
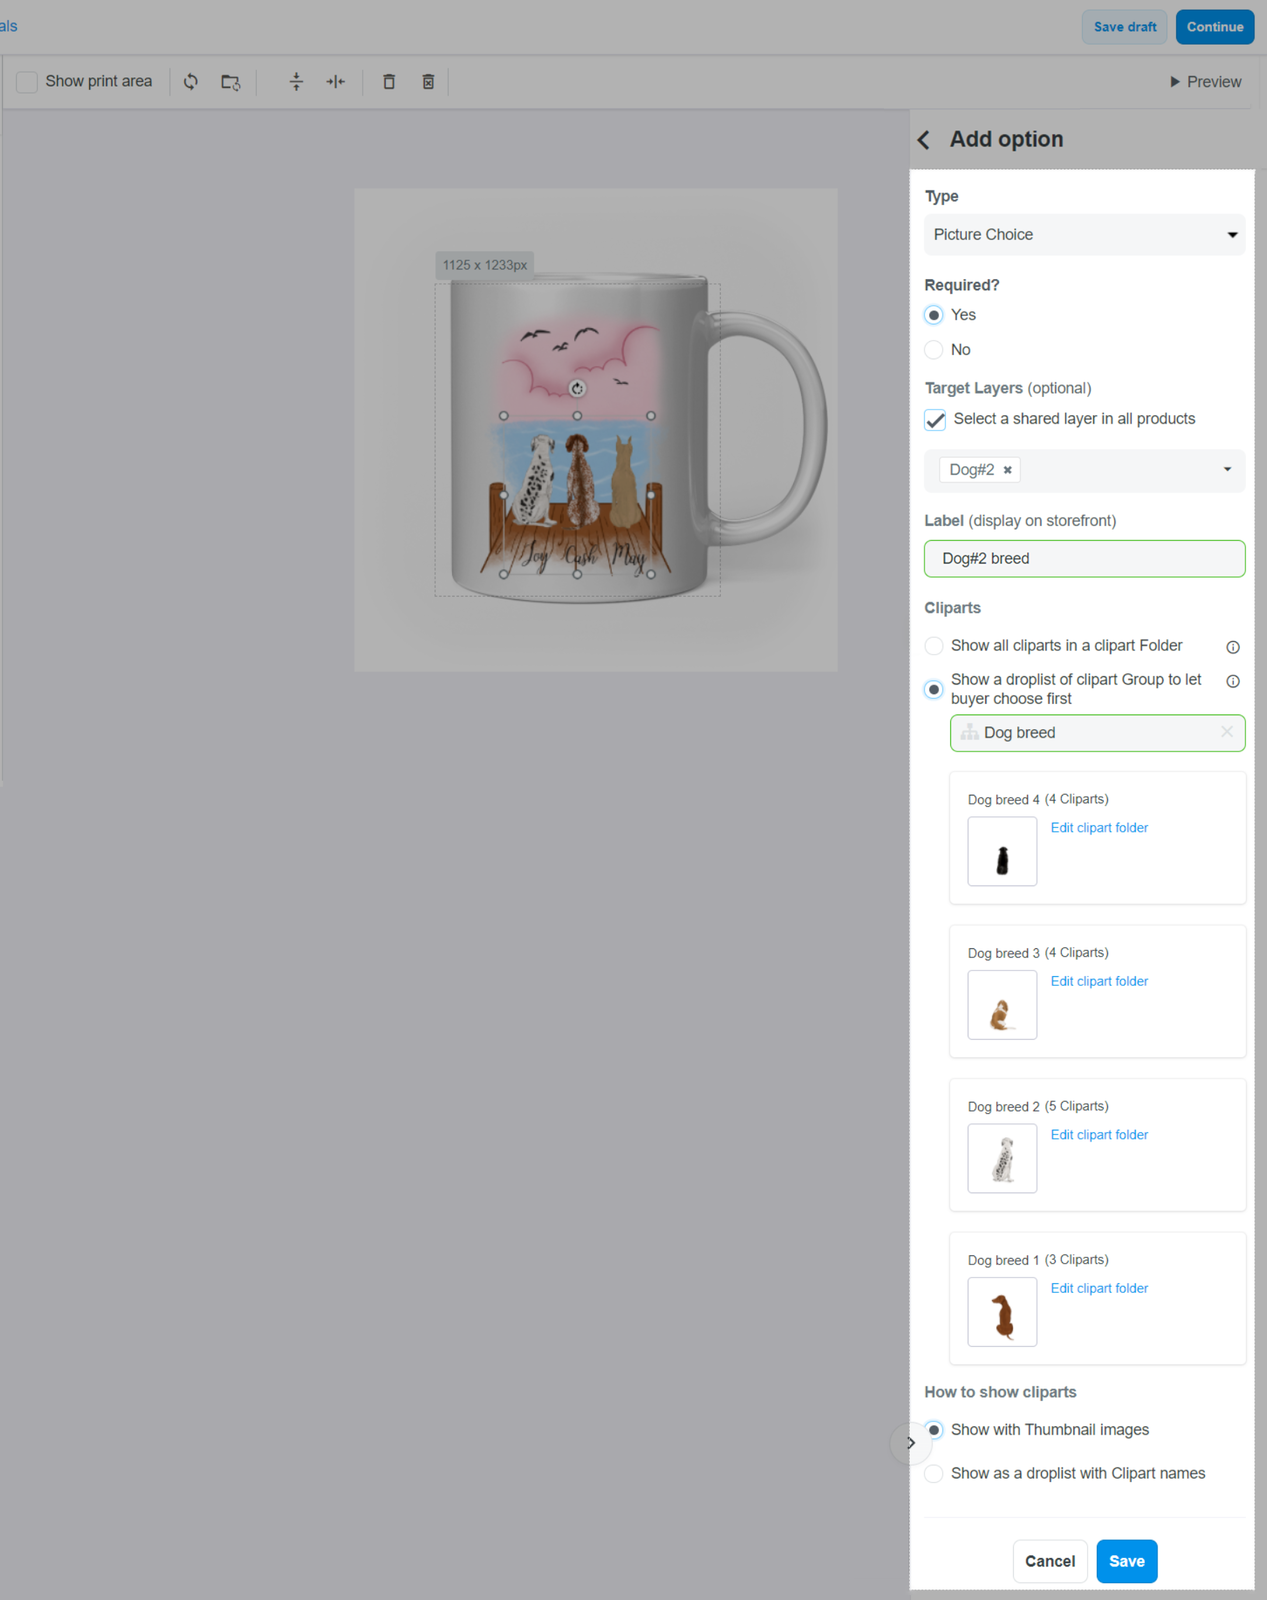
Create a custom option to customize the Dog#1 breed. In the custom option list, click Add option below and fill in the conditions. Then, click Save.
Type: Select Picture choice.
Required?: Select Yes.
Target Layers: Tick Select a shared layer in all products and choose Dog#1 layer.
Label: Enter Dog#1 breed.
Cliparts: Click Show all cliparts in a clipart Folder > Add a clipart folder. In the pop-up, create 4 clipart folders for 4 different dog breeds and sort them into the same group Dog breed. Upload the respective .PNG files of each dog breed in the resource package. Then, click Show a droplist of clipart Group to let buyer choose first and select Dog breed clipart folder group you just created. You can also refer to this article on how to create all necessary clipart folders beforehand.
How to show cliparts: Click Show with thumbnail images.
Repeat steps 3 and 4 to create 4 custom options to customize the Dog#2 and #3 names and breeds. You can also clone the Dog#1 name and Dog#1 breed custom options to create similar options quickly. Please make sure to select the correct target layers and enter the correct label for each custom option.