Set up conditional logic for your personalized campaigns
Another way to shorten your option list is to use conditional logic for your custom options. This will help build a flexible flow to collect buyer's personalized information. This article will guide you to set up conditional logic for your personalized campaigns.
Step by Step Tutorial
Before you start, please complete all the necessary steps in this article to create a personalized campaign with ShopBase (PrintHub), PrintBase, and PlusBase.
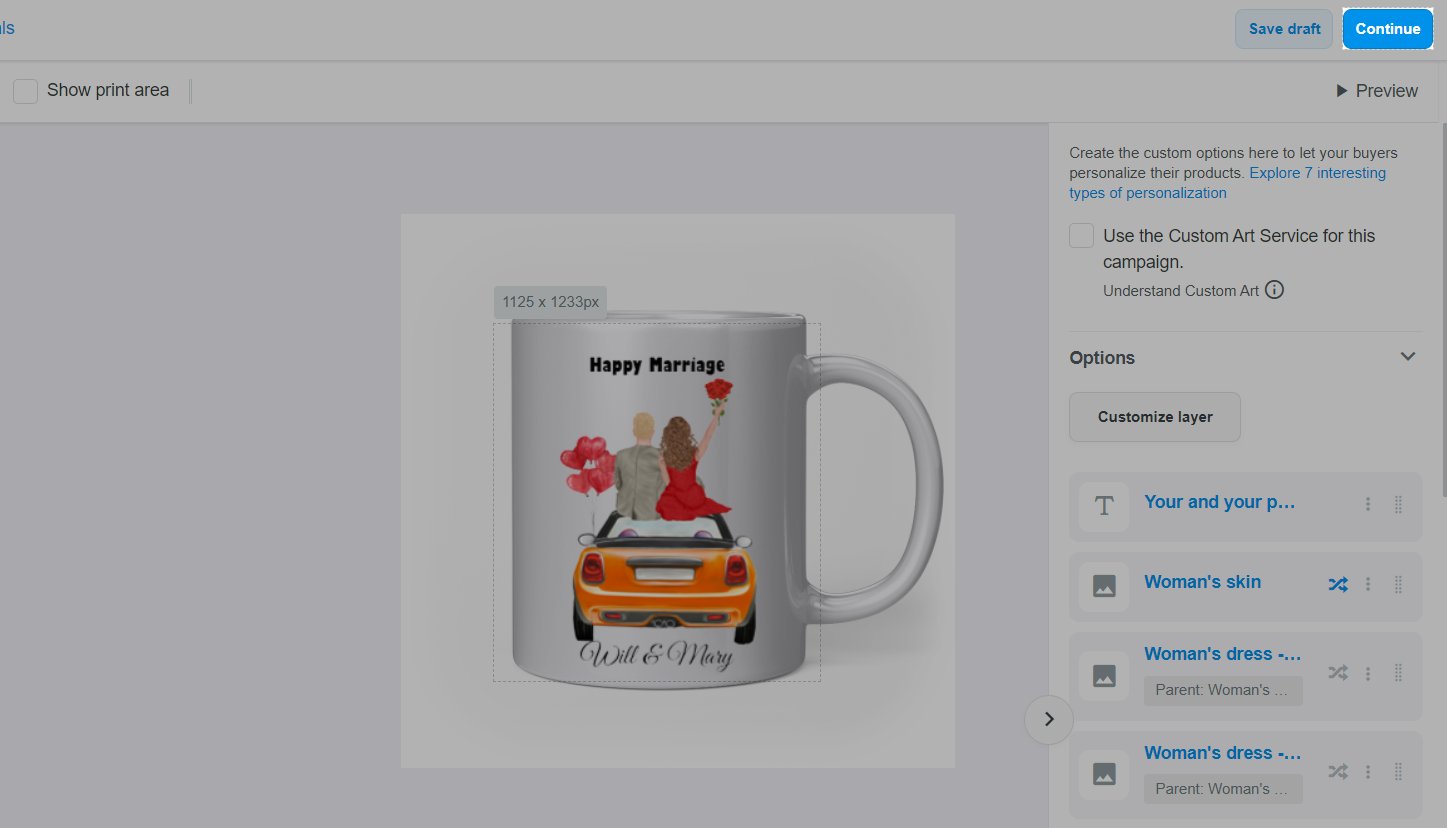
For example, there are three types of skin tone for the woman in your product's design (Light, Tan, and Dark). At first, create a Picture choice custom option for Woman's skin (including Light, Tan, and Dark). Then, create three Picture choice custom options for the woman's dresses according to her skin tone.
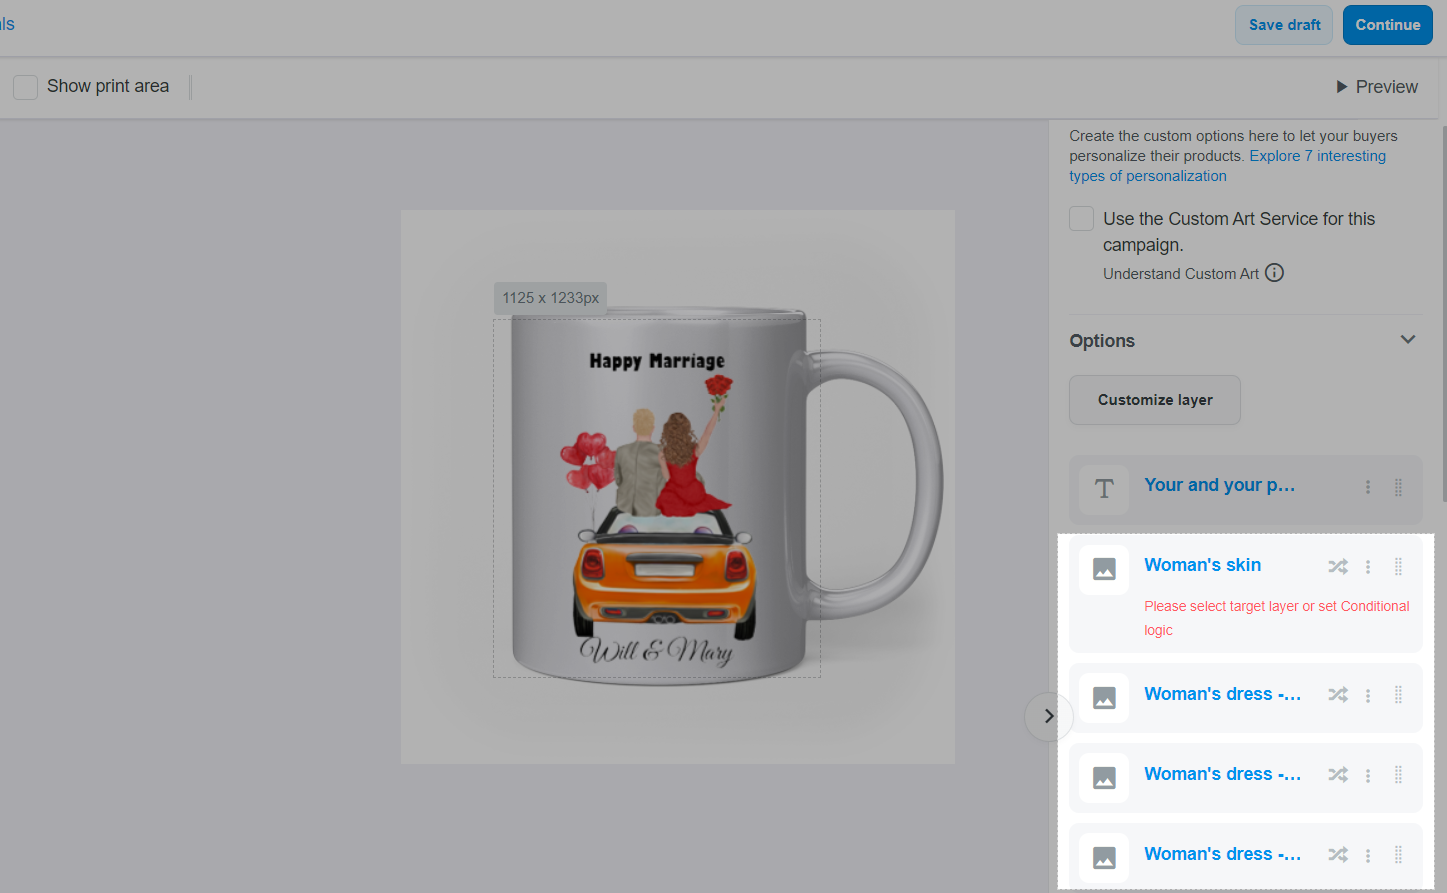
In this case, click the two-arrow icon in the Woman's skin custom option.
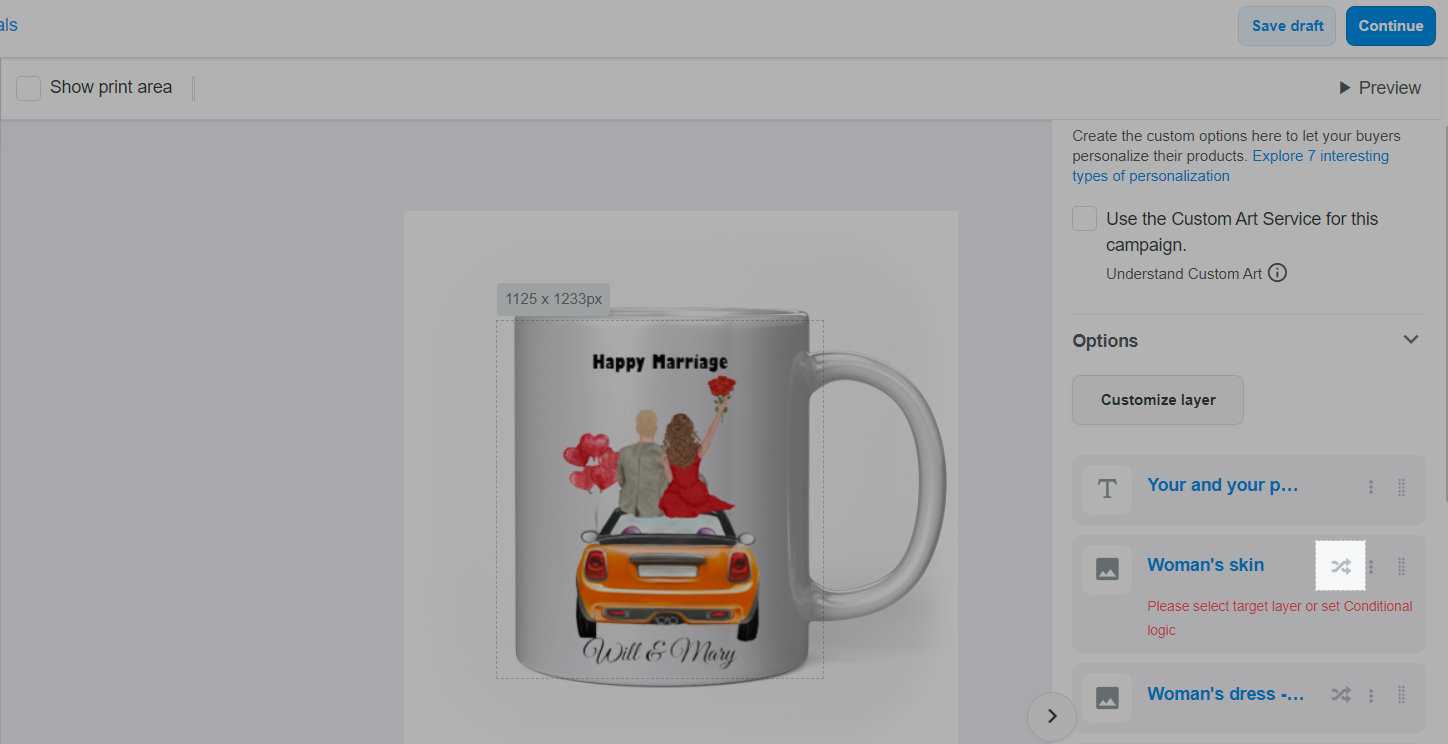
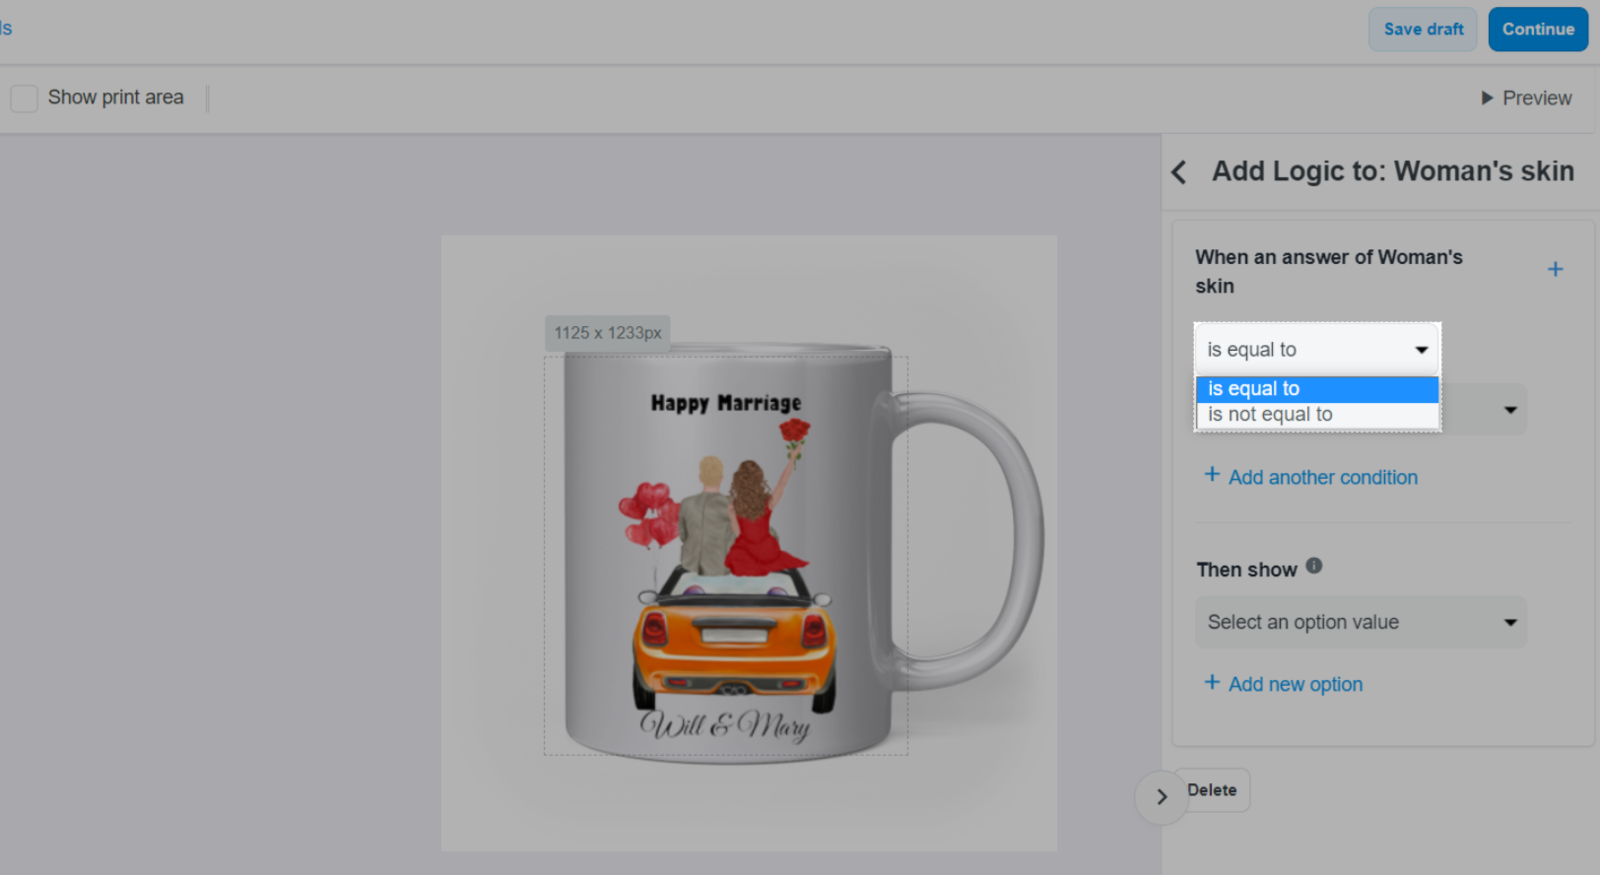
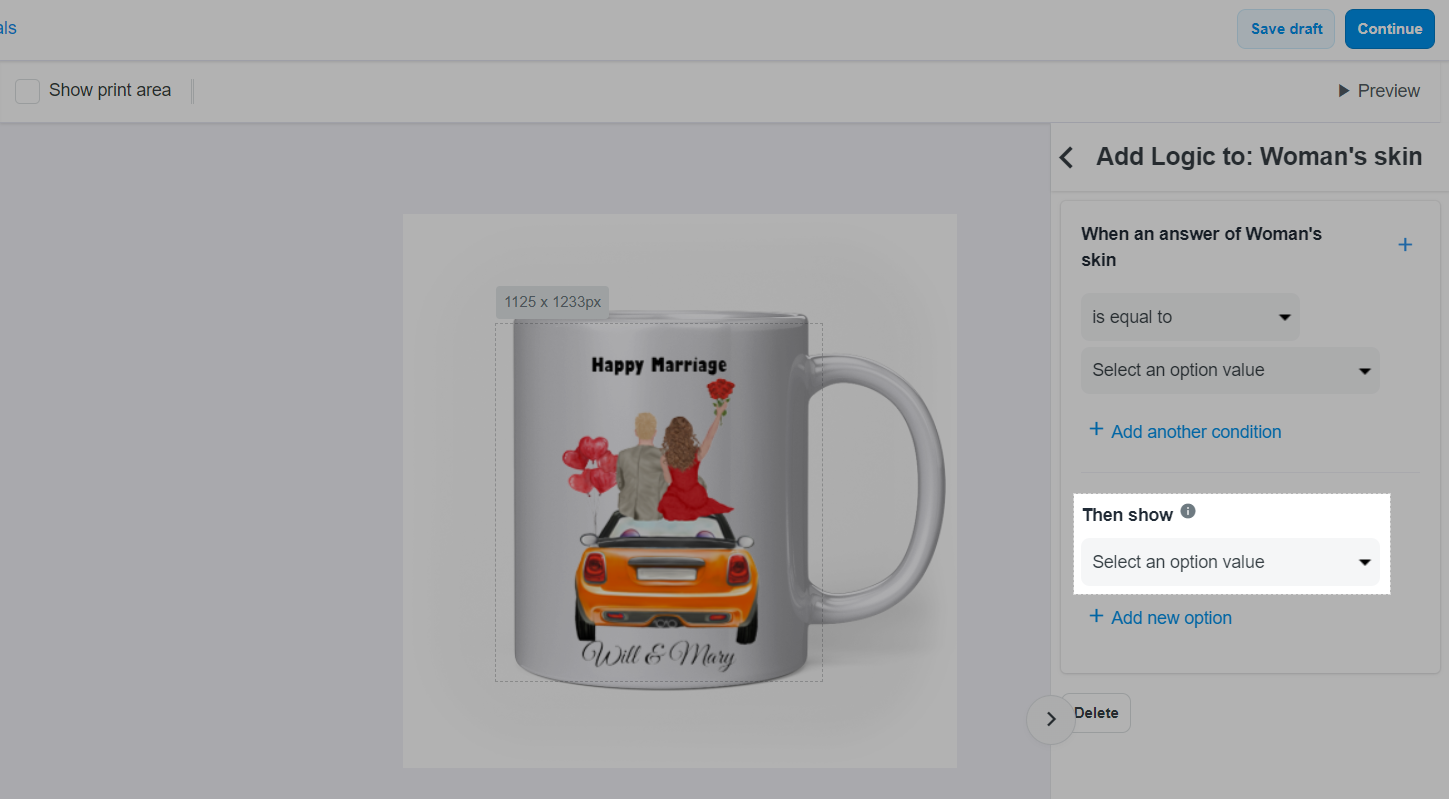
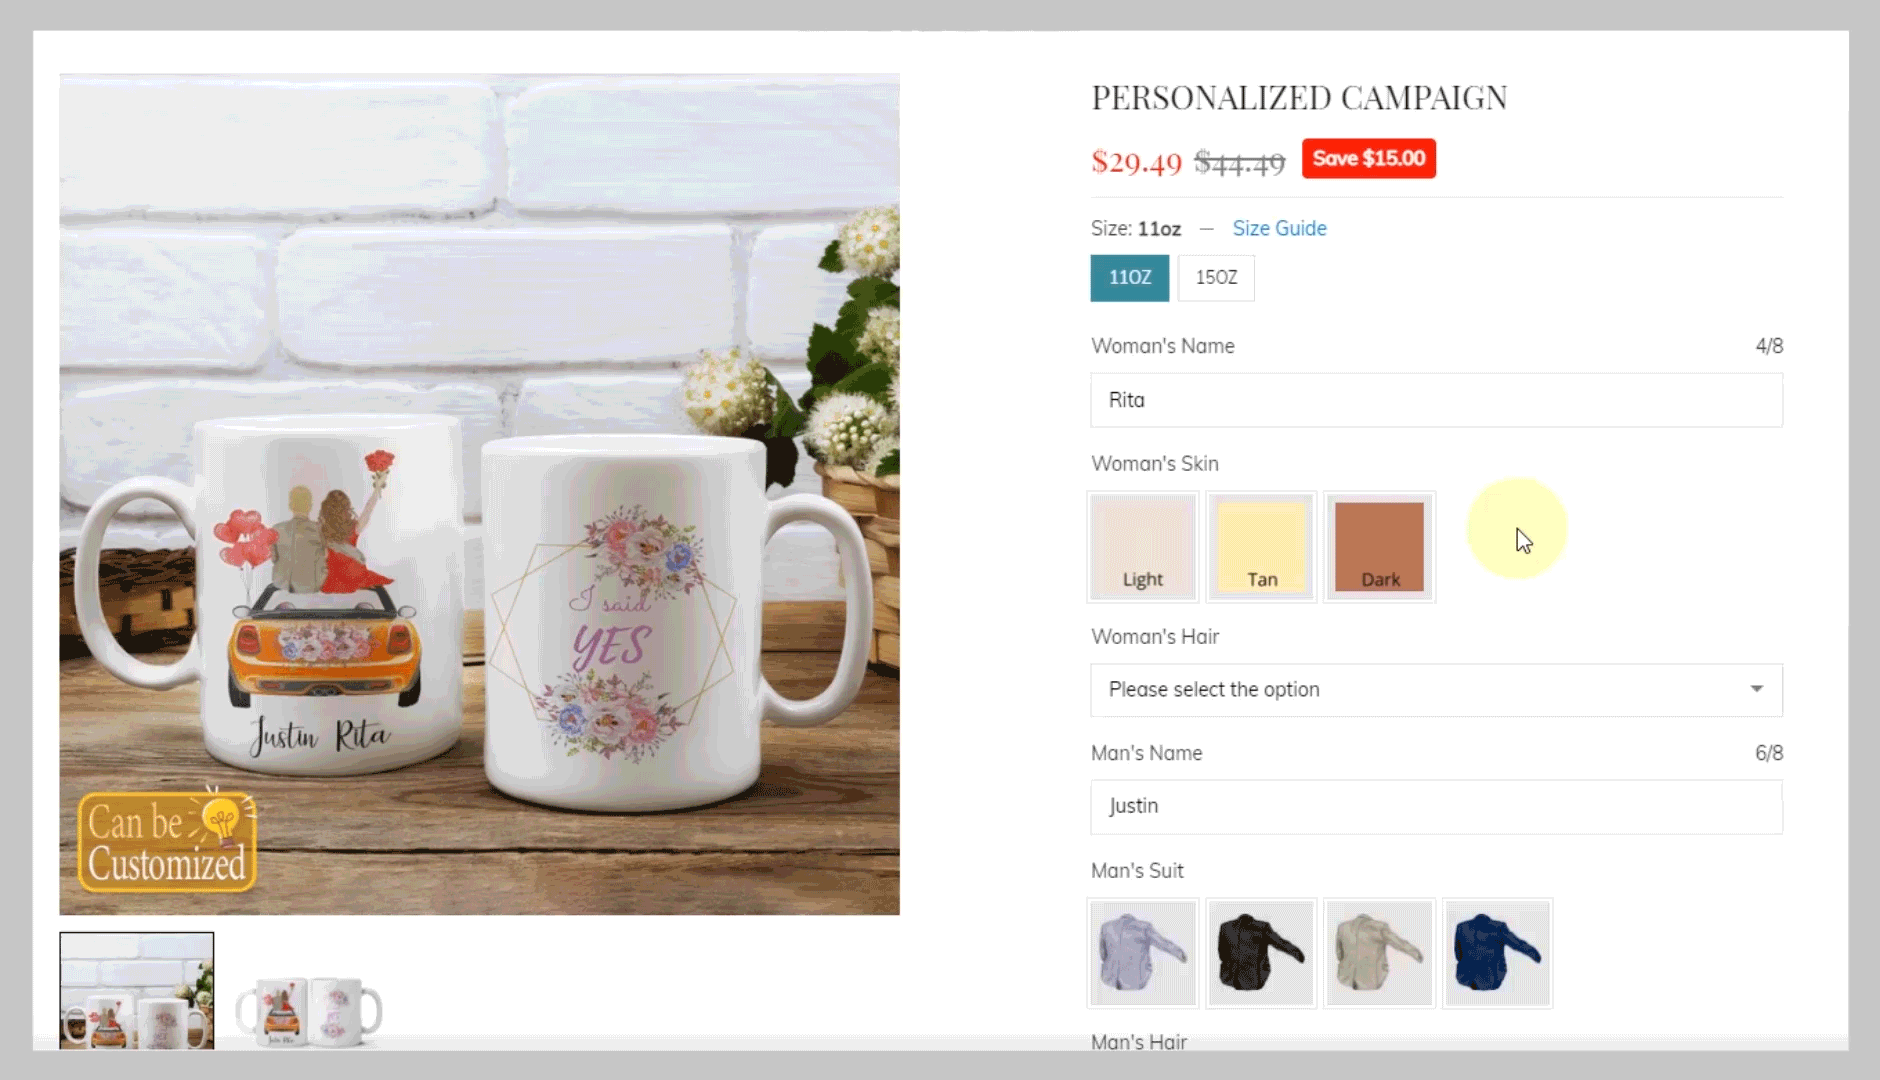
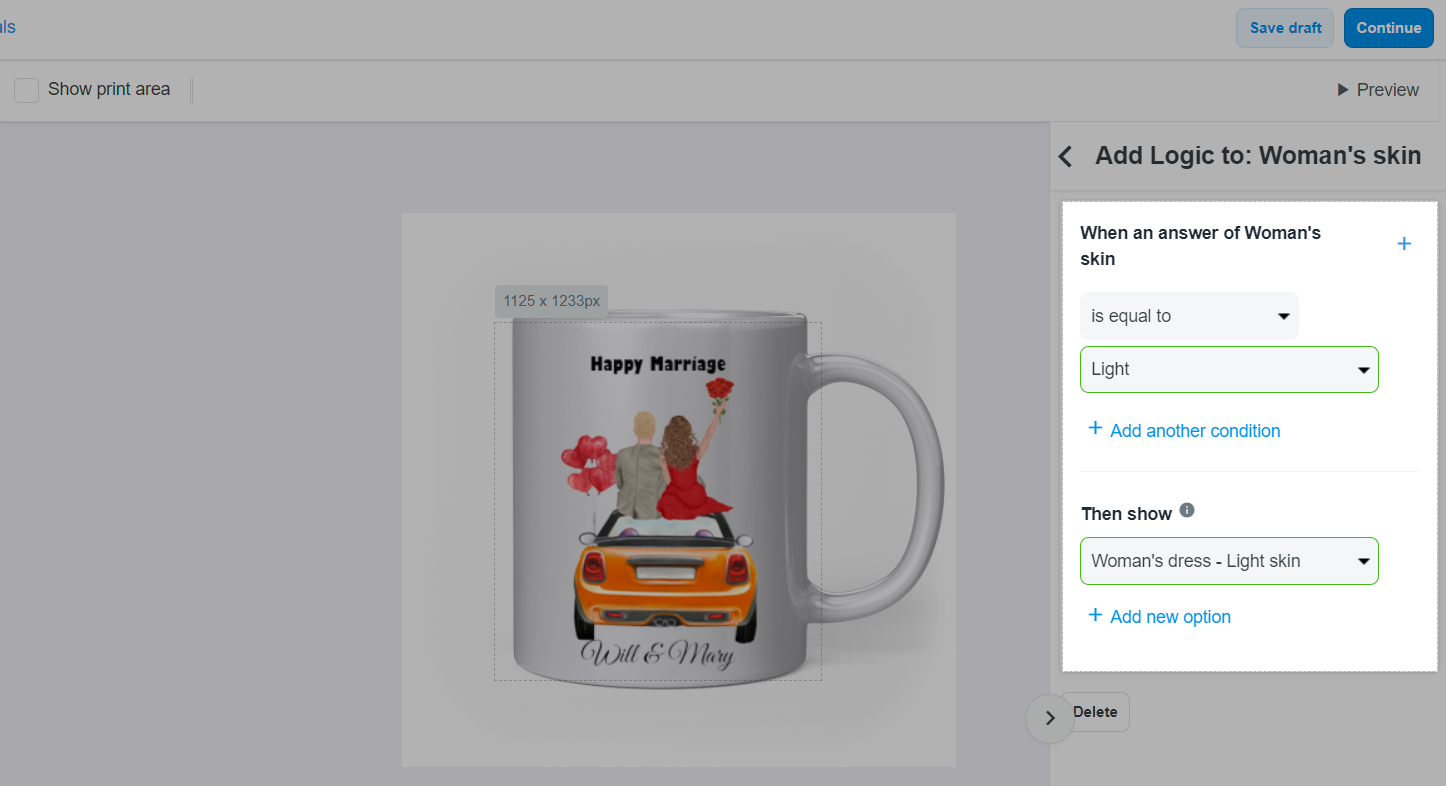
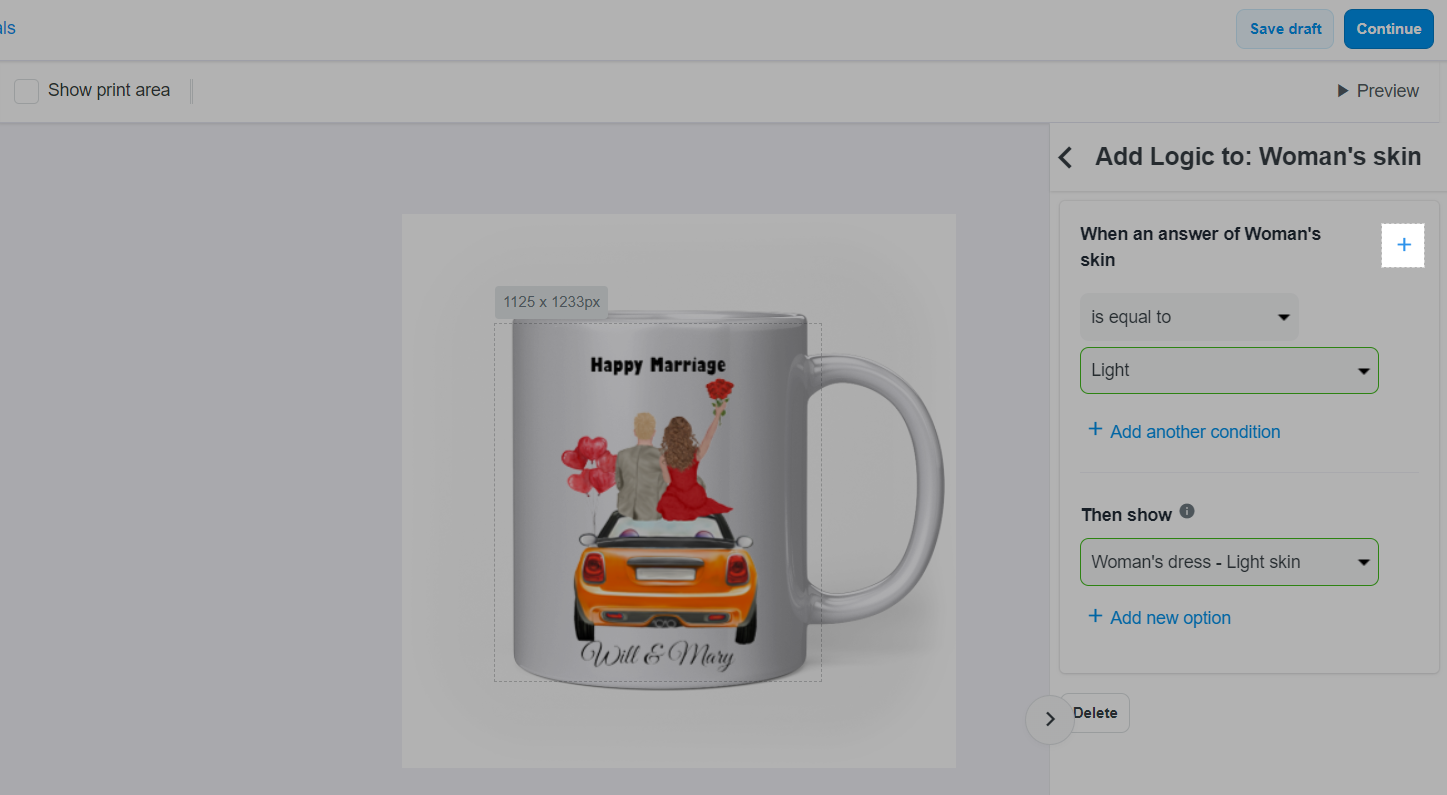
In this case, set When an answer of Woman's skin is equal to Light, then show Woman's dress - Light skin. With this setting, if buyers choose custom option Light, the corresponding custom option Woman's dress - Light skin will be automatically displayed along with the preview images so that buyers can easily visualize the product. To add more conditions and options for Tan skin and Dark skin, click the + button and repeat steps 4 and 5.
You can also use Radio and Droplist to set up conditional logic. For example, you can set a Droplist of clothes that buyers want to have in the design (dresses, t-shirt with jeans, suits…). Then, if buyers choose dresses, the corresponding set of picture choices will be displayed for them to choose.
Conditional logic for one custom option can only be set for other custom options that are placed below it in the list.