To personalize your own print-on-demand products (by adding custom text, uploading photos, choosing photo options), ShopBase (PrintHub), PrintBase, and PlusBase provide a feature named Personalized Campaign. This is a great way to easily create more personalized products and increase conversion rate of your store. This article will show you how to create a personalized campaign based on our example using our demo resource package.
Please visit this link to see our demo for a personalized campaign.
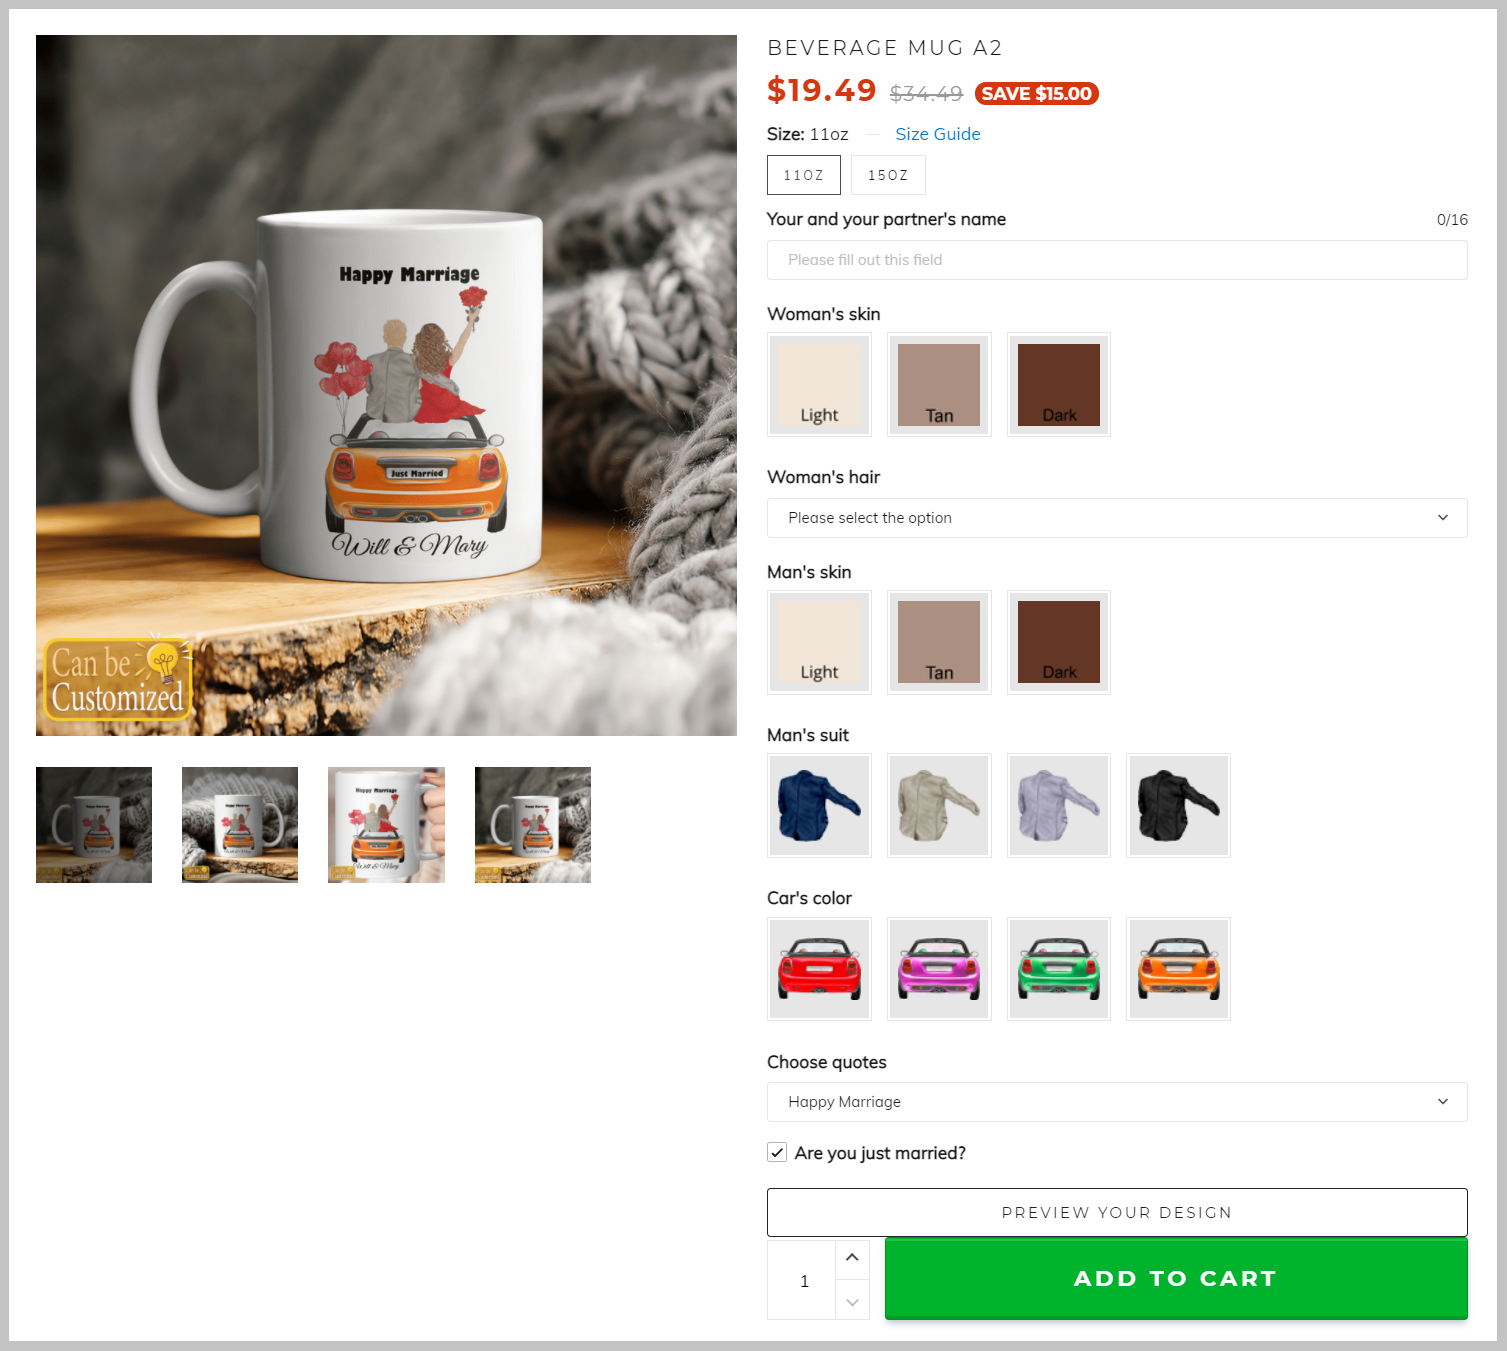
This personalized campaign includes custom options that allow your customers to freely customize their product as follow:
In this article
A. Prepare all necessary files
A. Prepare all necessary files
Before creating a campaign, you should prepared all necessary artwork files that will be printed on the product. We allow sellers to create product designs by uploading multiple image files (image layers), and adding multiple layers of texts (text layers).
Supported image file formats: .PNG, .JPG, .JPEG, and .PSD.
Supported color mode: RGB.
Please visit this link to download our resource package for a personalized campaign. In this resource package, you could find the sample assets as following:
In the .PSD files, you will see the following layers, which are used for customers to customize options on storefront.
Couple's Name - Text layer of names that can be used for Text field option.Woman's Hair & Woman's Dress - Image layers of female character's hair and dress that can be used for used for Picture choice option.Man's Hair & Man's Suit - Image layers of male character's hair and suit that can be used for Picture choice option.Car - Image layer of car that can be used for Picture choice option.Happy Marriage - Text layer of a quote that can be used for Droplist option.Just Married - Text layer that can be used for Checkbox option.These files can be named upon your preference, however, simple names will be easily remembered and customized.
In addition to preparing all the artwork files, you should also prepare some sayings or quotes to be used for the Droplist type of custom option so that your customers can select according to their preferences.
Please follow these steps below to create a personalized campaign based on our example using our resource package
B. Create a personalized campaign
Make sure that your design follows the dimension and template of your desired products.
After you have selected your base products, upload your designs (the .PSD file in the resource package), and make changes to them as instructed in section B and C of this article. Then proceed to create custom options, set up cliparts, and add conditional logic for your custom options by following the steps below.
+ to create a new custom option.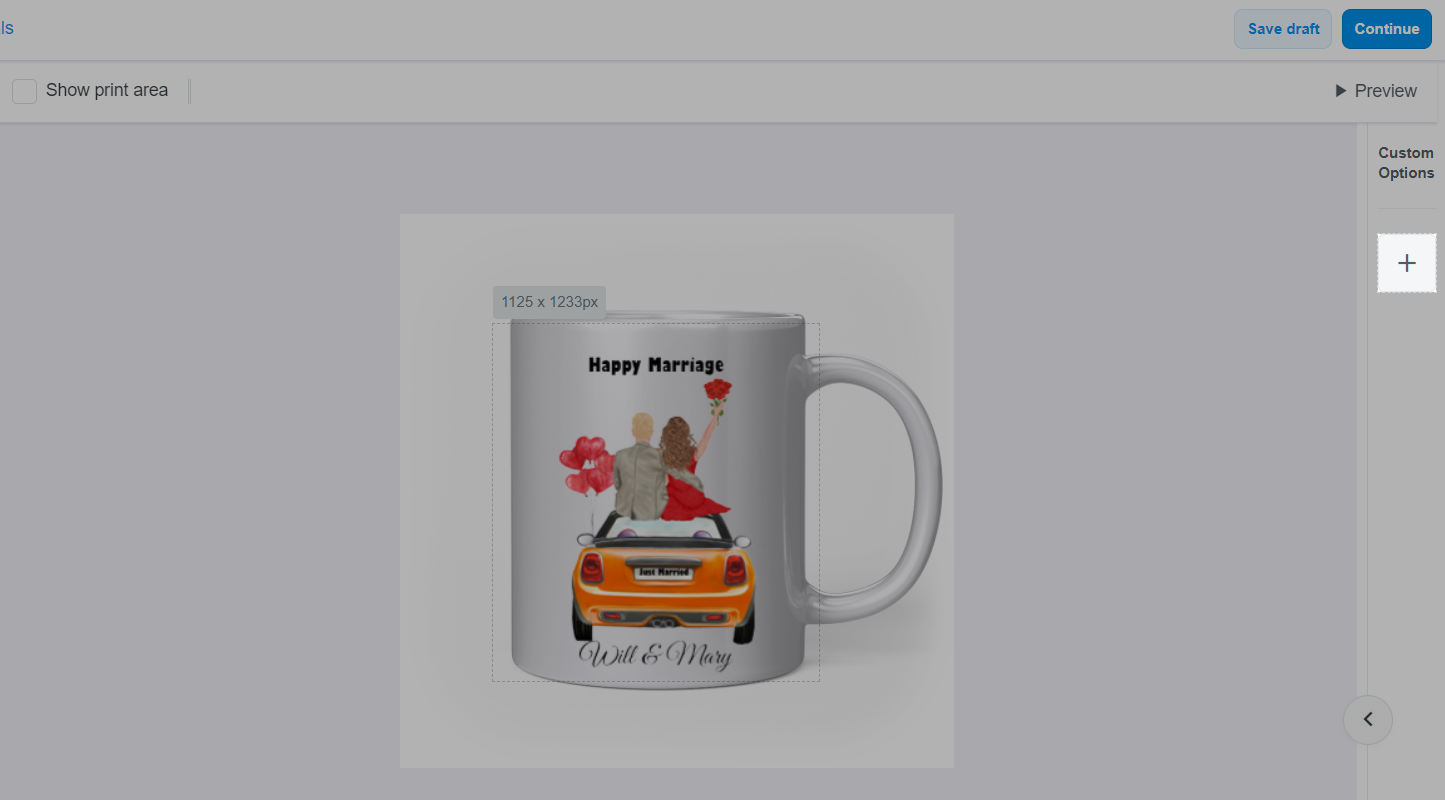
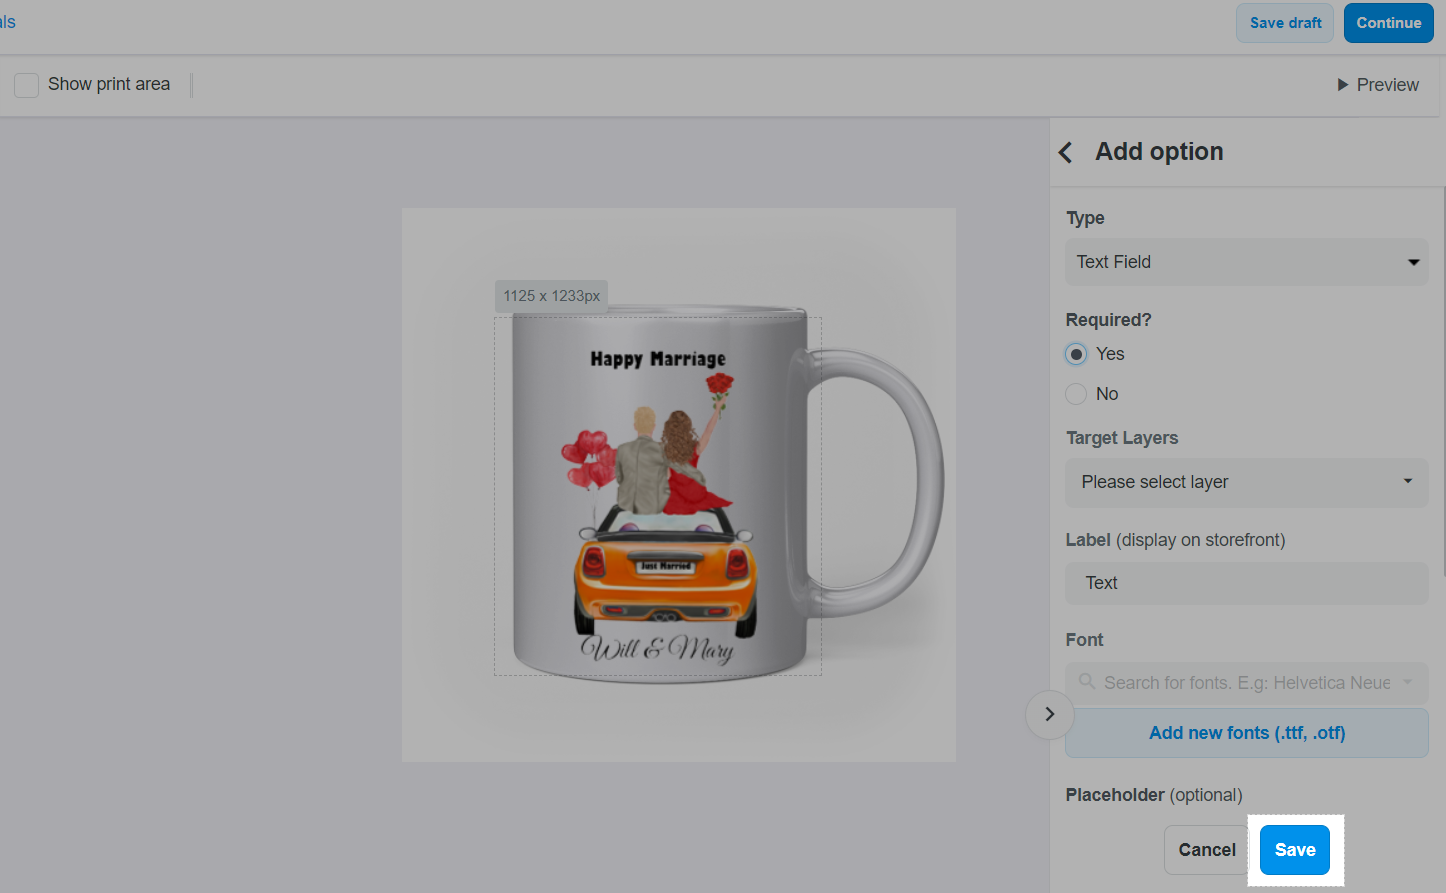
Please refer to this article for more information on how to create custom options for your campaign.
< button next to Add Option, you will see the custom option you just created listed in the column Custom Options. Hover over the option, you will see the display of two choices: + Add option above and + Add option below, click either to add a new custom option for products.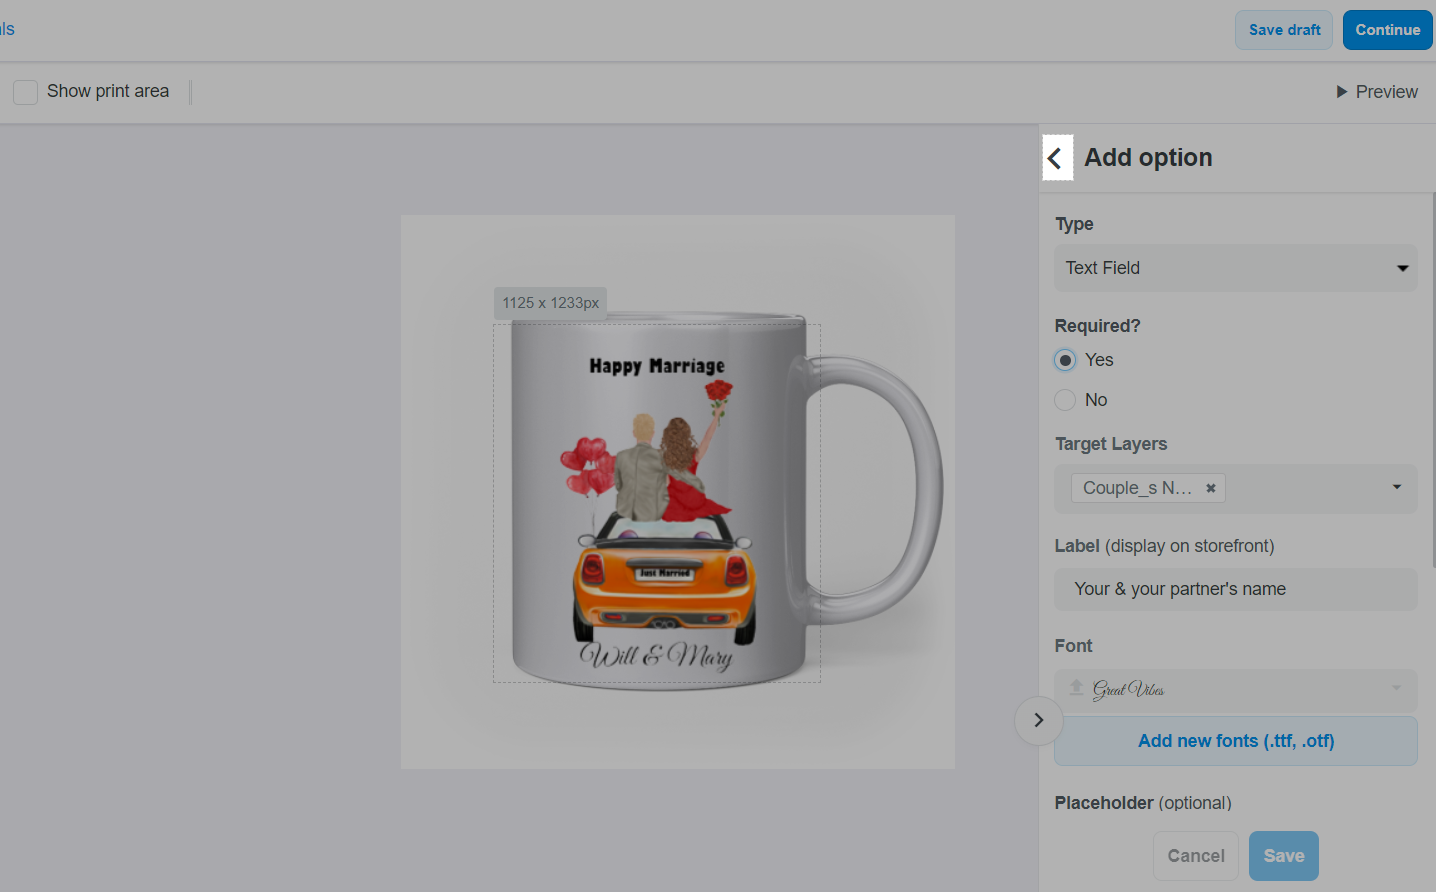
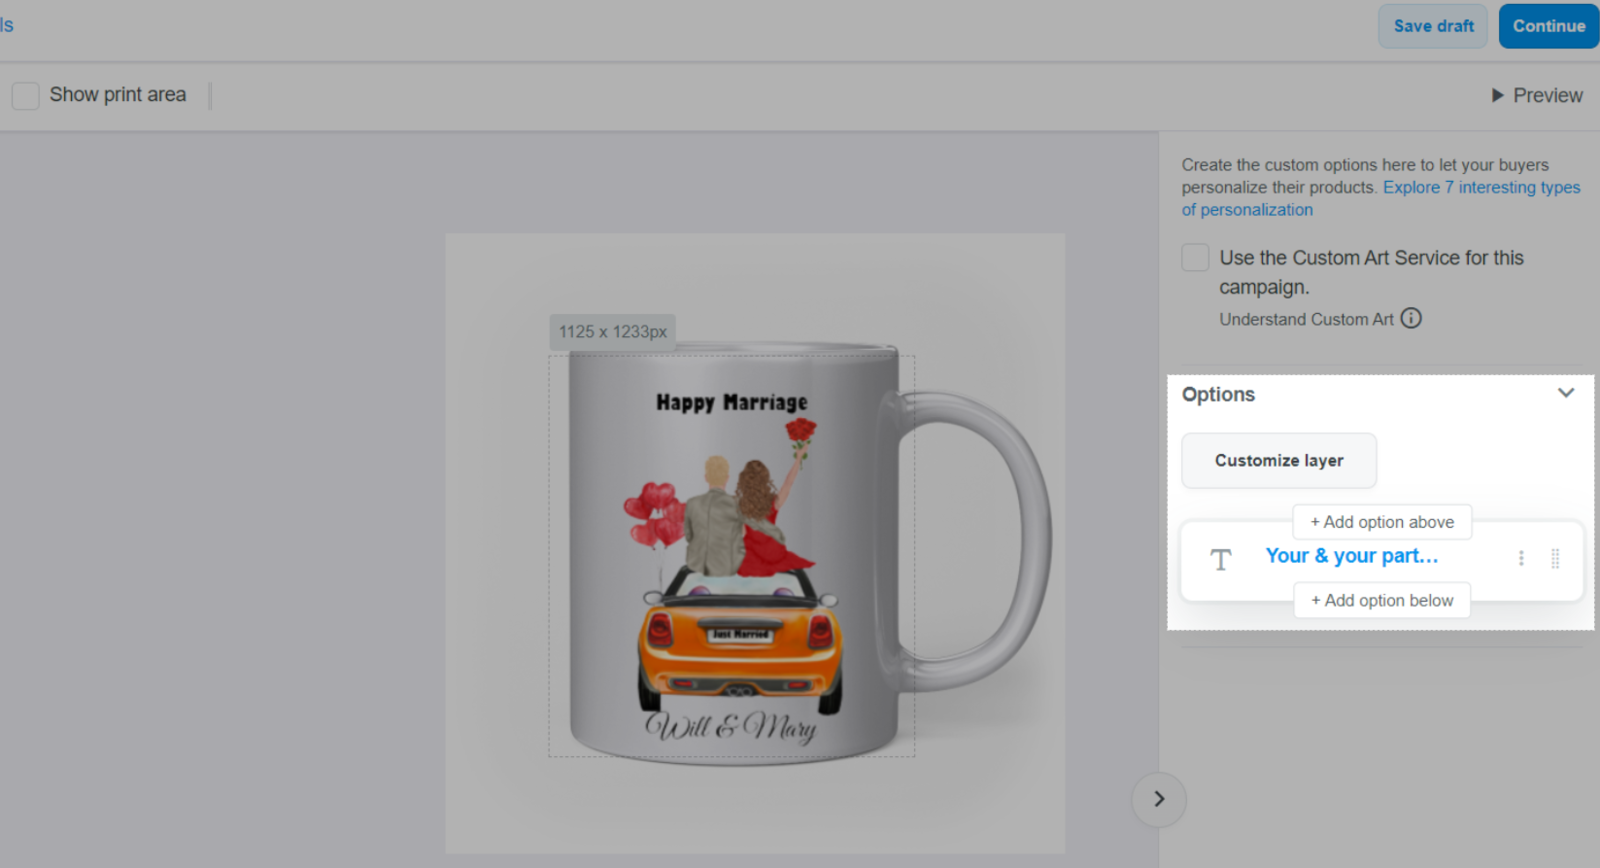
Custom option 1 (Text field): Your & your partner's name
Couple_s Name layer in .PSD file of our resource package.Great vibes font from our resource package.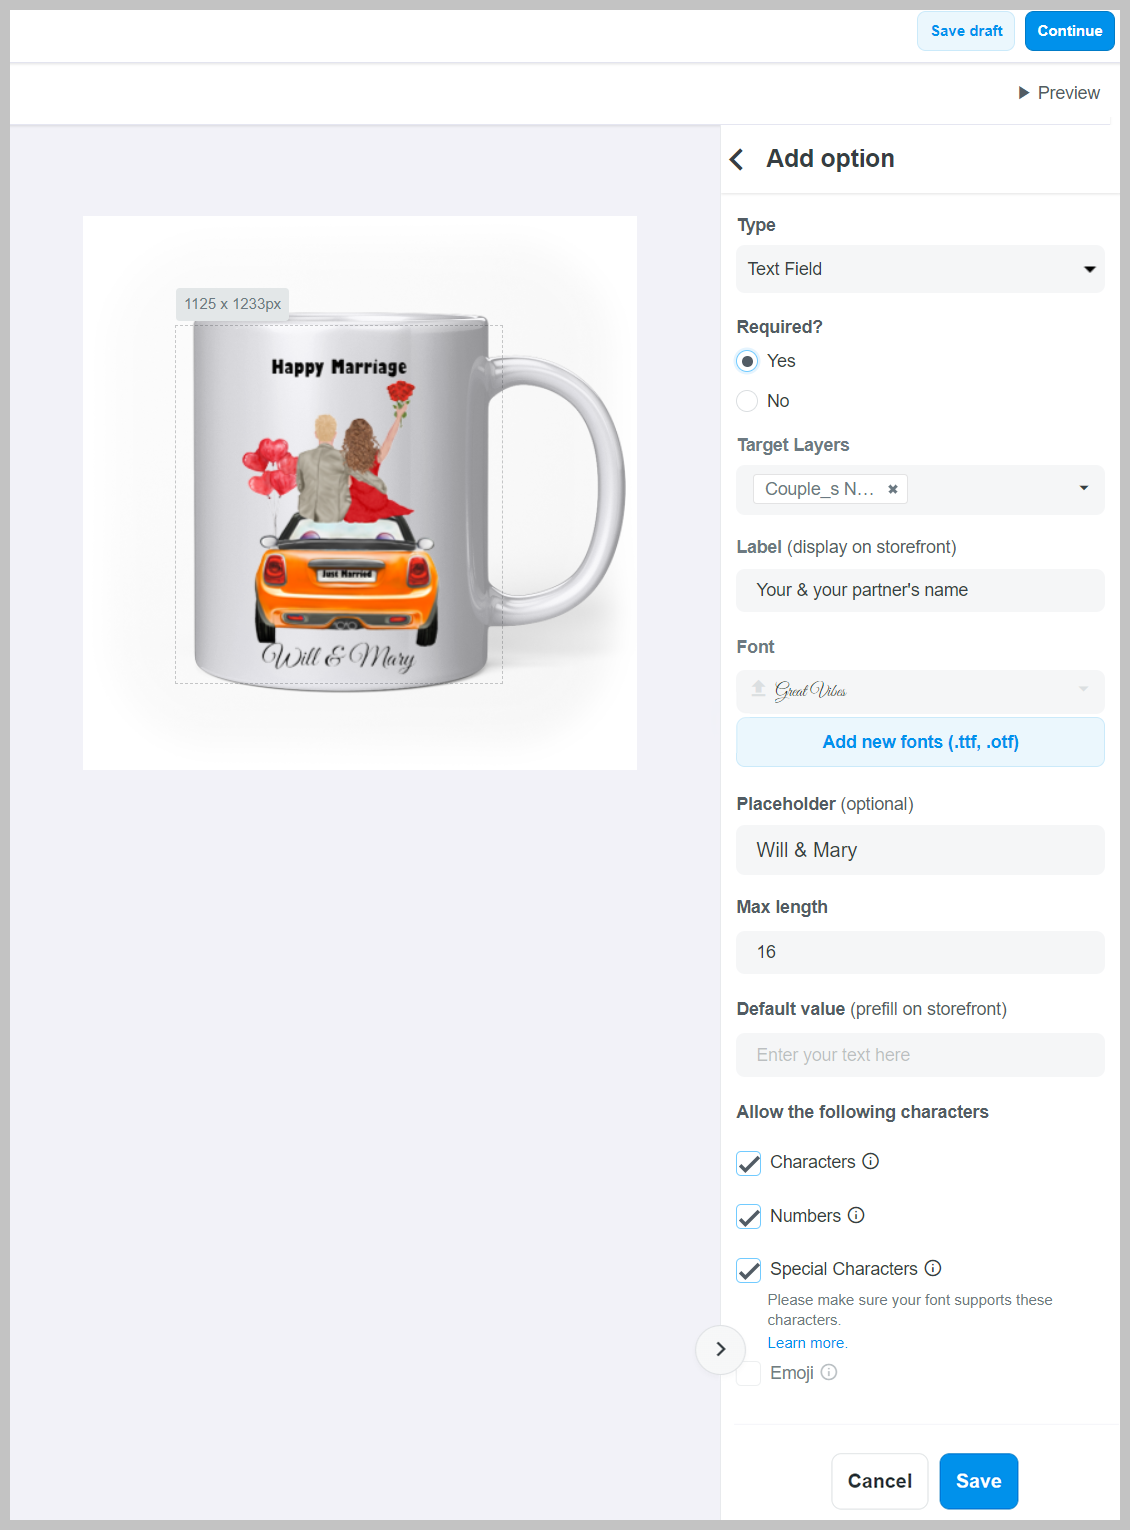
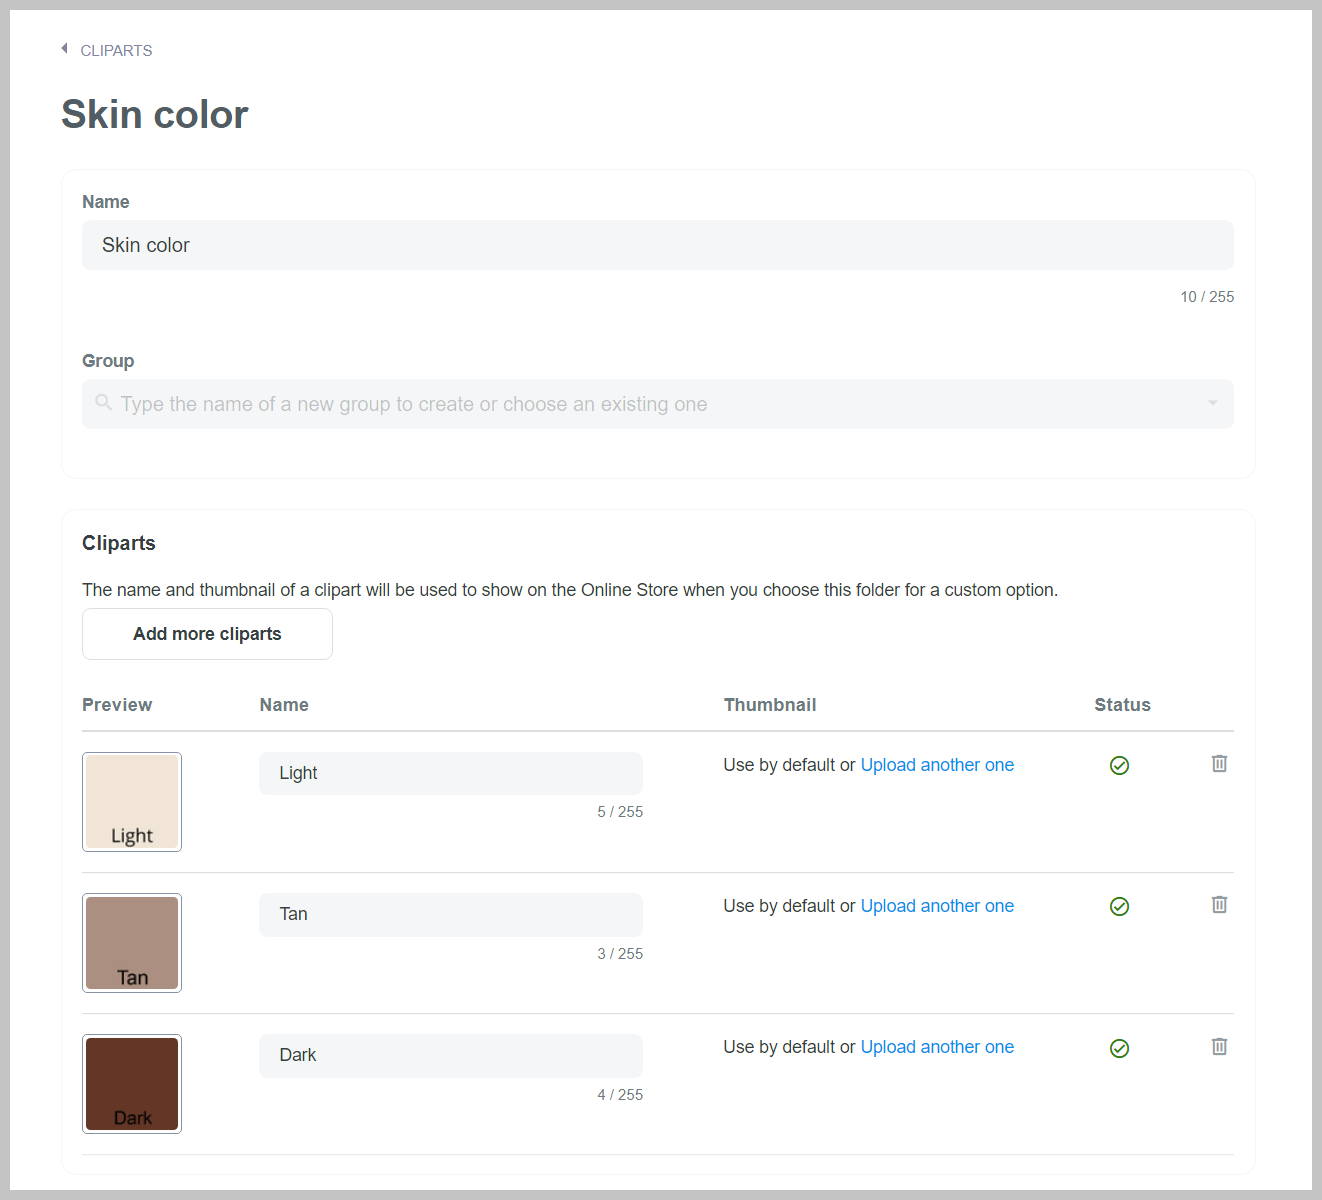
Custom option 2 (no type): Woman's skin
Skin color and upload the .PNG files for skin colors in the resource package. You can also refer to section C. Appendix of this article to create all clipart folders beforehand.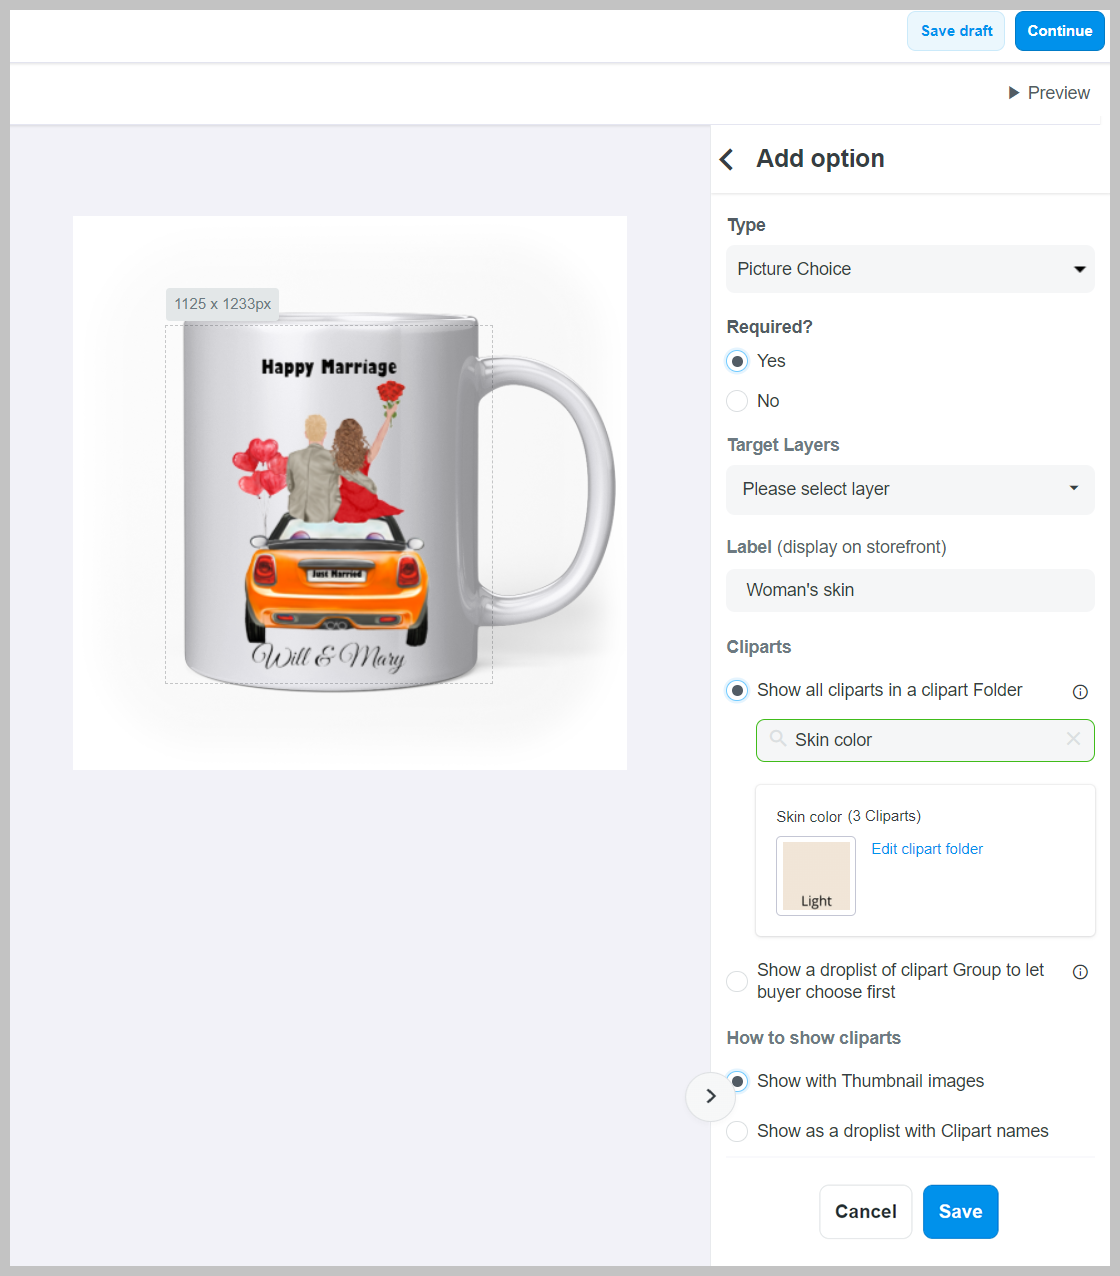
Custom option 3 (Picture choice): Woman's dress - Light skin
Woman_s Dress layer in .PSD file of our resource package.Woman's dress - Light skin and upload the .PNG files for woman's dress (light skin) in the resource package. You can also refer to section C. Appendix of this article to create all clipart folders beforehand.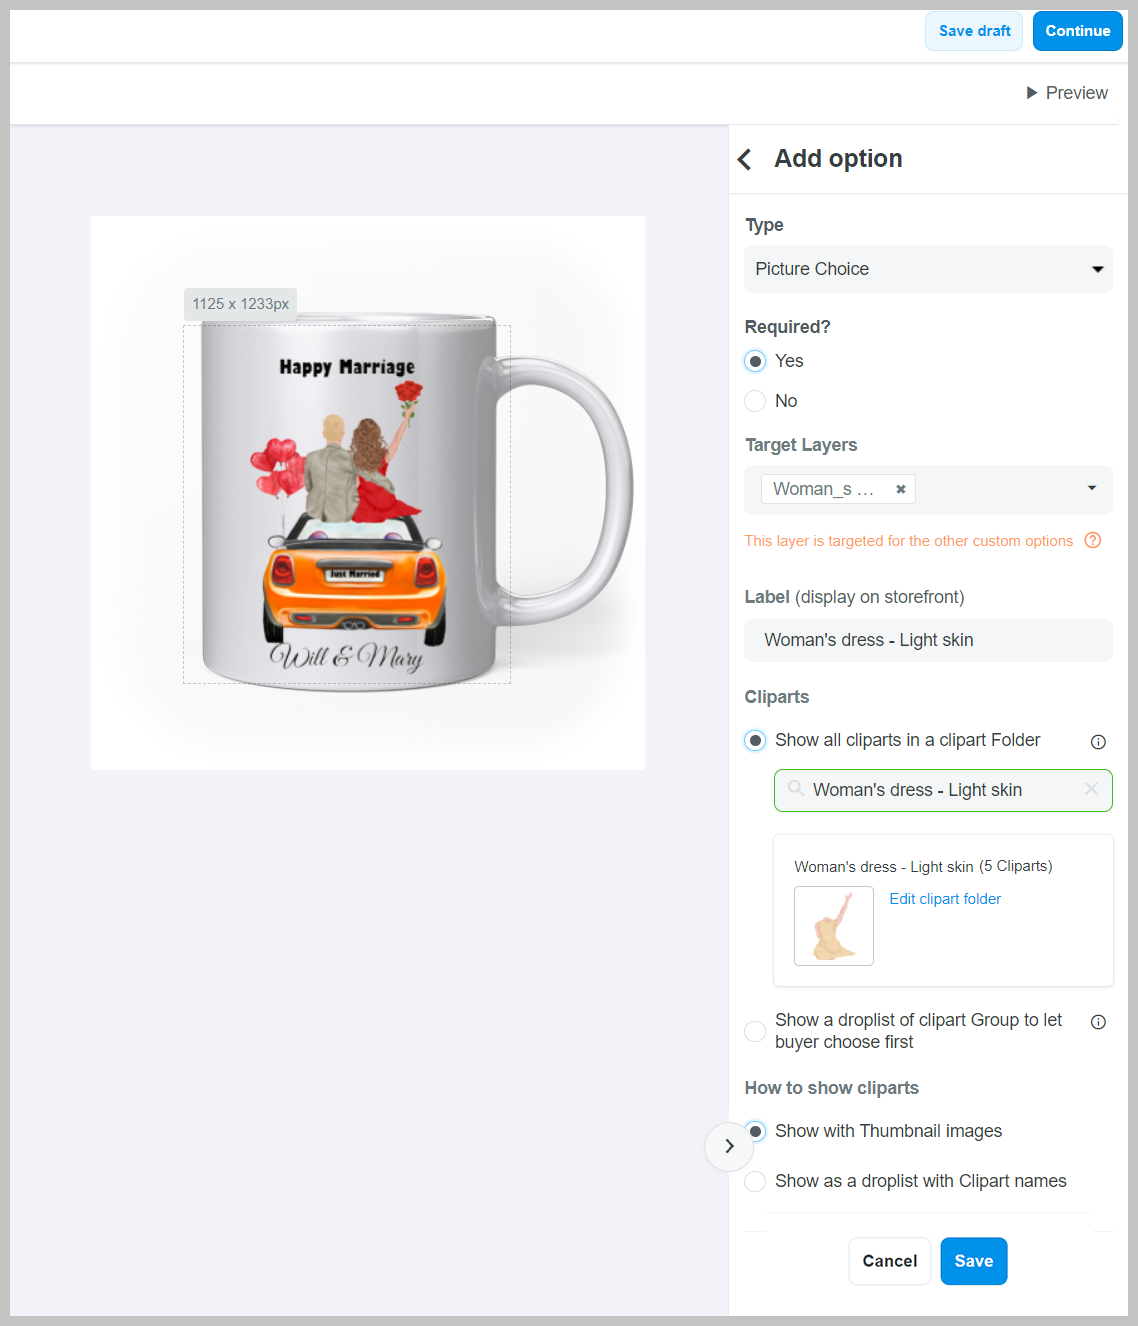
Custom option 4 (Picture choice): Woman's dress - Tan skin
Woman_s Dress layer in .PSD file of our resource package.Woman's dress - Tan skin and upload the .PNG files for woman's dress (tan skin) in the resource package. You can also refer to section C. Appendix of this article to create all clipart folders beforehand.
Custom option 5: (Picture choice): Woman's dress - Dark skin
Woman_s Dress layer in .PSD file of our resource package.Woman's dress - Dark skin and upload the .PNG files for woman's dress (dark skin) in the resource package. You can also refer to section C. Appendix of this article to create all clipart folders beforehand.
Custom option 6 (Picture choice): Woman's hair
Woman_s Hair layer in .PSD file of our resource package.Blonde hair, Light brown hair, Dark brown hair, and Black hair, sort them into the same group Woman's hair. Upload the respective .PNG files for woman's hair in the resource package. Then, click Show a droplist of clipart Group to let buyer choose first and select Woman's hair clipart folder group you just created. You can also refer to section C. Appendix of this article to create all clipart folders beforehand.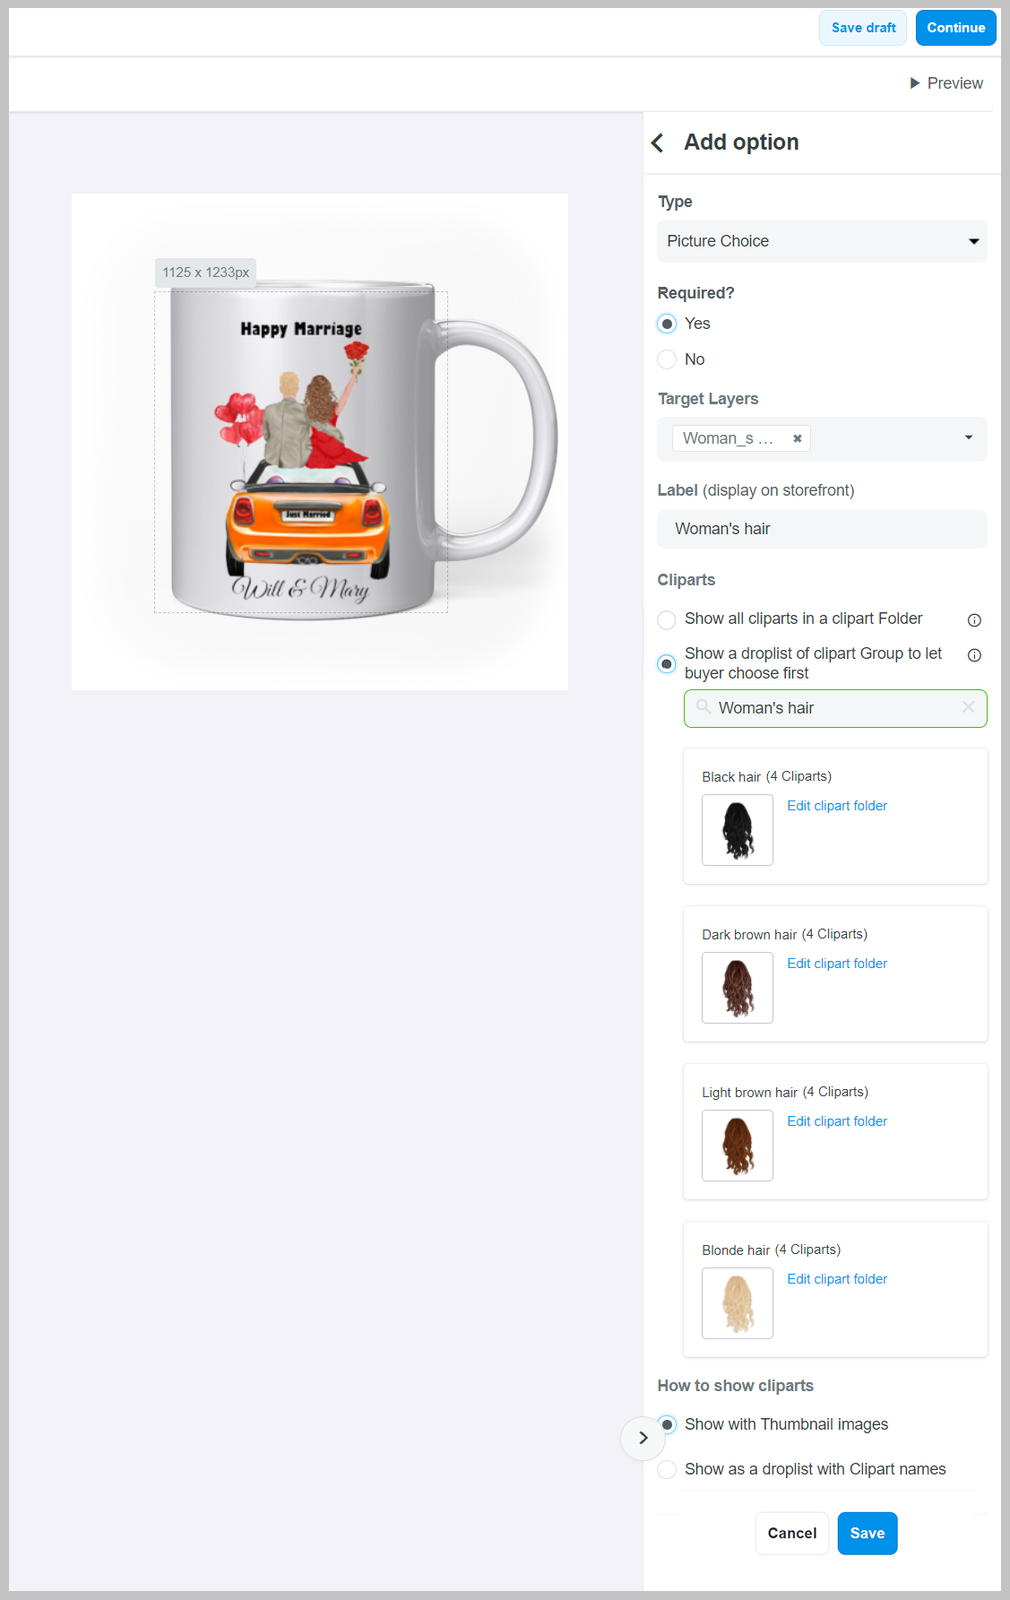
Custom option 7 (Picture choice): Man's skin
Skin color clipart folder you created as guided in custom option 2.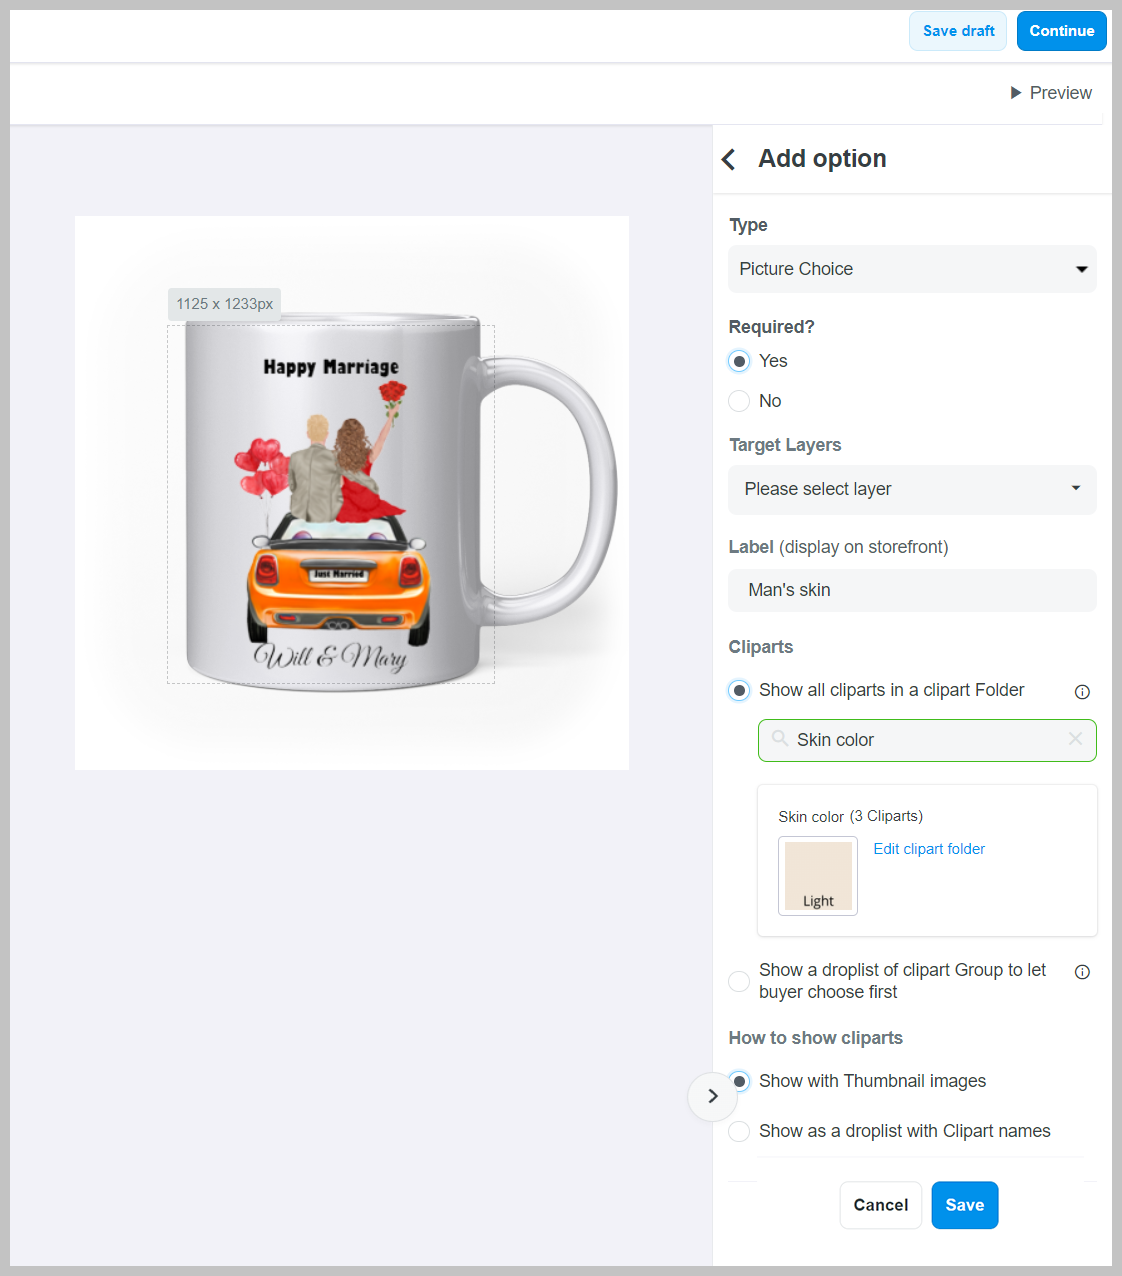
Custom option 8 (Picture choice): Man's hair - Light skin
Man_s Hair layer in .PSD file of our resource package.Man's hair - Light skin and upload the .PNG files for man's hair (light skin) in the resource package. You can also refer to section C. Appendix of this article to create all clipart folders beforehand.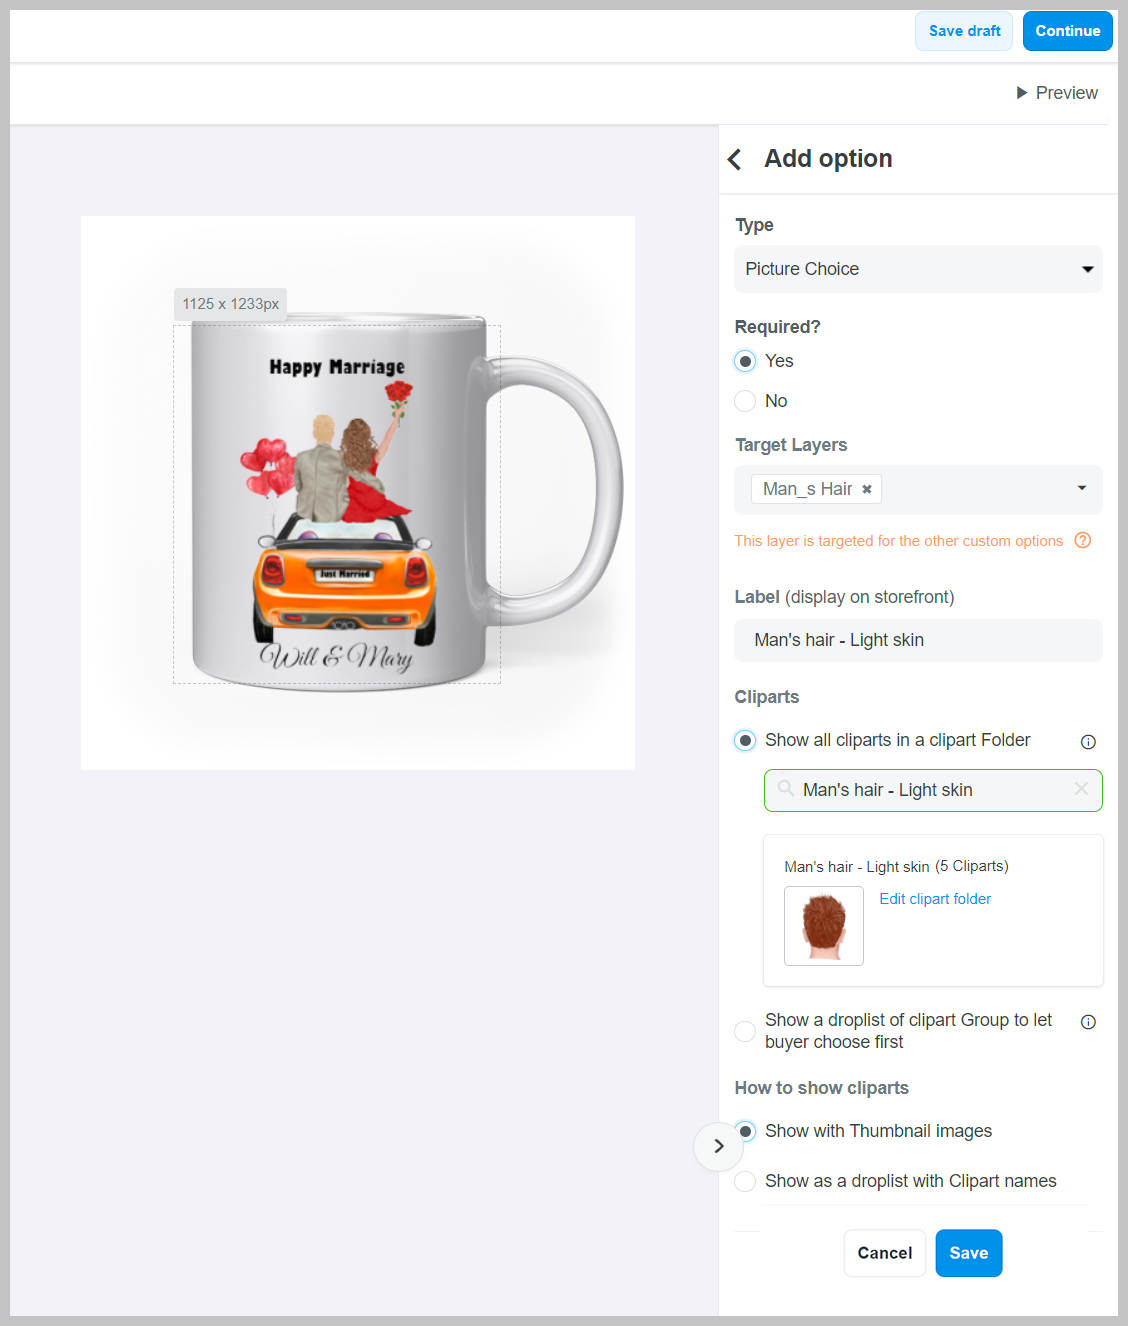
Custom option 9 (Picture choice): Man's hair - Tan skin
Man_s Hair layer in .PSD file of our resource package.Man's hair - Tan skin and upload the .PNG files for man's hair (tan skin) in the resource package. You can also refer to section C. Appendix of this article to create all clipart folders beforehand.
Custom option 10 (Picture choice): Man's hair - Dark skin
Man_s Hair layer in .PSD file of our resource package.Man's hair - Dark skin and upload the .PNG files for man's hair (dark skin) in the resource package. You can also refer to section C. Appendix of this article to create all clipart folders beforehand.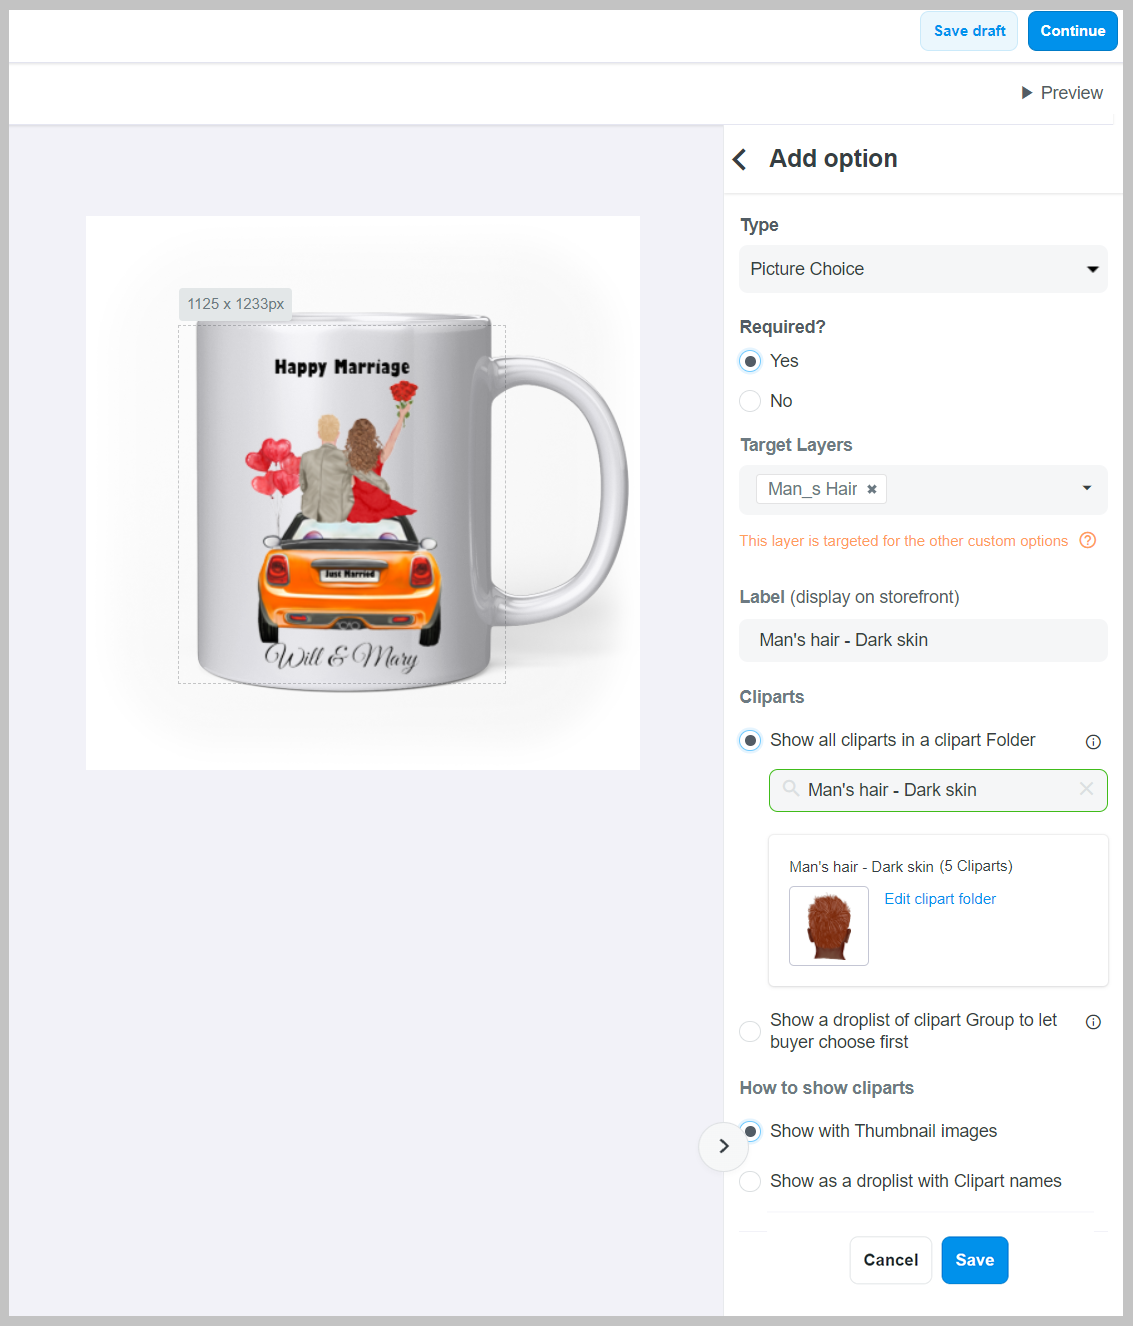
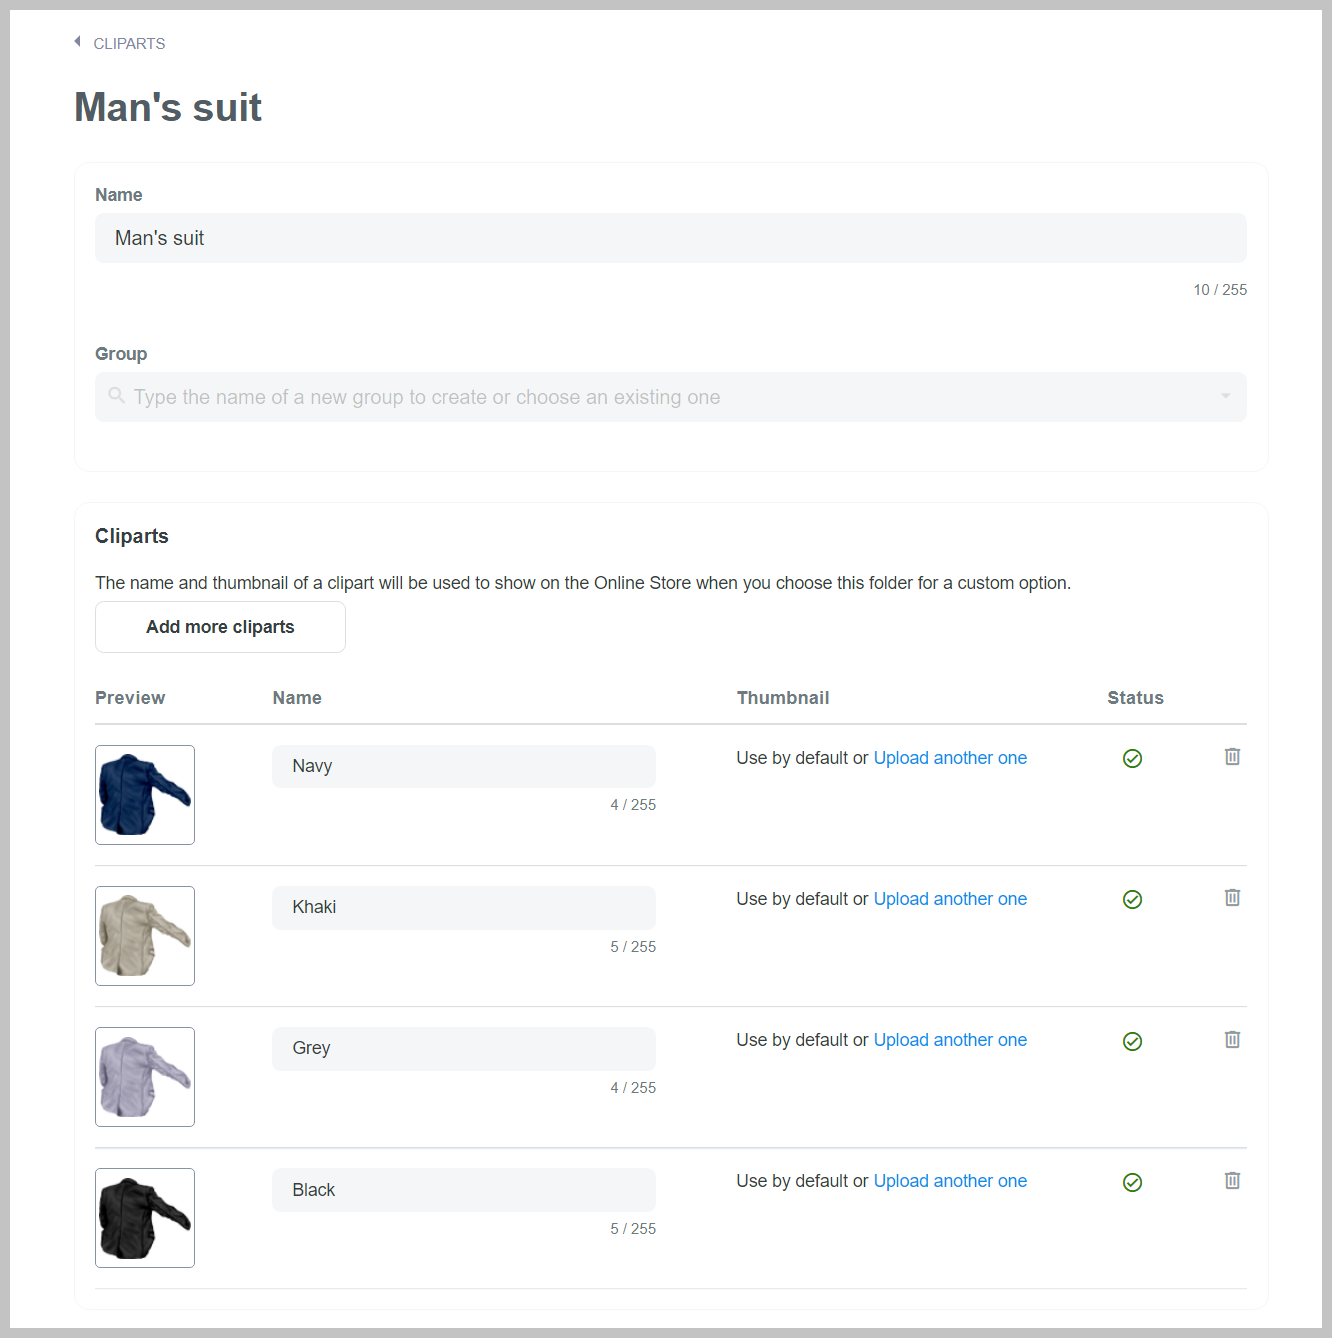
Custom option 11 (Picture choice): Man's suit
Man_s Suit layer in .PSD file of our resource package.Man's suit and upload the .PNG files for man's suit in the resource package. You can also refer to section C. Appendix of this article to create all clipart folders beforehand.
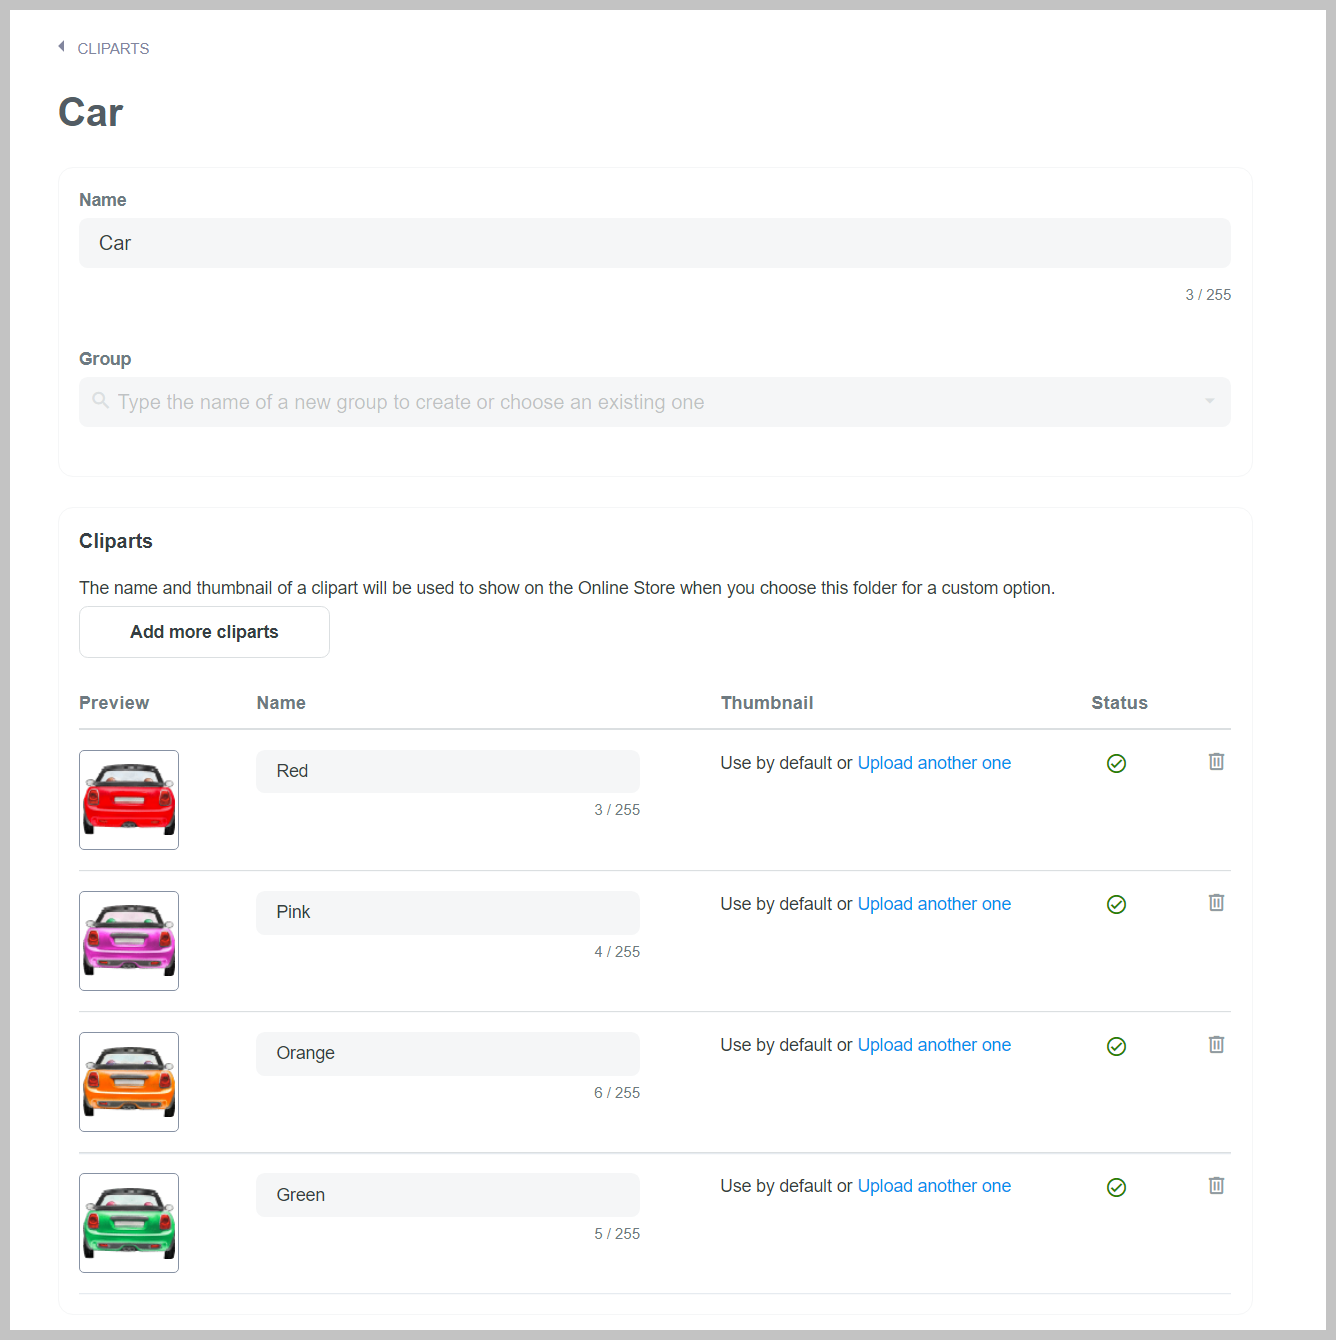
Custom option 12 (Picture choice): Car's color
Car layer in .PSD file of our resource package.Car and upload the .PNG files for car's color in the resource package. You can also refer to section C. Appendix of this article to create all clipart folders beforehand.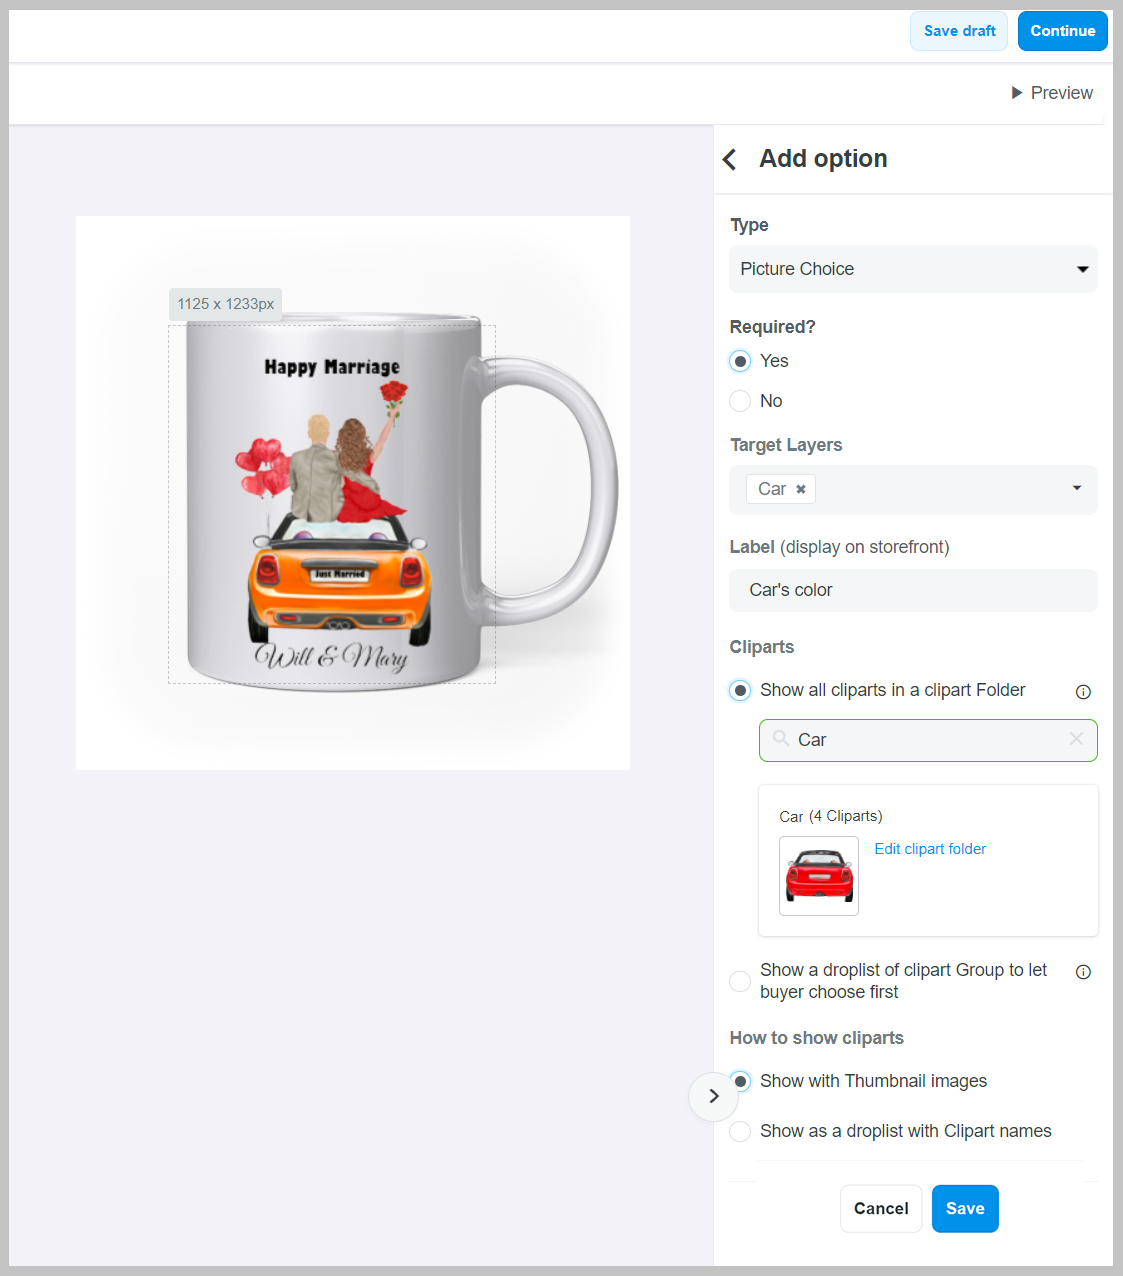
Custom option 13 (Droplist): Choose quotes
Happy Marriage layer in .PSD file of our resource package.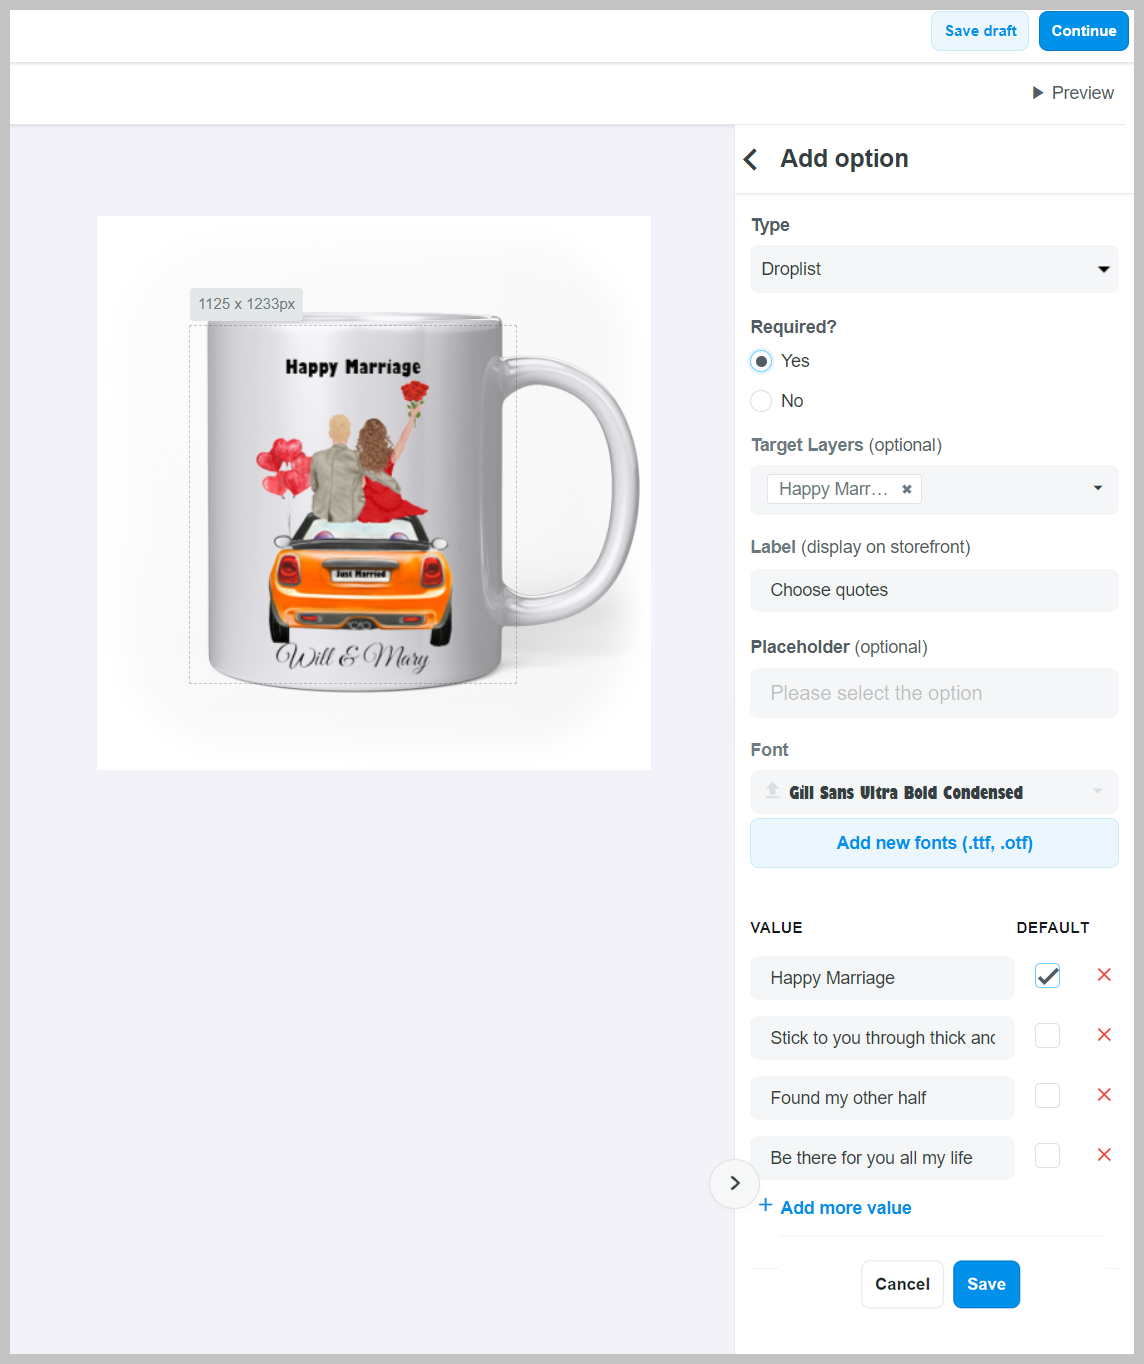
Custom option 14 (Checkbox): Are you just married?
Just Married layer in .PSD file of our resource package.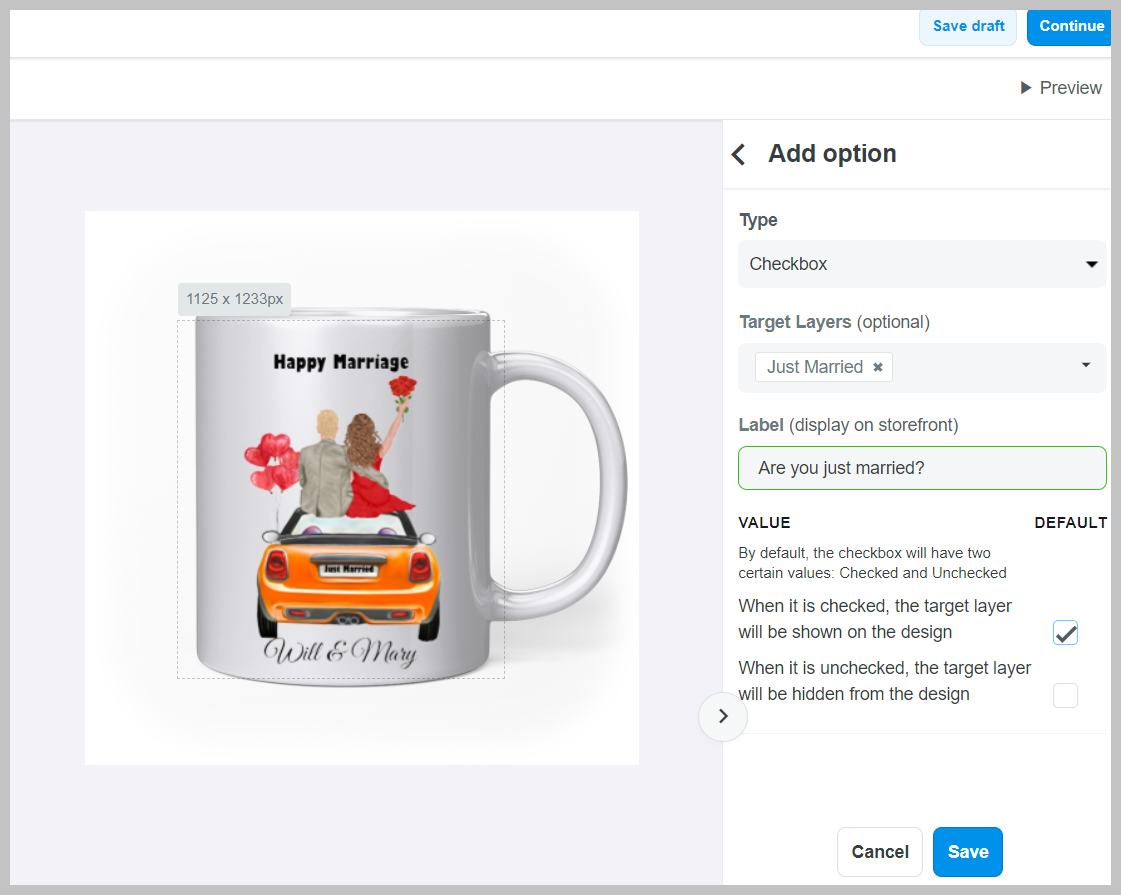
In this demo campaign, please follow the steps below to create 2 conditional logic for 2 custom options Woman's skin and Man's skin. With conditional logic, when customers choose skin colors, hair colors and clothes will match with each skin color accordingly, giving customers a lot of choices while personalizing their product.
Woman's skin:
Light, then show Woman's dress - Light skin.+ button to add another logic.Tan, then show Woman's dress - Tan skin.+ button to add another logic.Dark, then show Woman's dress - Dark skin.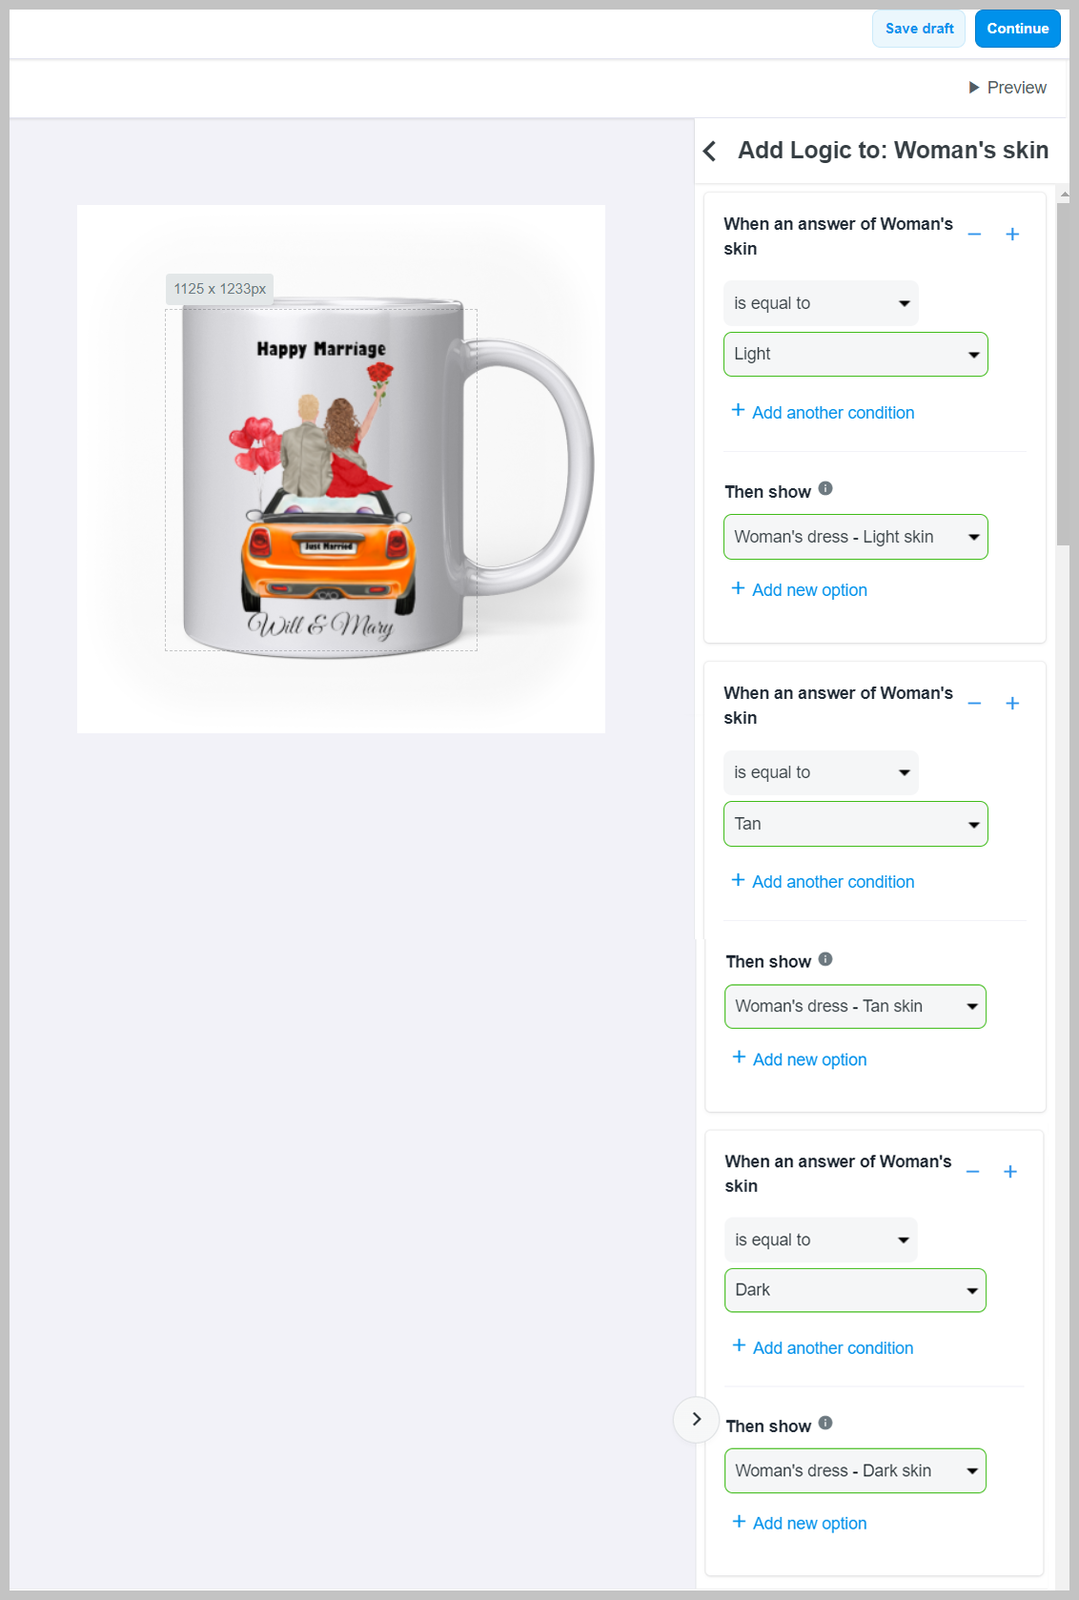
Man's skin:
Light, then show Man's hair - Light skin.+ button to add another logic.Tan, then show Man's hair - Tan skin.+ button to add another logic.Dark, then show Man's hair - Dark skin.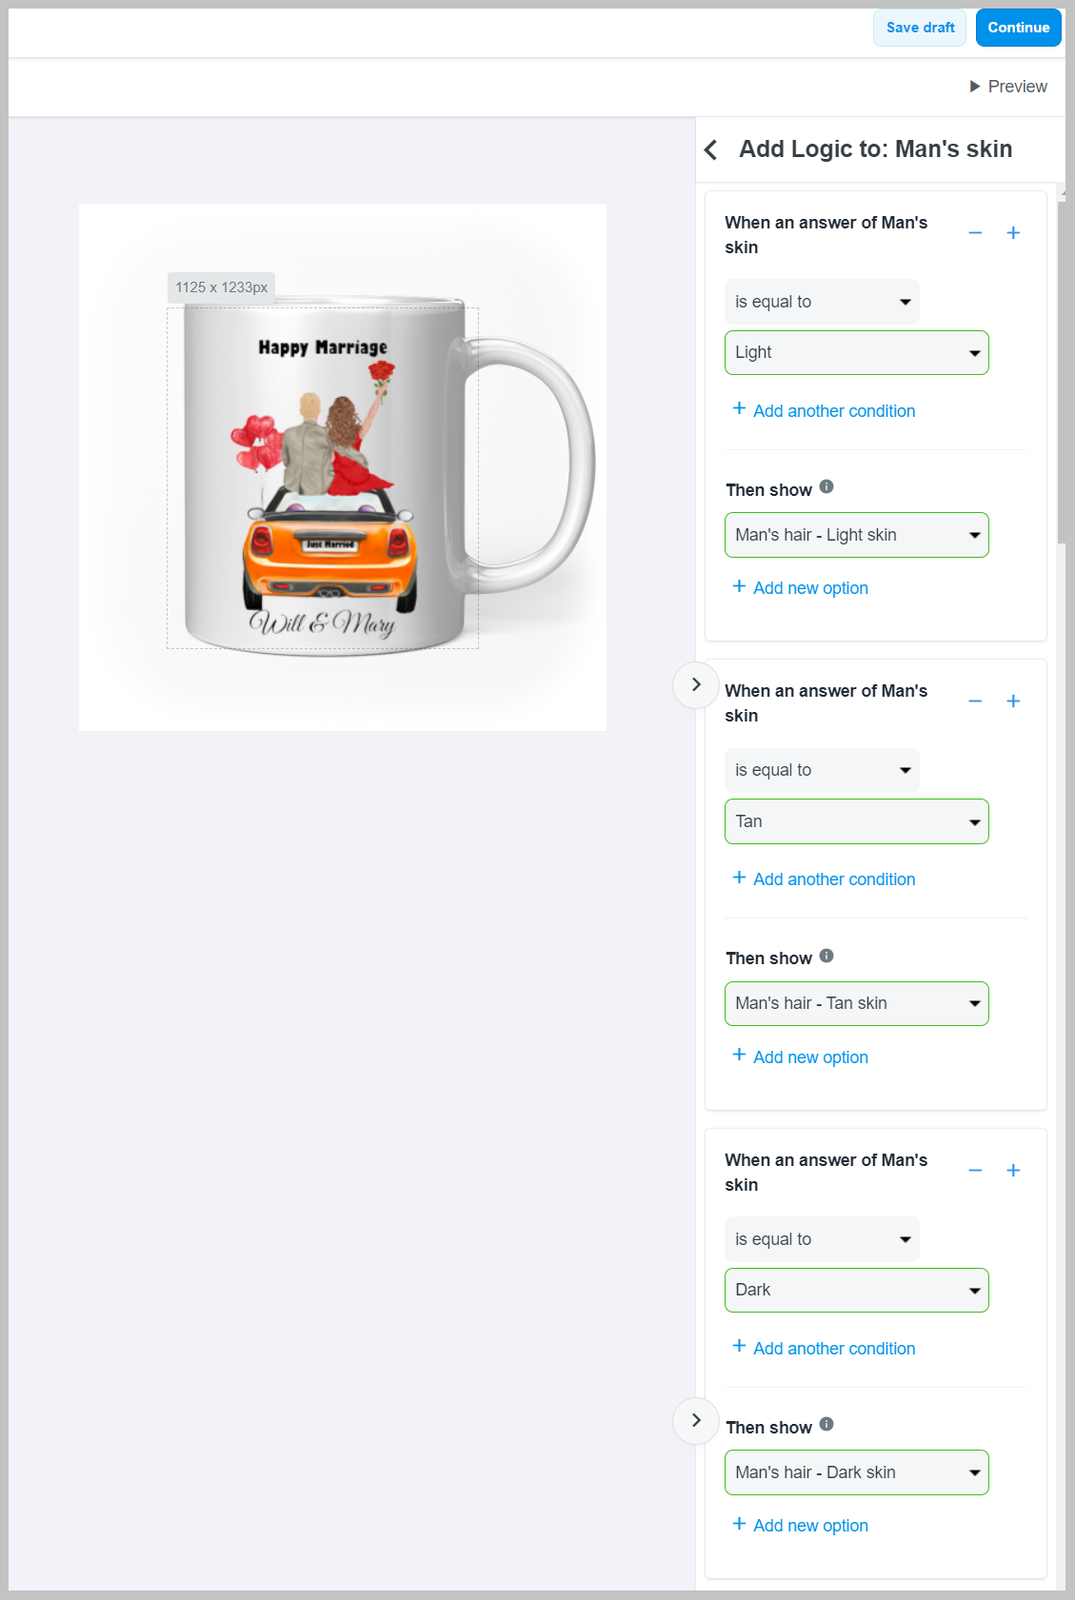
You can enable Personalization Preview mode for your campaign so that customers can see the product design before making a purchase. Please refer to this article on how you can enable this feature.
C. Appendix: Set up cliparts
You can also set up all clipart folders before creating your campaigns by following the steps below:
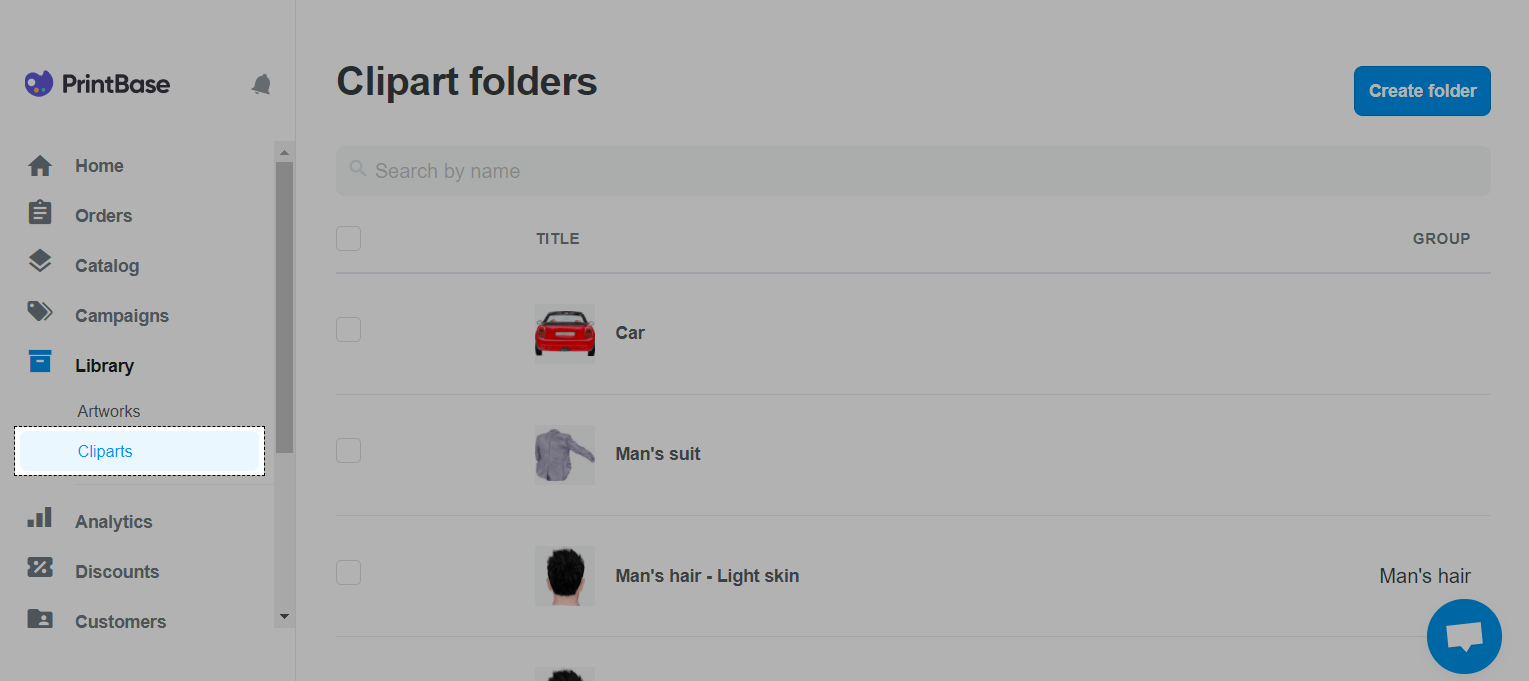
If you're using ShopBase (PrintHub), from ShopBase admin site, go to Apps > Print Hub > Library > Clipart.

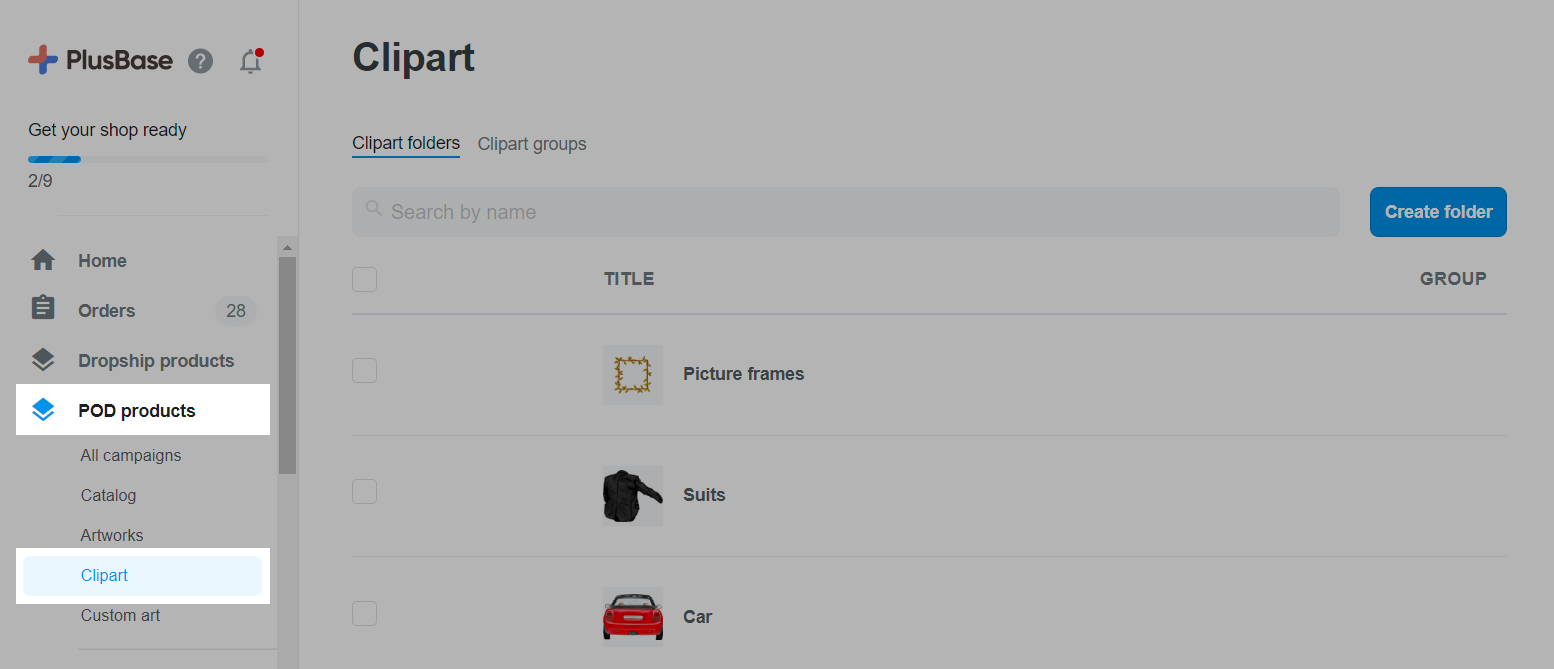
If you're using PlusBase, from your PlusBase admin site, go to POD products > Clipart.
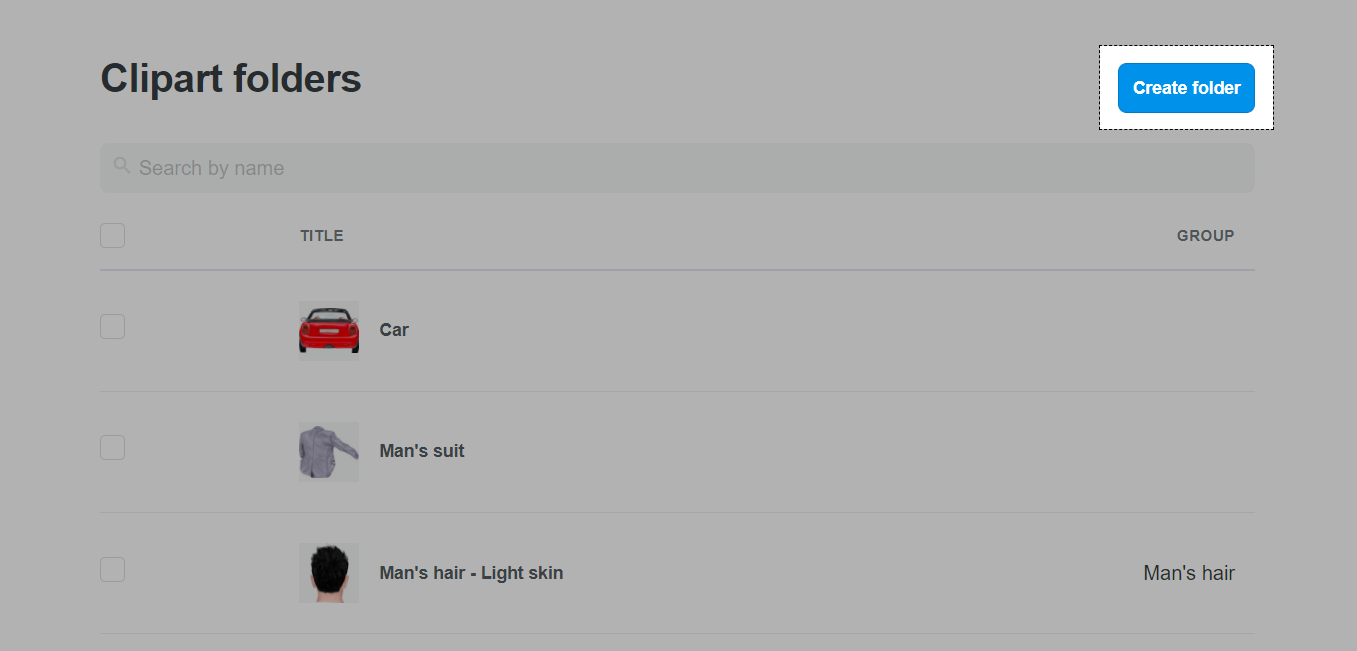
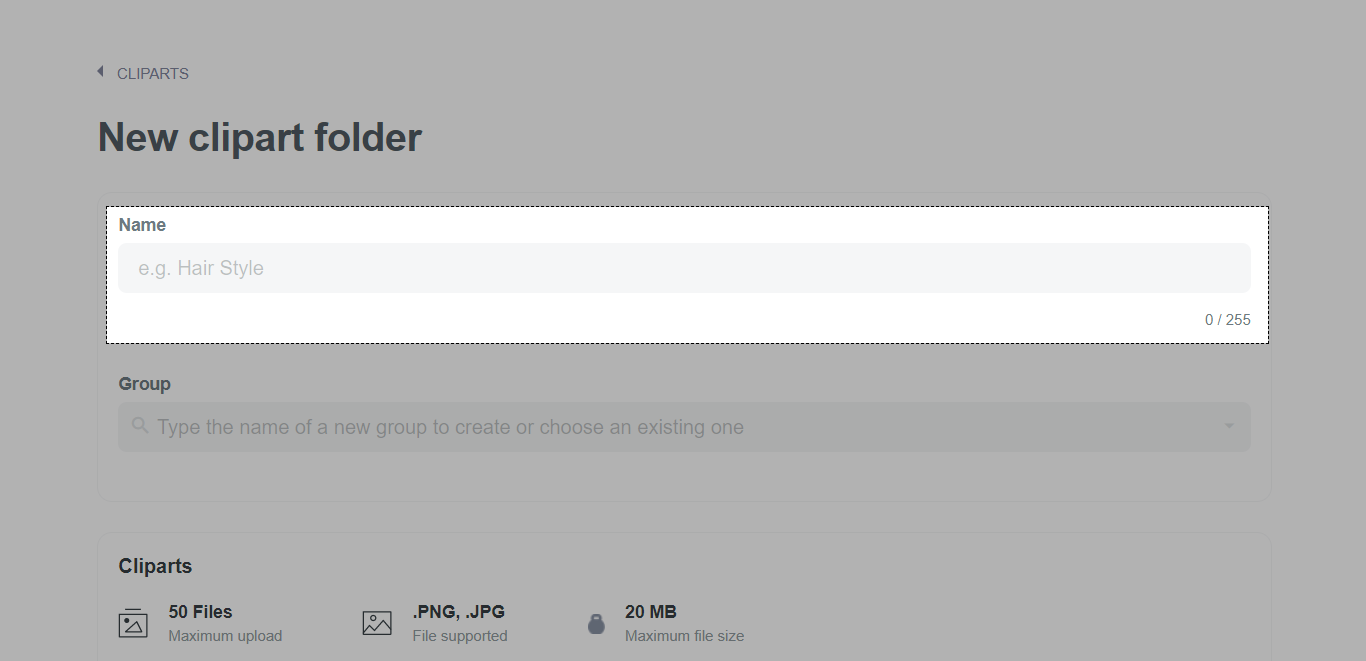
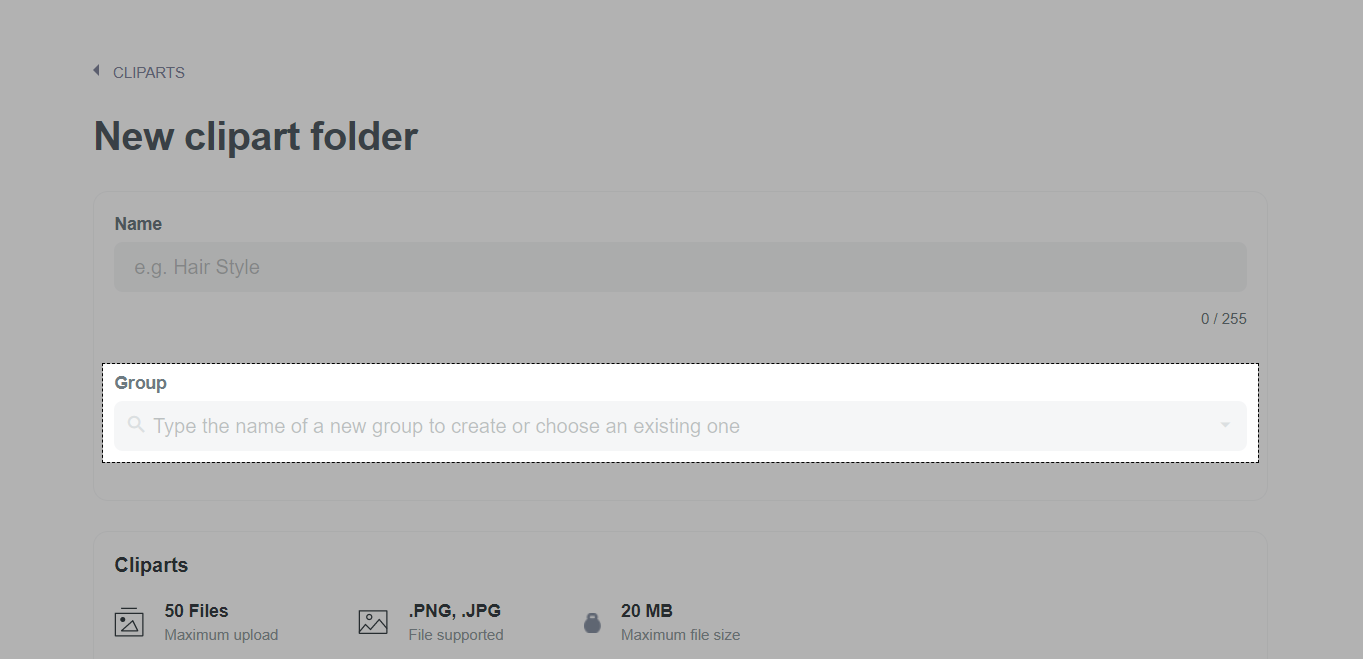
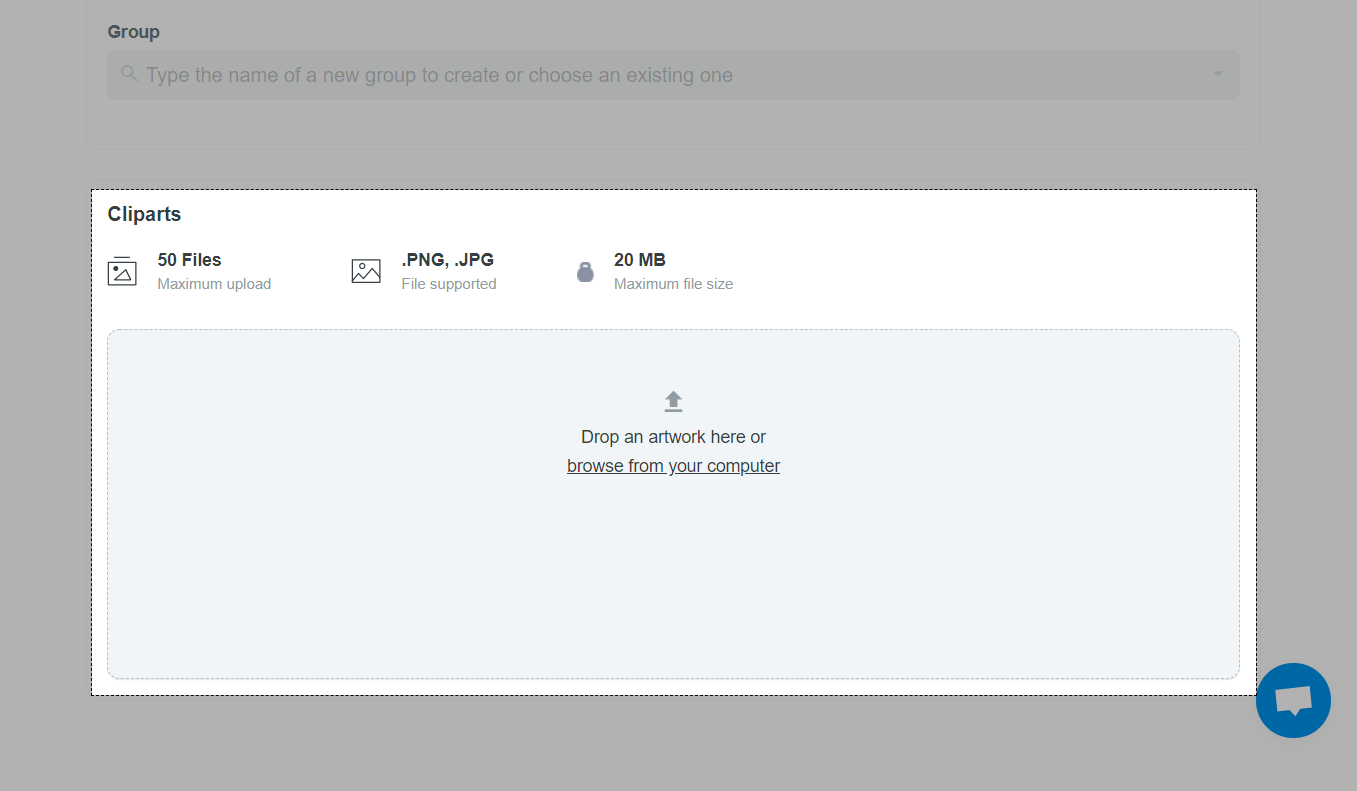
If you are using our resource package, you should create 13 clipart folders as listed in the examples below:
Woman's dress.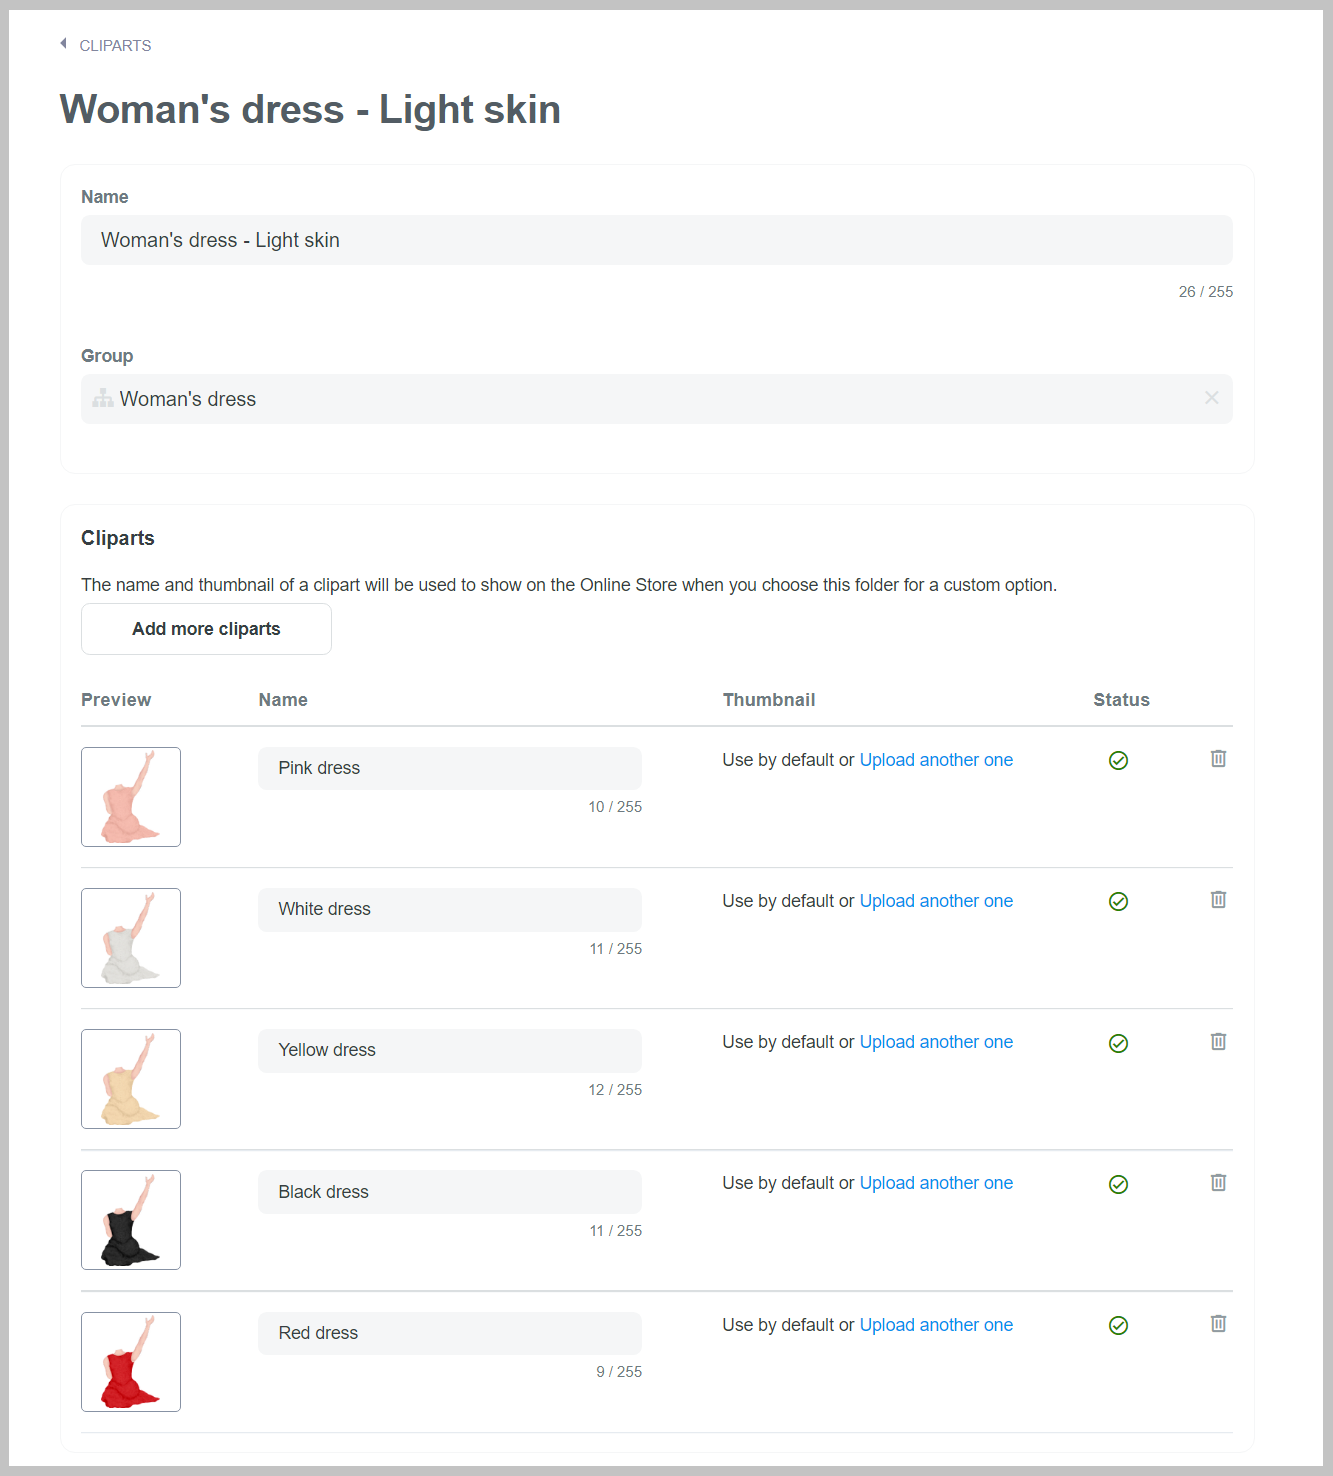
Woman's dress.
Woman's dress.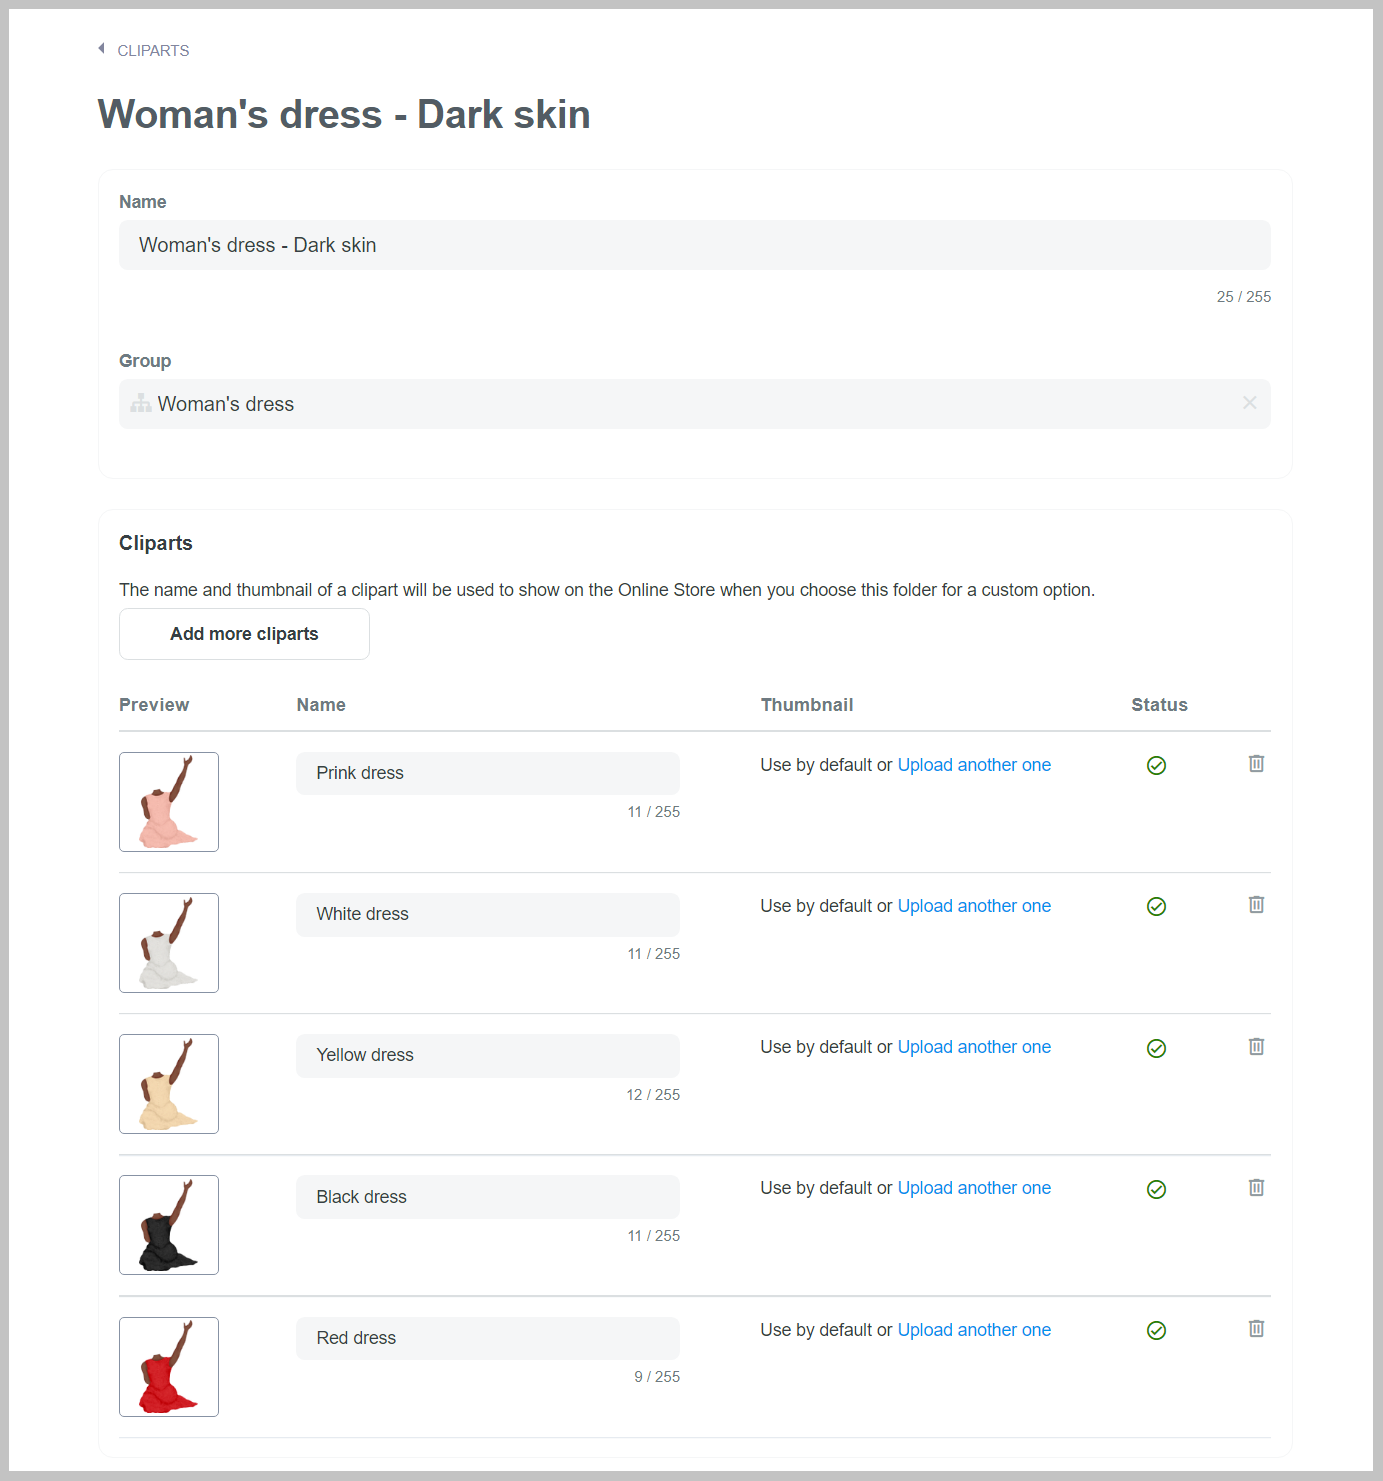
Woman's hair.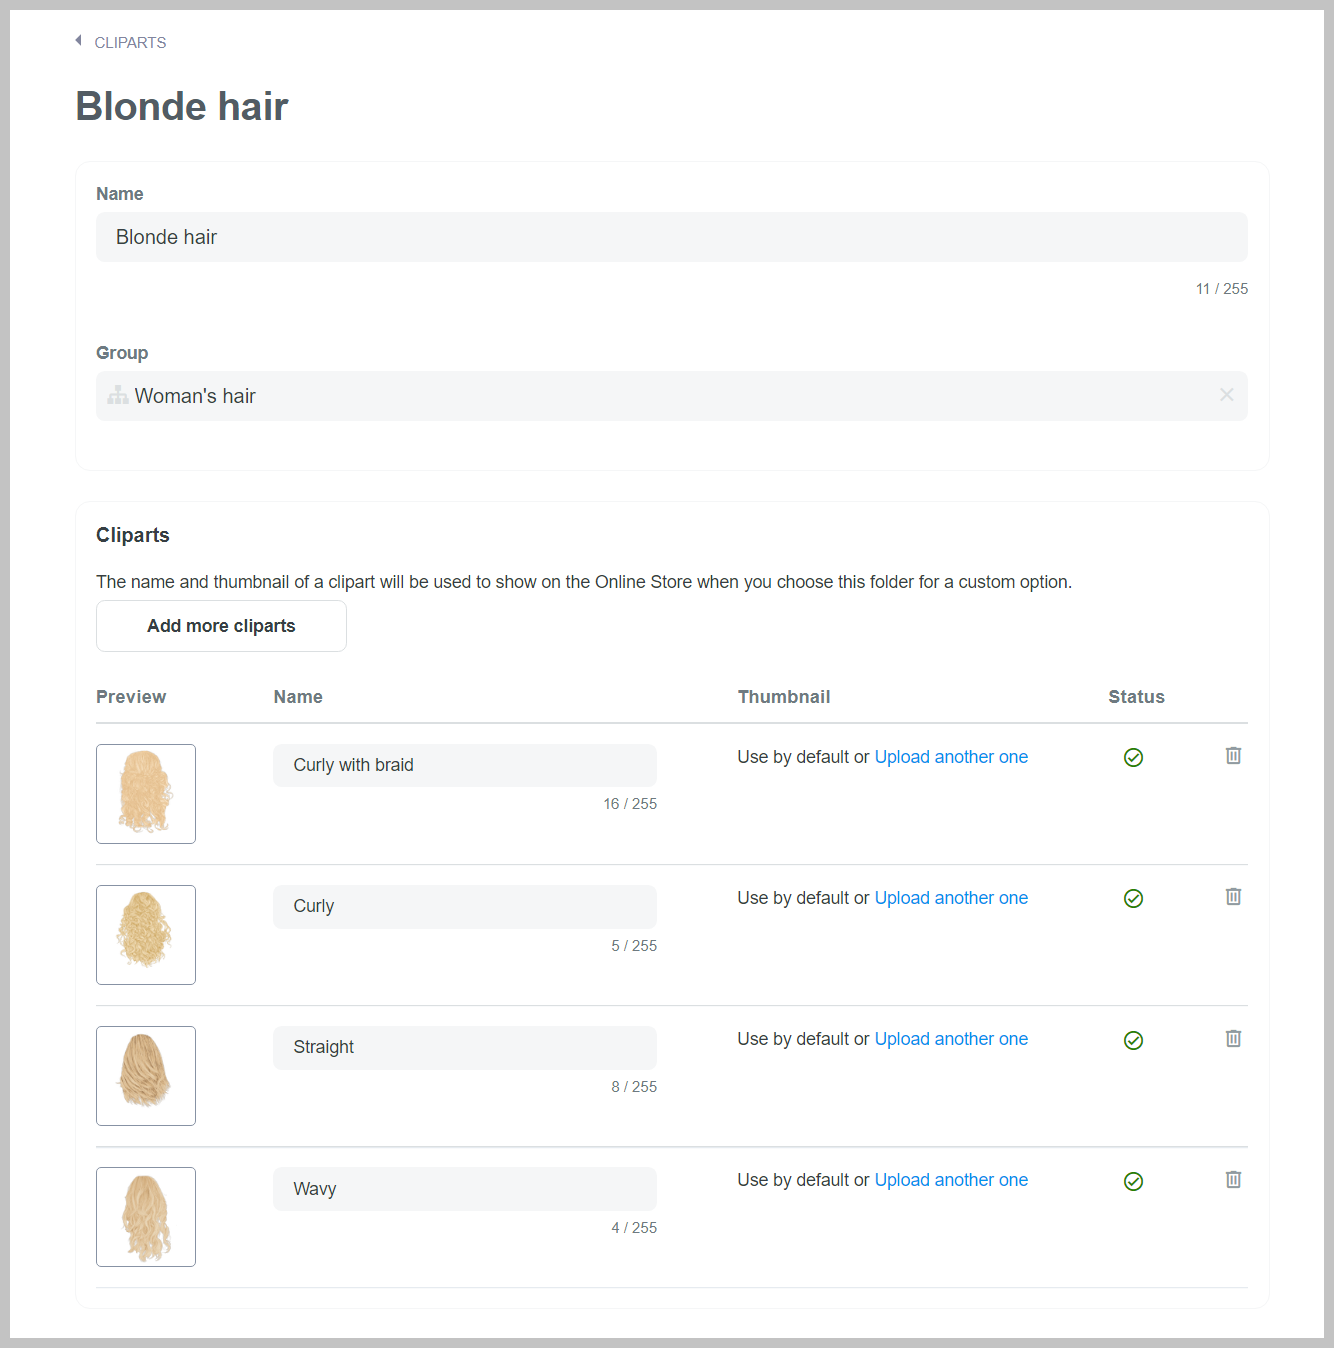
Woman's hair.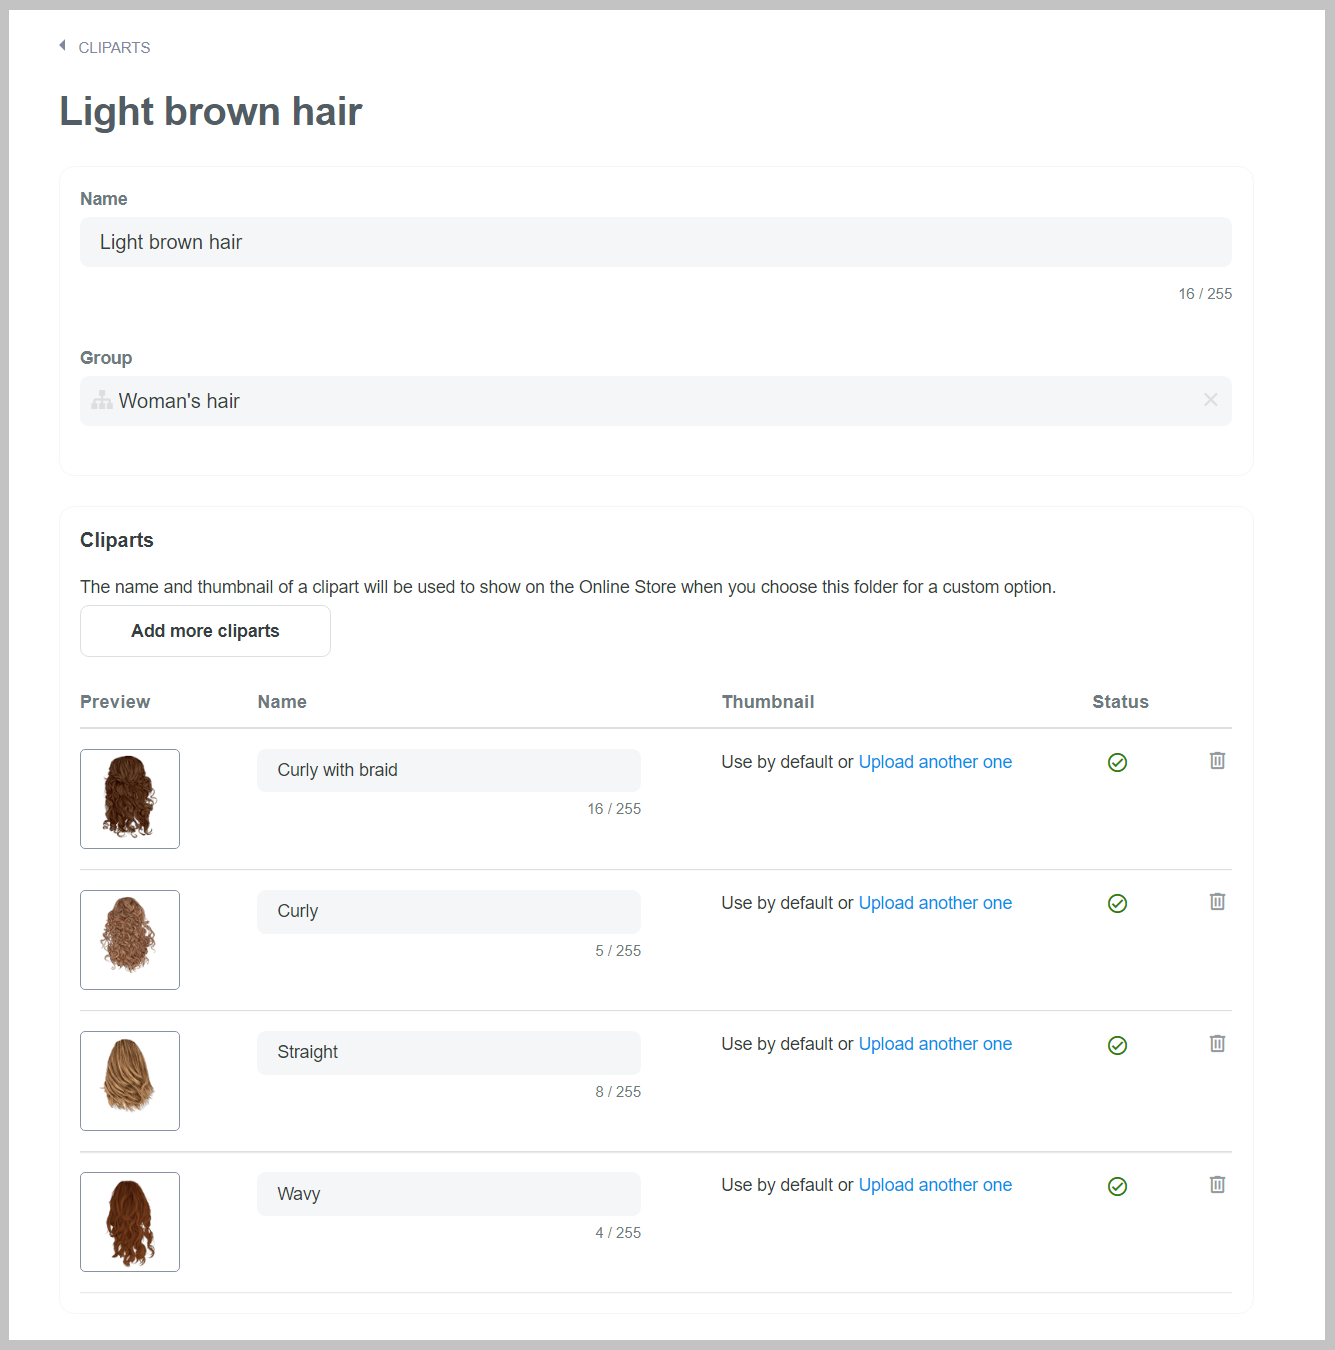
Woman's hair.
Woman's hair.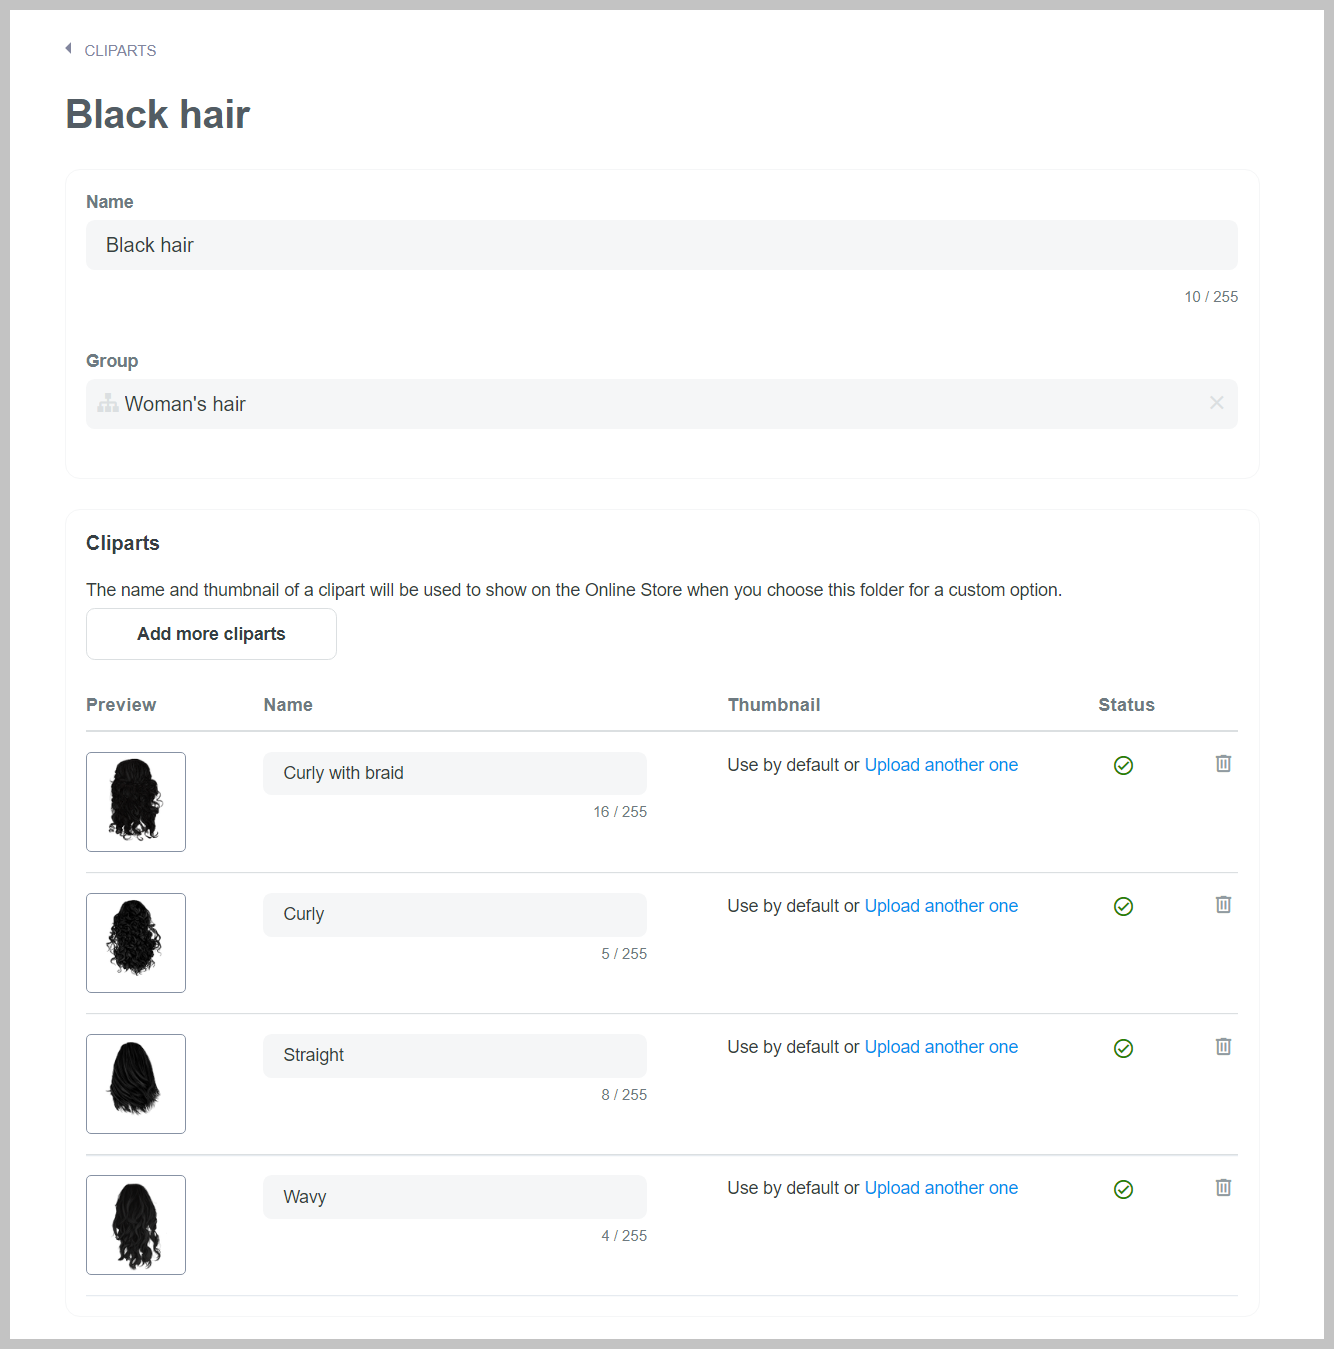
Man's hair.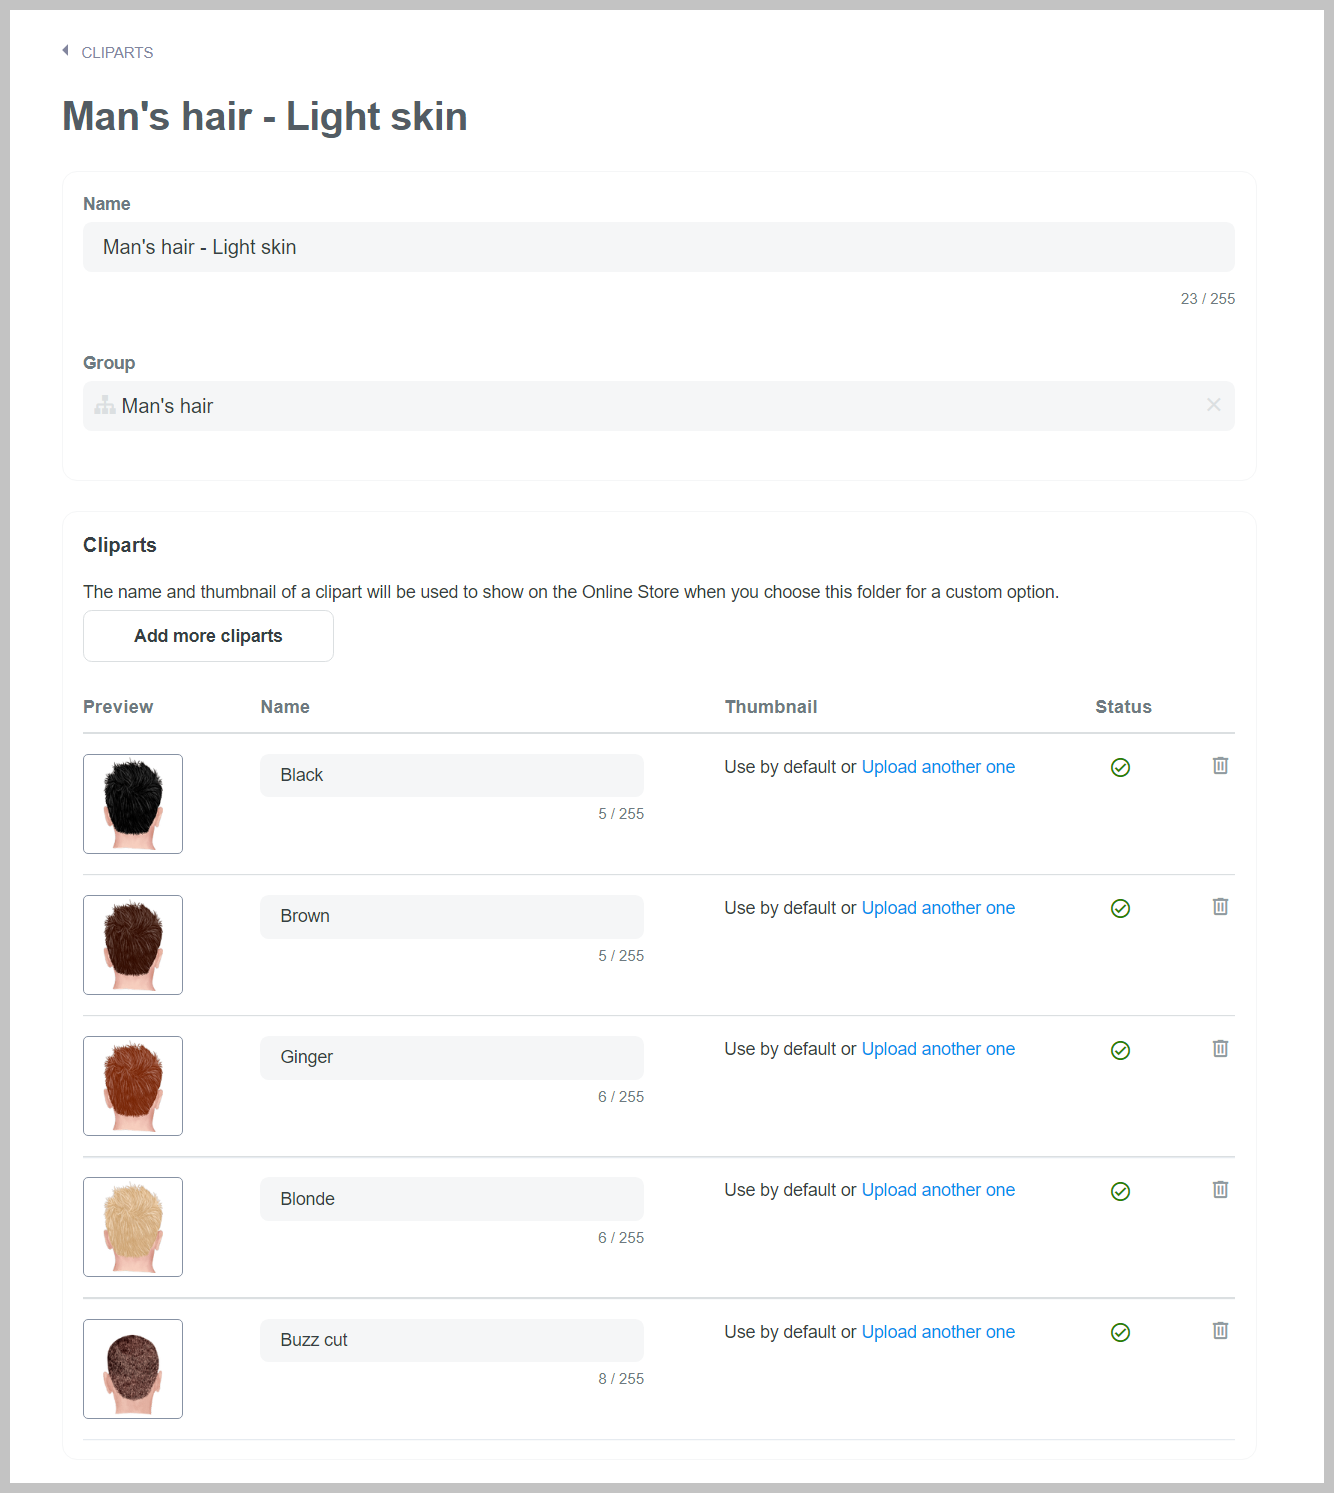
Man's hair.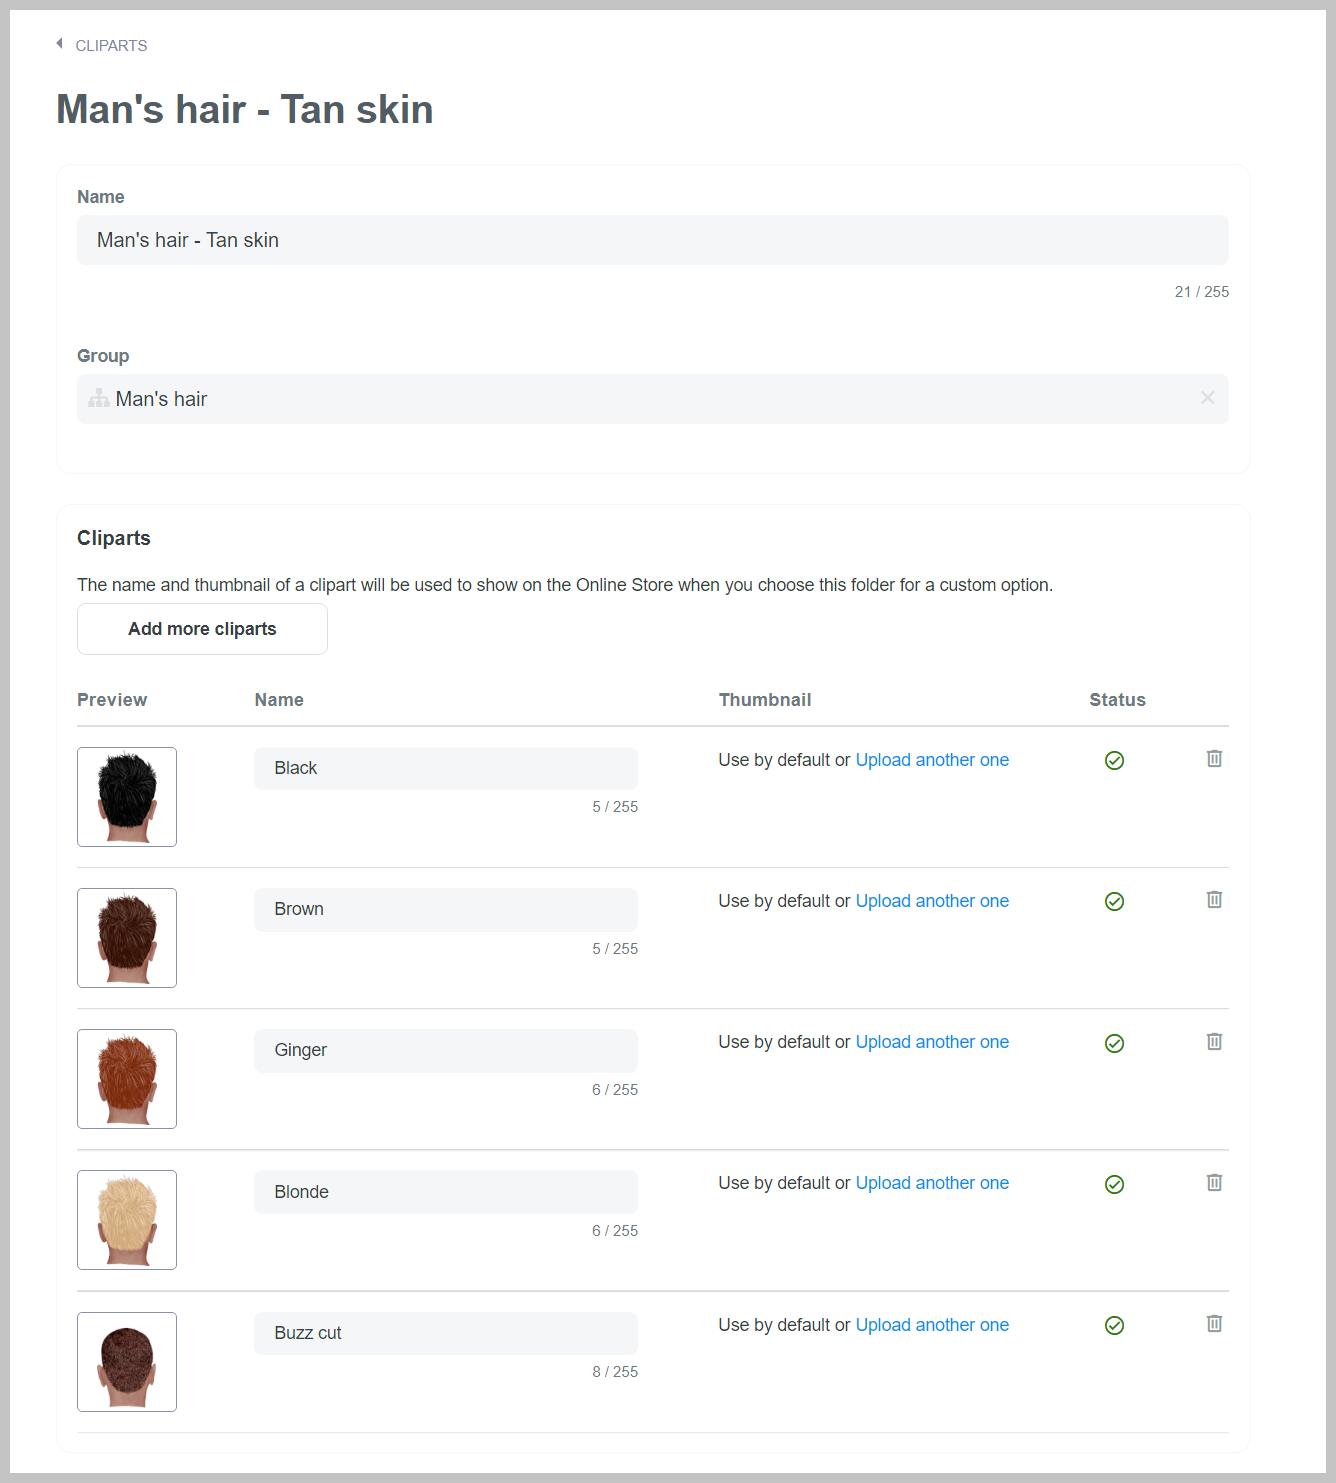
Man's hair.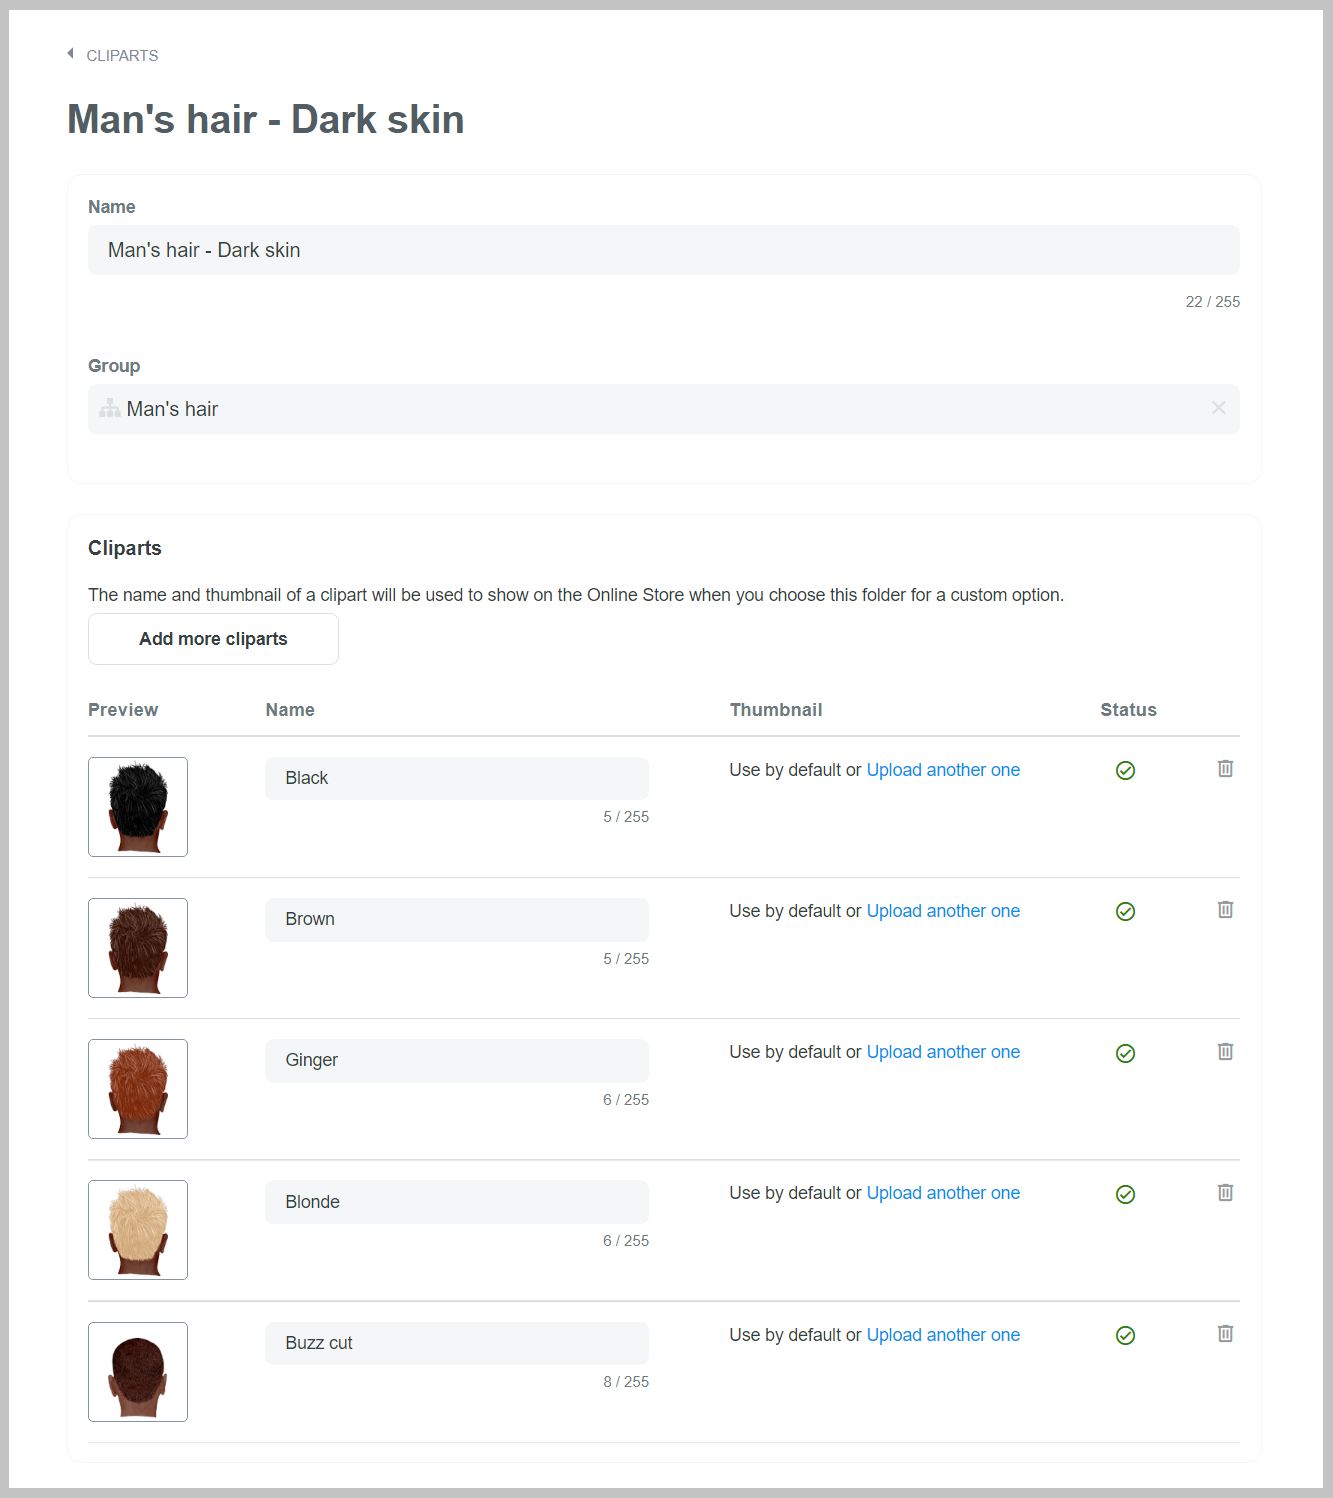
Please prepare accurate names for these files because they will be automatically displayed in your storefront.