For PrintBase orders of imported campaigns, you will need to upload the artwork for the ordered items before fulfilling them. In this article, we will guide you on how to upload artworks for campaigns in 2 ways:
Upload artwork from the order detail page.
Upload artwork from the campaign detail page.
In this article
A. Upload artwork from the order detail page
B. Upload artwork from the campaign detail page
C. Upload and edit your artwork design
A. Upload artwork from the order detail page
From your PrintBase admin, go to Orders > All orders.
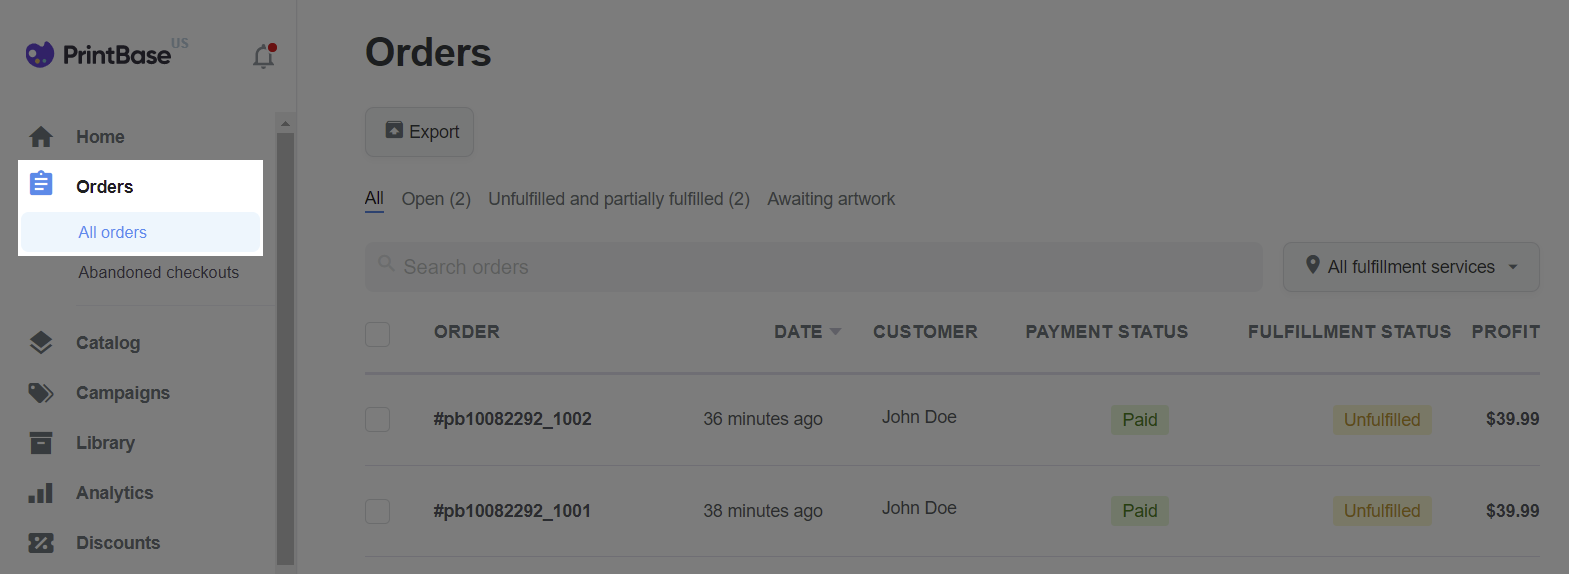
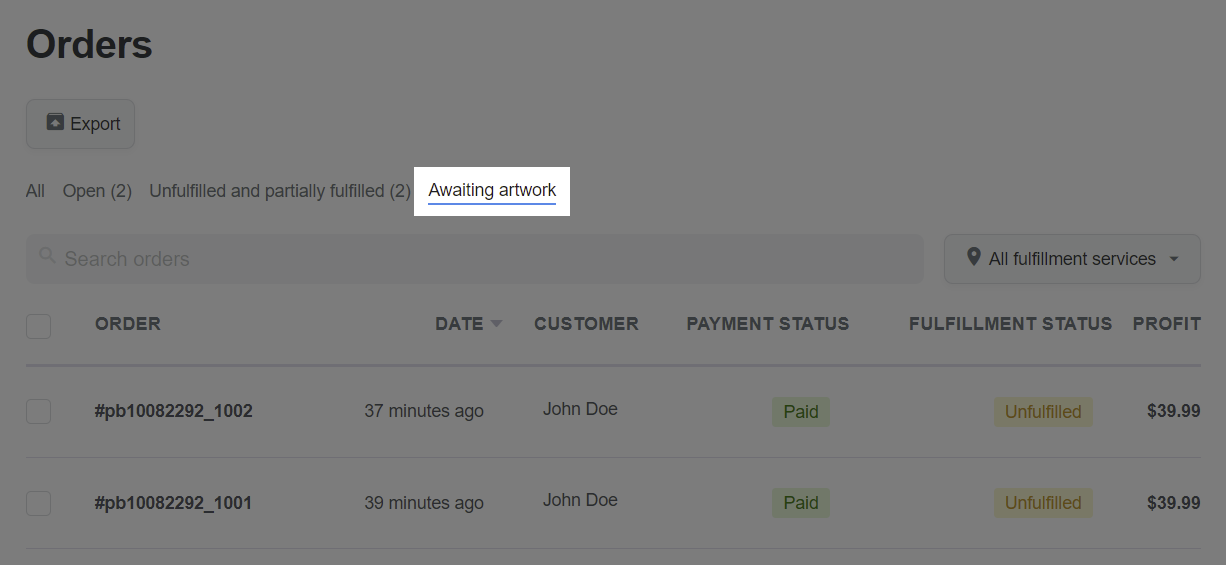
Click on the Awaiting artwork tab and select the order containing the ordered item you want to upload artwork for.
In the order detail page, click Upload artwork.
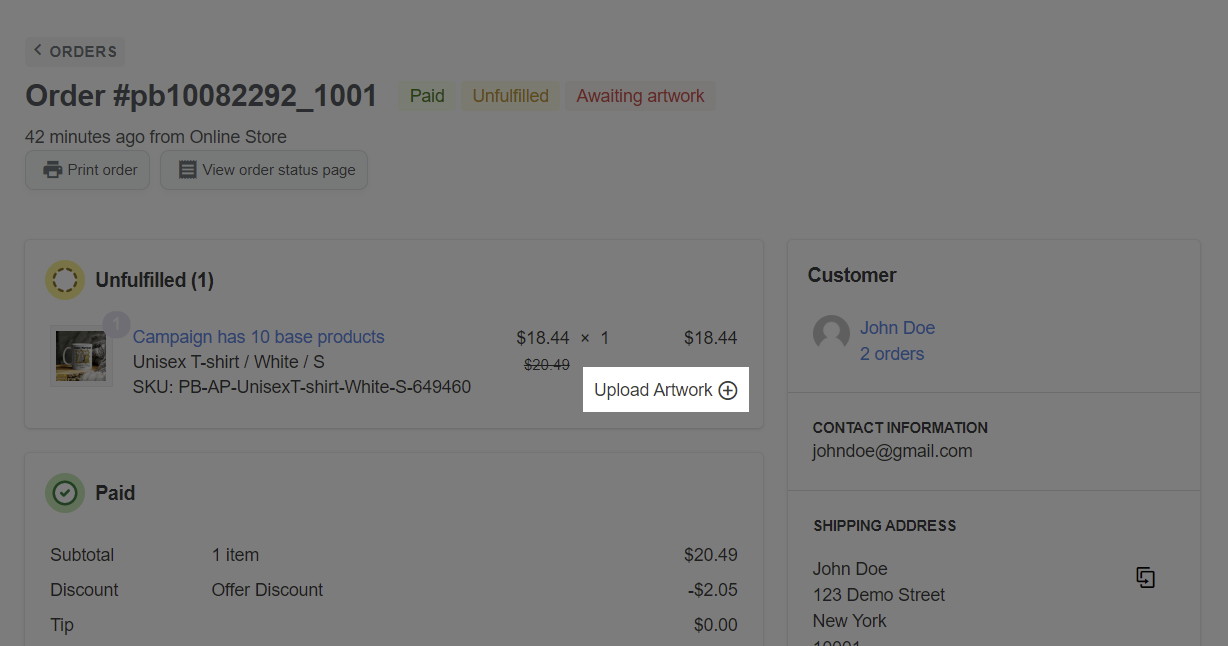
You can only upload artwork for items in imported campaigns.
In the campaign editor page, you can upload artwork for ordered items and other items in the campaign. You can refer to section C for more information on how to upload and edit your campaign's artwork.
For orders that contain items waiting for artwork to be uploaded, please upload the artwork within 36 hours following the order confirmation time. Read more: Policy for PrintBase's Sellers - Orders containing awaiting artwork items.
B. Upload artwork from the campaign detail page
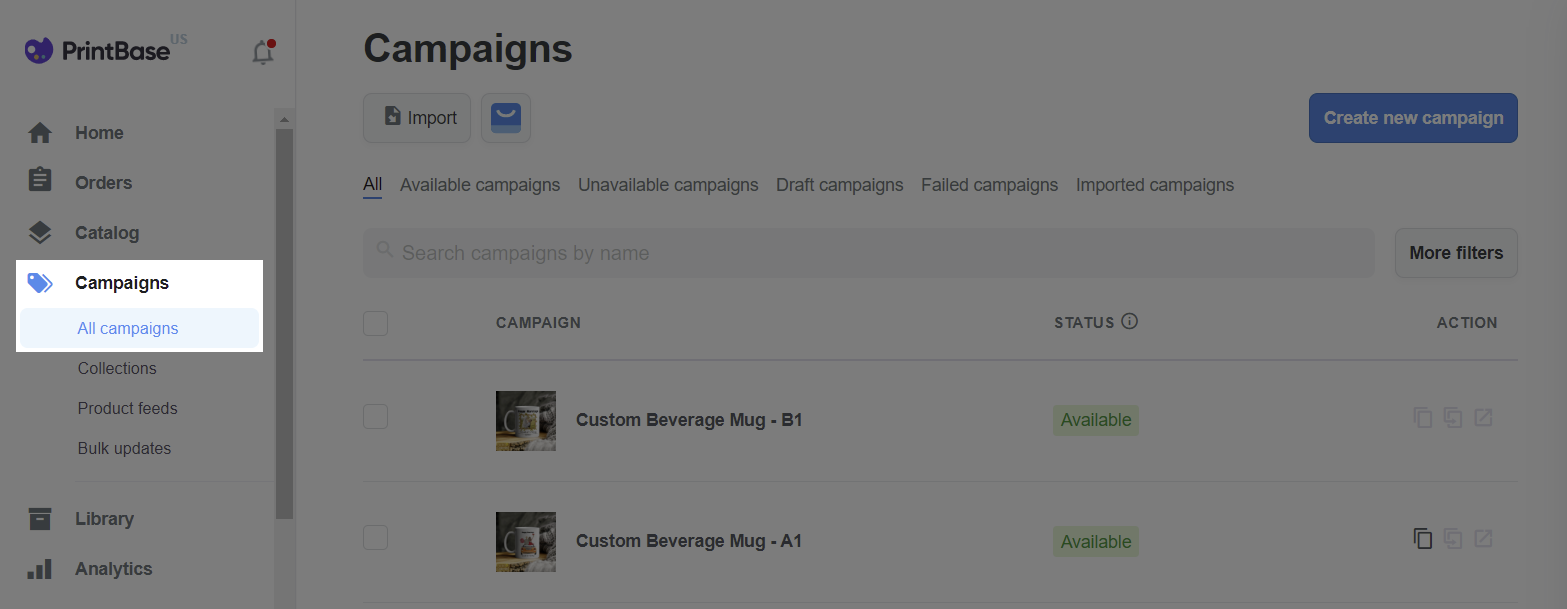
From your PrintBase admin, go to Campaigns > All campaigns.
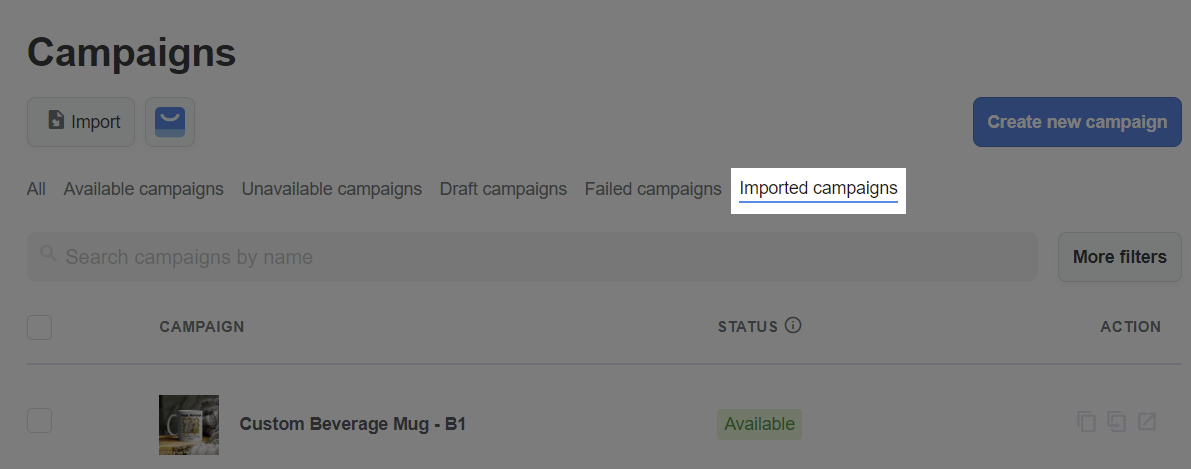
Click on the Imported Campaigns tab and select the campaign you want to upload artwork for.
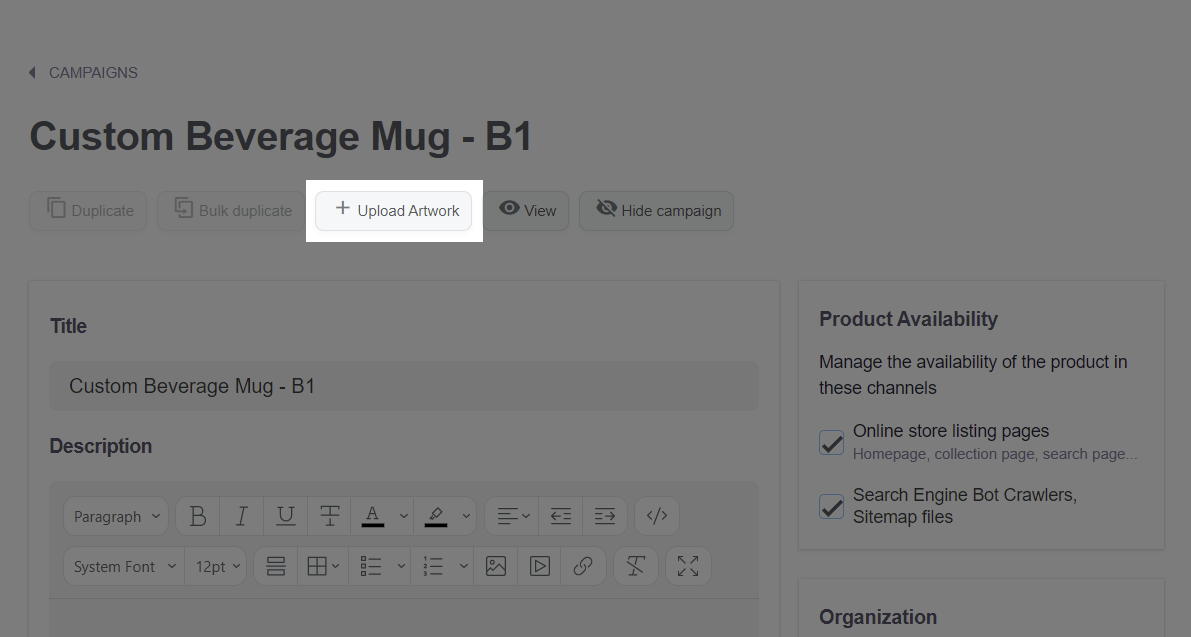
In the campaign detail page, click Upload artwork.
In the campaign editor page, you can upload artwork for any base product item. You can refer to section C for more information on how to upload and edit your campaign's artwork.

C. Upload and edit your artwork design
Prepare all necessary files.
Before creating a campaign, you should prepare all necessary artwork files that will be printed on the product. PrintBase allow sellers to create product designs by uploading multiple image files (image layers), and adding multiple layers of texts (text layers).
Supported image file formats: .PNG, .JPG, .JPEG, and .PSD.
Supported color mode: RGB.
Please visit this link to download our resource package for a simple personalized campaign. In this resource package, you could find the sample assets as follows:
A .PSD file for the template artwork used in this article.
Font files for text personalization.
.PNG files to picture choice personalization.
These files can be named upon your preference, however, simple names will be easily remembered and customized.
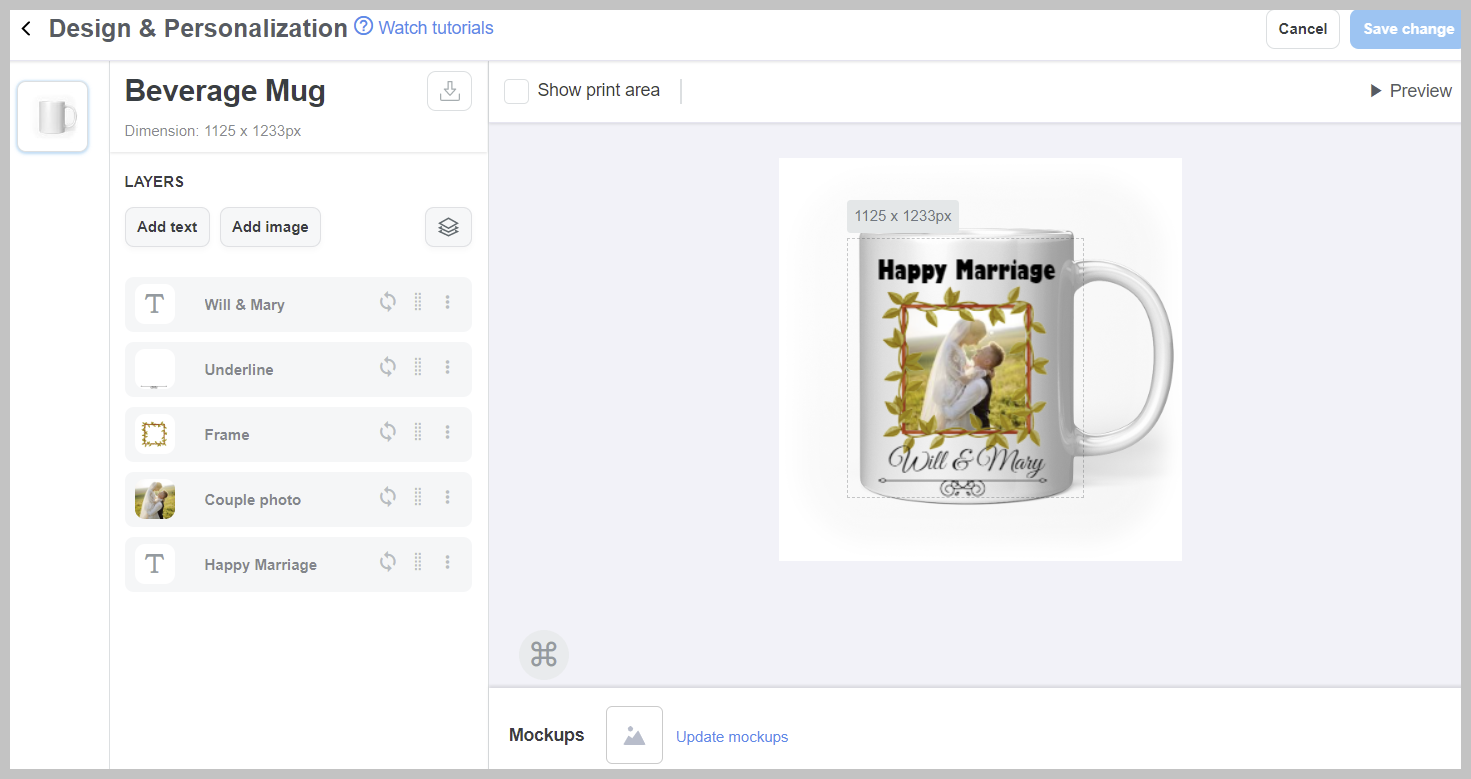
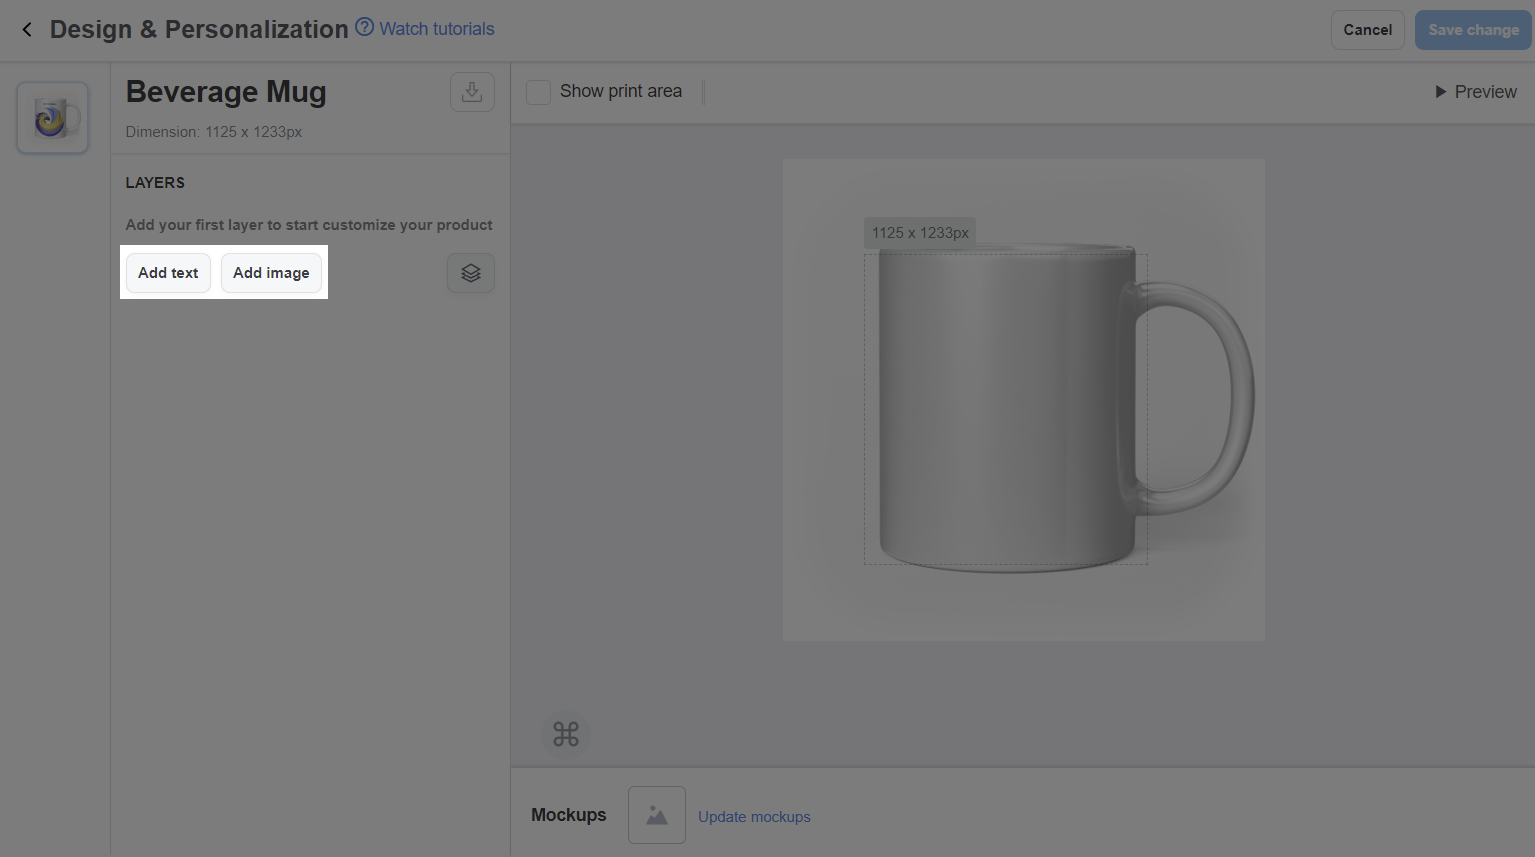
Next, you can add text or image layer to your product's artwork by clicking Add text or Add image in Layers.
Designs need to follow the dimension and template of your desired products.
You can combine layers into different groups to easily organize and manage them, as well as to create campaigns with multiple design versions for your customers to choose from. Please refer to this article for more information about layer groups.
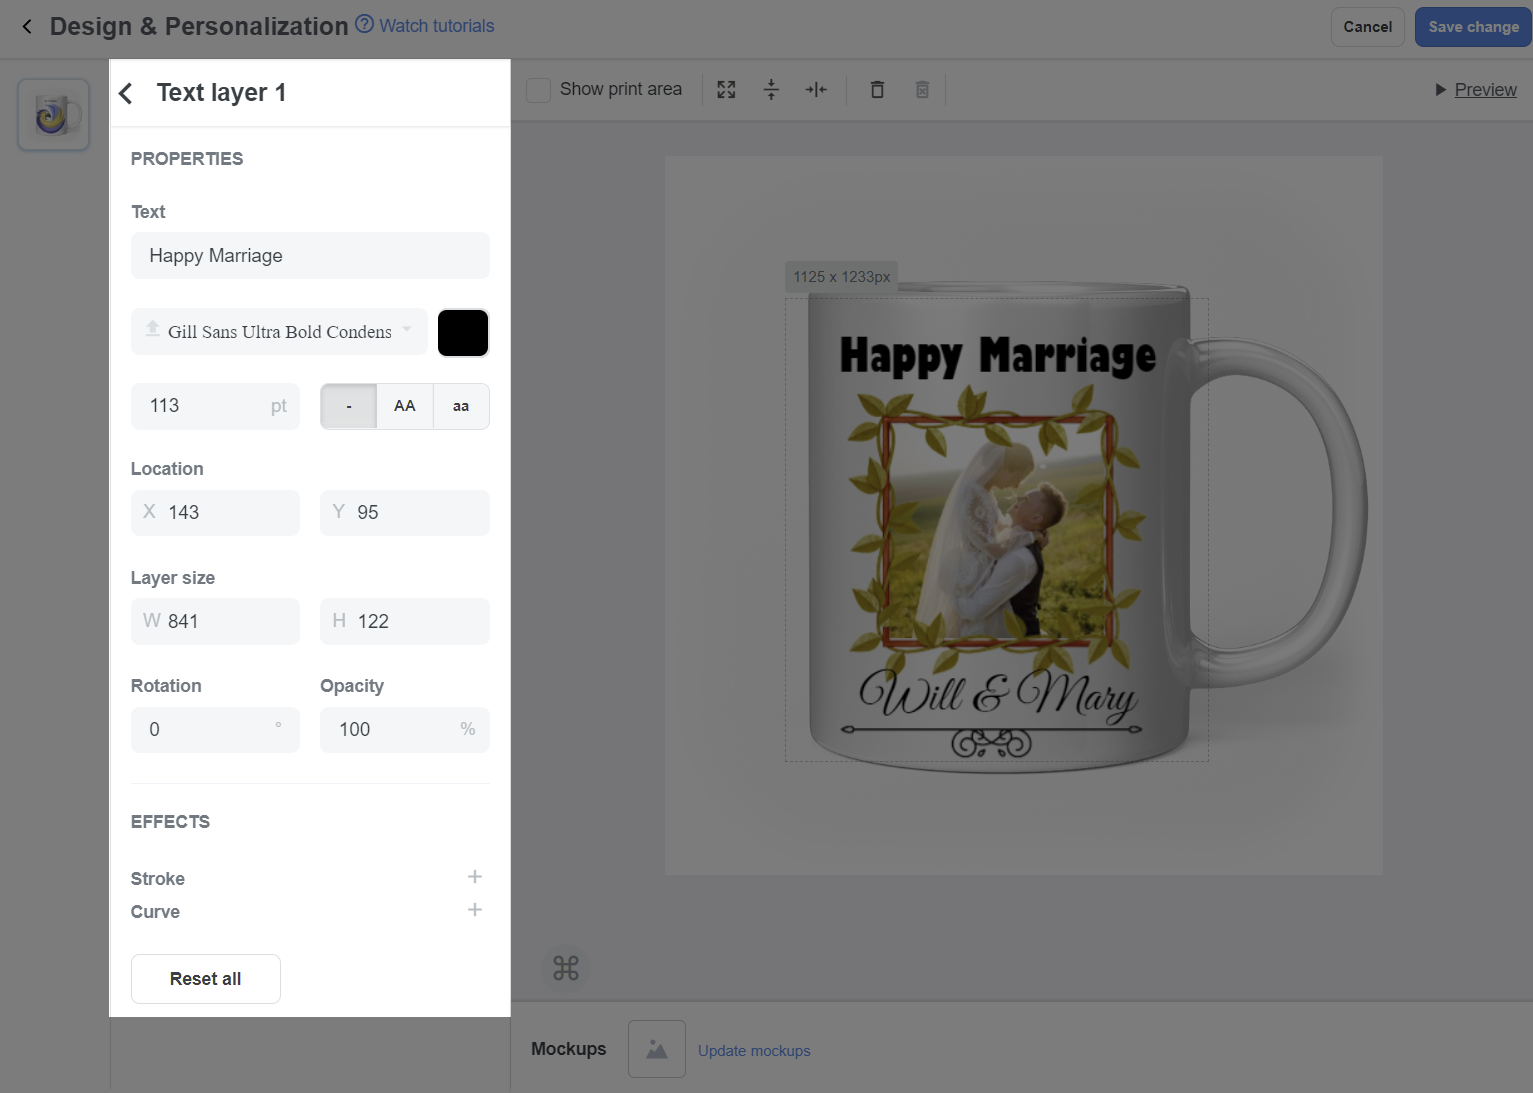
Click the Text layer to edit Text, Font, Size, Color, Letter case, Location, Rotation, Opacity.
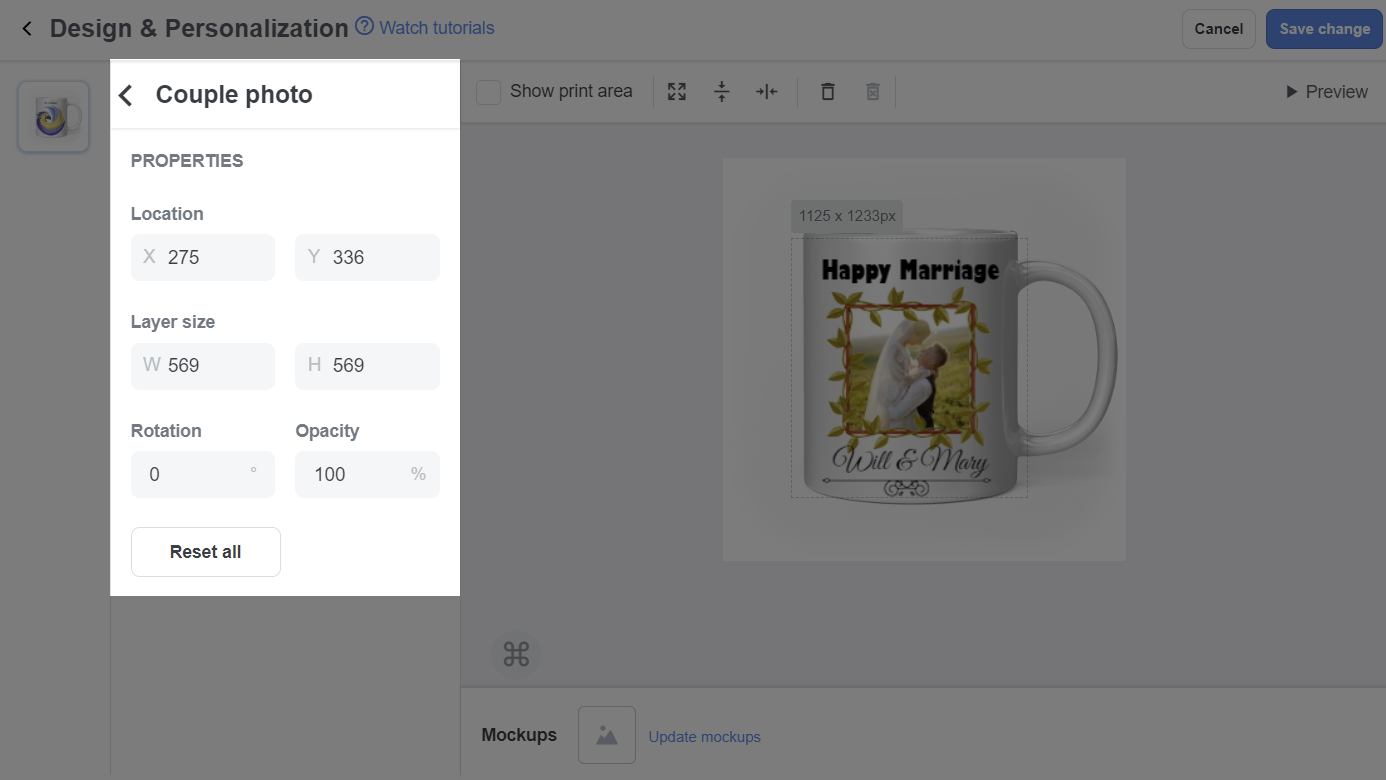
Click the Image layer to edit the uploaded artwork in terms of Location, Size, Opacity, etc. of each artwork.
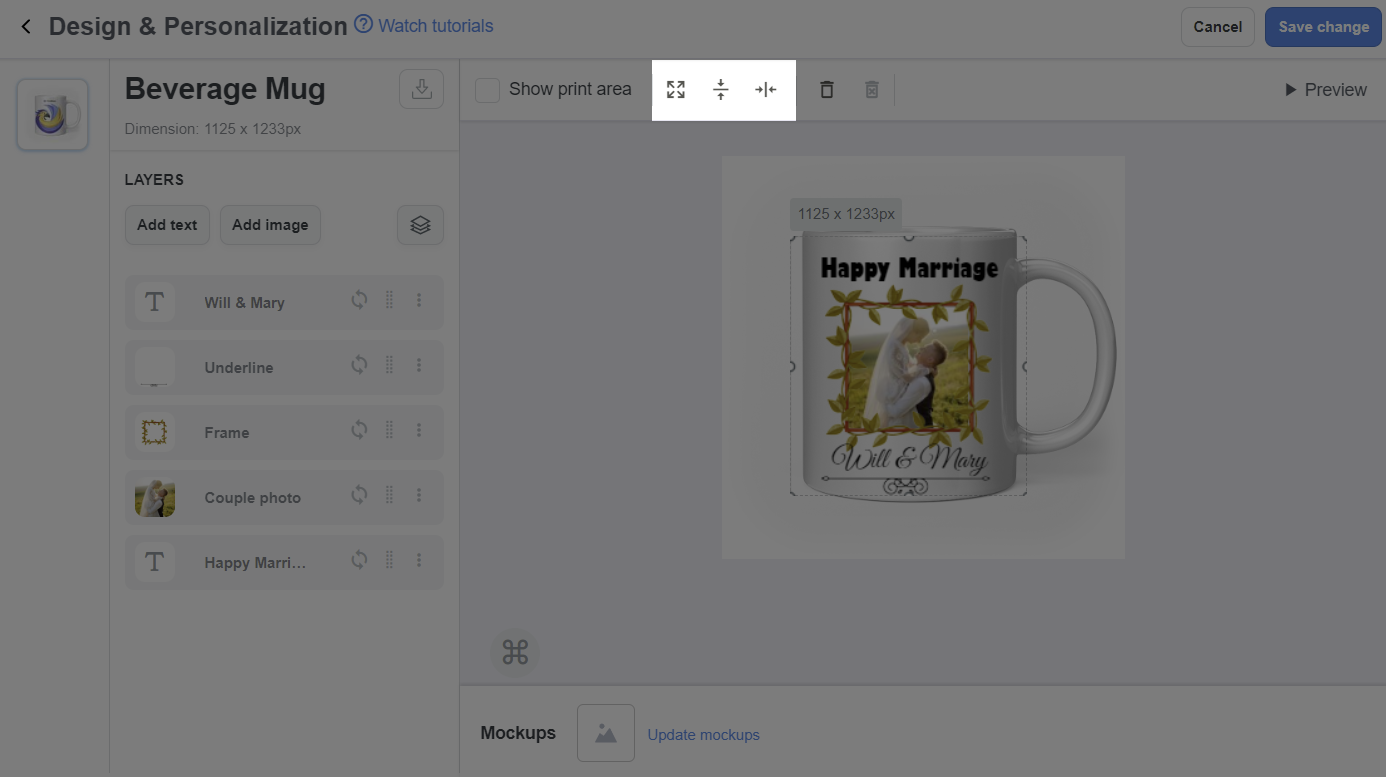
In case you want to align the layers so they are balanced and look better in the print area, choose among Scale to fit, Center vertically, and Center horizontally buttons as shown below. When you click Scale to fit, the Layer will be aligned to be in the print area, in the middle of the center area, meeting DPI requirements of the product (usually 150 DPI). When Center vertically is clicked, the layer will be horizontally centered. When Center horizontally is clicked, the layer will be vertically centered.
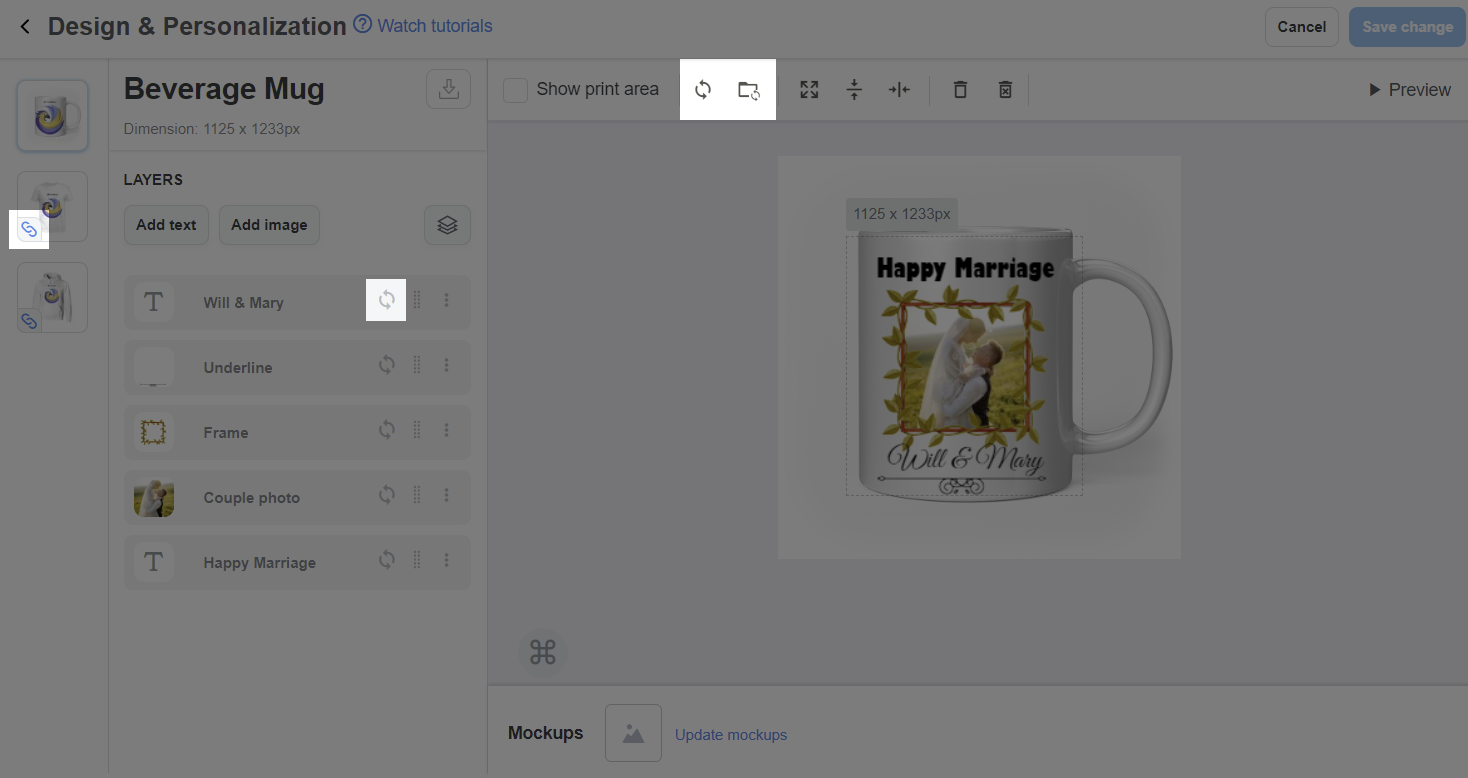
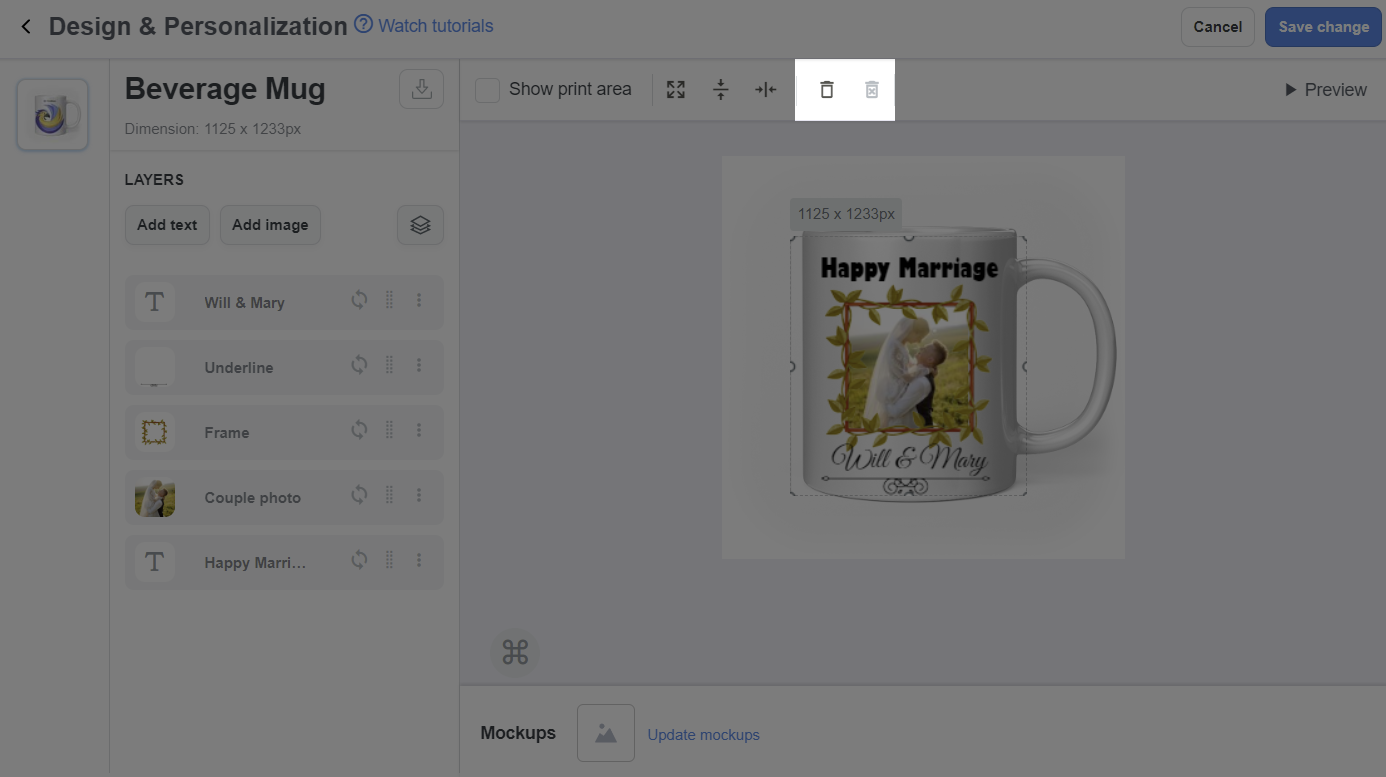
If you want to delete a layer, select that layer and click on the trash can button as shown below: the trash can button on the left to delete the layer on the product and the trash can button on the right to delete the layer on all products.
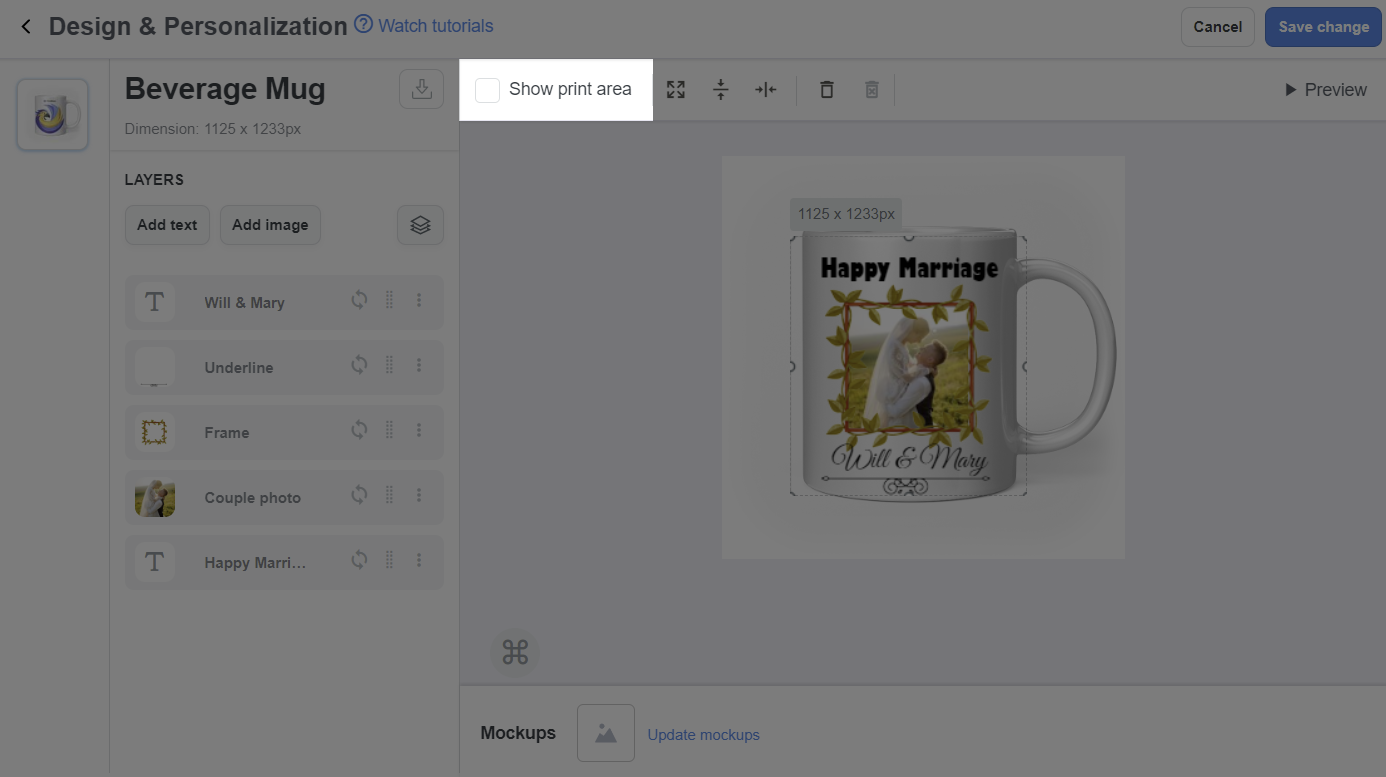
Tick Show print area to check if your design is compatible with the print area.
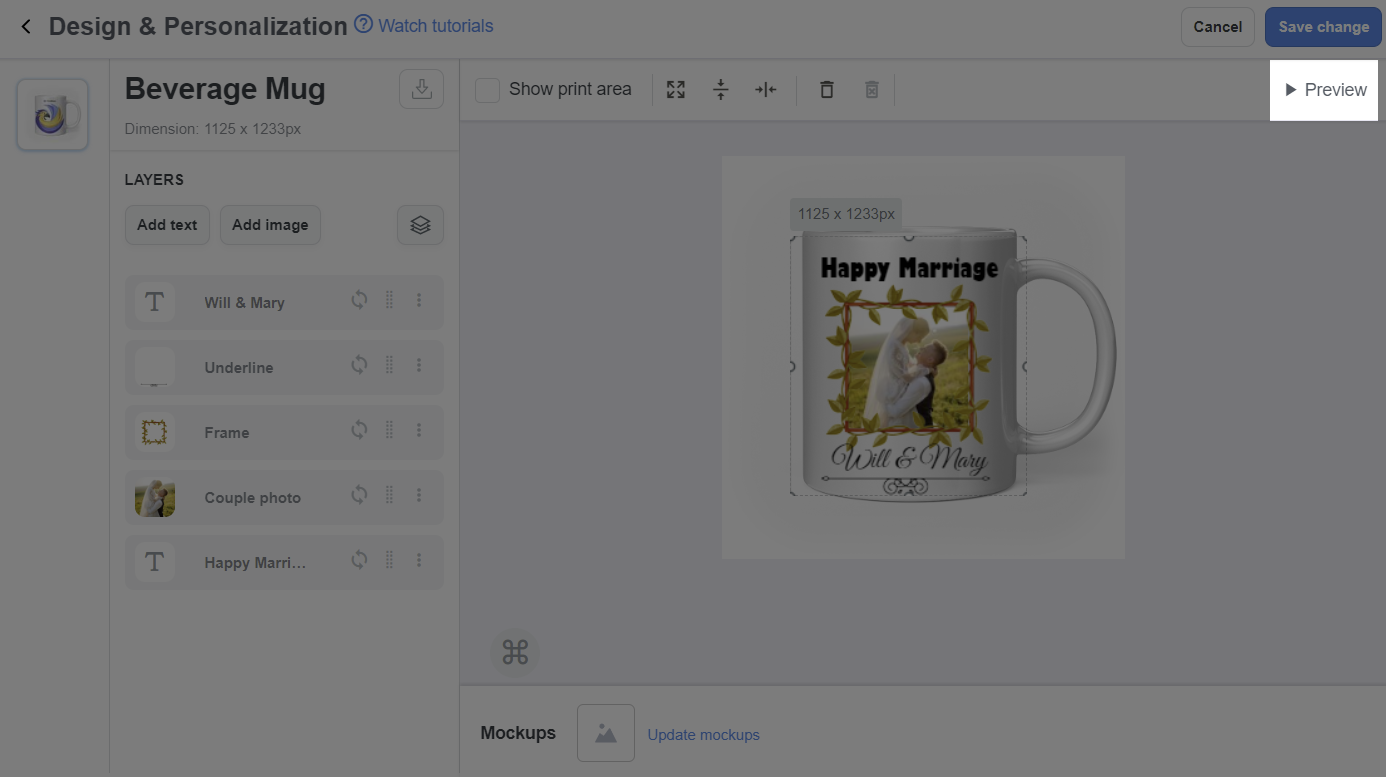
Click Preview to see the mockup for your product.
Click Save changes to save the artwork. The artwork will be uploaded for all unfulfilled orders with corresponding items.
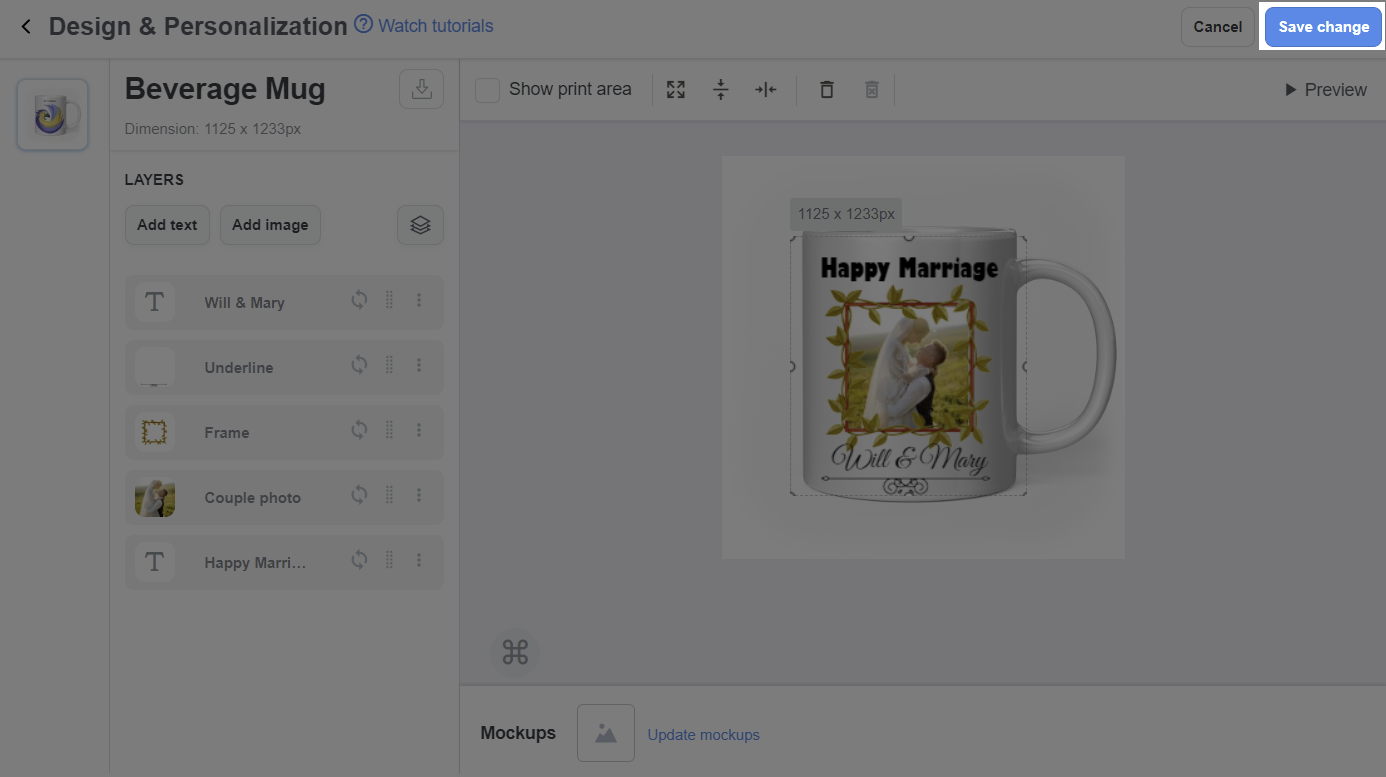
After uploading artwork for the campaign, you can update the artwork and the changes will be automatically applied for all unfulfilled orders.
Related articles