Track Google Ads Conversions with ShopBase
When using Google Ads, you may want to see detailed analysis of your ads to see if visitors from the ad took any certain action or purchased anything. With ShopBase, you can track your customers' buying behavior using Conversion ID and Conversion Label. The setup instructions below will work best with Purchase tracking.
In this article
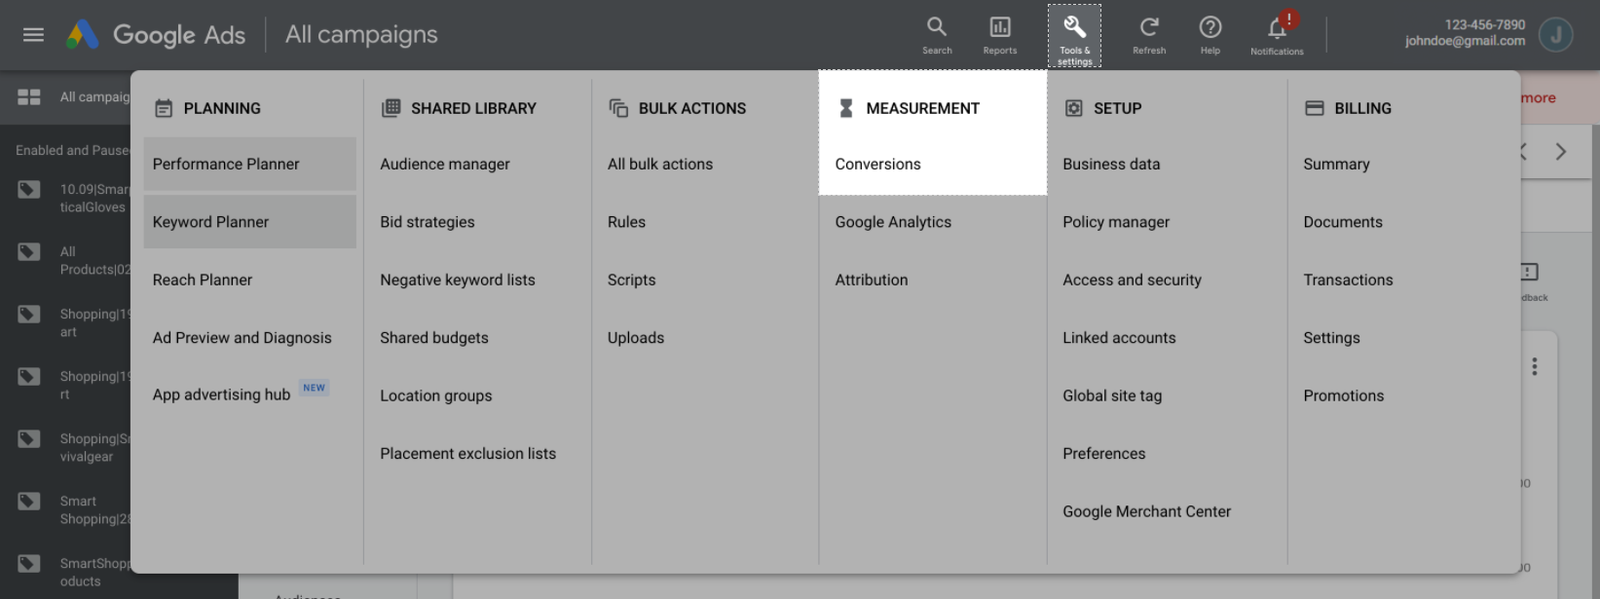
A. Create conversion ID and conversion label from Google Ads
B. Connect Google Ads Conversion and set up Google Dynamic Remarketing on ShopBase store
A. Create conversion ID and conversion label from Google Ads
You need a Google Ads account to use this tracking feature. If you don't already have one, please visit this link to sign up with Google Ads.
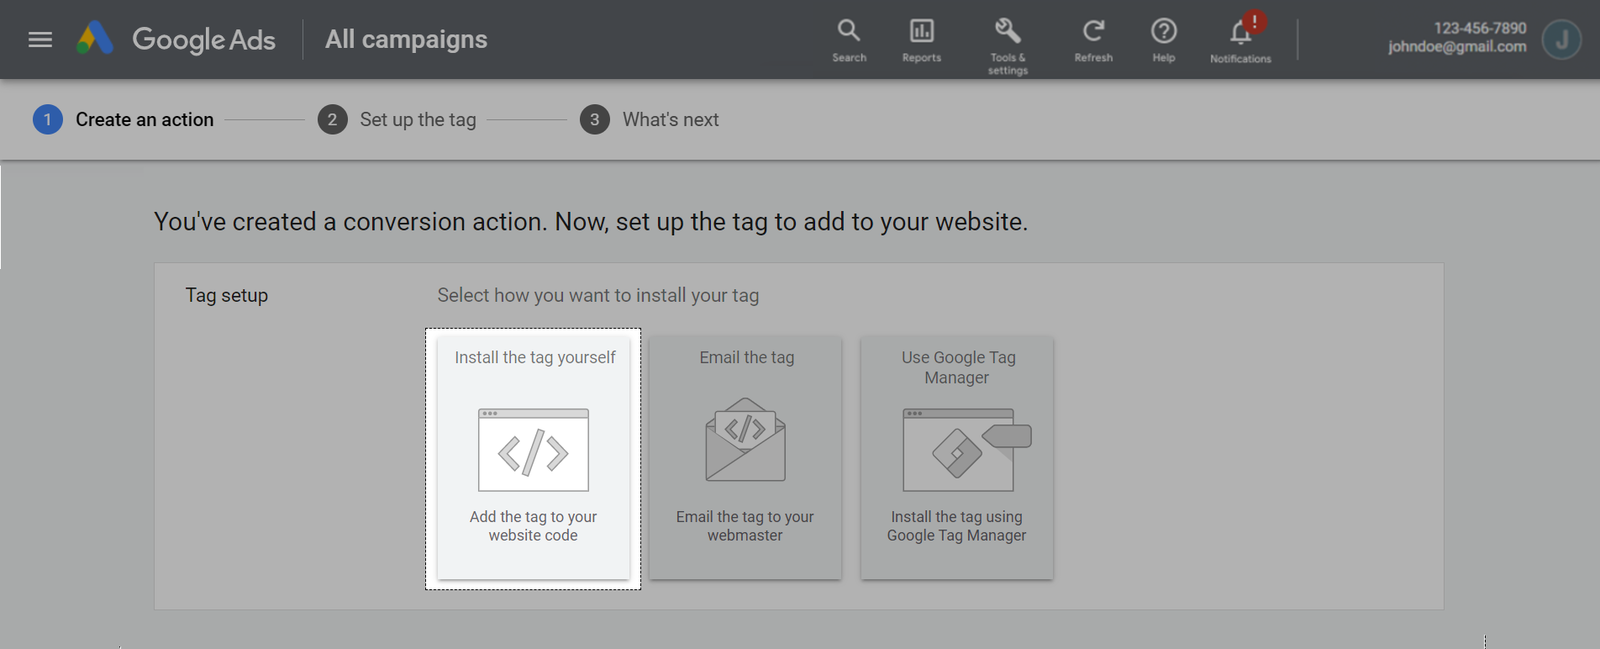
Click Create and continue.

Choose Global site tag: The global site tag isn't installed on all your HTML pages
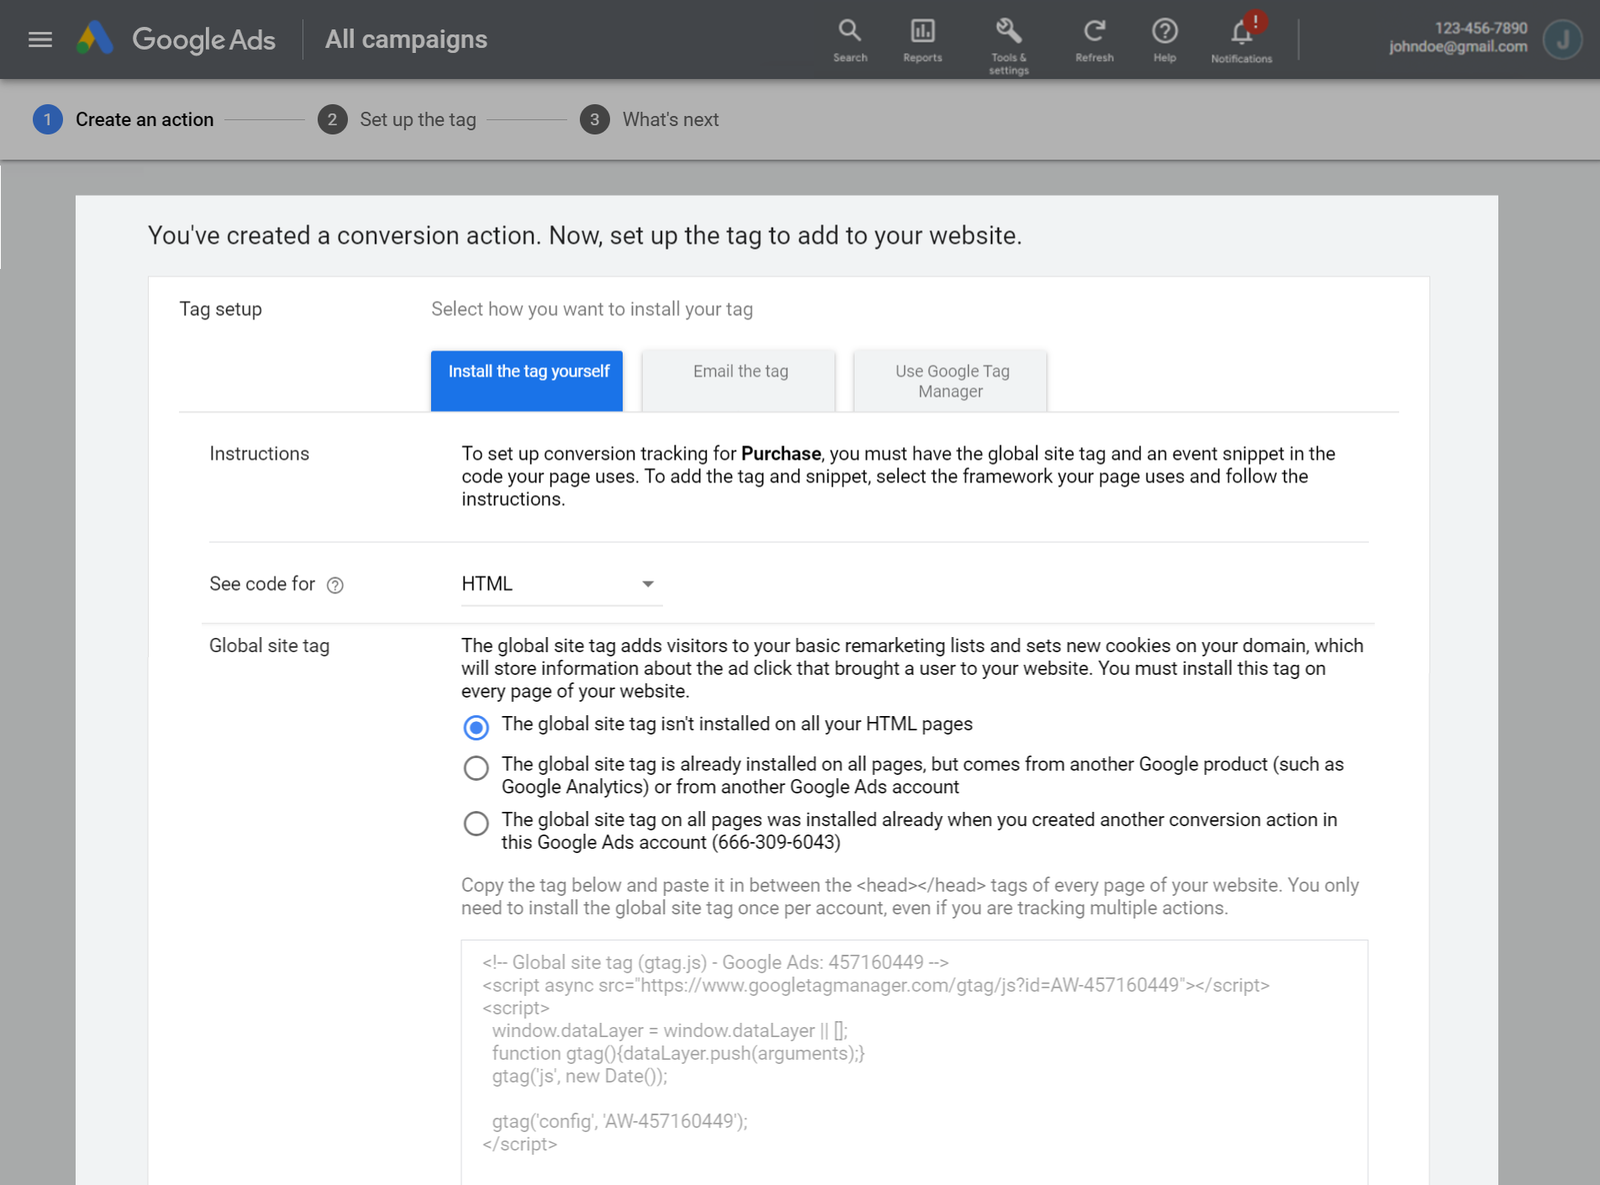
Choose Event snippet: Page load.
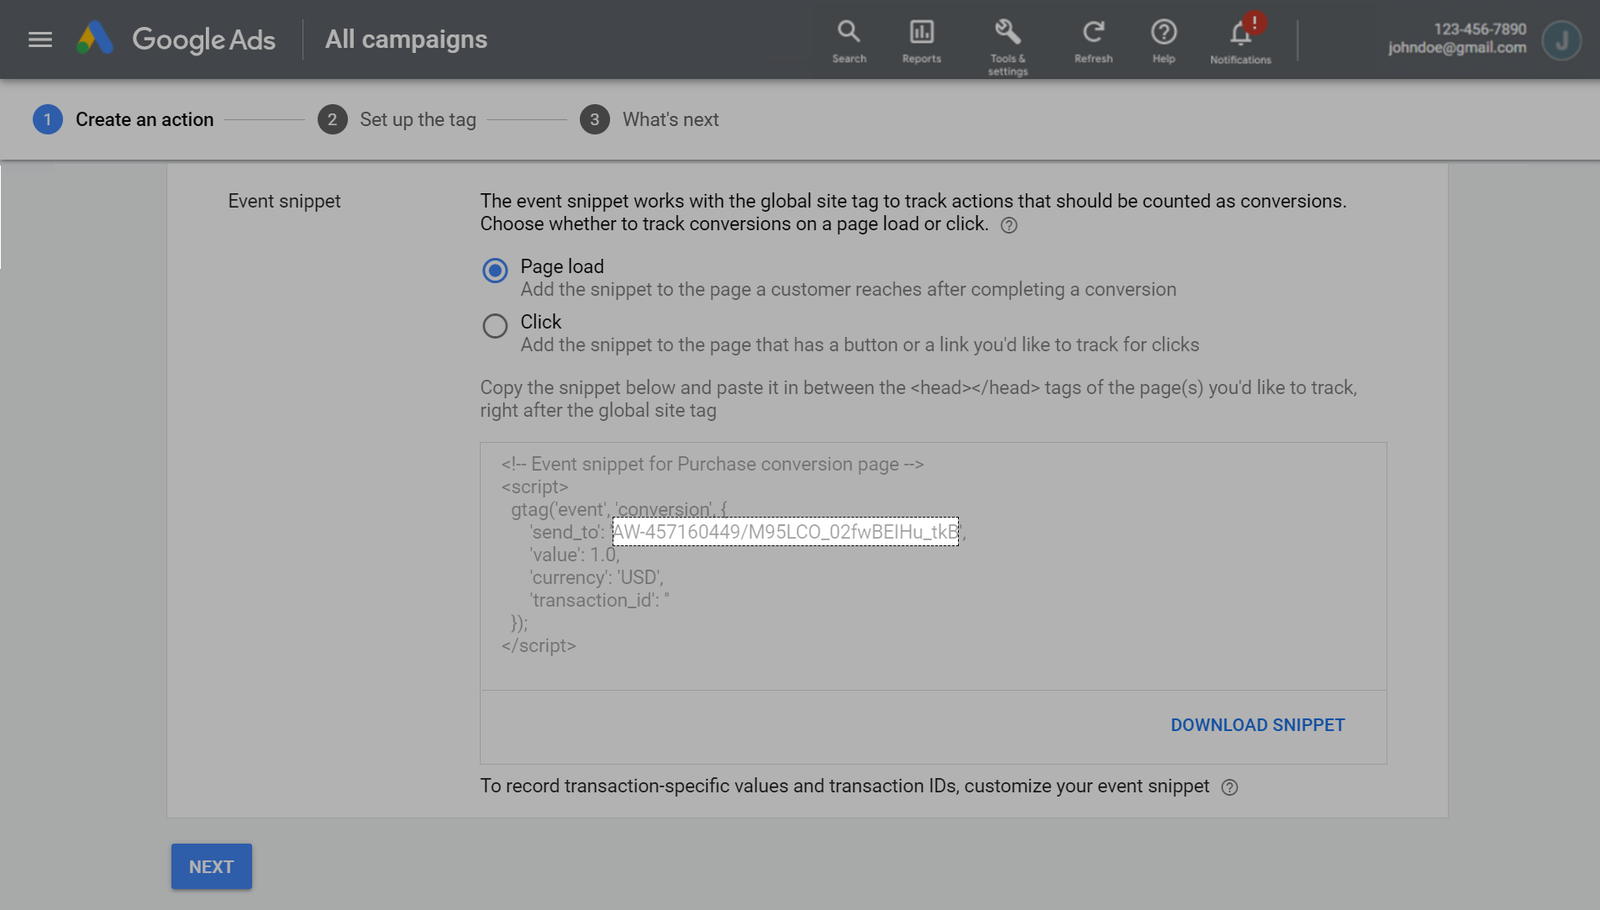
As you can see from the above image, the conversion tracking code and conversion tracking label will appear in the "Event snippet" section, after "send_to". Please copy it to use in later steps. The example in the above case is:
Google Ads will only count conversion if the customer makes a purchase after clicking on your Google ad link.
B. Connect Google Ads Conversion and set up Google Dynamic Remarketing on ShopBase store
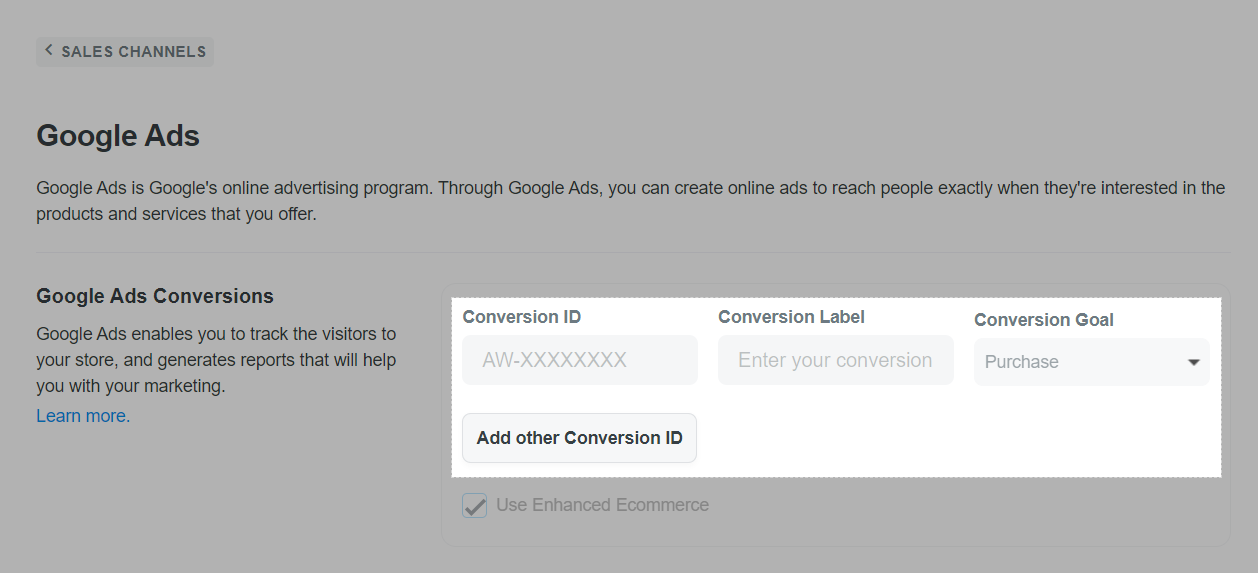
Enhanced Ecommerce is automatically applied for all stores connecting to Google Ads.
Currently, ShopBase supports 4 conversion goals: View product page, Add to cart, Begin checkout, and Purchase. By default, your conversion goal is set to Purchase.
By default, Google Dynamic Remarketing is enabled whenever Conversion is added to your store. Please refer to this article on how to set up Google Dynamic Remarketing on ShopBase.
Because of the relatively significant amount of data sent to Google Ads, a difference of roughly 5-10% may occur in some cases. This difference is permissible when integrating a third-party tool into ShopBase.