Create and edit Popup in Website Builder
You can create a Popup in the Website Builder and customize it to display sales promotion announcements or business activity announcements such as holidays.
A. Create a Popup
B. Edit Popup
There are two ways to create a popup.
Go to Insert Panel (the + button) > Search Popup > Drag Popup to the desired position.
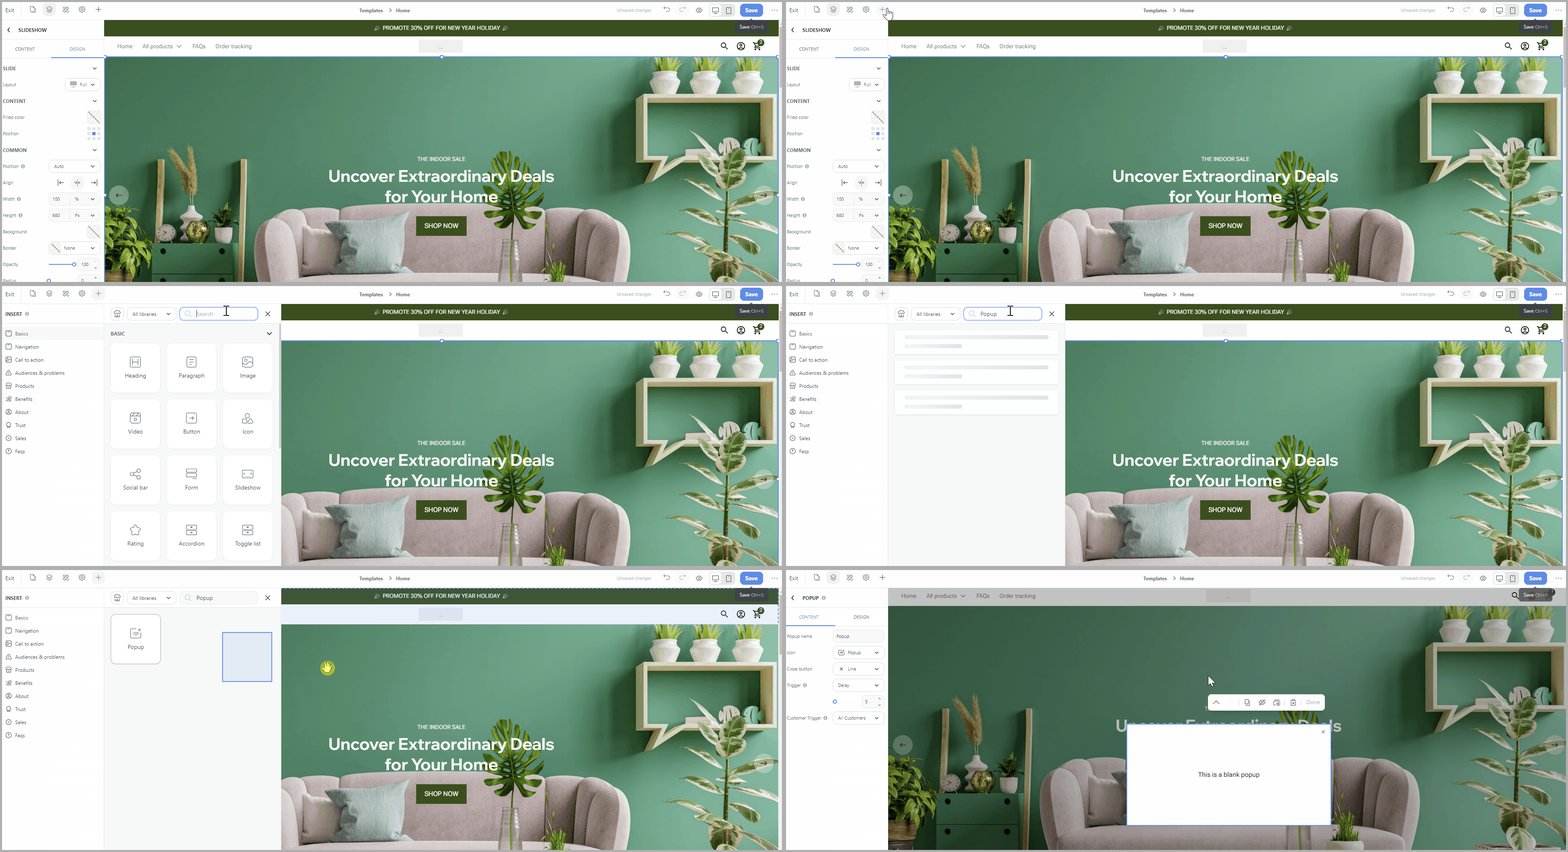
Go to Insert Panel > Use a Popup template. (Update soon).
Click the Popup to edit its Content and Design.
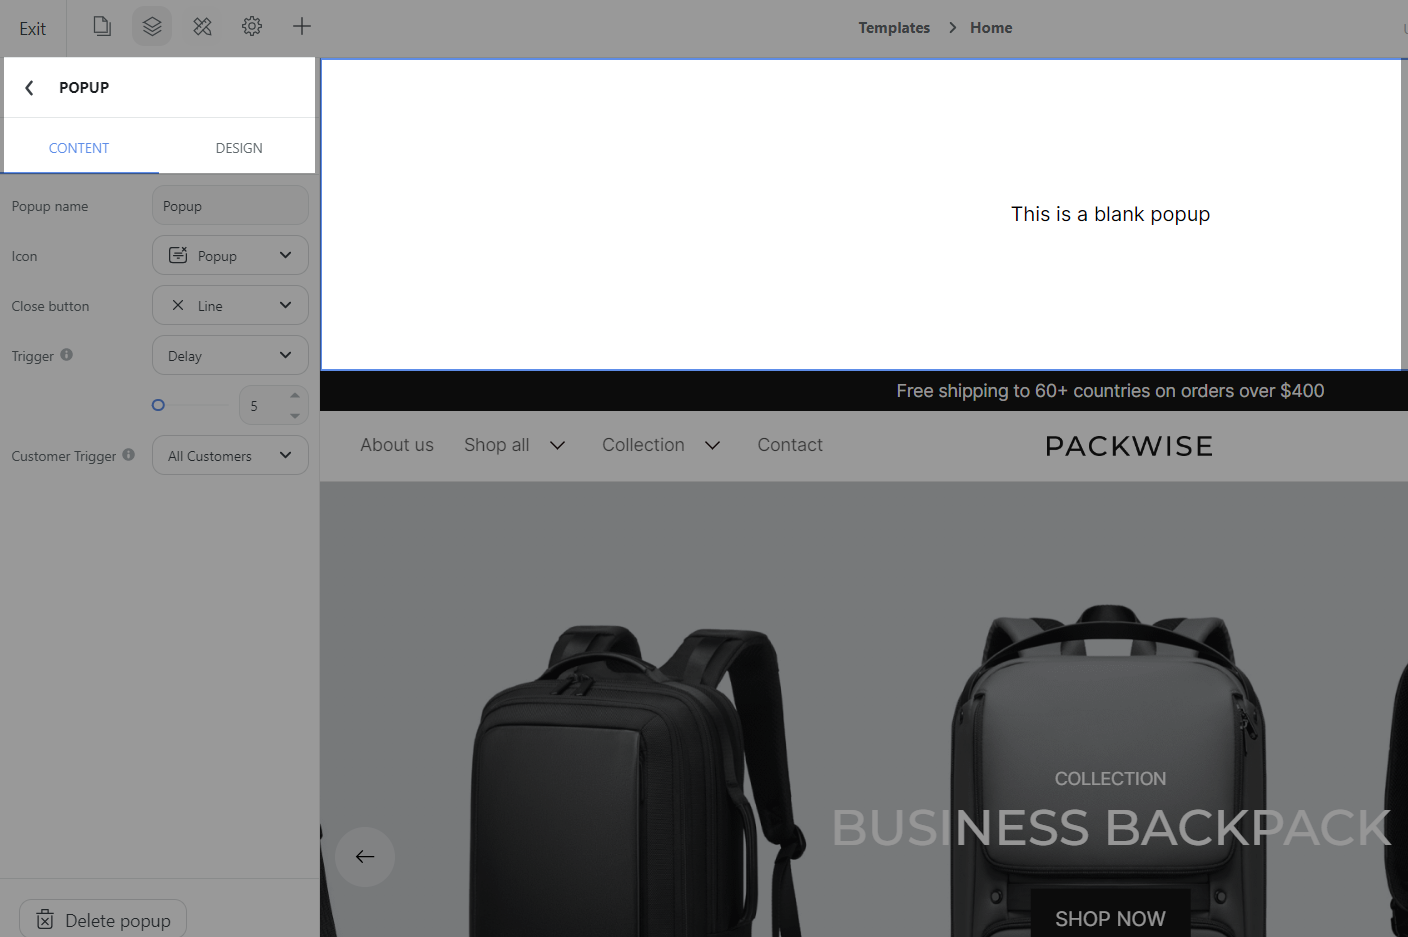
Content
1.1 Edit Popup name and icon
Popup name and icon help you to easily seach Popup the Layers panel. Popup name is also set up to trigger turning on Popup by using button.
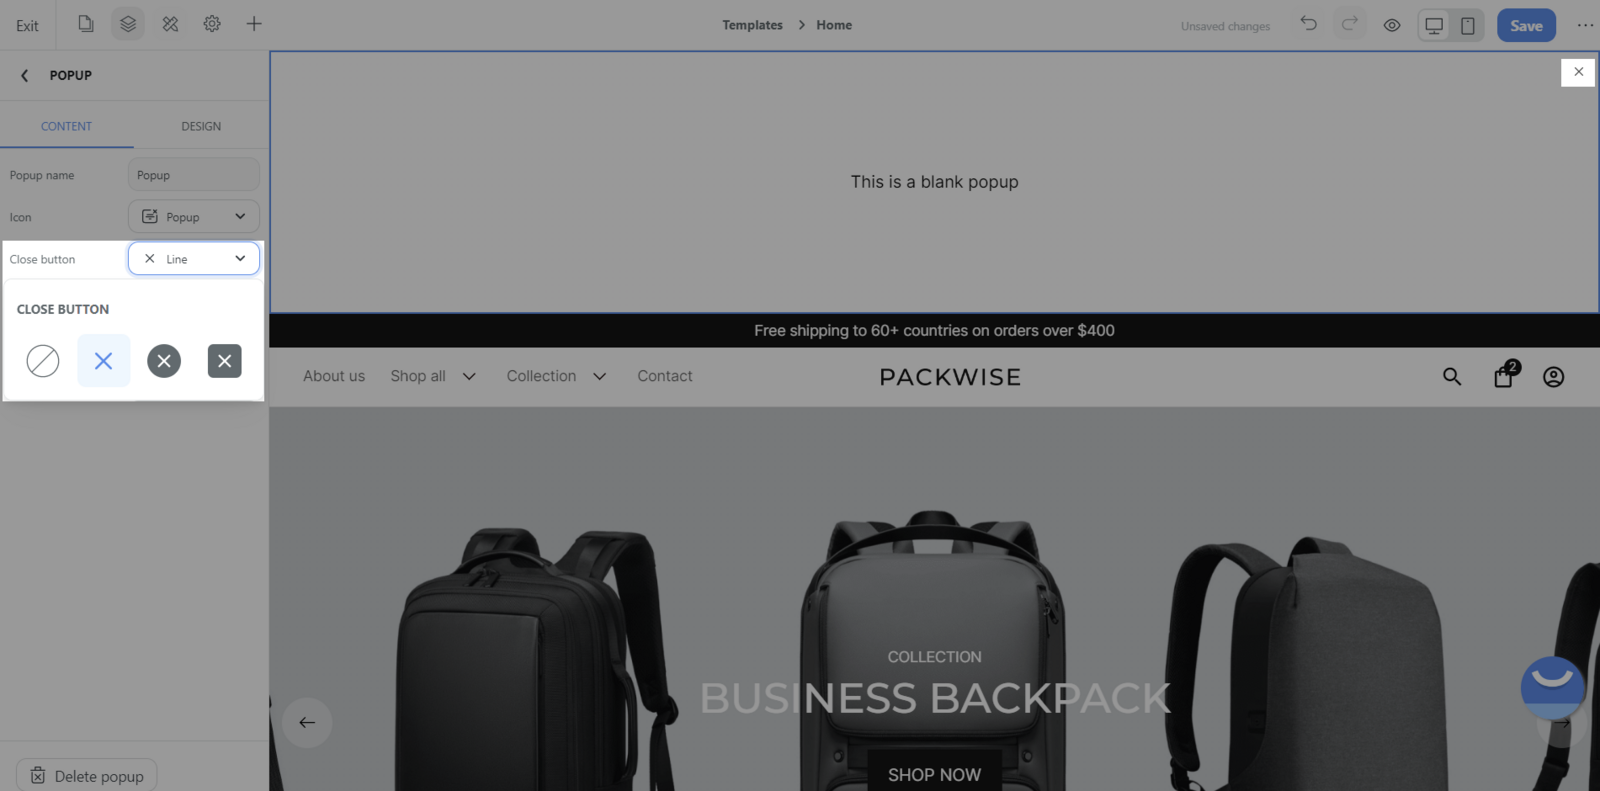
1.2. Close button
There are 3 styles of Close button: Line, Ellipse, Rectangle or None to hide Close button.
1.3. Trigger
There are 4 conditions to open the Popup: Delay, Page scroll, Exit intent, Mouse click.
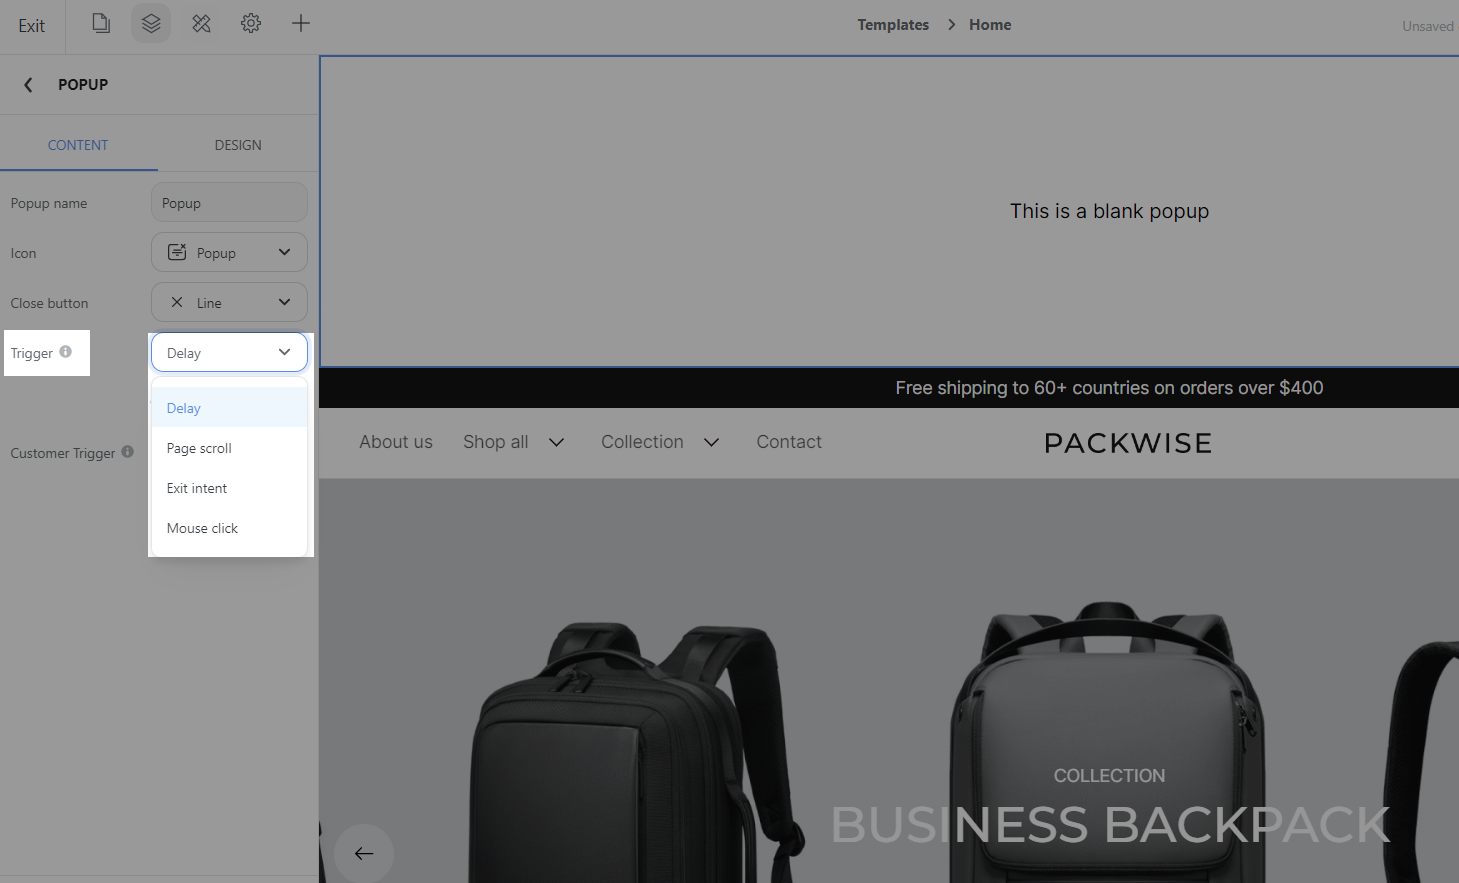
Delay: The time Popup appears after the page has finished loading for x seconds.
Page scroll: Popup appears when customers scroll down the page by x percent.
Exit intent: Popup appears when customers leave the page.
Mouse click: Popup appears when customers clicks on a button or link.
The Block button will be triggered as Open a pop-up action and you can choose the name of the Popup.
1.4. Customer Trigger
There are 3 types of Customer Trigger.
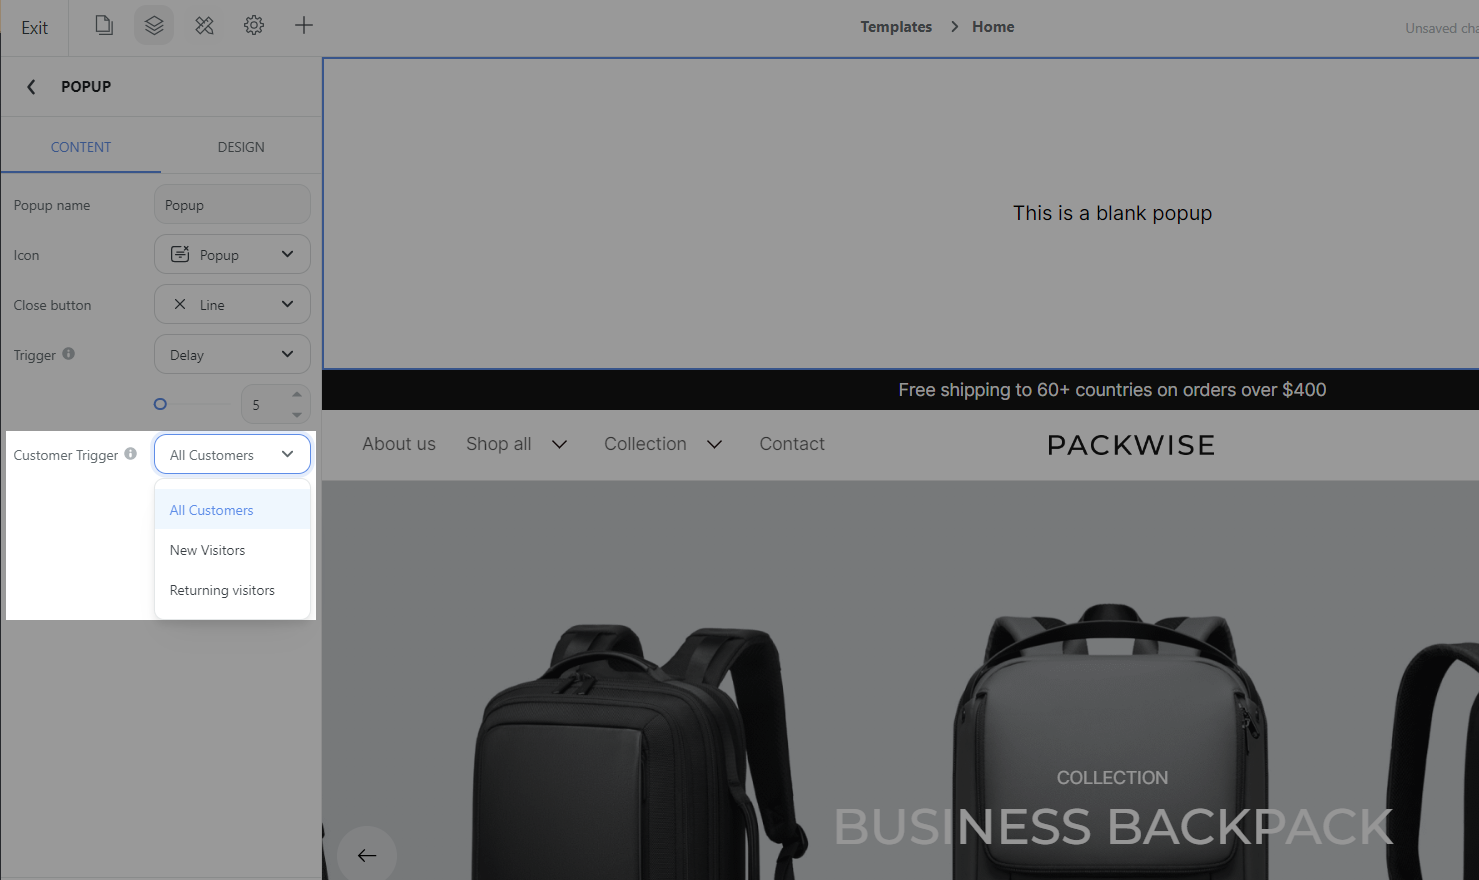
All customers: Trigger to open Popup to all customers.
New visitor: Trigger to open Popup to a new visitor.
Returning visitor: Trigger to open Popup to returning visitors.
Design
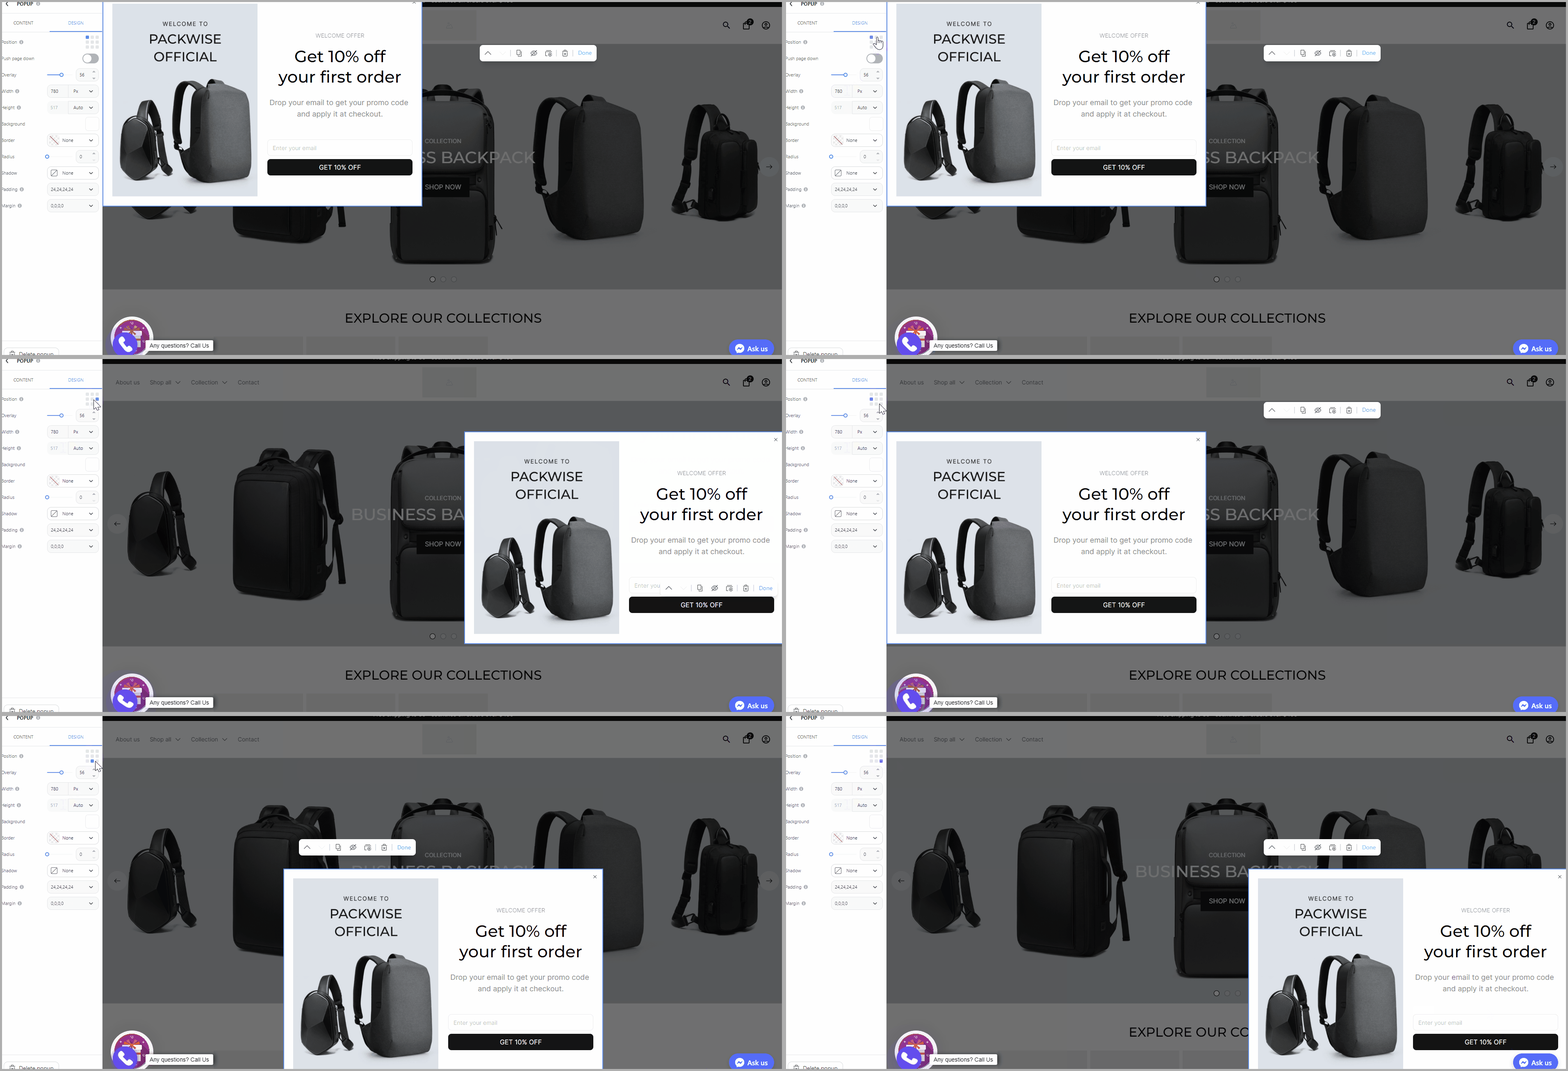
2.1. Position
You can set up 9 positions of the Popup.
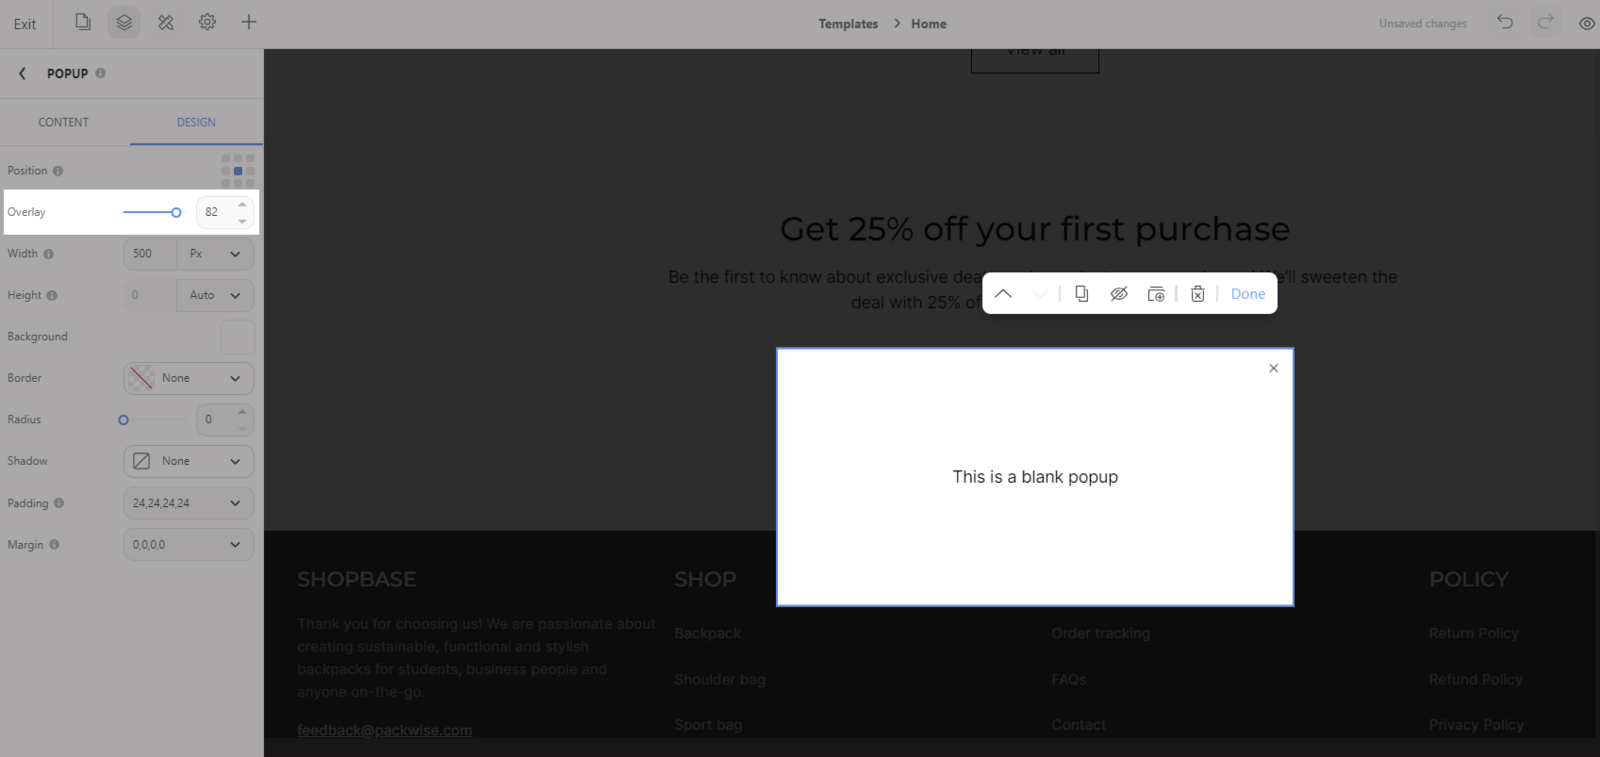
2.2. Overlay
Overlay is a dark layer that is under the Popup so that customers can focus on the Popup's content.
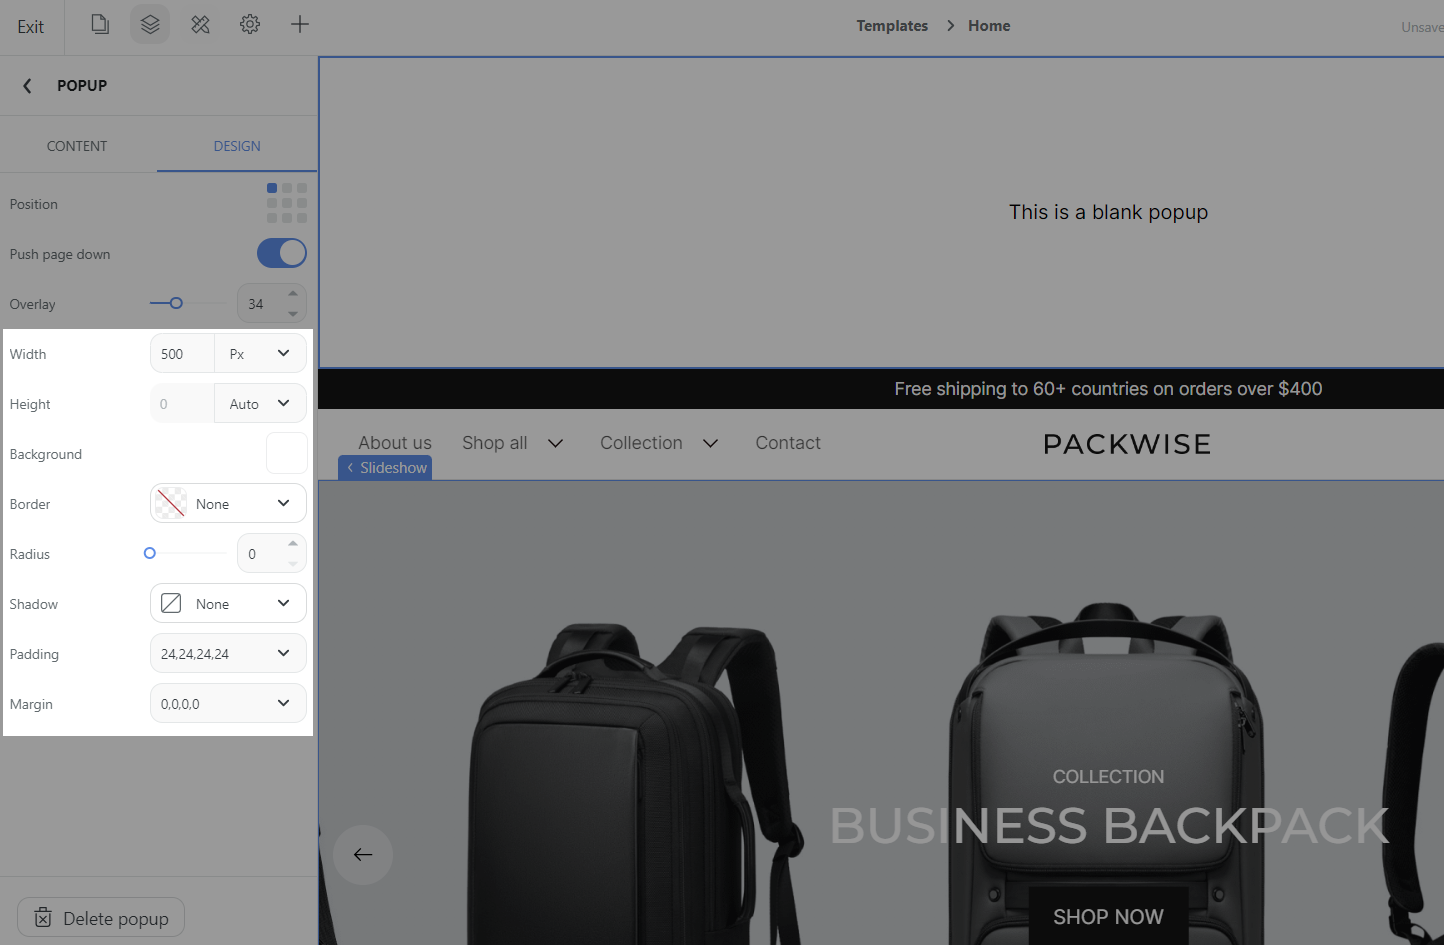
2.3. Push page down
Once the Popup is in the Top-left, Top-right, Top-center, you can choose to Push page down so that the Popup doesn't cover the page's content.
2.4. Other settings
You can set up the other settings. Please visit this article for more information.
Overview of Website Builder
Get started with Website Builder
Set up sections on Website Builder
Set up blocks on Website Builder
In this article
A. Create a Popup
B. Edit Popup
A. Create a Popup
There are two ways to create a popup.
Go to Insert Panel (the + button) > Search Popup > Drag Popup to the desired position.
Go to Insert Panel > Use a Popup template. (Update soon).
B. Edit Popup
Click the Popup to edit its Content and Design.
Content
1.1 Edit Popup name and icon
Popup name and icon help you to easily seach Popup the Layers panel. Popup name is also set up to trigger turning on Popup by using button.
1.2. Close button
There are 3 styles of Close button: Line, Ellipse, Rectangle or None to hide Close button.
1.3. Trigger
There are 4 conditions to open the Popup: Delay, Page scroll, Exit intent, Mouse click.
Delay: The time Popup appears after the page has finished loading for x seconds.
Page scroll: Popup appears when customers scroll down the page by x percent.
Exit intent: Popup appears when customers leave the page.
Mouse click: Popup appears when customers clicks on a button or link.
The Block button will be triggered as Open a pop-up action and you can choose the name of the Popup.
1.4. Customer Trigger
There are 3 types of Customer Trigger.
All customers: Trigger to open Popup to all customers.
New visitor: Trigger to open Popup to a new visitor.
Returning visitor: Trigger to open Popup to returning visitors.
Design
2.1. Position
You can set up 9 positions of the Popup.
2.2. Overlay
Overlay is a dark layer that is under the Popup so that customers can focus on the Popup's content.
2.3. Push page down
Once the Popup is in the Top-left, Top-right, Top-center, you can choose to Push page down so that the Popup doesn't cover the page's content.
2.4. Other settings
You can set up the other settings. Please visit this article for more information.
Related articles
Overview of Website Builder
Get started with Website Builder
Set up sections on Website Builder
Set up blocks on Website Builder
Updated on: 19/12/2023
Thank you!