Create a form for your storefront
ShopBase Form helps provide a way to customize your form and gather the information you need to run and grow your business. The form can be added directly to your web front for collecting leads or subscribers, or a standalone form to help buyers reach out to you.
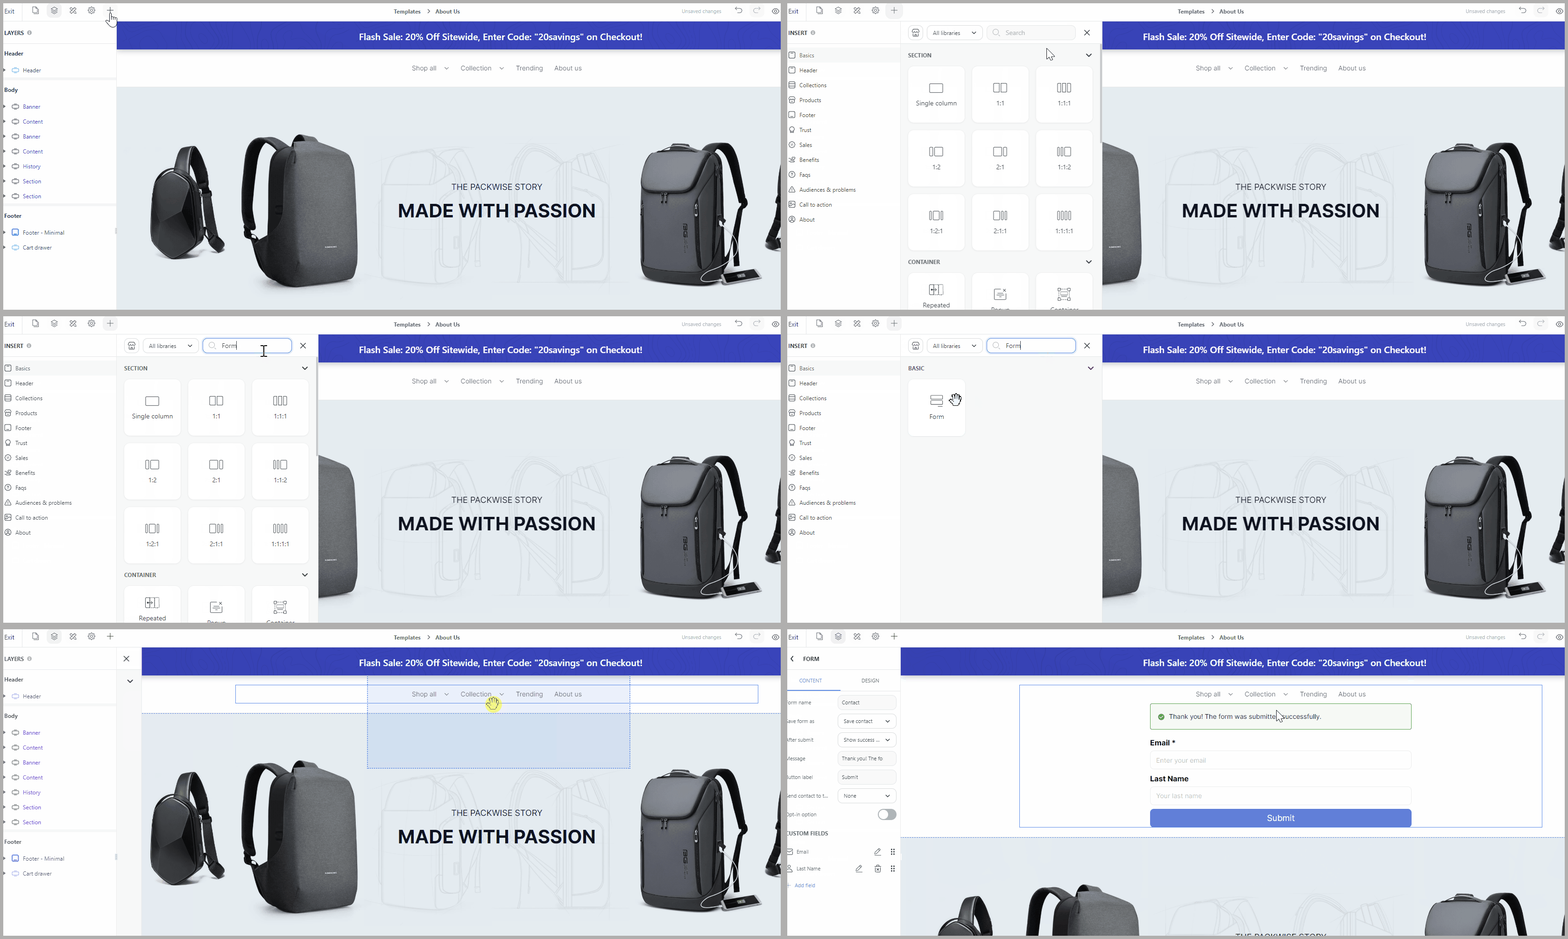
When designing your store, you can easily add a form to your current page. Here, you can drag and drop the Form from the Insert panel to the desired position on your page. Then, you can edit the Content and Design of your block. Make sure you have a clear goal when starting to create your form.
A. Designing Your Site Forms
B. Customize Your Form With Form Fields
C. Creating Rules for Your Form
D. View Form Submission Data
From admin dashboard, go to Online Store > Design > Current template > Customize.
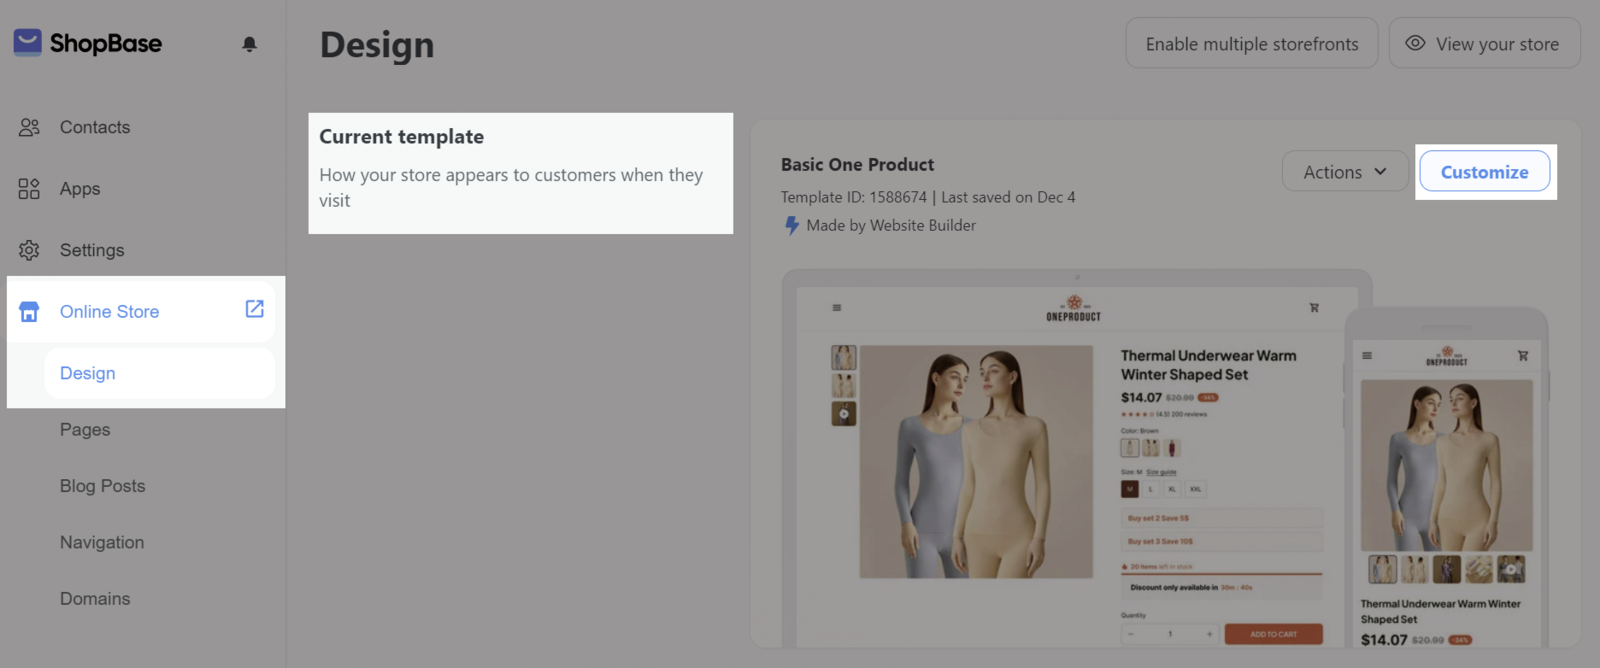
Click on Plus shape ( + ) on the top left corner > Search Form and drag it to your desired place.
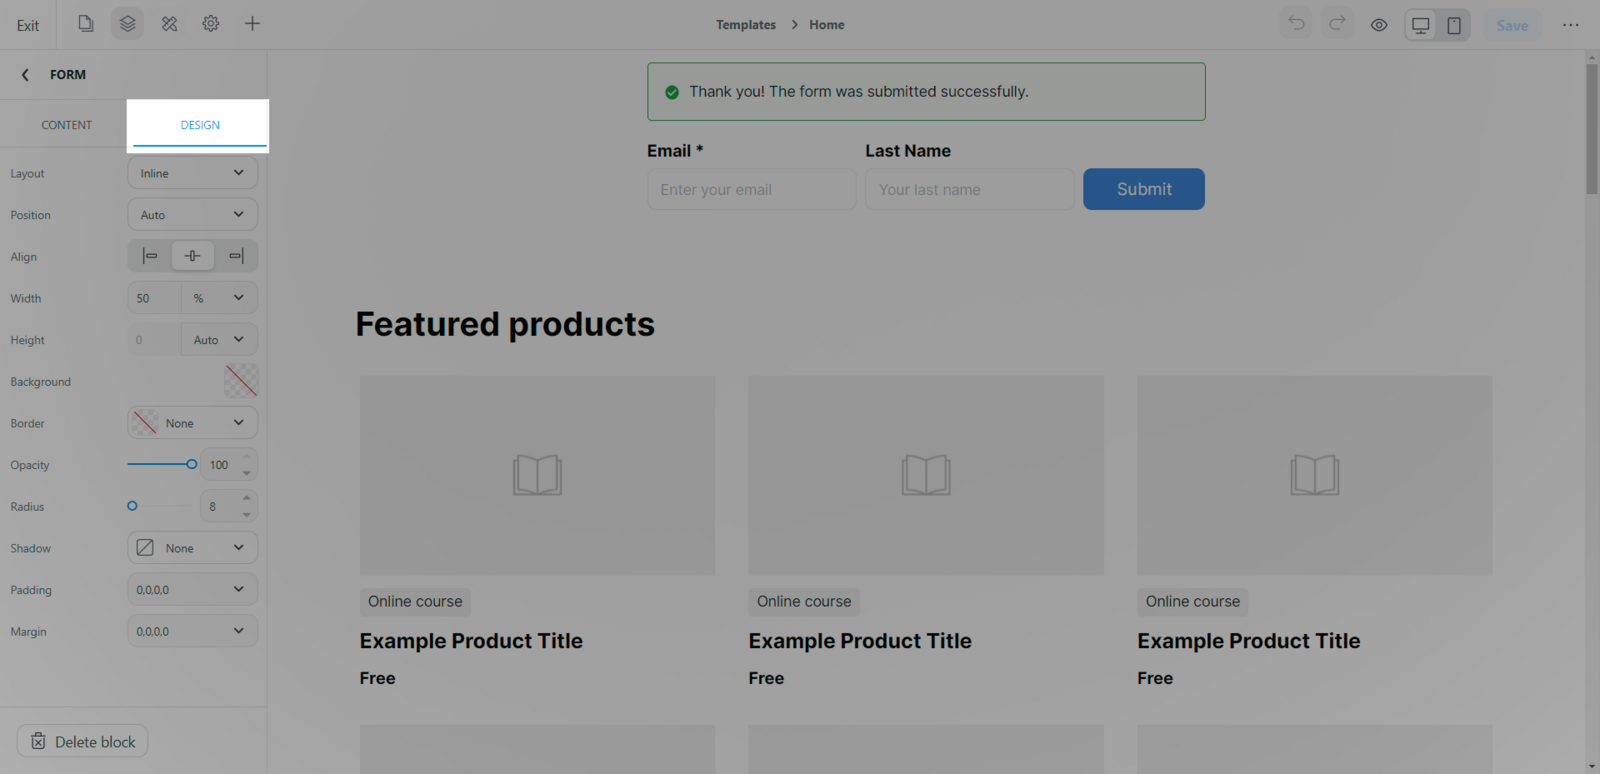
Go to the tab Design and start customizing your form.
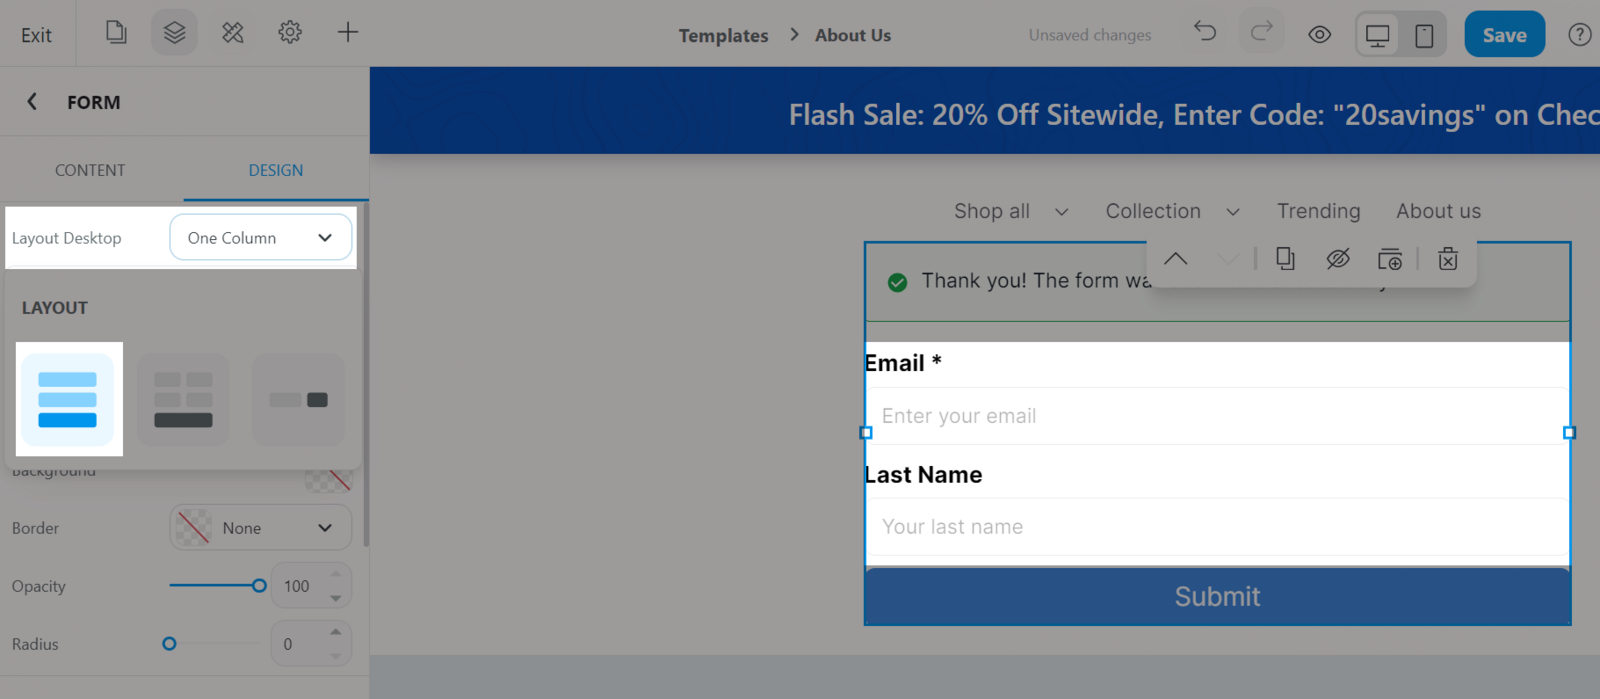
Choose a layout for your form. The layout will decide the type of form you will be doing.
One column: Form fields will be in vertical order. This will help visitors easily fill out the form as fields are ordered in 1 column consecutively.
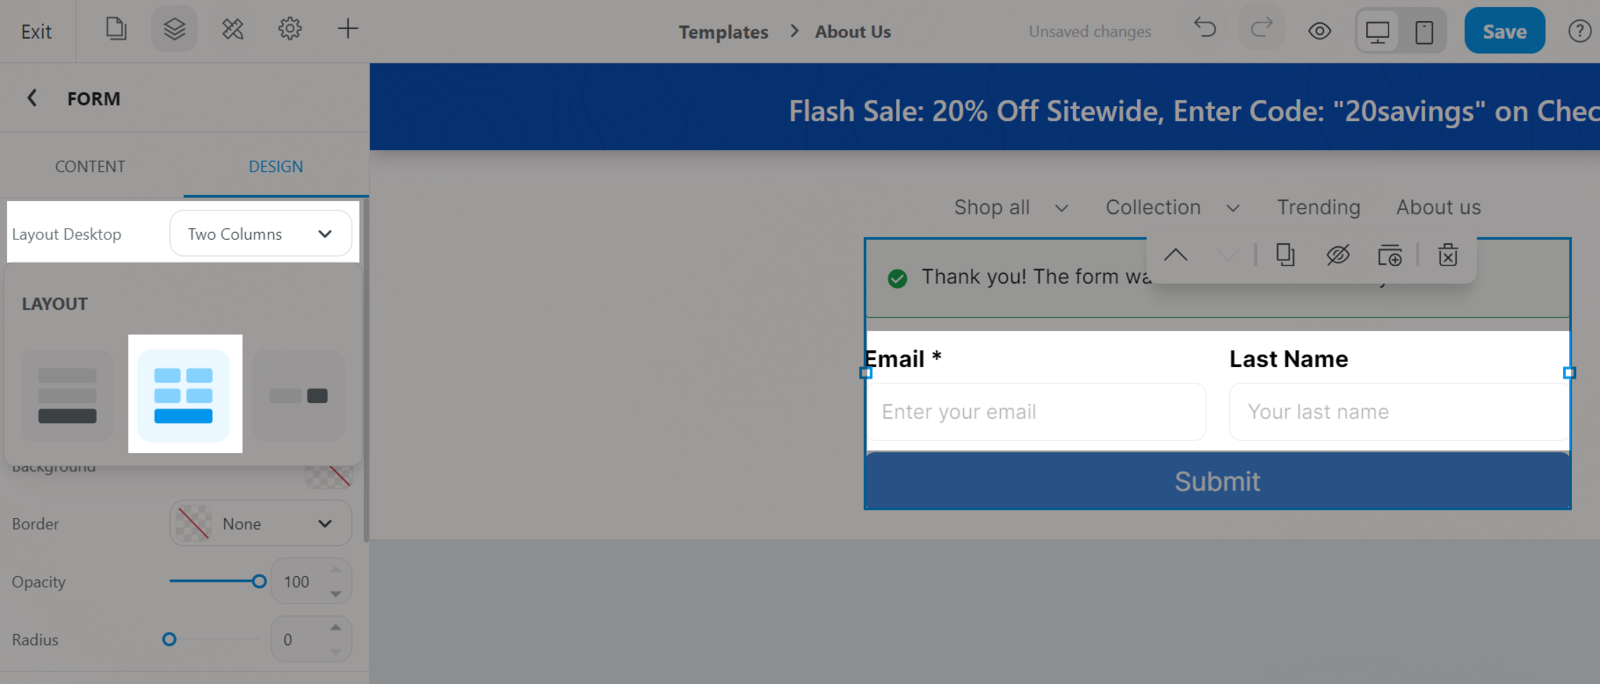
Two-column: Form fields will be in 2 fields in a row. However, there will be some fields that need to be standalone because they need space to write (For example: Text area, Checkbox, Radio, Selection). This will be helpful if you have many different fields and some fields only require short input (For example: Phone, First name, Last name) and you would like to optimize the form space.
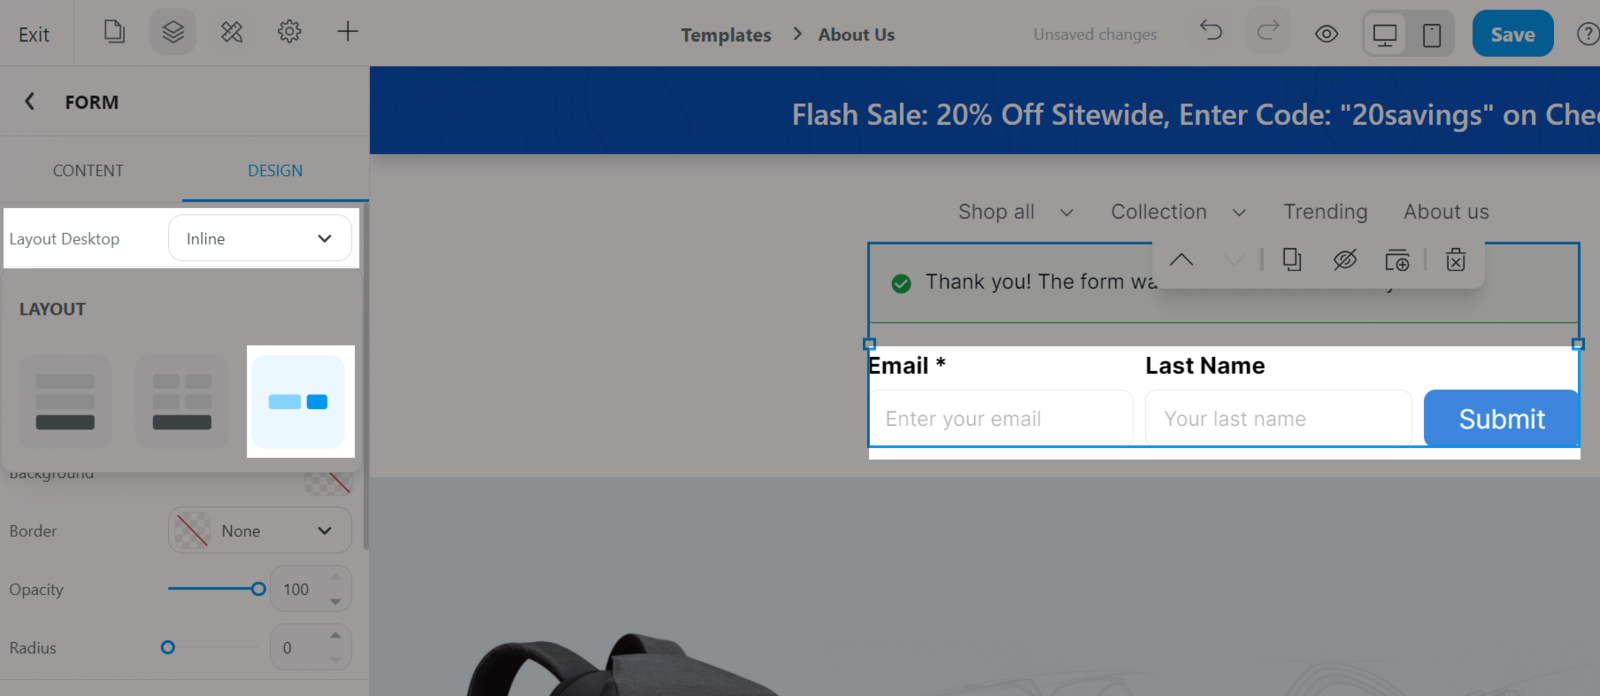
Inline: Form fields are made specifically to collect Subscription, Leads and you can only add up to 3 form fields. This will be helpful if you need to match form in a pop-up or an announcement bar to collect leads, subscribers and visitors are not required to fill in more information.
In all forms of the layout, the Email field will be required and cannot be deleted. Other design options are the same as any other blocks.
You can gather the best information from site visitors by adding and editing form fields. All edits to site forms are done in ShopBase web builder.
Go to the tab Content > Custom field section and choose which sections are shown.
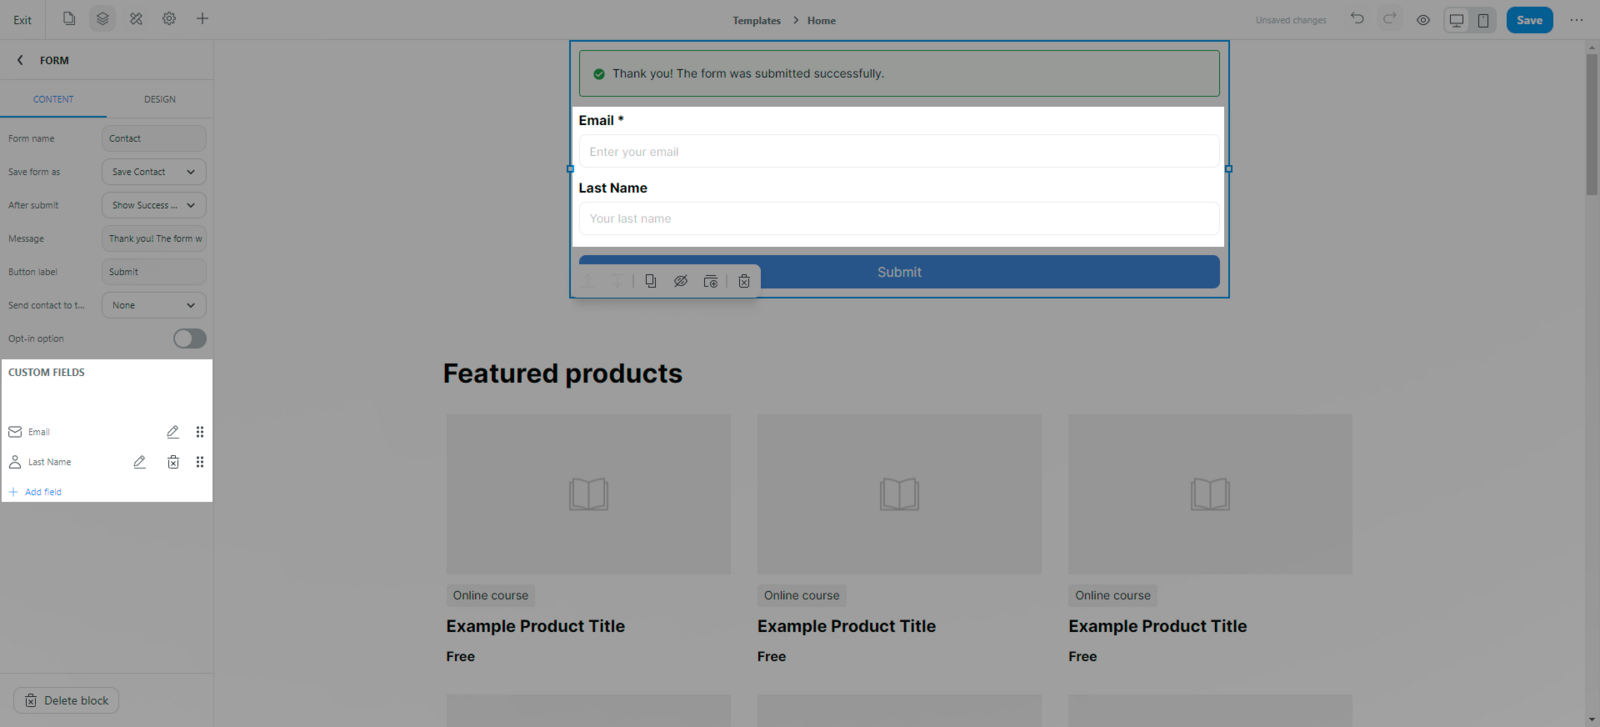
Email is required in all forms so that ShopBase can save your form data.
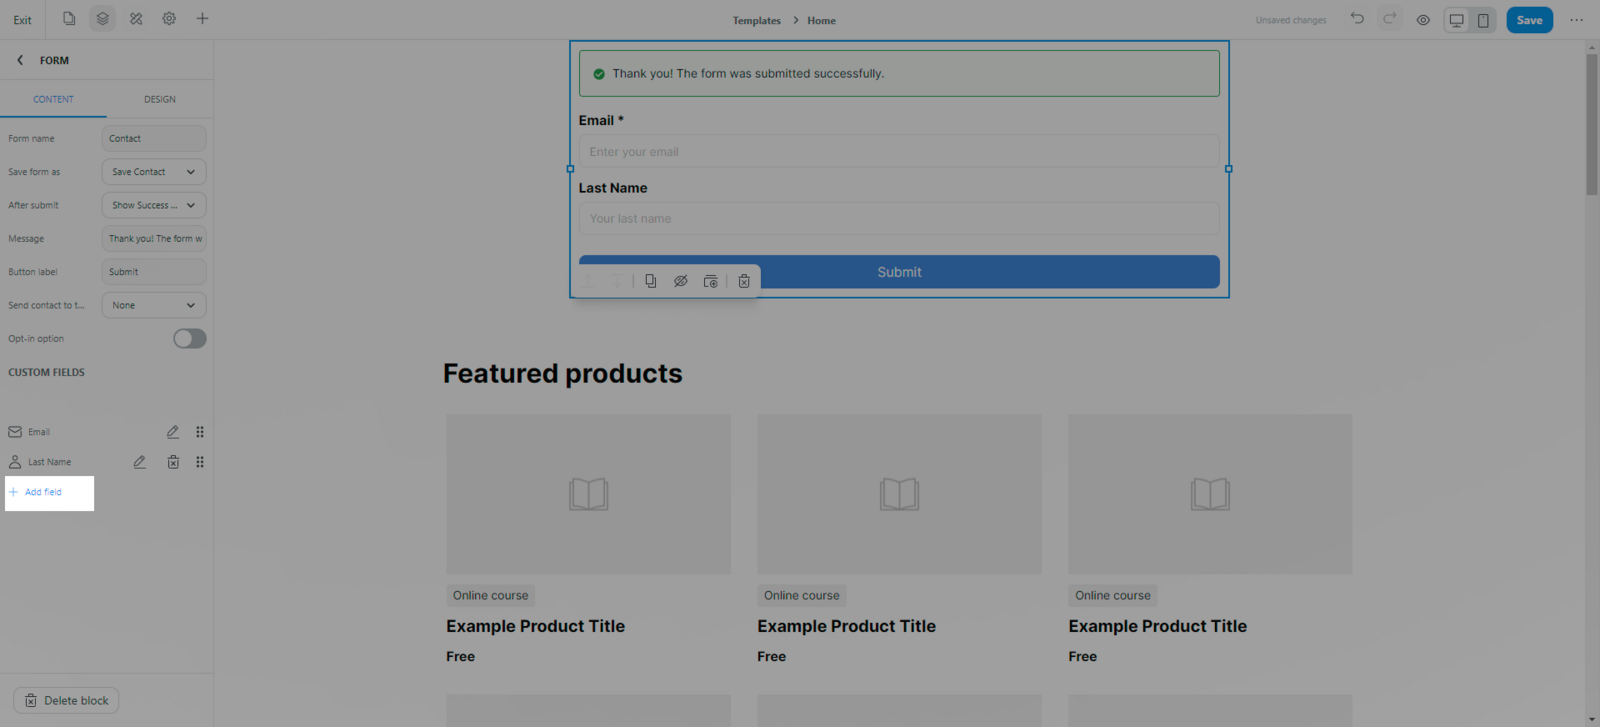
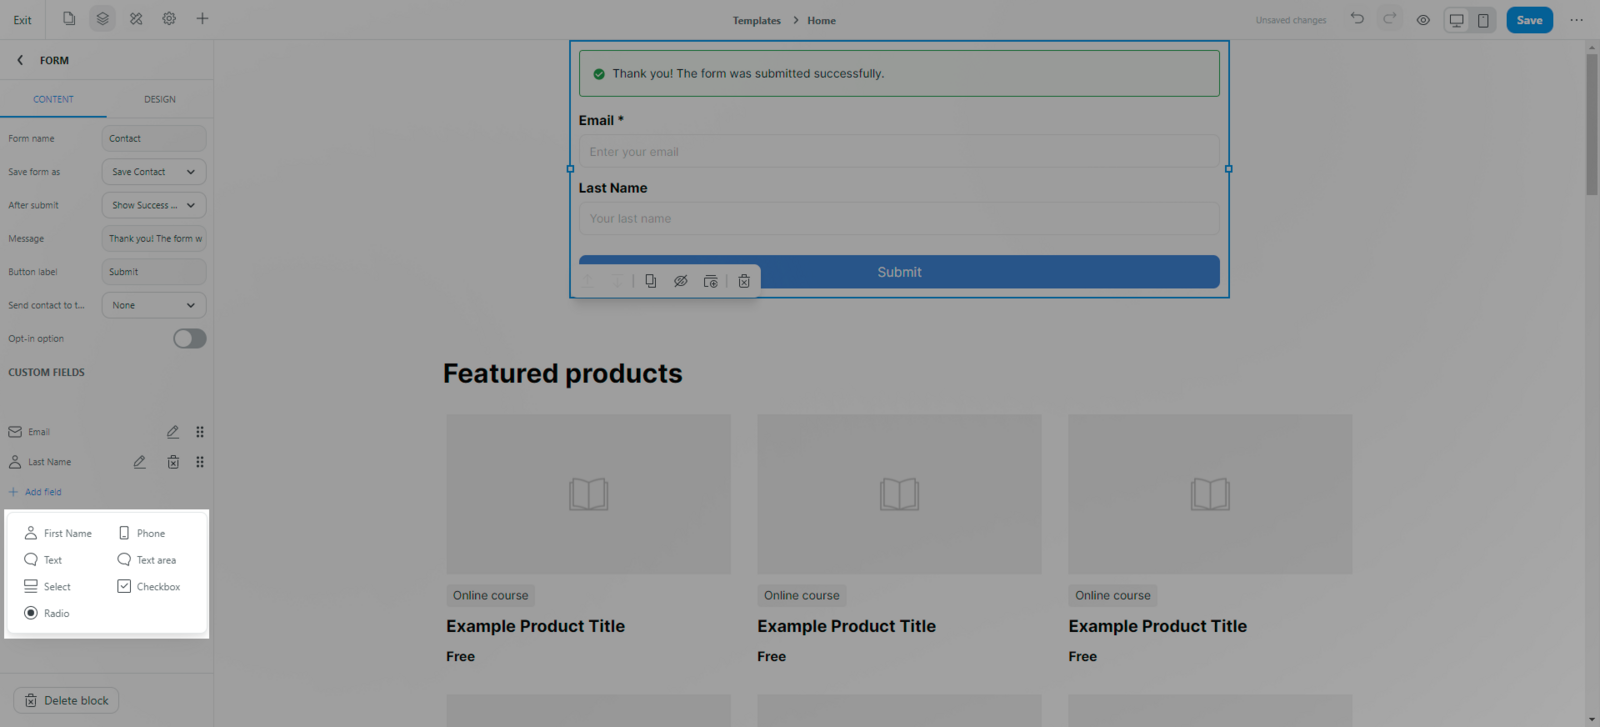
Add new field: Click Add field and choose the type of field you want to have in your form.
Add Personal information fields to your forms to collect contact information from site visitors. Personal information fields are useful because the data collected is automatically saved in your contact list. If a lead fills out a contact field, a new contact card is created with the information in your dashboard. The fields you can add to your form include:
First Name
Last Name
Email
Phone Number
Other fields are common types of fields you can add in such as:
Text fields
Text area fields
Selection fields like Checkbox, Dropdown lists or Radio.
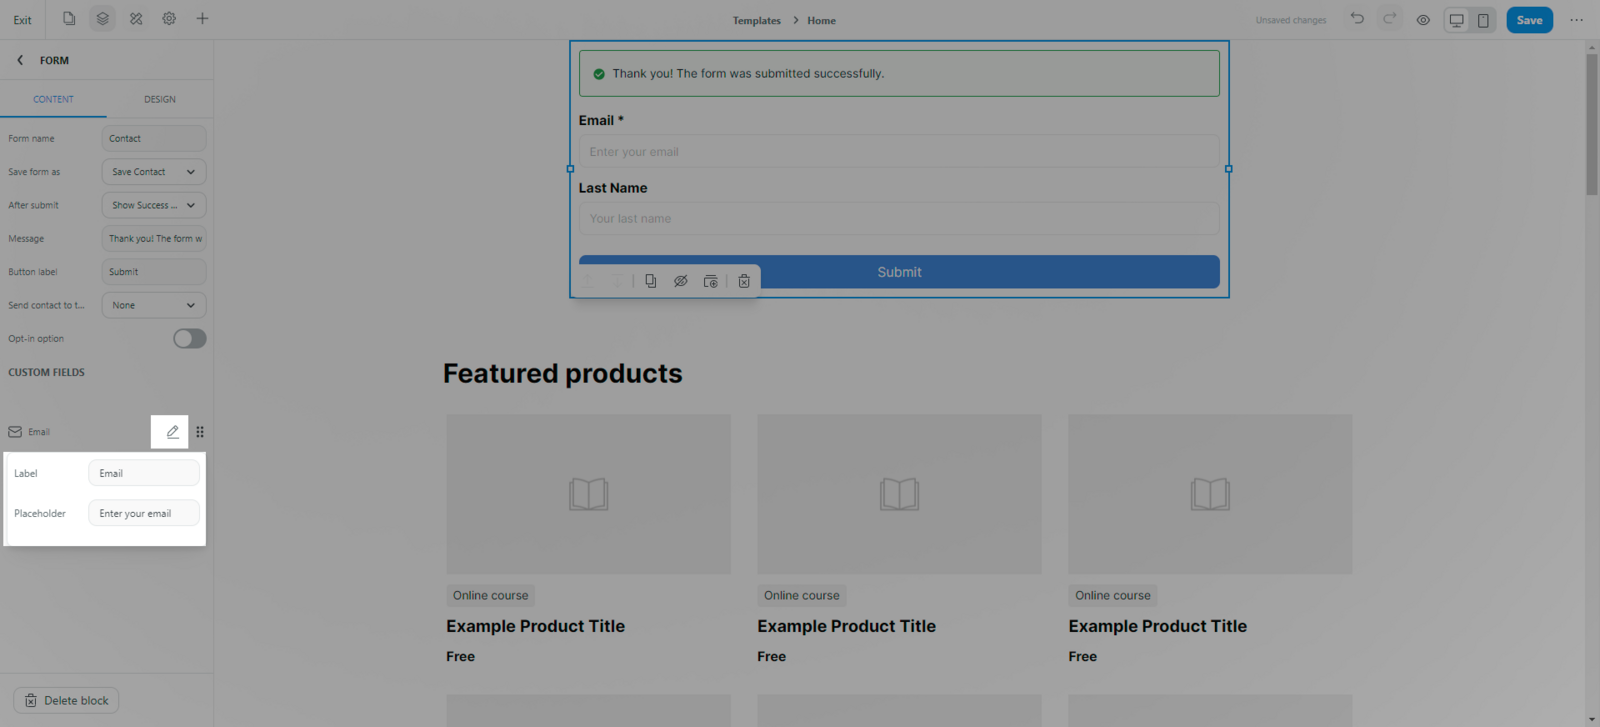
Edit field: Based on the functionality of a field, the way to edit a field vary. However, there are some basic rules to edit a field.
Add Label to your fields.
Add Placeholders .
Required (optional): Choose whether site visitors are required to fill in which fields.
For some fields which do not have options to choose from, you will have to add options manually.
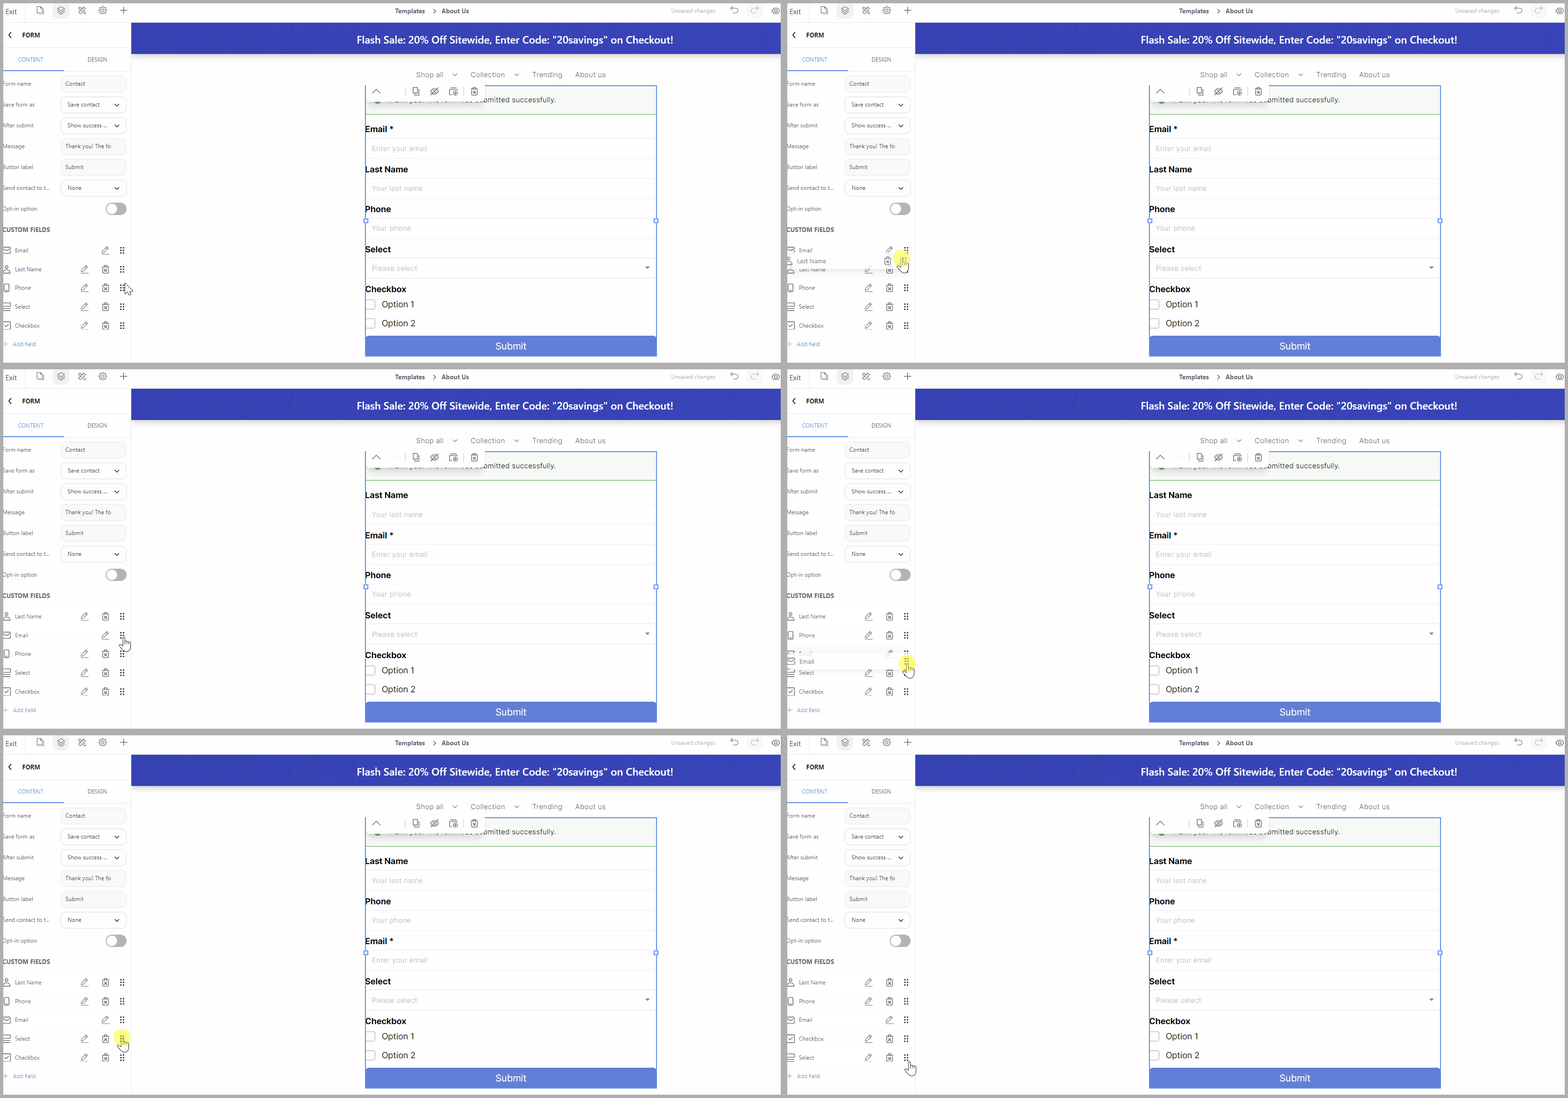
Reorder a field: Click and drag a field to move it up or down the question order of the form.
Delete field : Click Delete in the custom field list beside the field name
You can create rules for your form in the tab Content.
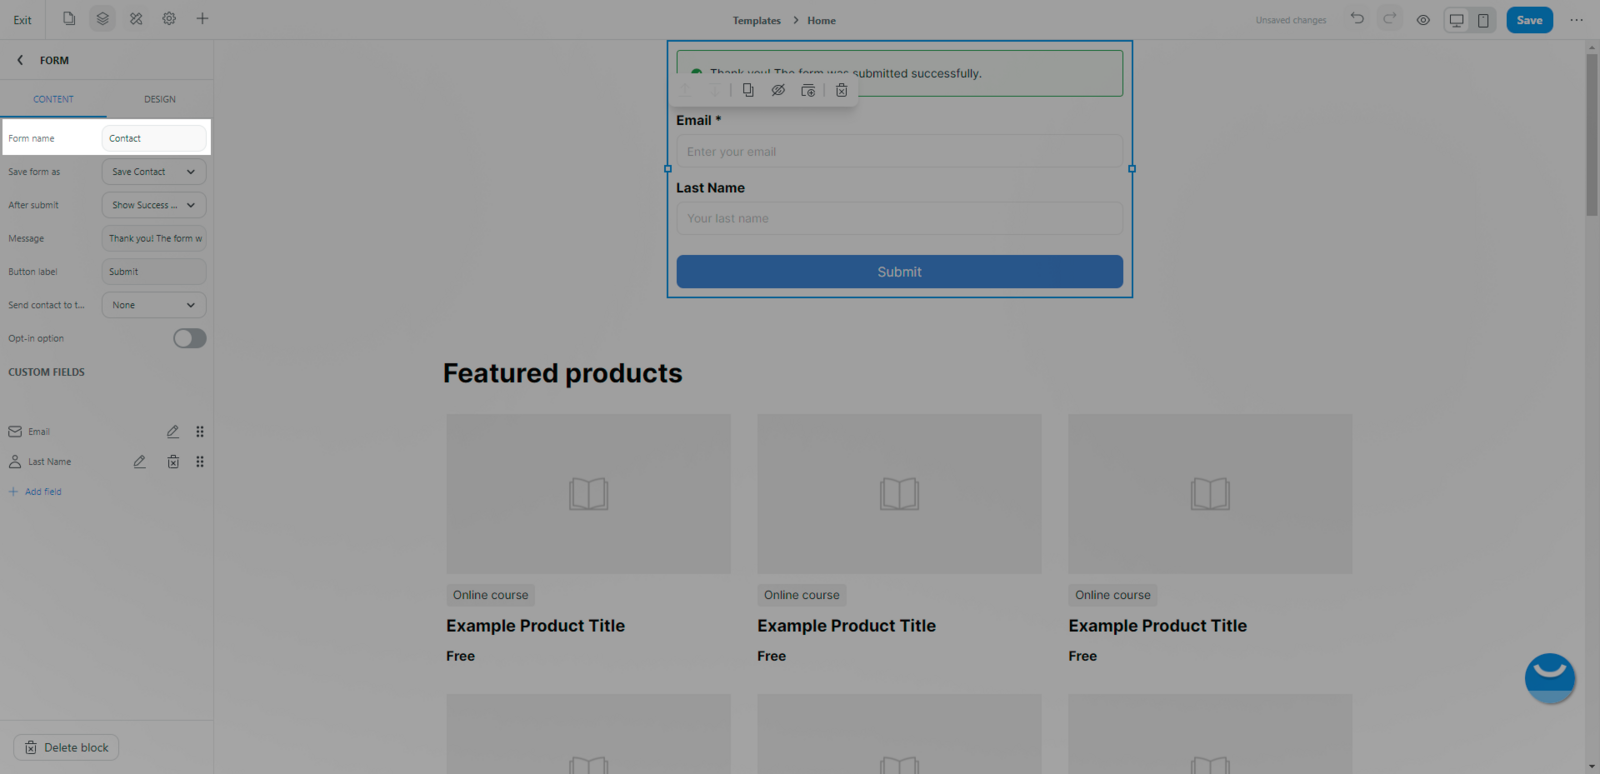
Form name: In order to distinguish between forms you have created, you have to fill out the Form name. This will be shown in Dashboard after a visitor submit that form, it will not be shown to visitors. You must fill the Form name differently. We suggest it can base on form’s purpose (For example: Collect subscriber, Contact us…).
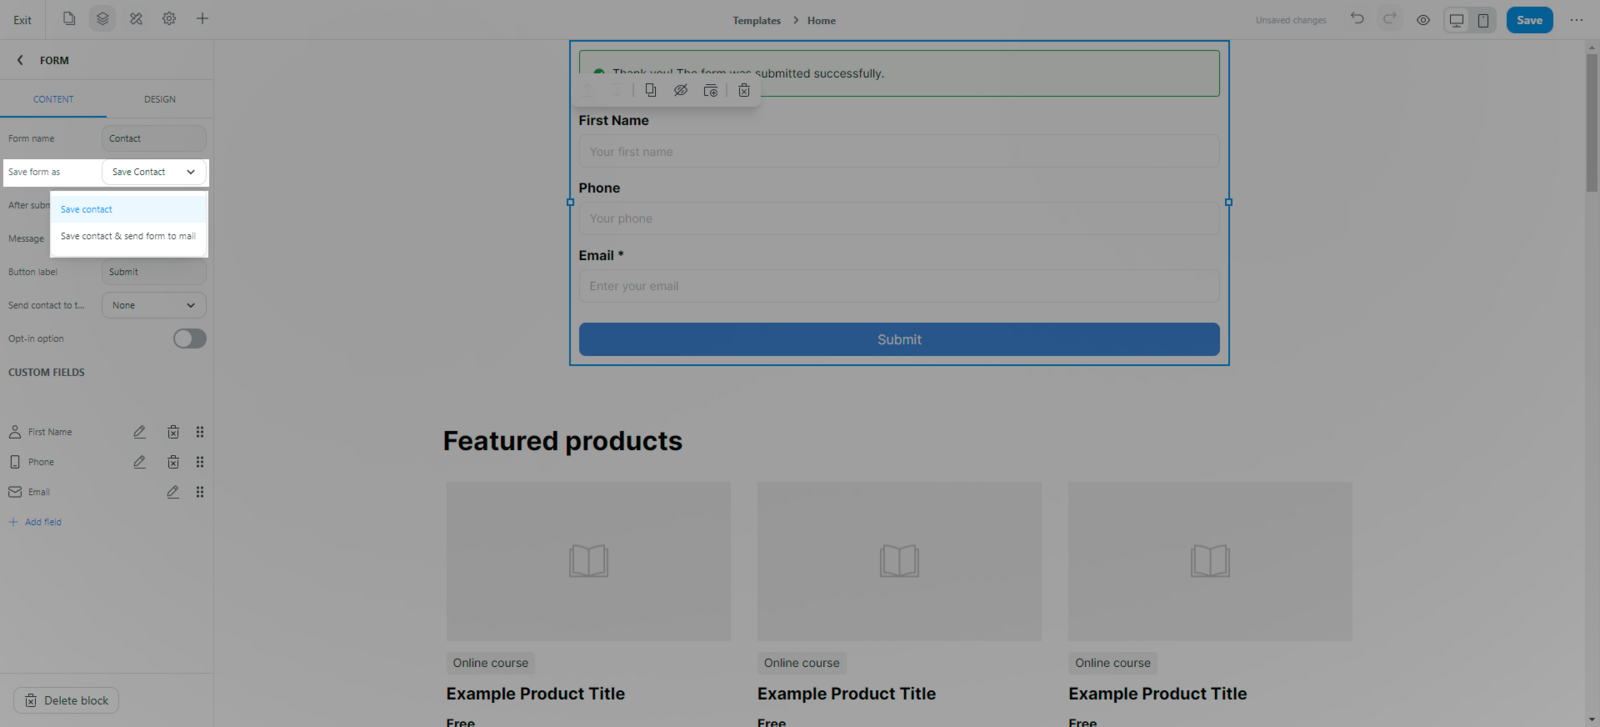
Save form as: This helps you determine how your form information will be stored. You can choose to Save contact (Once a visitor fills out a form on your website, a contact is created in your Contact List), or you can also choose to Save contact & send form to mail (Send the submitted form to your mailbox for tracking).
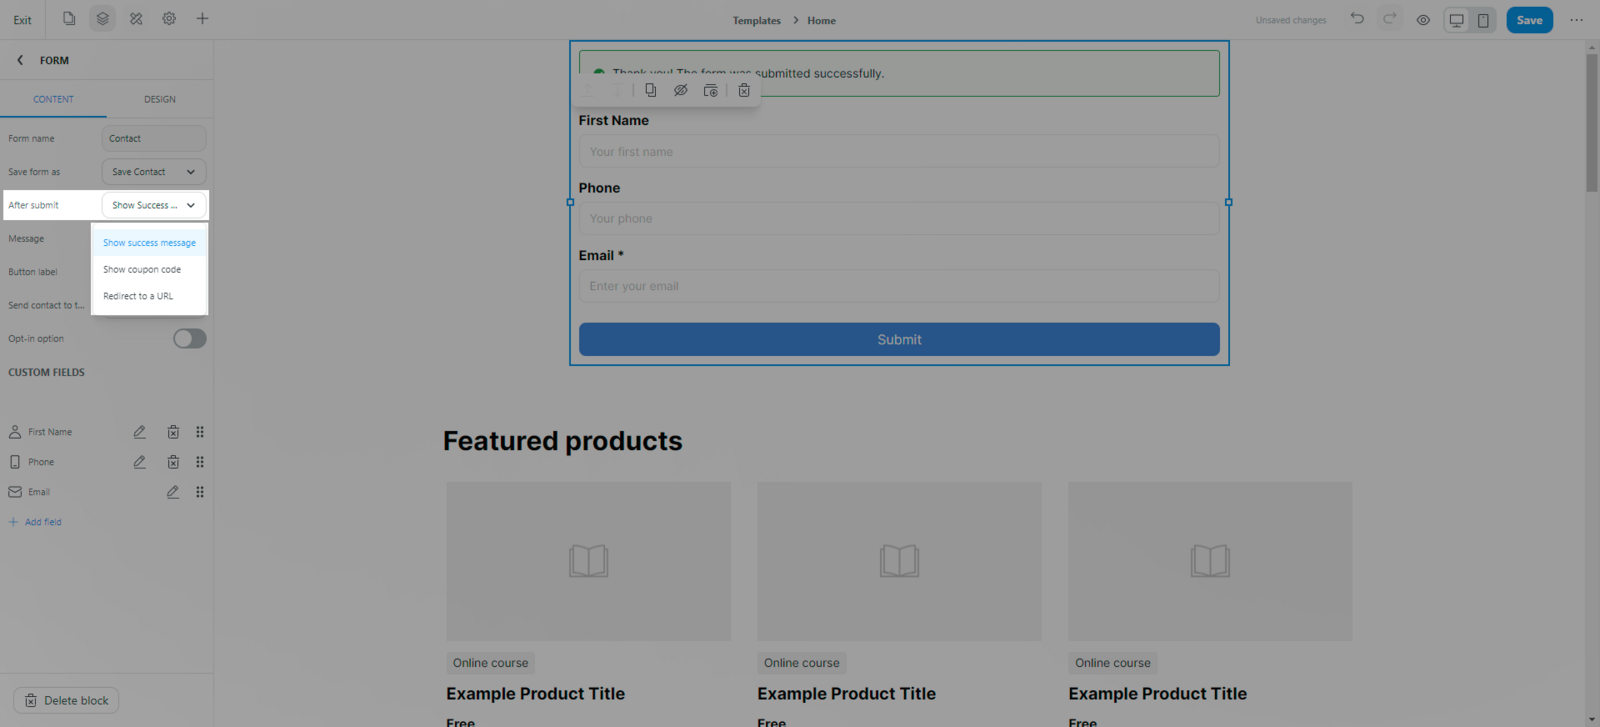
After submit: This is what will be the result once the visitor finishes submitting form:
Show success message: This option will only save the visitor data to your Contact list.
Show coupon code: This option will help you to show some coupon codes at the end while still saving your visitor information.
Redirect to a URL link: This option will help your visitor be directed to your desired site to make a purchase or to see your promotion.
Each option will require you to fill in Message and Button label to be in sync with your form.
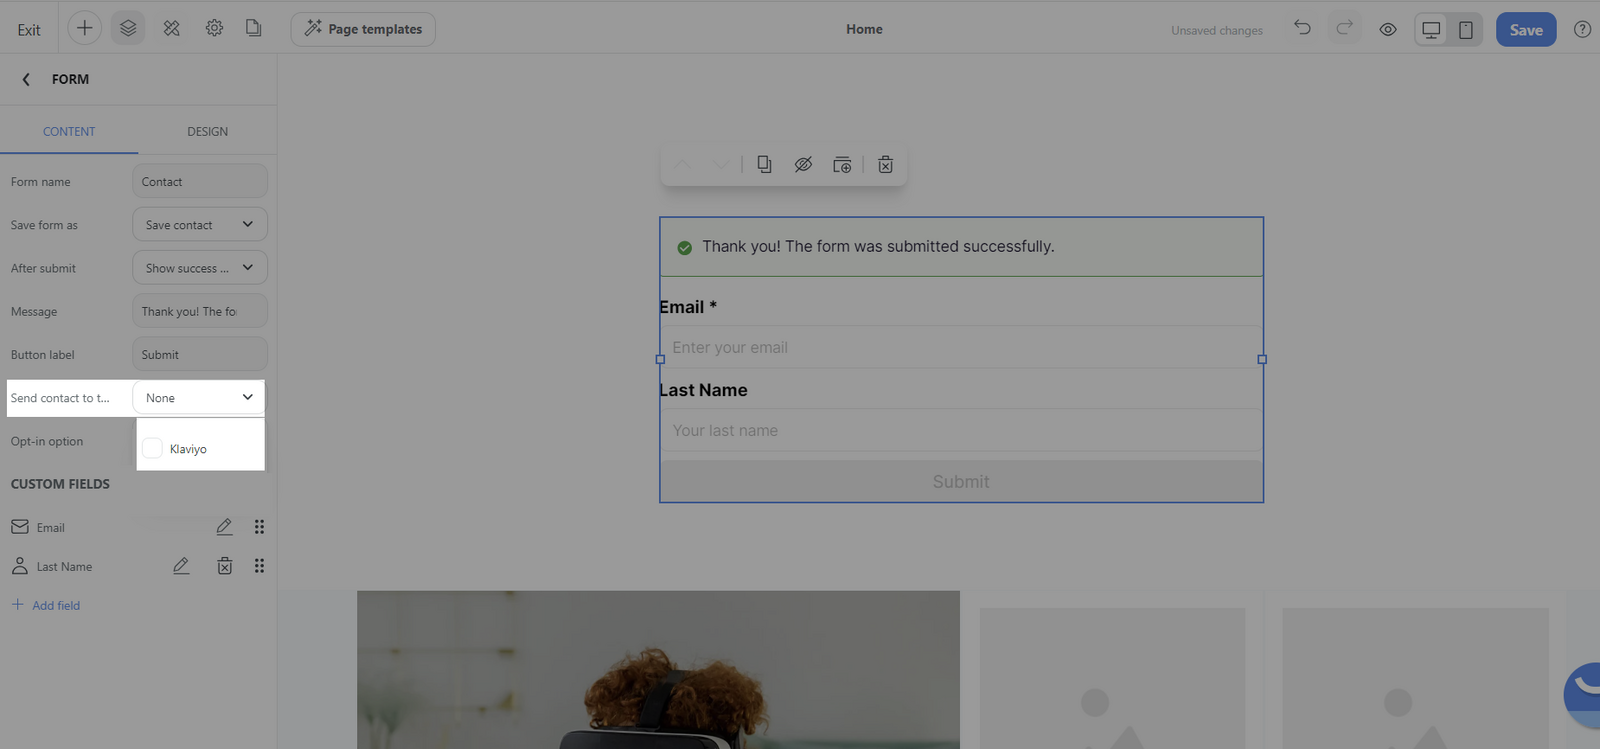
Send contact to third-party email provider: Send visitor data to some marketing applications we have integrated to ShopBase including Klaviyo. However, you need to connect your Klaviyo to ShopBase first in order to send data to those applications.
Opt-in option:
Once you have published a form on your website, all the form submission data will be saved in Contact information. You can go to Contacts > All Contacts > Choose to filter by Form to know how many visitors have submitted your forms.
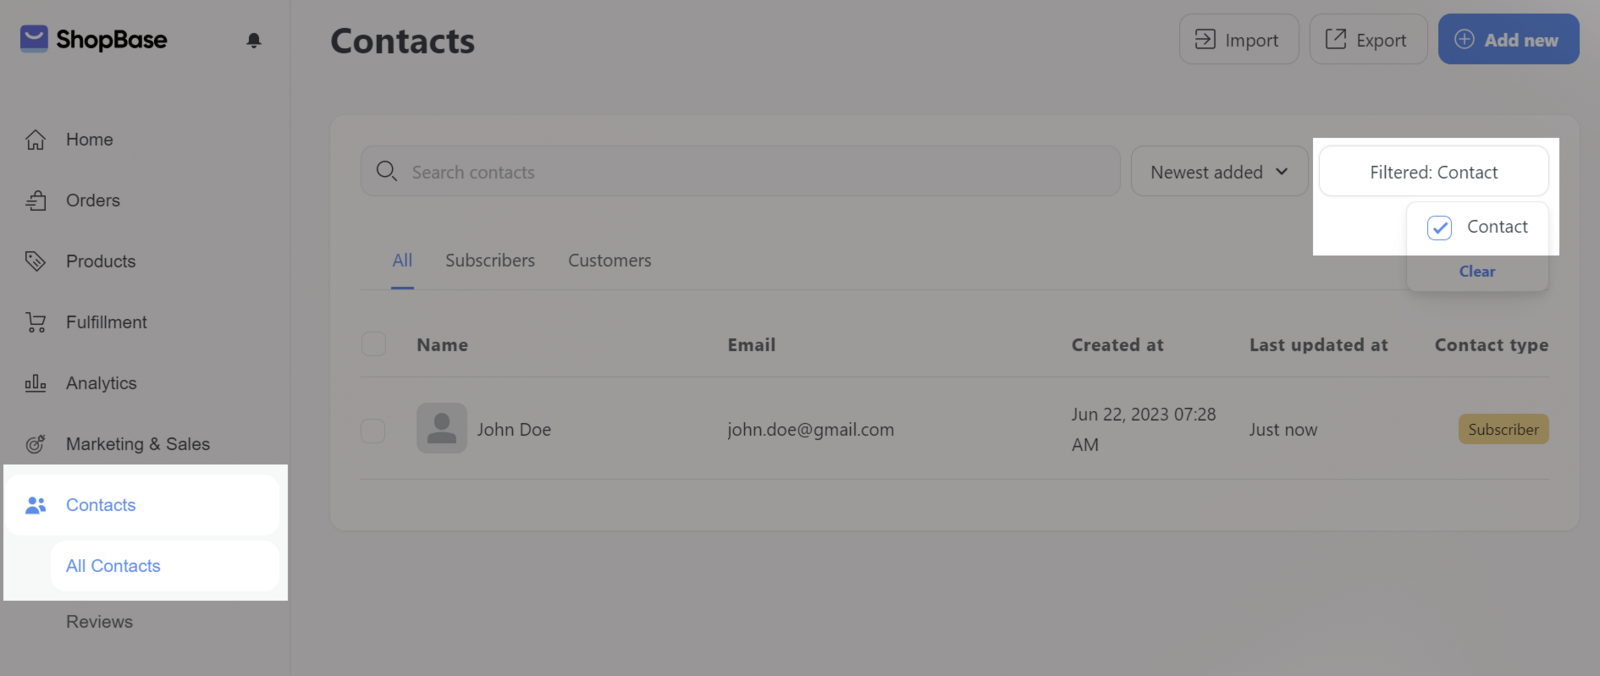
You can also see the submission information ( Latest submission) of each visitor by clicking on each visitor's name.
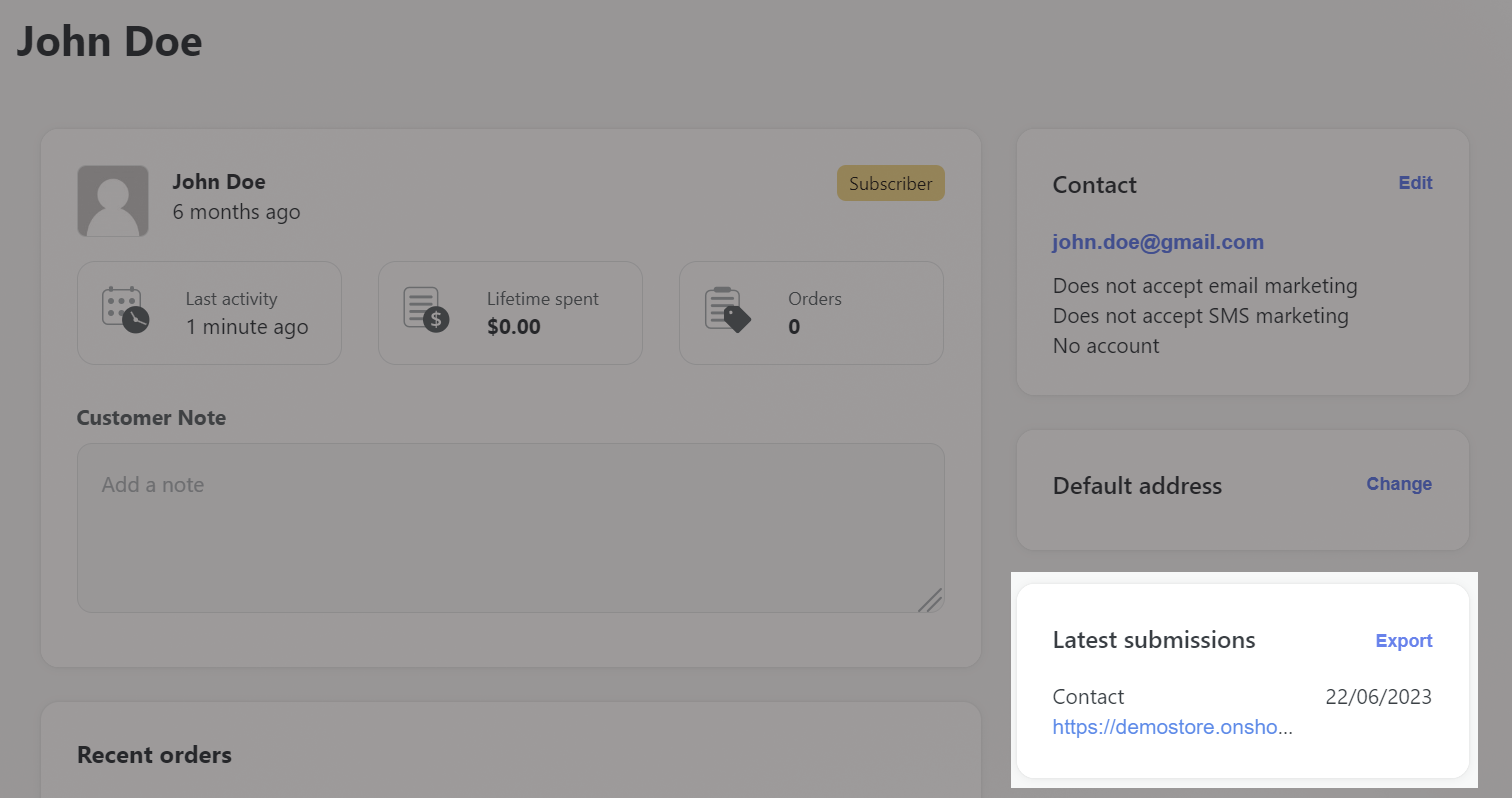
If you want to see the separate submissions, you can export form data from Contacts by clicking Export and choose to export by Form submission
Get started with Website Builder
Launch a web page using Website Builder
Understand styling settings in Website Builder
Set up sections on Website Builder
Set up blocks on Website Builder
Select and customize page templates using Website Builder
When designing your store, you can easily add a form to your current page. Here, you can drag and drop the Form from the Insert panel to the desired position on your page. Then, you can edit the Content and Design of your block. Make sure you have a clear goal when starting to create your form.
In this article
A. Designing Your Site Forms
B. Customize Your Form With Form Fields
C. Creating Rules for Your Form
D. View Form Submission Data
A. Designing Your Site Forms
From admin dashboard, go to Online Store > Design > Current template > Customize.
Click on Plus shape ( + ) on the top left corner > Search Form and drag it to your desired place.
Go to the tab Design and start customizing your form.
Choose a layout for your form. The layout will decide the type of form you will be doing.
One column: Form fields will be in vertical order. This will help visitors easily fill out the form as fields are ordered in 1 column consecutively.
Two-column: Form fields will be in 2 fields in a row. However, there will be some fields that need to be standalone because they need space to write (For example: Text area, Checkbox, Radio, Selection). This will be helpful if you have many different fields and some fields only require short input (For example: Phone, First name, Last name) and you would like to optimize the form space.
Inline: Form fields are made specifically to collect Subscription, Leads and you can only add up to 3 form fields. This will be helpful if you need to match form in a pop-up or an announcement bar to collect leads, subscribers and visitors are not required to fill in more information.
In all forms of the layout, the Email field will be required and cannot be deleted. Other design options are the same as any other blocks.
B. Customize Your Form With Form Fields
You can gather the best information from site visitors by adding and editing form fields. All edits to site forms are done in ShopBase web builder.
Go to the tab Content > Custom field section and choose which sections are shown.
Email is required in all forms so that ShopBase can save your form data.
Add new field: Click Add field and choose the type of field you want to have in your form.
Add Personal information fields to your forms to collect contact information from site visitors. Personal information fields are useful because the data collected is automatically saved in your contact list. If a lead fills out a contact field, a new contact card is created with the information in your dashboard. The fields you can add to your form include:
First Name
Last Name
Phone Number
Other fields are common types of fields you can add in such as:
Text fields
Text area fields
Selection fields like Checkbox, Dropdown lists or Radio.
Edit field: Based on the functionality of a field, the way to edit a field vary. However, there are some basic rules to edit a field.
Add Label to your fields.
Add Placeholders .
Required (optional): Choose whether site visitors are required to fill in which fields.
For some fields which do not have options to choose from, you will have to add options manually.
Reorder a field: Click and drag a field to move it up or down the question order of the form.
Delete field : Click Delete in the custom field list beside the field name
C. Creating Rules for Your Form
You can create rules for your form in the tab Content.
Form name: In order to distinguish between forms you have created, you have to fill out the Form name. This will be shown in Dashboard after a visitor submit that form, it will not be shown to visitors. You must fill the Form name differently. We suggest it can base on form’s purpose (For example: Collect subscriber, Contact us…).
Save form as: This helps you determine how your form information will be stored. You can choose to Save contact (Once a visitor fills out a form on your website, a contact is created in your Contact List), or you can also choose to Save contact & send form to mail (Send the submitted form to your mailbox for tracking).
After submit: This is what will be the result once the visitor finishes submitting form:
Show success message: This option will only save the visitor data to your Contact list.
Show coupon code: This option will help you to show some coupon codes at the end while still saving your visitor information.
Redirect to a URL link: This option will help your visitor be directed to your desired site to make a purchase or to see your promotion.
Each option will require you to fill in Message and Button label to be in sync with your form.
Send contact to third-party email provider: Send visitor data to some marketing applications we have integrated to ShopBase including Klaviyo. However, you need to connect your Klaviyo to ShopBase first in order to send data to those applications.
Opt-in option:
D. View Form Submission Data
Once you have published a form on your website, all the form submission data will be saved in Contact information. You can go to Contacts > All Contacts > Choose to filter by Form to know how many visitors have submitted your forms.
You can also see the submission information ( Latest submission) of each visitor by clicking on each visitor's name.
If you want to see the separate submissions, you can export form data from Contacts by clicking Export and choose to export by Form submission
Related articles
Get started with Website Builder
Launch a web page using Website Builder
Understand styling settings in Website Builder
Set up sections on Website Builder
Set up blocks on Website Builder
Select and customize page templates using Website Builder
Updated on: 08/01/2025
Thank you!