This article goes into details on how to create Meta Pixels (Facebook Pixels) and generate respective Access Tokens to help set up Conversions API on Facebook, which would help you increase the efficiency of online ads for your store.
To get an overview of Facebook ads tracking integration into your ShopBase online store, click here.
In this section
B. Generate an Access Token for Facebook Pixel
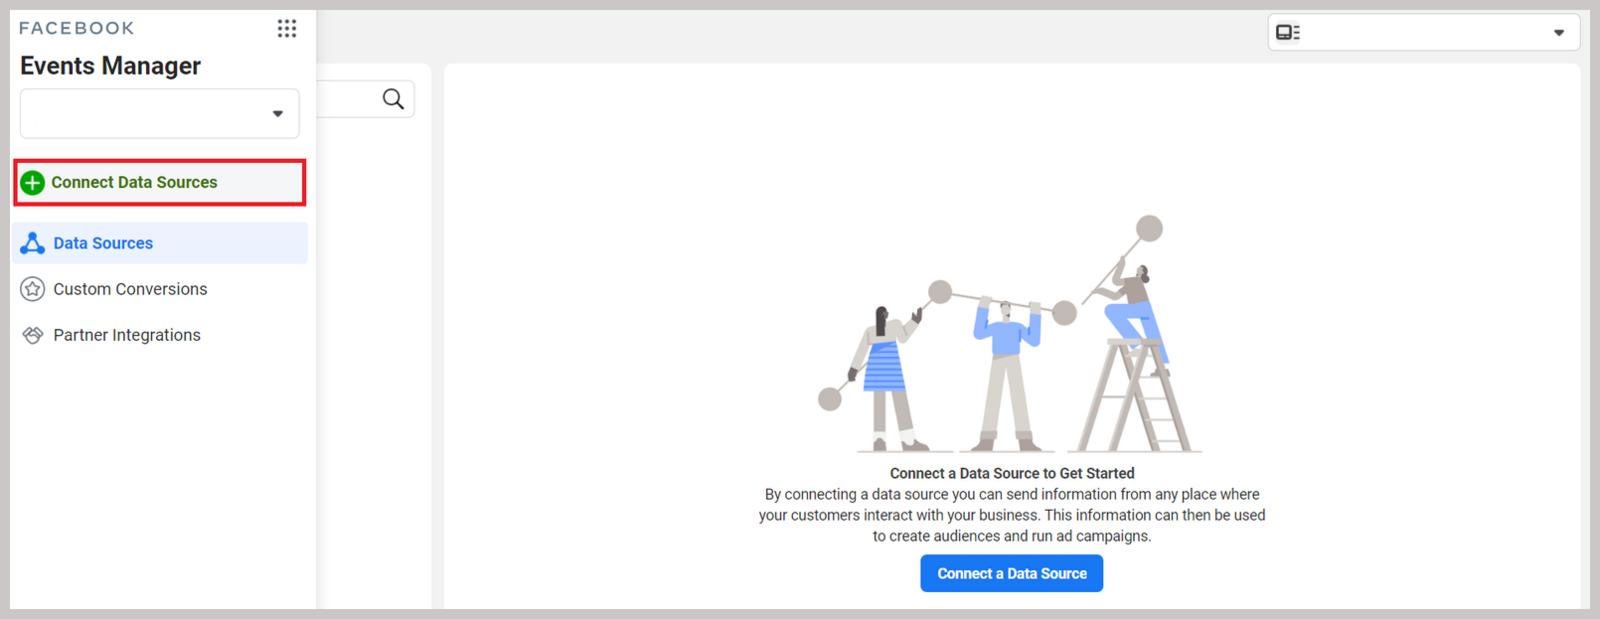
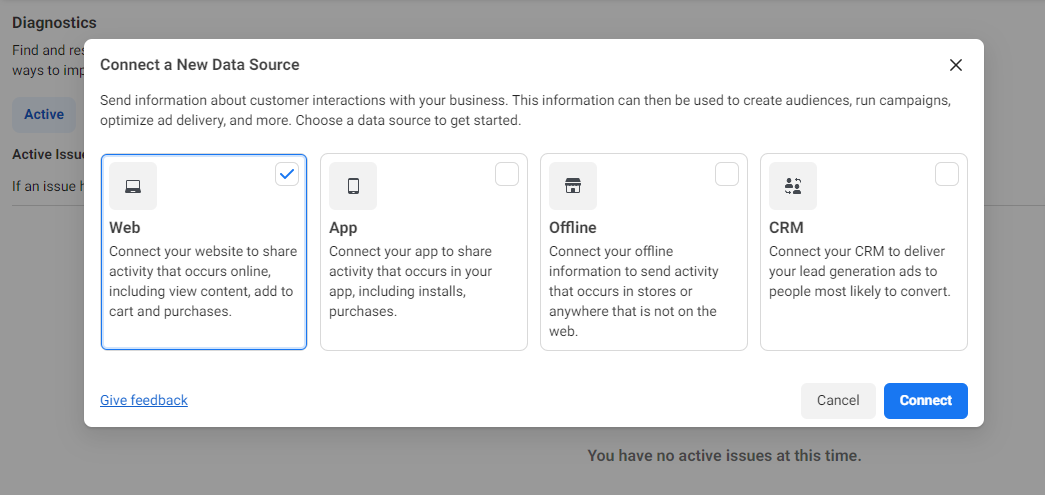
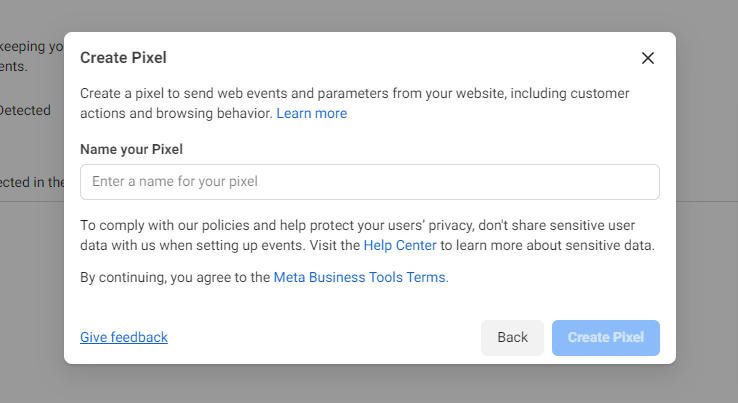
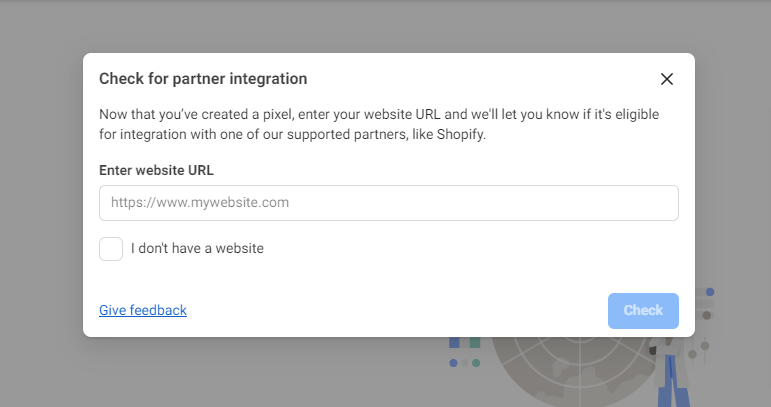
A. Create a Facebook Pixel
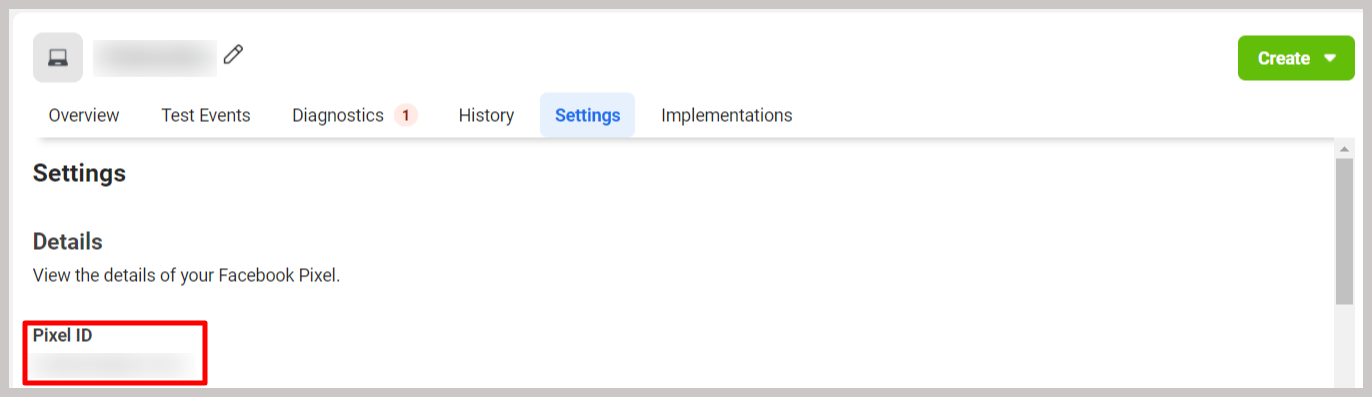
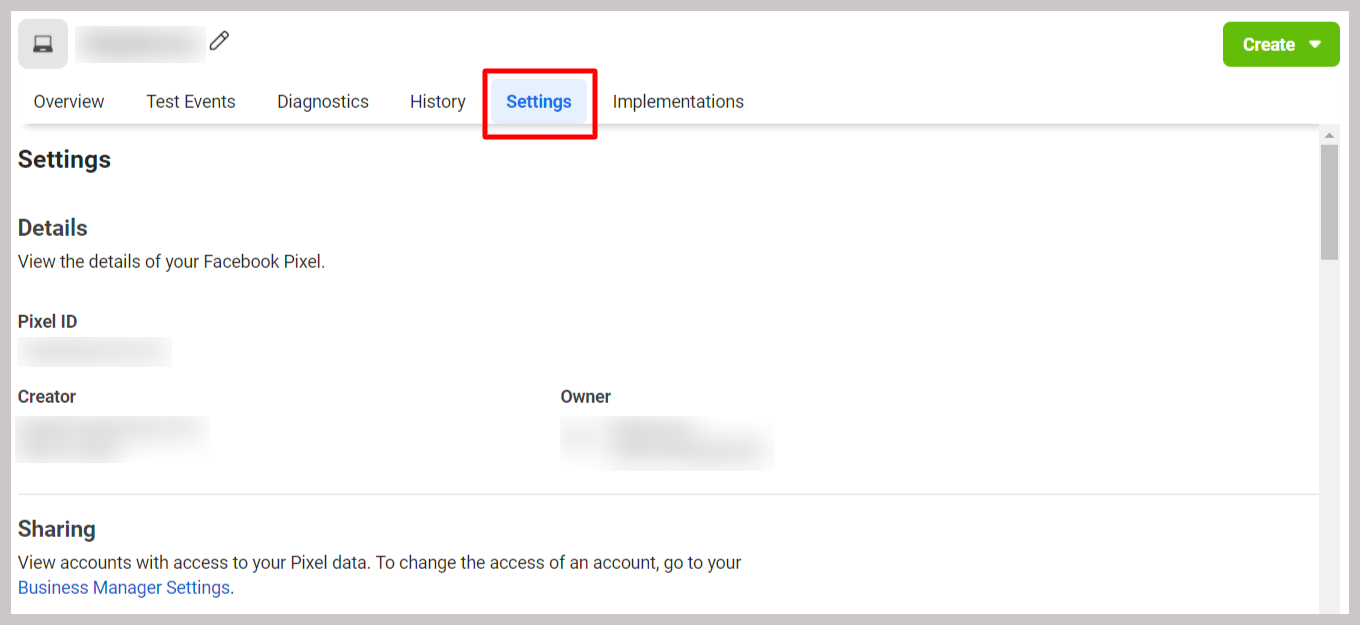
To create a Facebook Pixel, you need access to Facebook Business Manager for your online store.
B. Generate an Access Token for Facebook Pixel
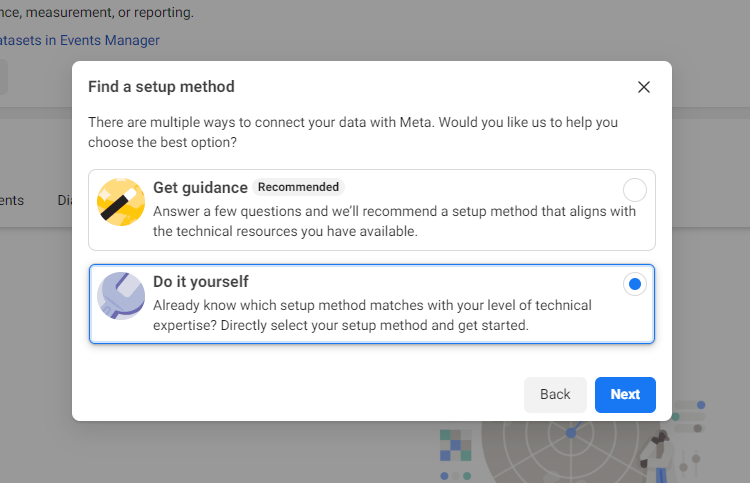
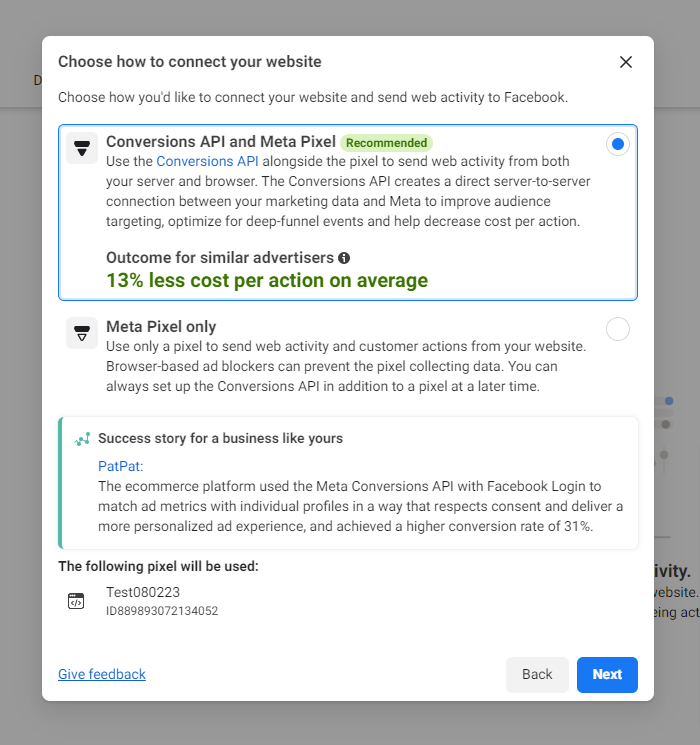
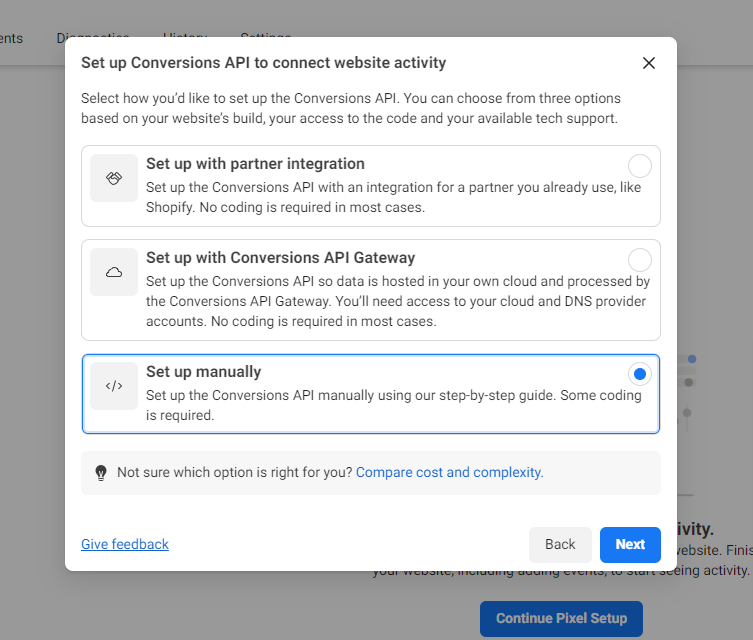
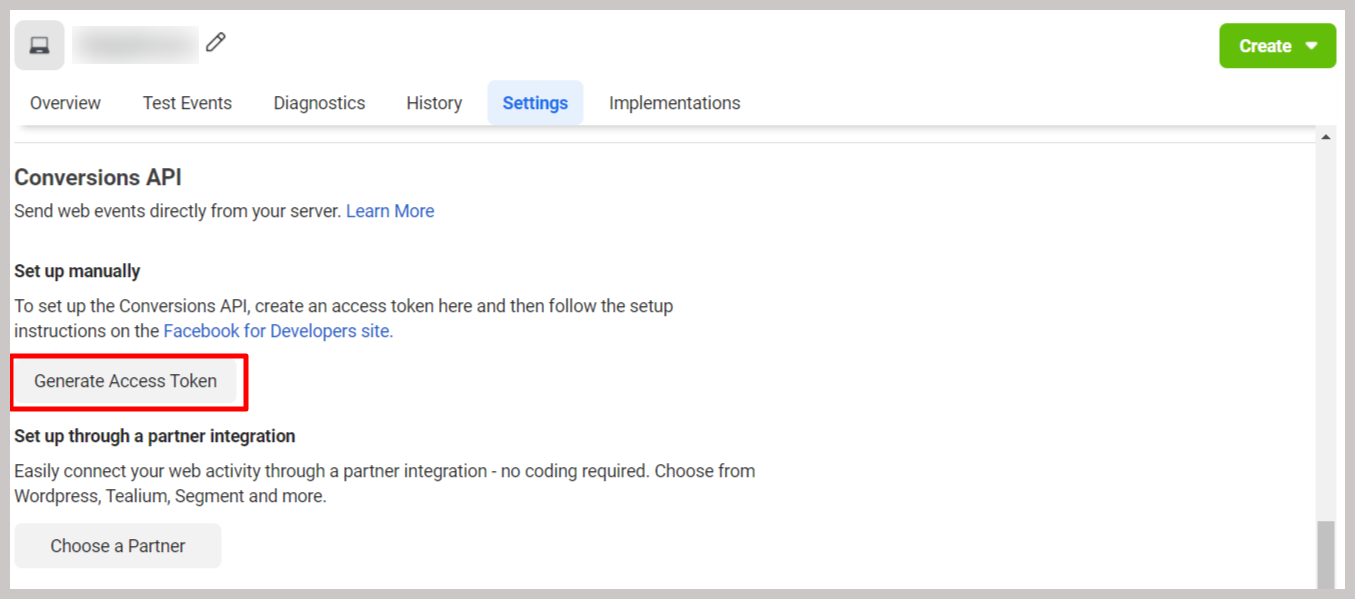
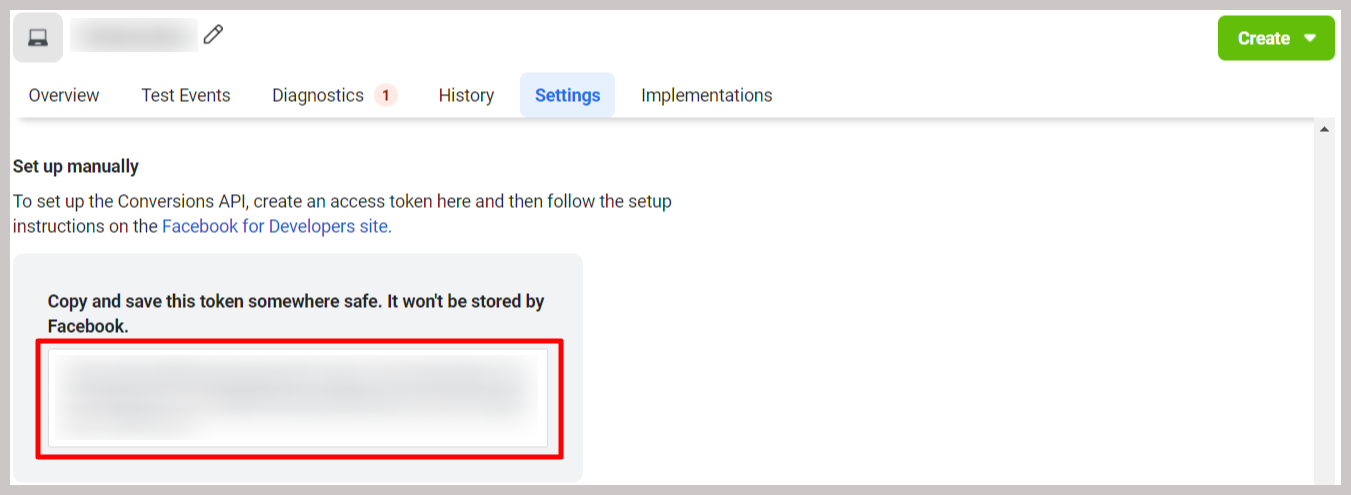
Conversions API works simultaneously with Facebook Pixel to optimize the efficiency of your Facebook ads by sending events directly from server to Facebook. These server events are attached to a specific Facebook Pixel. To set it up, you need to generate an Access token for the previously created Pixel.
To generate an access token, you need to have admin access to Facebook Business Manager.
To see more information on how to add Facebook Pixel and Access Token to your ShopBase online store, follow this link.
It is optional, but recommended, to have both Facebook Pixel ID and Access token.