Design guideline is an instruction to help you easily design product's artwork using PrintBase's available product templates. This set of guidelines not only walks you through the design process, but also includes our design samples for you to refer to.
This article will provide you with the guideline for AOP Hawaii Shirt product.
In this article
A. Product's template
B. Design guideline
C. Sample design file
A. Product's template
Kindly visit this link to download the artwork template for AOP Hawaii Shirt.
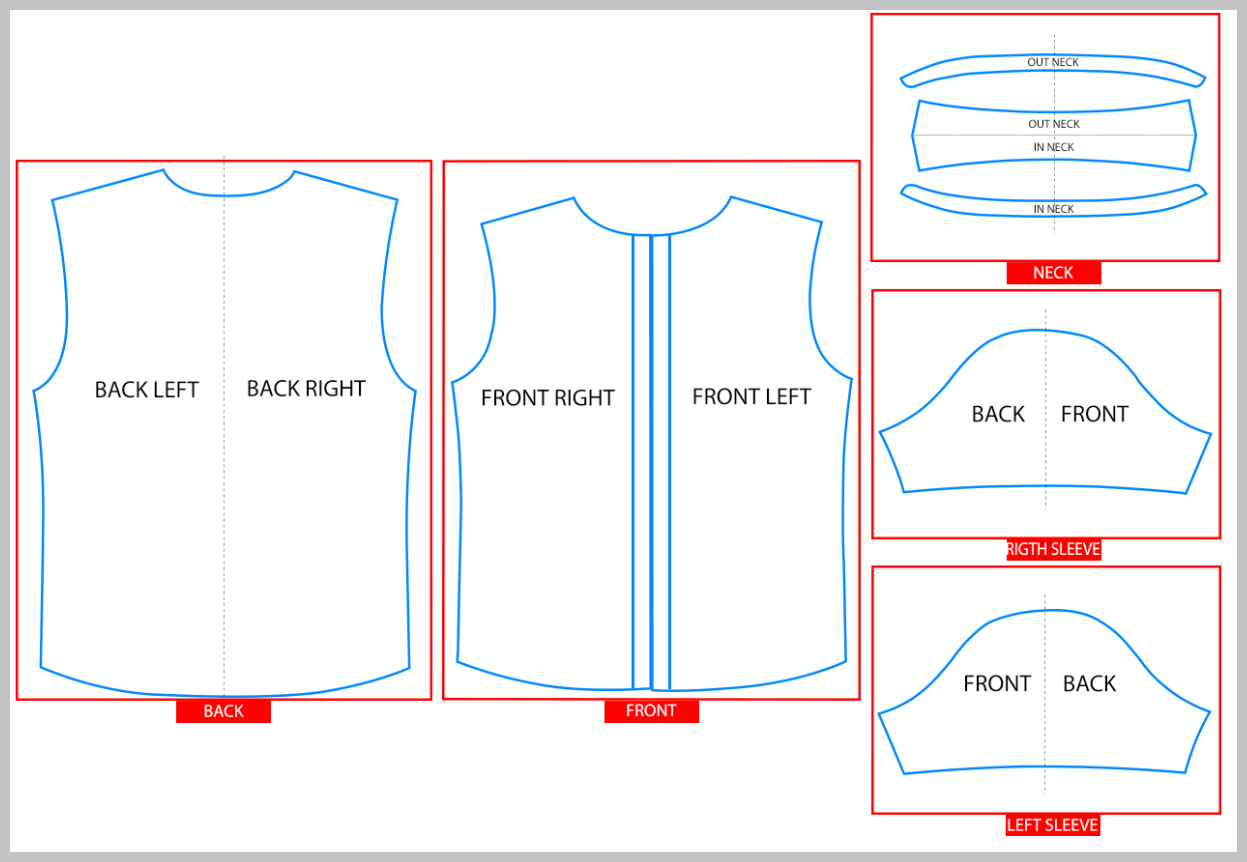
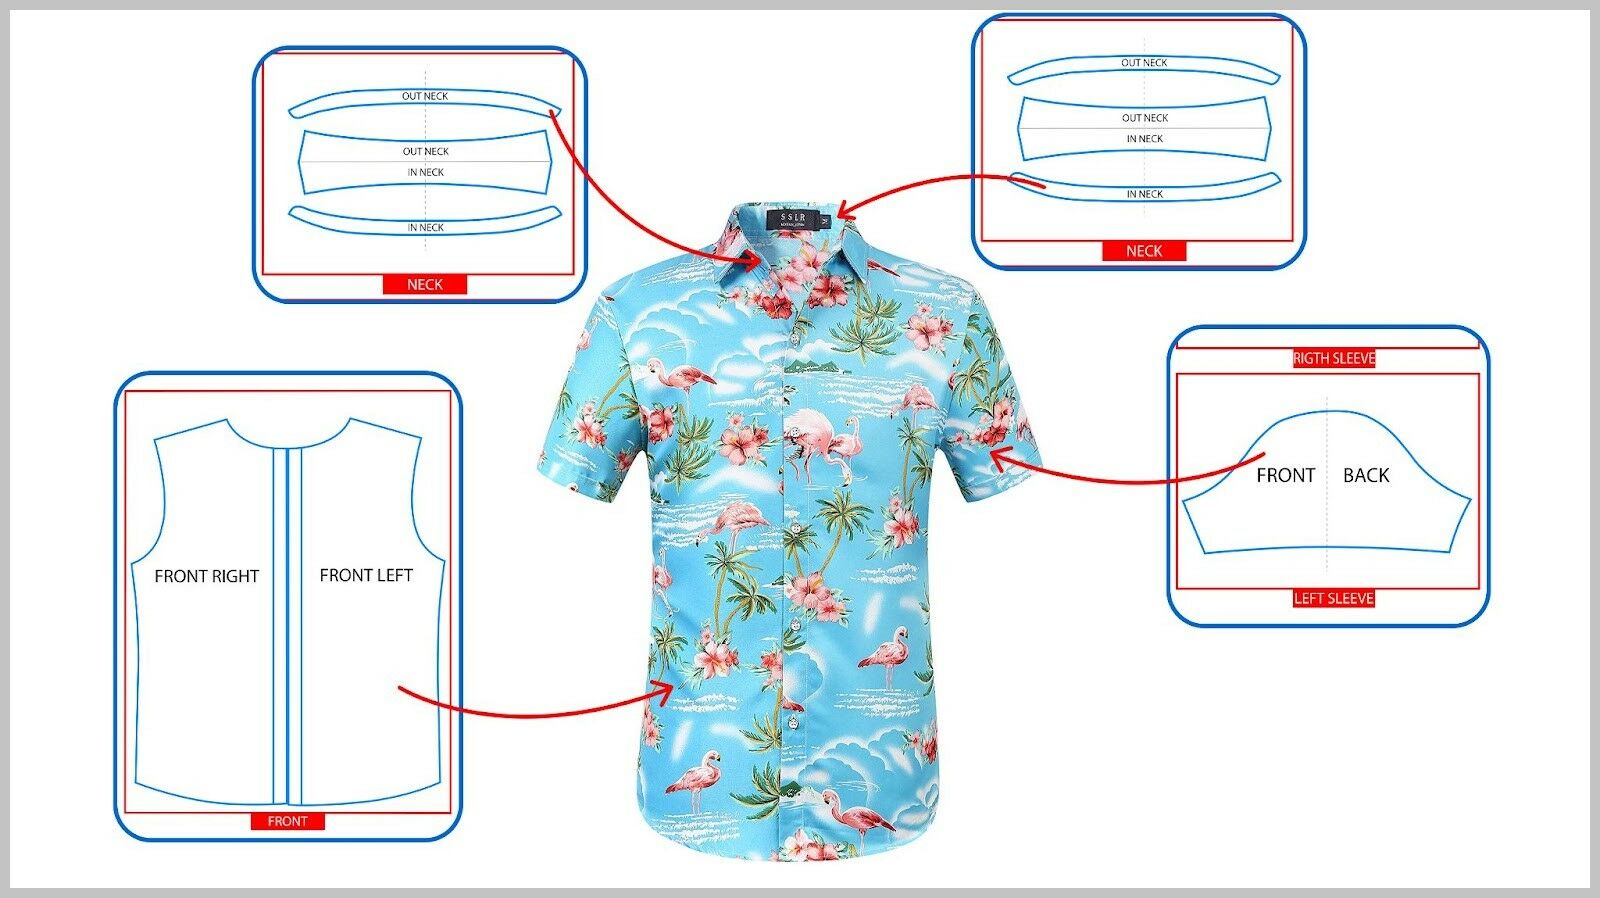
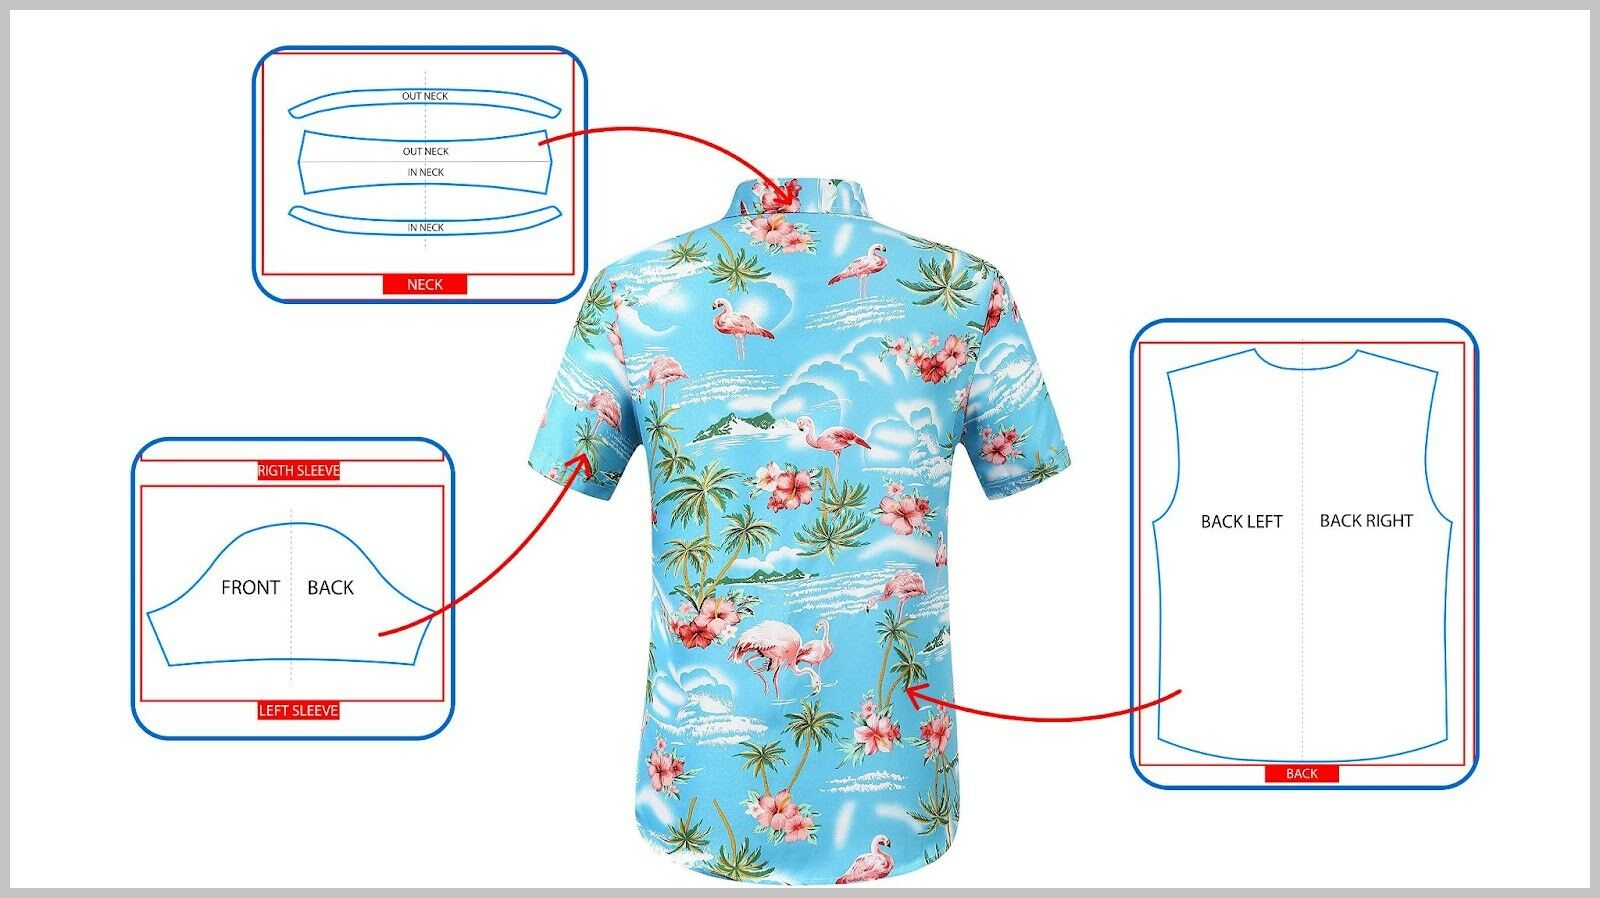
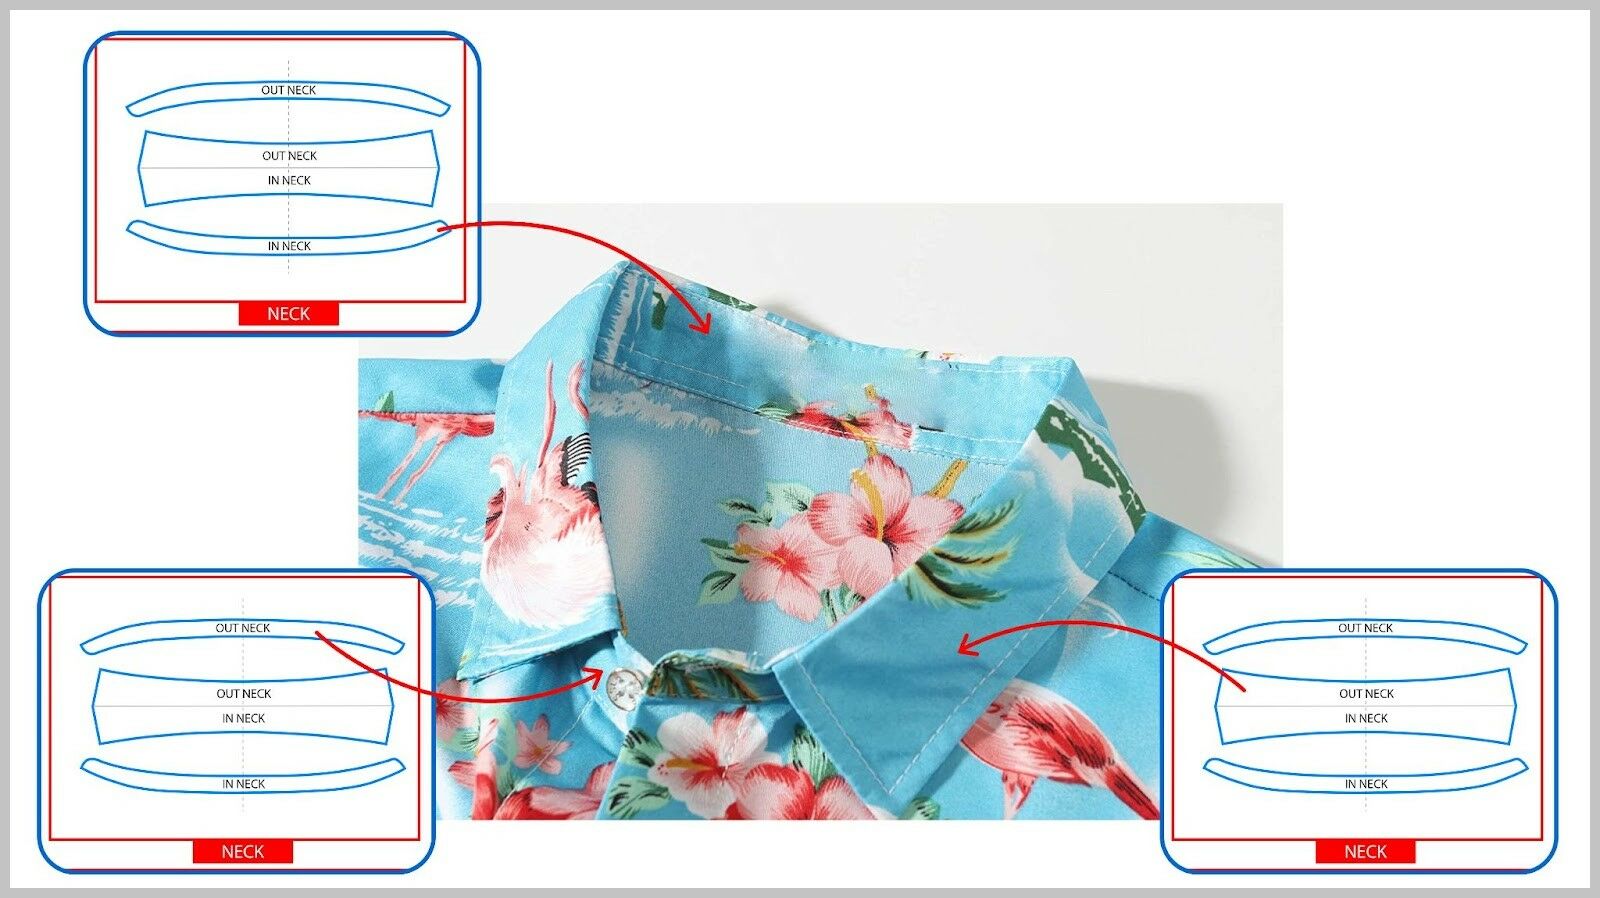
Look at the 3 photos below to see which parts of the template will correspond to which parts of the actual shirt:
There are 2 ways to design this product's artwork:
Directly design on the product's template when creating a new campaign using our Campaign Editor.
Download the product's template from
our Catalog and design using Photoshop.
Please note the following details in the template:
Dimension: 10186 x 7005 px.
Resolution: 150 dpi.
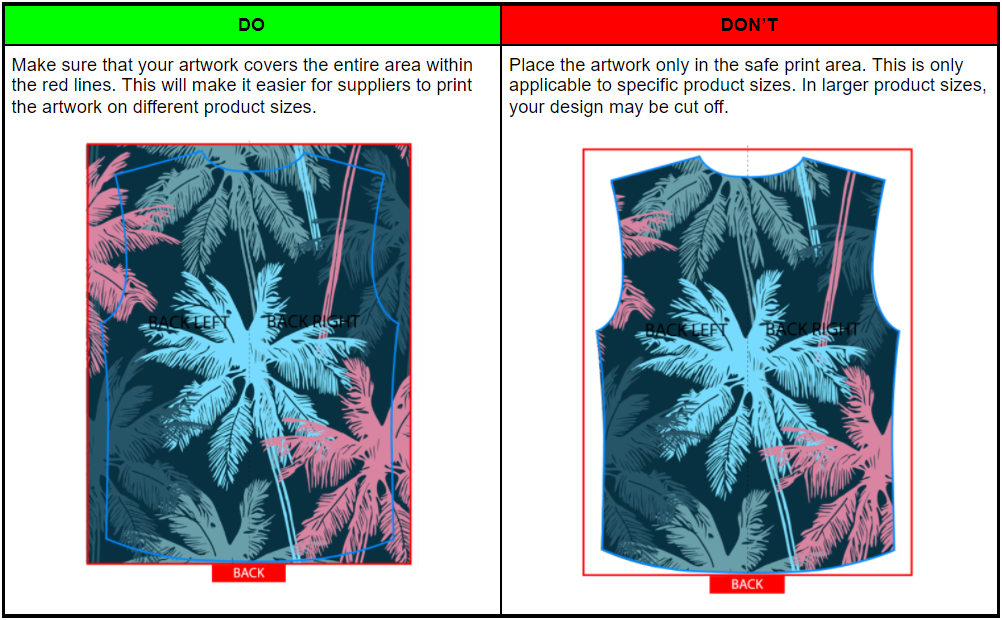
Areas within blue lines: Artwork's safe print area.
Areas within red lines: Artwork's print area. Your artwork must cover this entire area, not just the safe print area.
Horizontal grey dashed lines: These can be used as a guide to center your artwork on the template.
B. Design guideline
Using Campaign Editor
Kindly follow the instructions in this article on how to edit your campaign's design in the Campaign Editor.
Using Photoshop
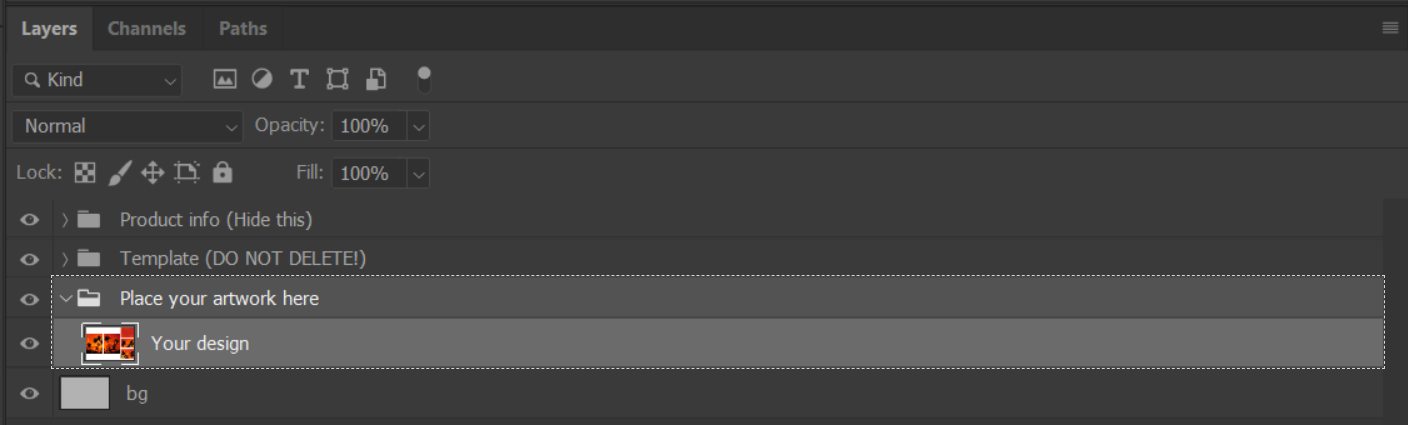
Add artwork to the template: You can either copy and paste your artwork to the Place your artwork here layer in the template, or click and drag it from your folder to this layer.
Adjust your artwork: This product is made up of different pieces that have been put together. Therefore, you should design them carefully so that these pieces fit each other.
Adjust your artwork in the most balanced and appropriate way possible by referring to the template's grey dashed lines.
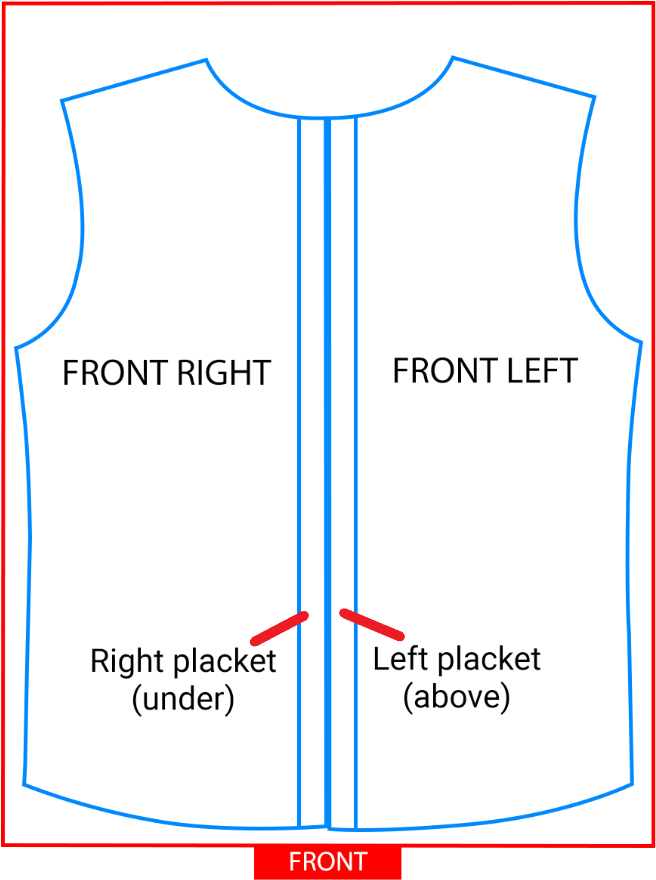
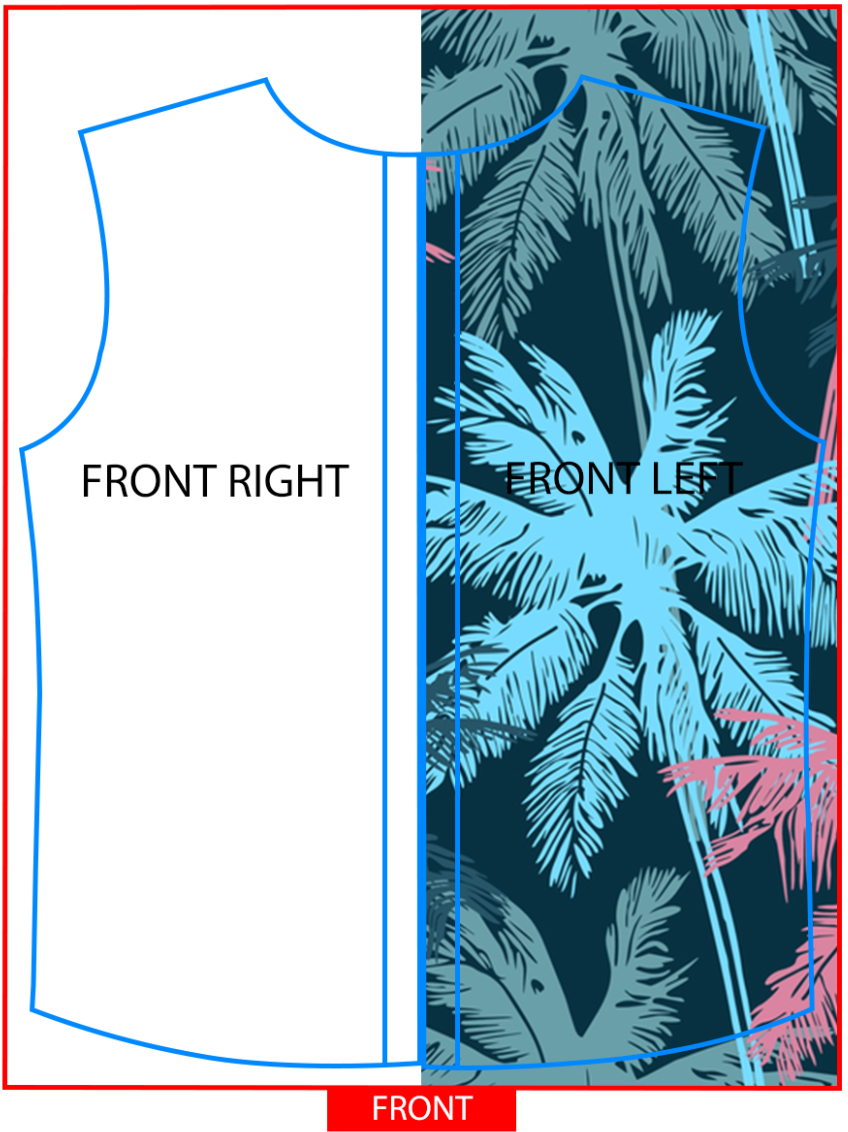
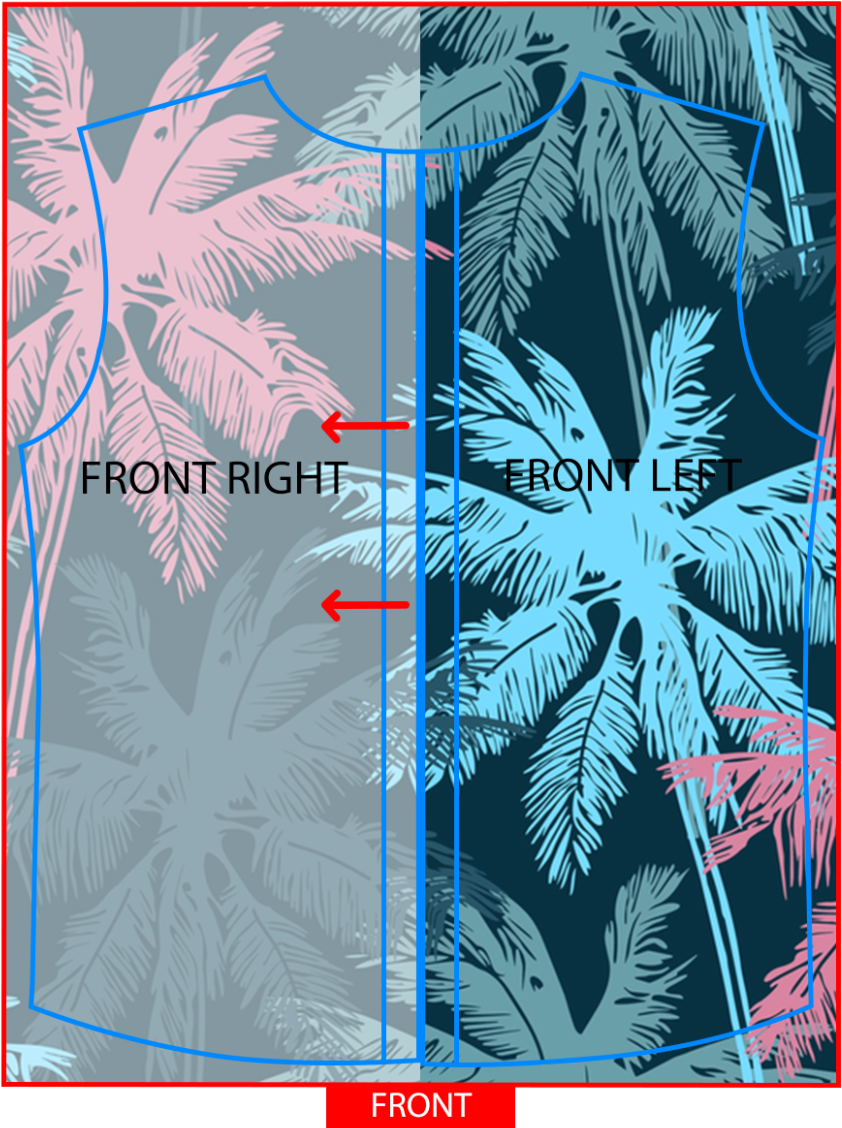
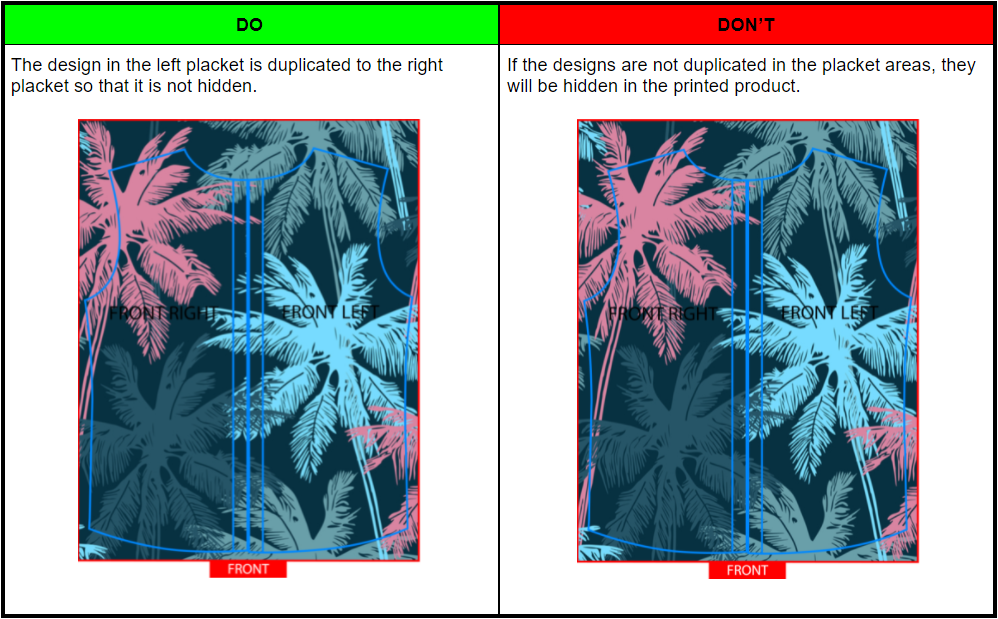
Placket areas: On this shirt, the right and left plackets overlap each other. To make the artwork appear seamless, duplicate the design in the left placket (front left area) and adjust the artwork to the left side (of your view, or towards the front right area on the template) a range equal to the size of that placket.
Save your file in .PNG format: After completing the above steps, hide the Product info and Template groups, keep the Place your artwork here group and Background layer in your Photoshop file. Then click Save As (or press Ctrl + Shift + S) and save the artwork in .PNG format.

Those are all the steps to design your artwork for AOP Hawaii Shirt. Then, you can upload this artwork and launch new campaigns by following the instructions in this article.
C. Sample design file
Please visit this link to our sample design and this link to view our demo campaign of this product.
By following the steps outlined in this article, you can also see how your designs will appear on product mockups.
Related articles