Track Outbrain conversions with ShopBase
When using Outbrain, you may want to see a detailed analysis of your ads performance and whether clicks on your ad led a customer to take a certain action, such as a purchase on your store. On ShopBase, you can track your customer's shopping behavior using Outbrain Pixel.
A. Create conversion on Outbrain
B. Get your Outbrain Pixel ID
C. Install Outbrain Pixel ID on ShopBase store
D. Verify your Outbrain Pixel
E. Troubleshoot duplicated events
F. Outbrain Pixel events
Log into your Outbrain dashboard.
In the main menu, select Conversions.
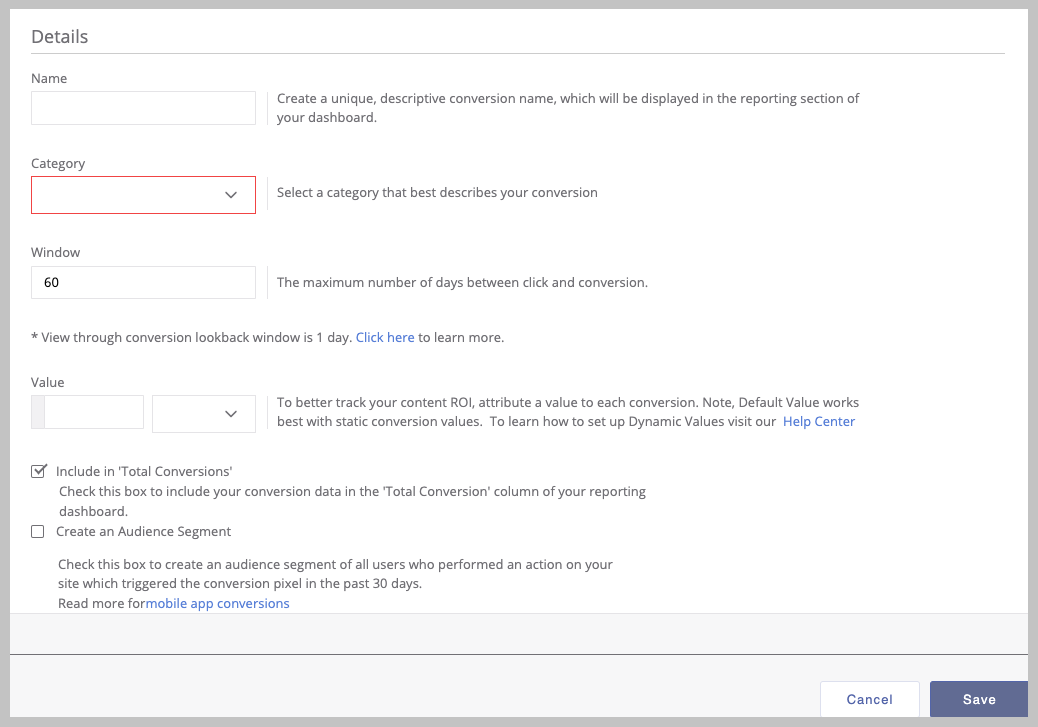
Click Add Conversion.
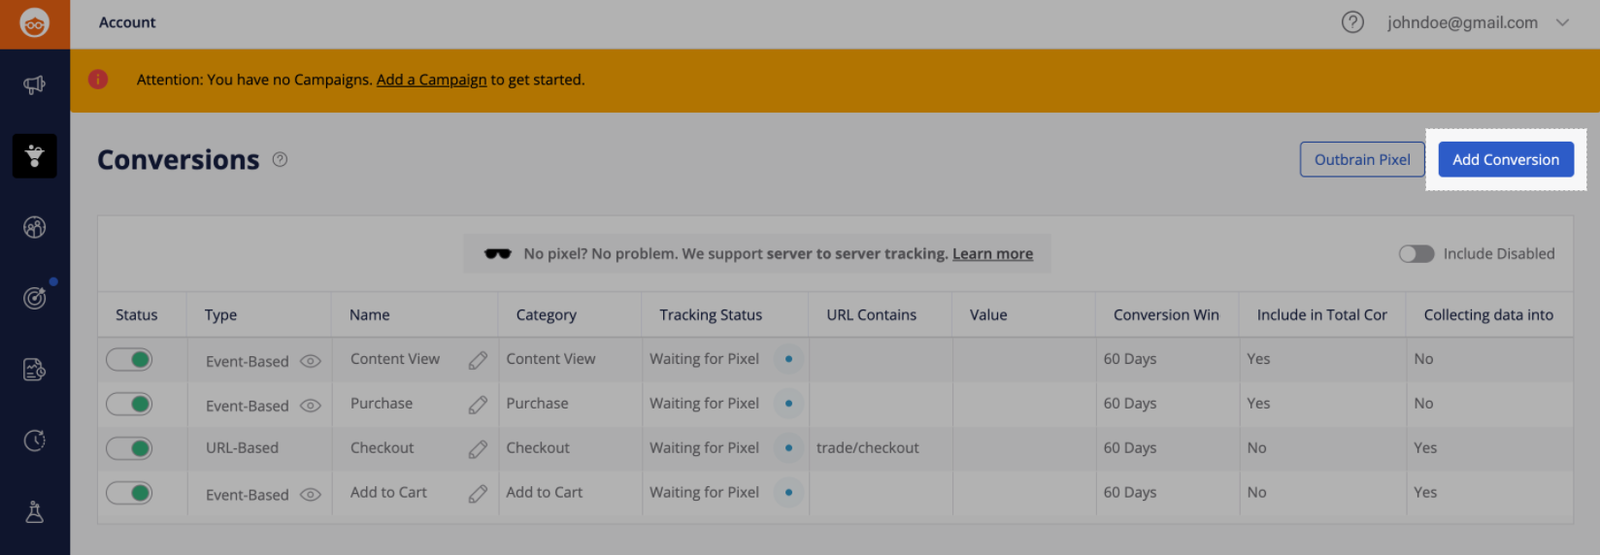
In Type section, select Event-Based Conversion.
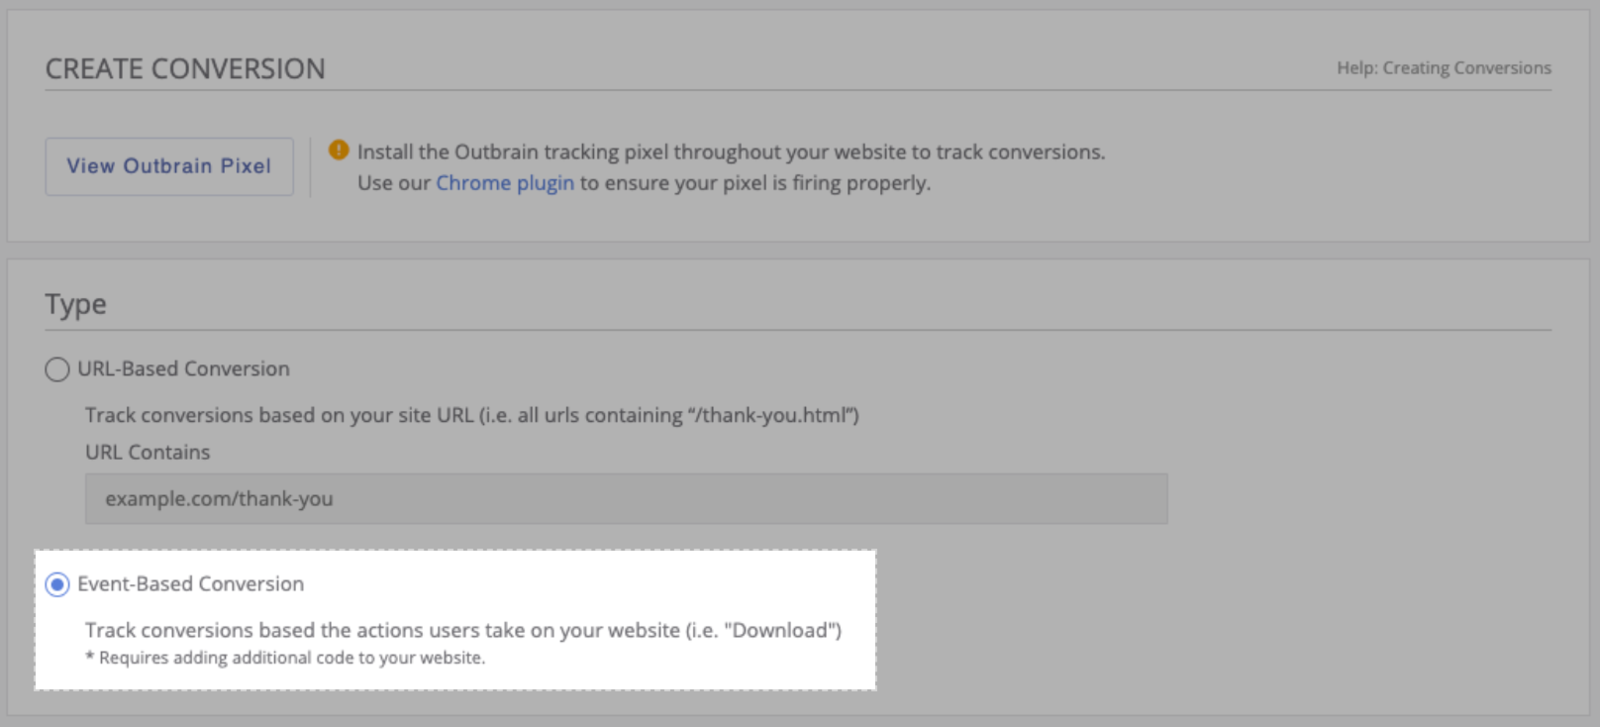
In Details, finish all settings for your conversion as below:
Name: Enter a name for your conversion.
Category: Select a suitable category that best describe your conversion.
Currently, ShopBase only supports tracking for 4 categories: Content View, Add to Cart, Checkout, and Purchase.
You have to fill in the same name and category to ensure your conversion is tracked correctly.
Window: Choose the maximum period of time that allows Outbrain to record a conversion after a guest clicks on the ads, for example someone clicks on the ad, 20 days later it will be converted.
Value: Leave this field blank if you want to use different values for each conversion. In case you want to set a fixed value for all conversions, fill in that value.
Include in 'Total Conversions': Check this box to include your conversion data in the Total Conversion column of your reporting dashboard.
Create an Audience Segment: Check this box to create an audience segment of all users who performed an action on your site which triggered the conversion pixel in the past 30 days.
Click Save to finish.
Log into your Outbrain dashboard.
In the main menu, select Conversions.
Click Outbrain Pixel.
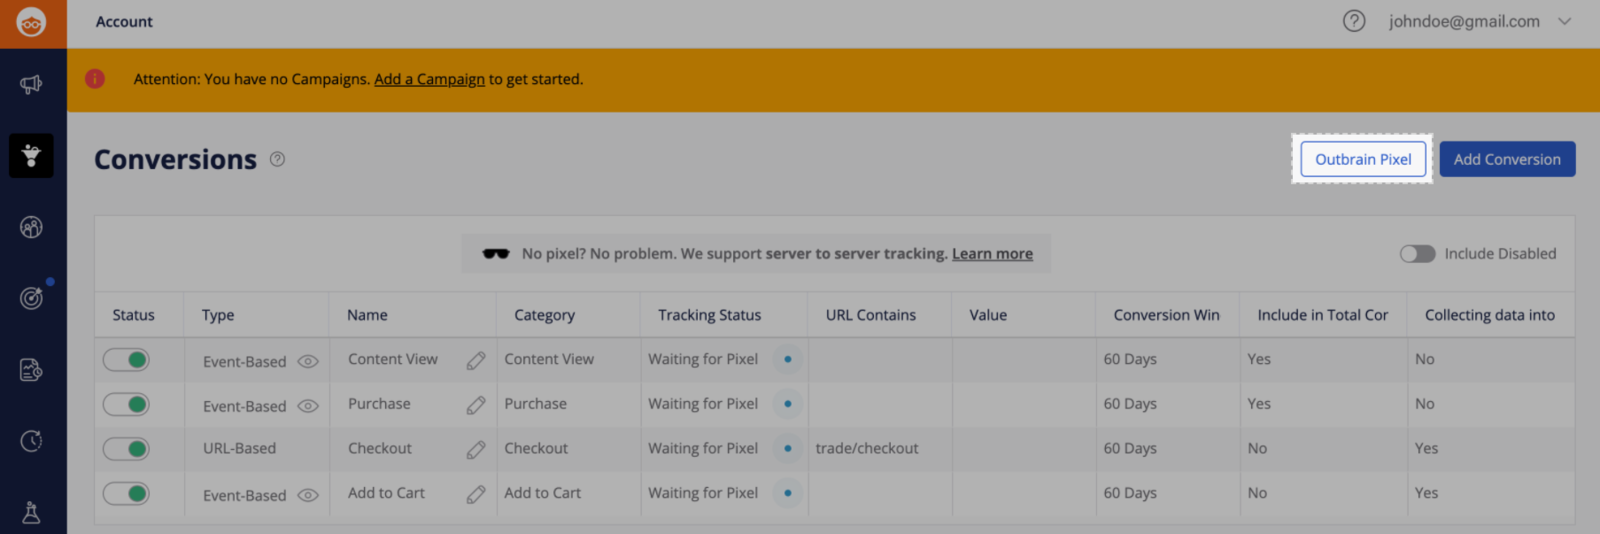
Copy the Pixel ID as in the photo below.
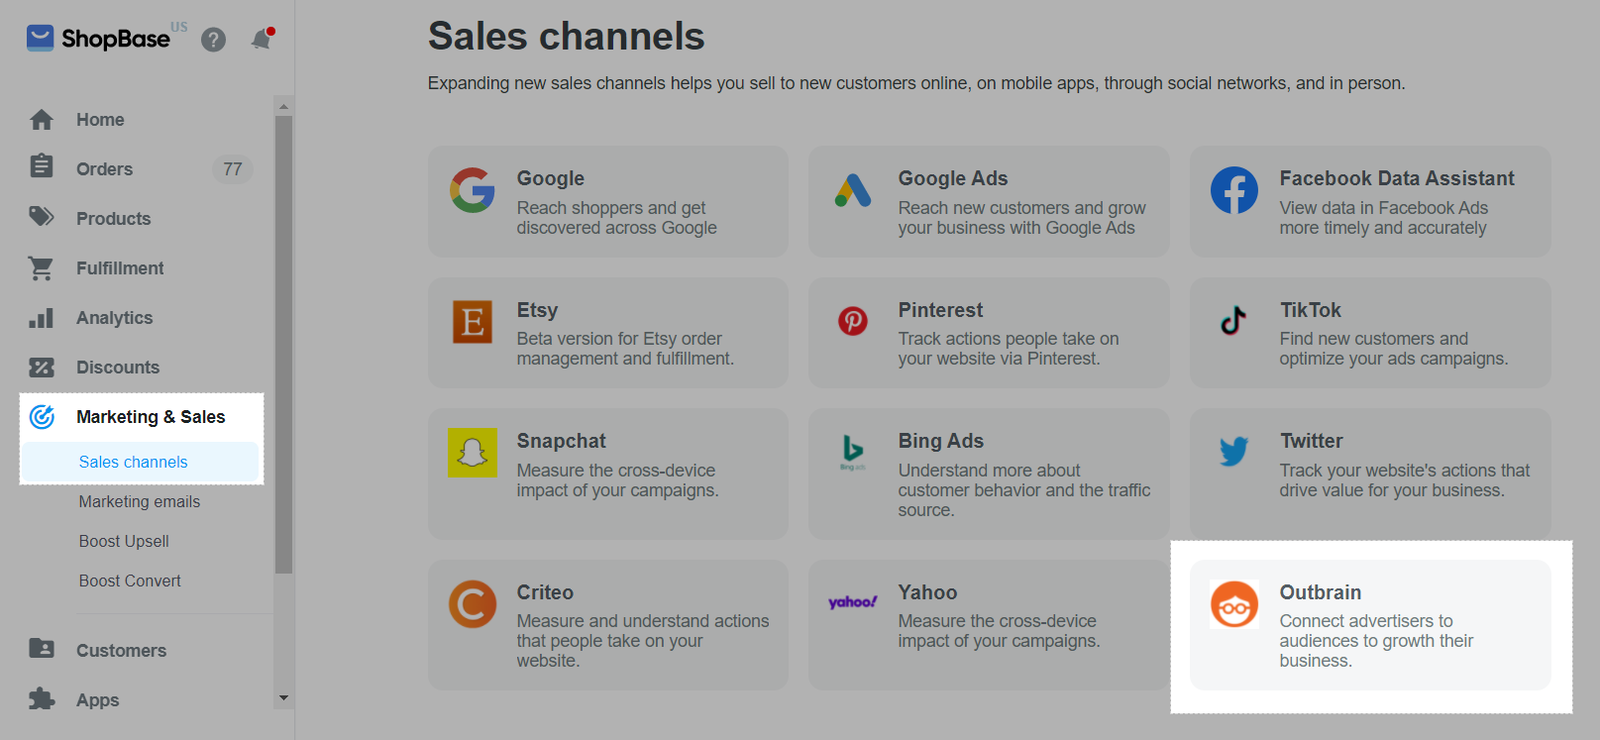
From your ShopBase admin, go to Marketing & Sales > Sales channels and select Outbrain.
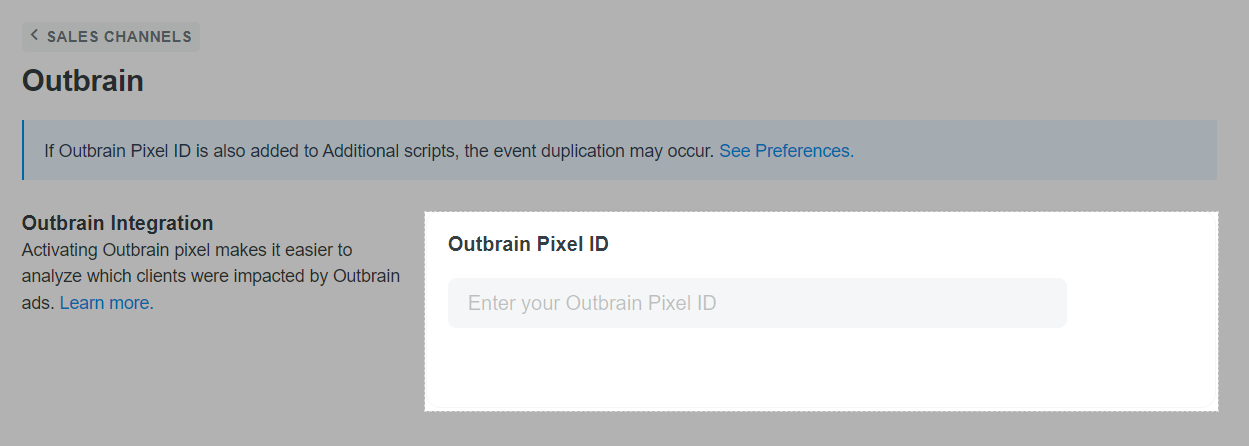
Paste the Outbrain Pixel ID that you have previously copied in part B in the text box.
Click Save changes.
Install Outbrain Pixel Tracker for Chrome. Once installed, you will see the Outbrain Pixel Tracker icon in your Chrome browser.
Go to any product pages on your online store, click on the icon to check if your tag is working correctly.
Along with the above method, you can track your customer behaviors by manually adding the Outbrain Pixel tracking script to Additional Scripts. However, if the two methods are applied simultaneously, each event will be sent more than once, leading to the data duplication.
To solve this problem, go to Preferences > Additional scripts and delete the Outbrain Pixel script added before.
When you create an event-based conversion, Outbrain will mark the corresponding action as a tracking event. Then, whenever an event happens on your online store after you've added an Outbrain Pixel in ShopBase, Outbrain will count the event as a conversion. You can use conversion data to monitor your advertising performance.
After you integrate an Outbrain Pixel with your online store, it automatically tracks 4 events, with their descriptions as follows:
Content View: When a visitor views a product page.
Add to Cart: When a visitor adds a product to the shopping cart.
Checkout: When a visitor clicks on the checkout button.
Purchase: When a visitor completes a purchase and views the thankyou page in the checkout.
Overview of Multichannel Marketing
In this article
A. Create conversion on Outbrain
B. Get your Outbrain Pixel ID
C. Install Outbrain Pixel ID on ShopBase store
D. Verify your Outbrain Pixel
E. Troubleshoot duplicated events
F. Outbrain Pixel events
A. Create conversion on Outbrain
Log into your Outbrain dashboard.
In the main menu, select Conversions.
Click Add Conversion.
In Type section, select Event-Based Conversion.
In Details, finish all settings for your conversion as below:
Name: Enter a name for your conversion.
Category: Select a suitable category that best describe your conversion.
Currently, ShopBase only supports tracking for 4 categories: Content View, Add to Cart, Checkout, and Purchase.
You have to fill in the same name and category to ensure your conversion is tracked correctly.
Window: Choose the maximum period of time that allows Outbrain to record a conversion after a guest clicks on the ads, for example someone clicks on the ad, 20 days later it will be converted.
Value: Leave this field blank if you want to use different values for each conversion. In case you want to set a fixed value for all conversions, fill in that value.
Include in 'Total Conversions': Check this box to include your conversion data in the Total Conversion column of your reporting dashboard.
Create an Audience Segment: Check this box to create an audience segment of all users who performed an action on your site which triggered the conversion pixel in the past 30 days.
Click Save to finish.
B. Get your Outbrain Pixel ID
Log into your Outbrain dashboard.
In the main menu, select Conversions.
Click Outbrain Pixel.
Copy the Pixel ID as in the photo below.
C. Install Outbrain Pixel ID on ShopBase store
From your ShopBase admin, go to Marketing & Sales > Sales channels and select Outbrain.
Paste the Outbrain Pixel ID that you have previously copied in part B in the text box.
Click Save changes.
D. Verify your Outbrain Pixel
Install Outbrain Pixel Tracker for Chrome. Once installed, you will see the Outbrain Pixel Tracker icon in your Chrome browser.
Go to any product pages on your online store, click on the icon to check if your tag is working correctly.
E. Troubleshoot duplicated events
Along with the above method, you can track your customer behaviors by manually adding the Outbrain Pixel tracking script to Additional Scripts. However, if the two methods are applied simultaneously, each event will be sent more than once, leading to the data duplication.
To solve this problem, go to Preferences > Additional scripts and delete the Outbrain Pixel script added before.
F. Outbrain Pixel events
When you create an event-based conversion, Outbrain will mark the corresponding action as a tracking event. Then, whenever an event happens on your online store after you've added an Outbrain Pixel in ShopBase, Outbrain will count the event as a conversion. You can use conversion data to monitor your advertising performance.
After you integrate an Outbrain Pixel with your online store, it automatically tracks 4 events, with their descriptions as follows:
Content View: When a visitor views a product page.
Add to Cart: When a visitor adds a product to the shopping cart.
Checkout: When a visitor clicks on the checkout button.
Purchase: When a visitor completes a purchase and views the thankyou page in the checkout.
Related articles
Overview of Multichannel Marketing
Updated on: 22/08/2022
Thank you!