Integrate Cloak Protection to ShopBase Store
IPCloakAPI is a specialized service for Cloaking & Fraud Prevention aimed at online merchants who want to improve lead quality and ROI by protecting store links and reducing fraudulent traffic. This tool blocks fraud and undesired visits in real-time, securing your websites from unwanted traffic.
Benefits:
Protect your landing pages
Instantly improve ROI and lead quality
Reduce IP fraud
Powerful filtering platform
This article will guide you on integrating Cloak with your ShopBase store.
A. Set up Cloak campaign and obtain the key
B. Integrate Cloak with ShopBase store
Create an account on IPCloakAPI and obtain the Cloak key
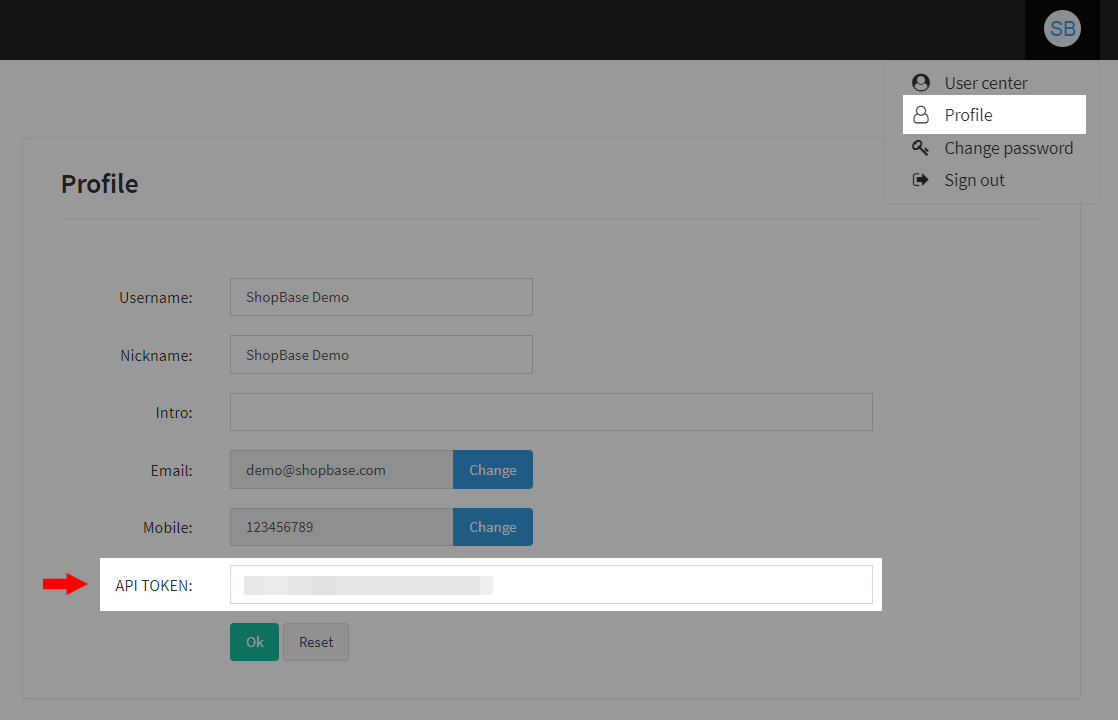
Register an account on ipcloakapi.com. Then navigate to the Profile settings, copy the API Token. This is your Cloak key.
Create and set up a new campaign
Create a new campaign and set up the desired filters. You can set up multiple filters for your campaign.
For example, in the Visitor's Location section, you can set the country to allow access to your store:
◈ Allow Only: Select the countries from which you want visitors to access your store. Here, select US (United States).
◈ Filter: Select the countries from which you want to redirect visitors to another site. Here, select CN (China).
When visitors access your store, they will go through the Cloak filter first. Visitors from the US will access the store directly, while visitors from China will be redirected to another site.
Click Save and go to the dashboard. Copy the Campaign ID you want to apply to your store.
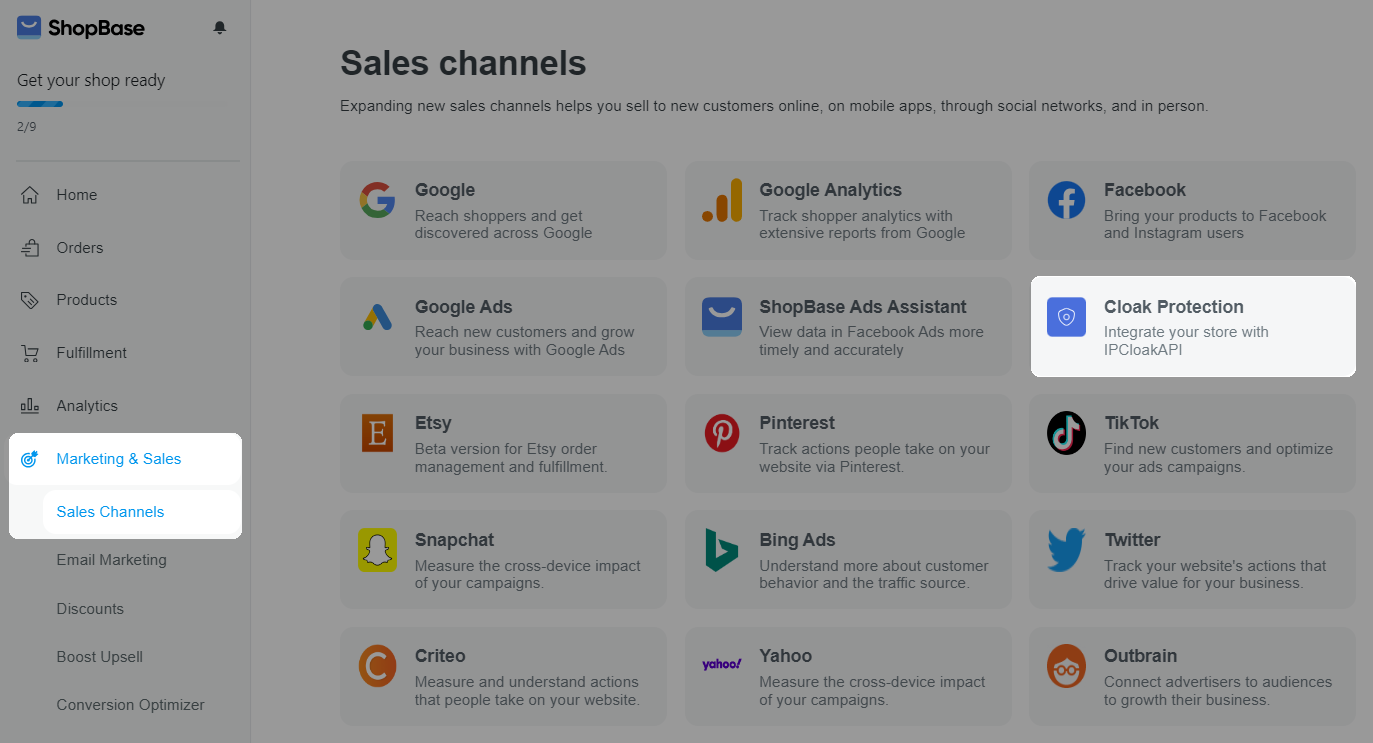
In the ShopBase store admin, go to Marketing & Sales > Sales Channels > Cloak Protection.
In Settings:
ID: Paste the Campaign ID you copied in section A.
Cloak Key: Paste the API token you copied in section A.
Applied countries: Select the countries from which you want the Cloak filter to be applied. Countries not selected will NOT be filtered by Cloak and will visit the store directly.
Redirections:
Same product URL handle, different store: Select the store which has the same handle as the original store. Unwanted visitors will be redirected to the product page that has the same handle in the selected store. If the selected store does not have a product with the same handle, the storefront will display an unavailable page.
Another URL: Enter the URL you want to redirect visitors to. Unwanted visitors will be redirected to the specified URL.
Click Save to finish. Once your setup is done, your store will be protected by IPCloakAPI.
Overview of Multichannel Marketing
Benefits:
Protect your landing pages
Instantly improve ROI and lead quality
Reduce IP fraud
Powerful filtering platform
This article will guide you on integrating Cloak with your ShopBase store.
In this article
A. Set up Cloak campaign and obtain the key
B. Integrate Cloak with ShopBase store
A. Set up Cloak campaign and obtain the key
Create an account on IPCloakAPI and obtain the Cloak key
Register an account on ipcloakapi.com. Then navigate to the Profile settings, copy the API Token. This is your Cloak key.
Create and set up a new campaign
Create a new campaign and set up the desired filters. You can set up multiple filters for your campaign.
For example, in the Visitor's Location section, you can set the country to allow access to your store:
◈ Allow Only: Select the countries from which you want visitors to access your store. Here, select US (United States).
◈ Filter: Select the countries from which you want to redirect visitors to another site. Here, select CN (China).
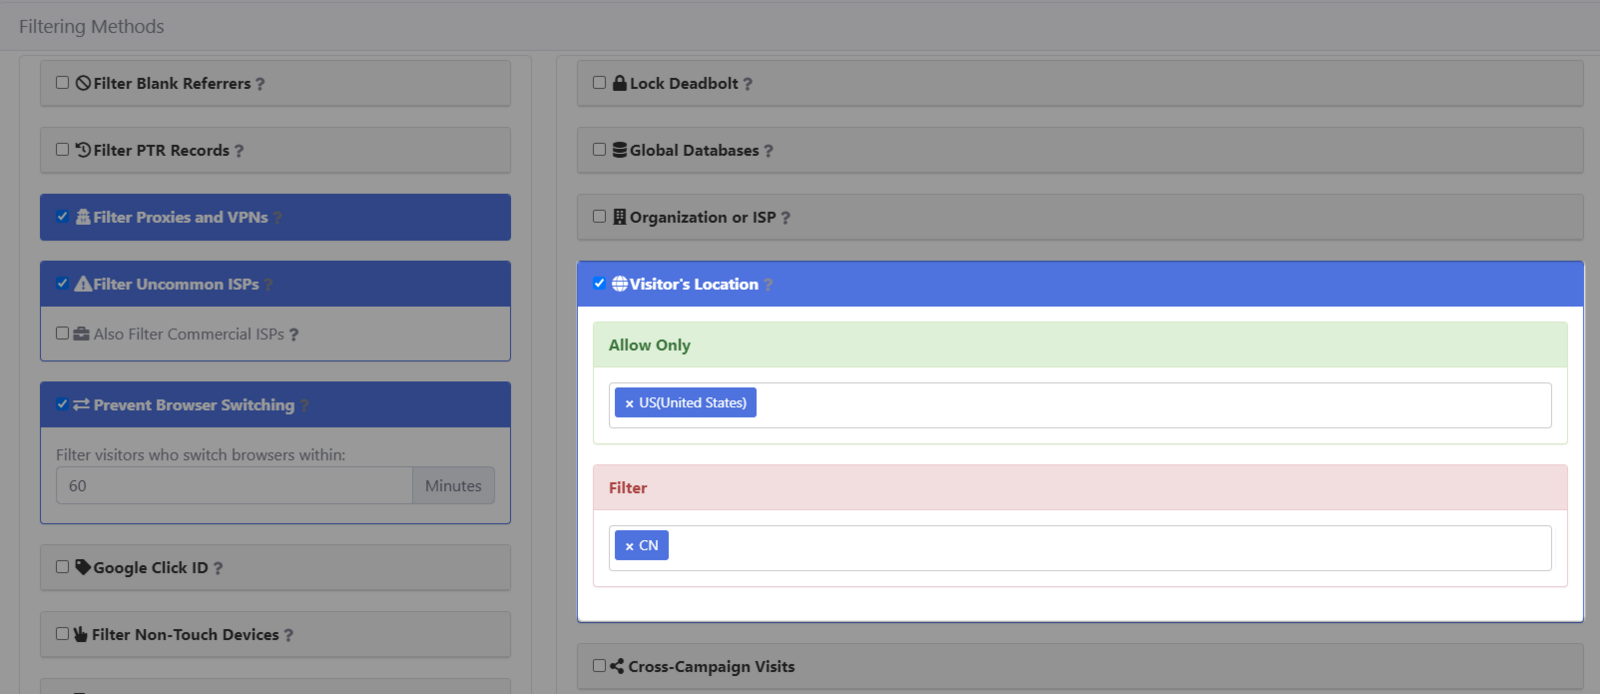
When visitors access your store, they will go through the Cloak filter first. Visitors from the US will access the store directly, while visitors from China will be redirected to another site.
Click Save and go to the dashboard. Copy the Campaign ID you want to apply to your store.
B. Integrate Cloak with ShopBase store
In the ShopBase store admin, go to Marketing & Sales > Sales Channels > Cloak Protection.
In Settings:
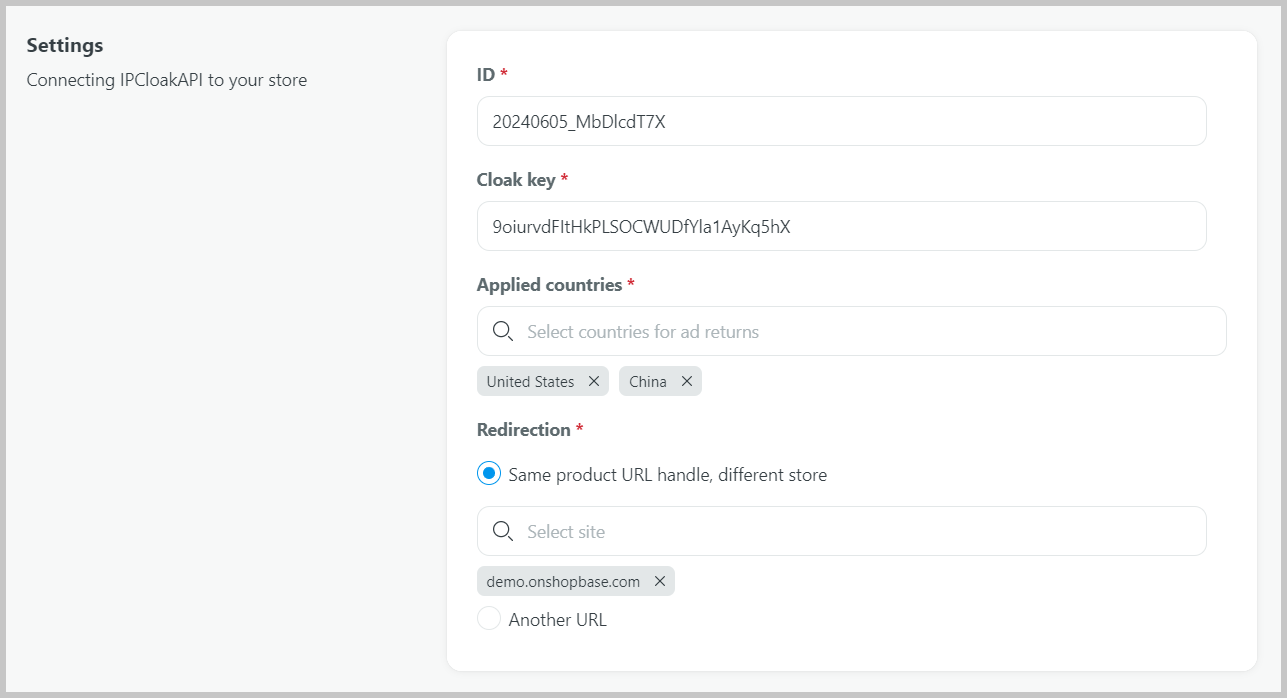
ID: Paste the Campaign ID you copied in section A.
Cloak Key: Paste the API token you copied in section A.
Applied countries: Select the countries from which you want the Cloak filter to be applied. Countries not selected will NOT be filtered by Cloak and will visit the store directly.
Redirections:
Same product URL handle, different store: Select the store which has the same handle as the original store. Unwanted visitors will be redirected to the product page that has the same handle in the selected store. If the selected store does not have a product with the same handle, the storefront will display an unavailable page.
Another URL: Enter the URL you want to redirect visitors to. Unwanted visitors will be redirected to the specified URL.
Click Save to finish. Once your setup is done, your store will be protected by IPCloakAPI.
Related articles
Overview of Multichannel Marketing
Updated on: 28/06/2024
Thank you!