Authenticate domain used in store’s customer email
This article is also available in:
Domain authentication on ShopBase allows you to show email providers that ShopBase has your permission to send emails on your behalf. In more detail, after the domain used in your store’s customer email has been authenticated, your recipients will no longer see the via shopbase.net following your email address in the emails sent from your store. Although this is a small change from the recipient's perspective, it has a significant impact on your reputation as a sender and email deliverability, leading to a higher rate of your emails reaching recipients' inbox.
Step by Step Tutorial
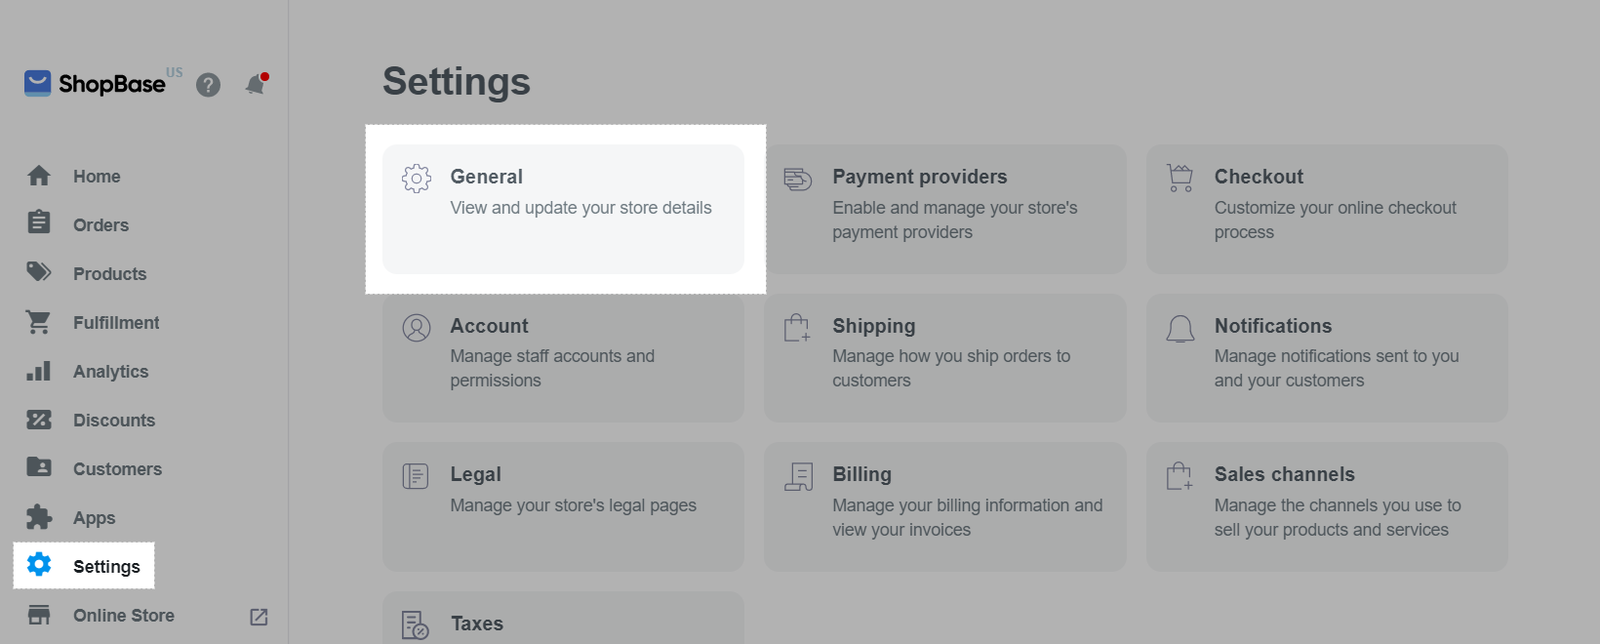
From your ShopBase admin site, go to Settings > General.
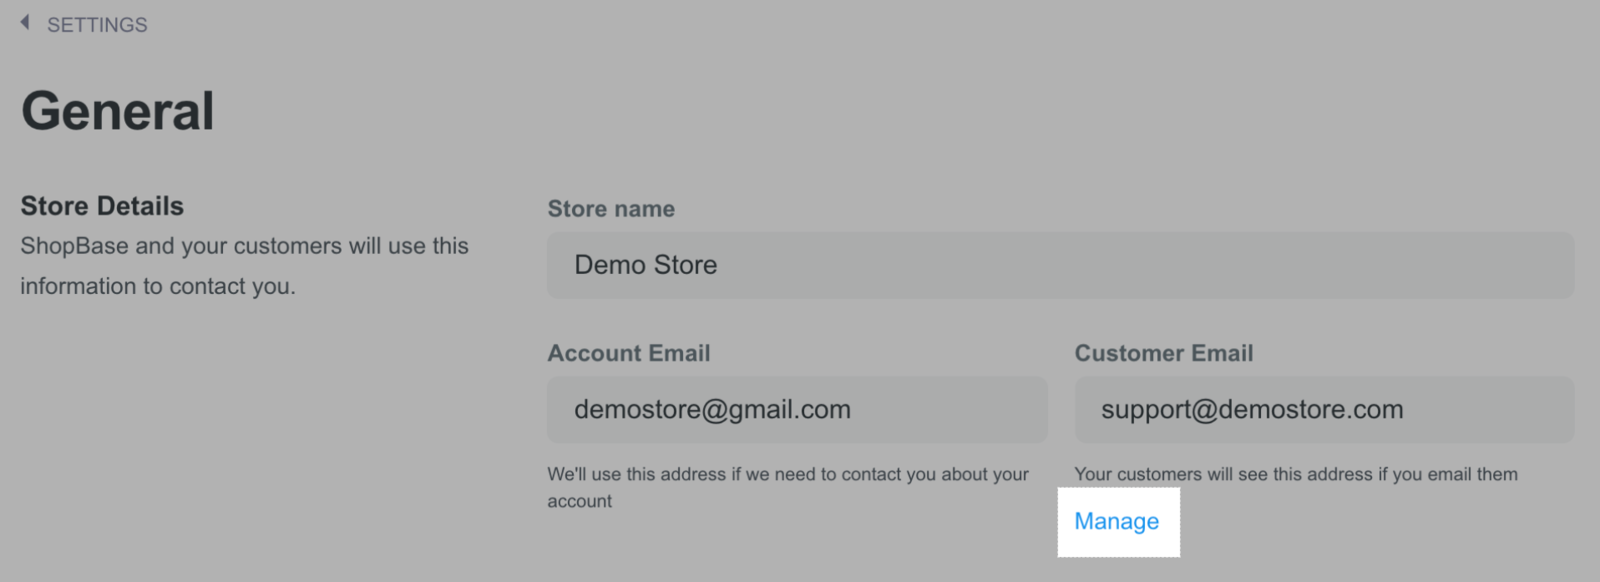
Click on Manage under your Customer Email.
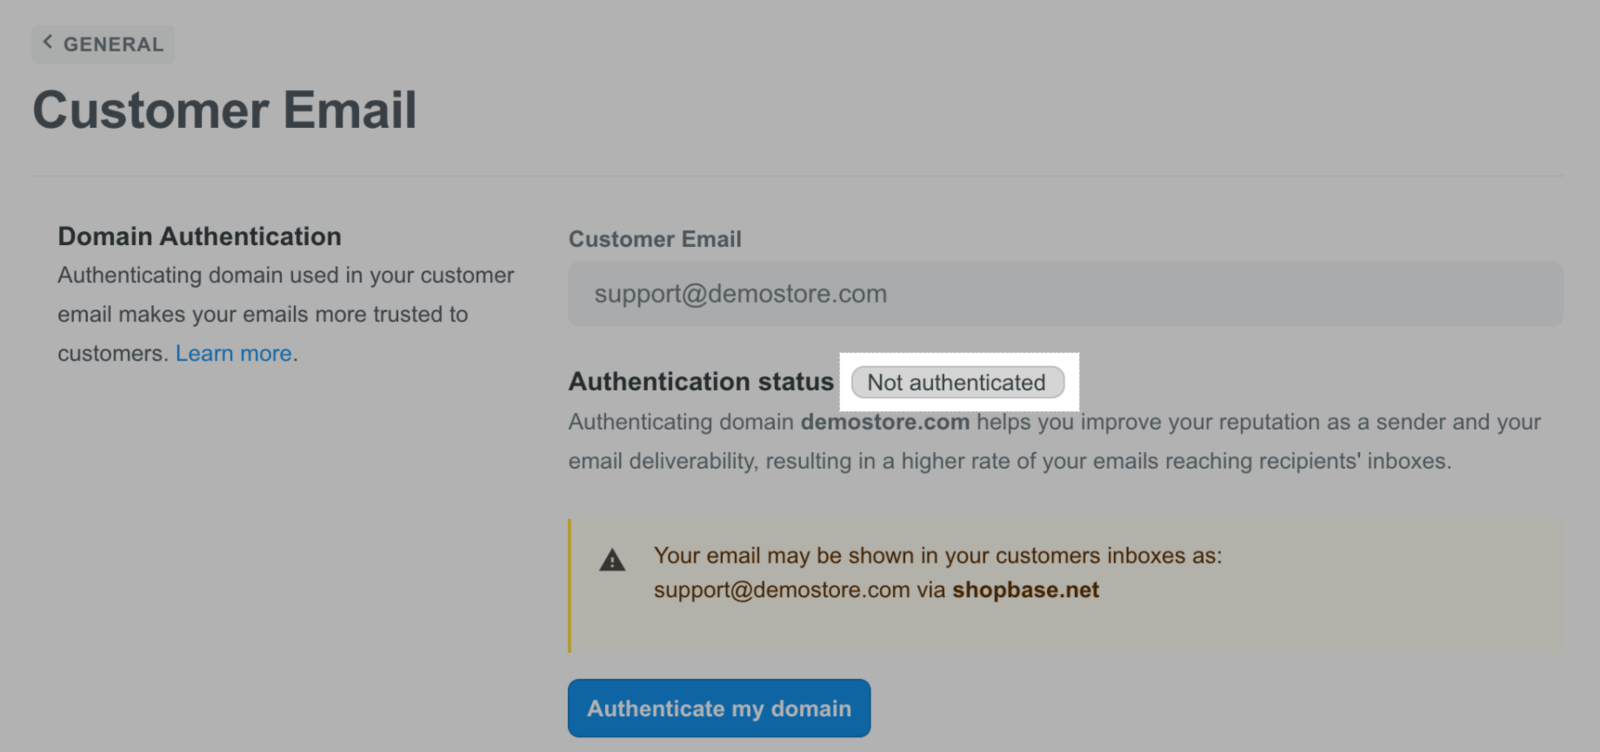
In Customer Email page, you can see the authentication status of your domain:
Not authenticated: Your domain has not been authenticated yet.
Pending: Your authentication request is being reviewed and processed.
Authenticated: Your authentication request is approved.
Failed: Your authentication request is rejected and you will need to authenticate again.
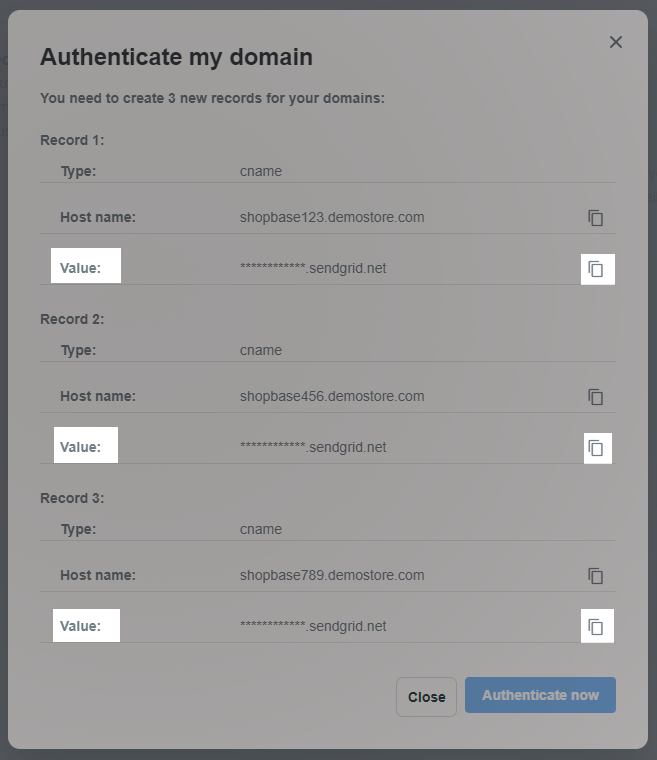
Click on Authenticate my domain to view what you need to set up on your domain to send an authentication request. In the pop-up, check the instruction and in Host name: copy the value before
domain.com and in Value: copy the whole value.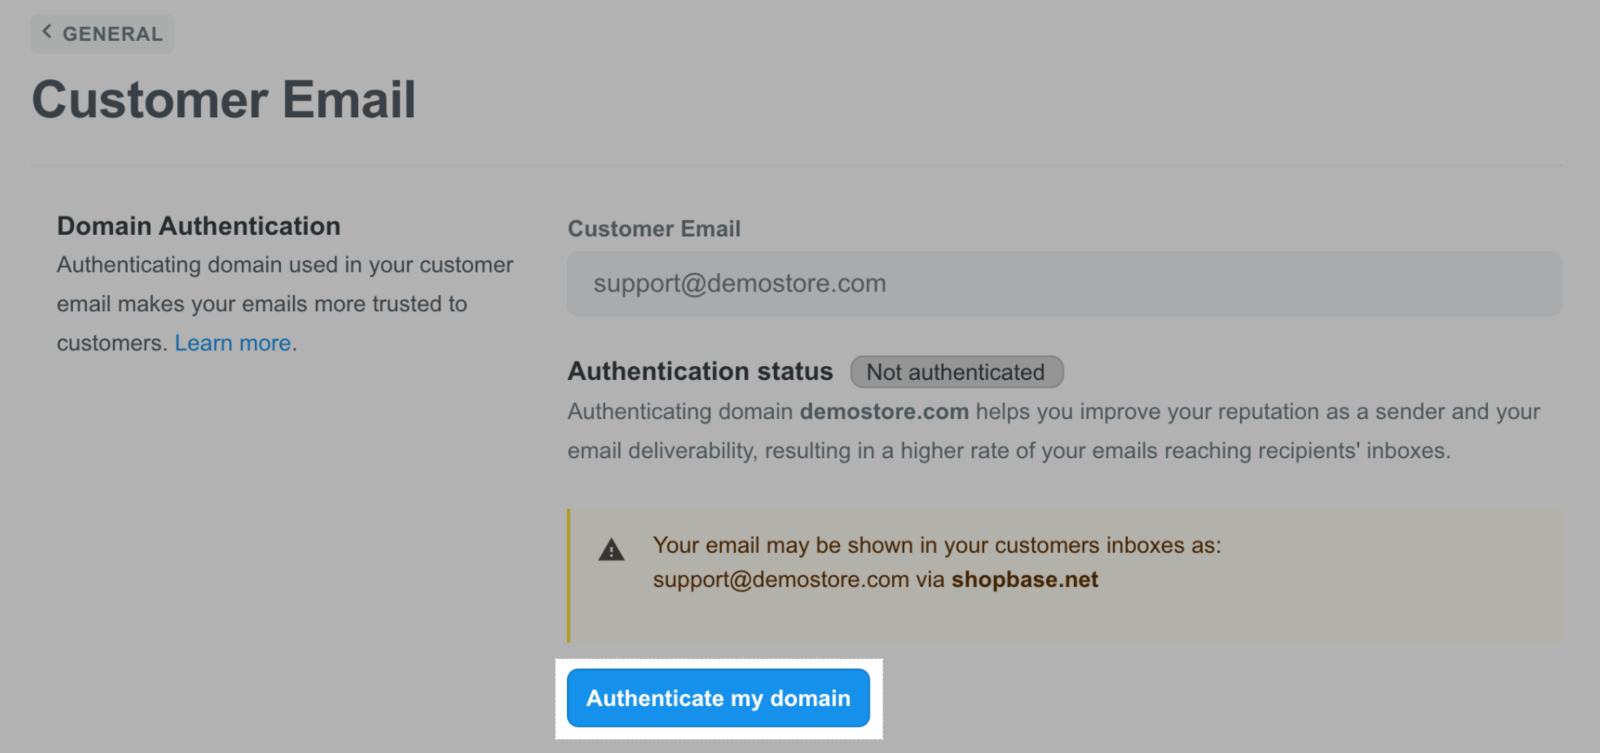
If your domain is purchased from ShopBase, please follow steps 5 to 9
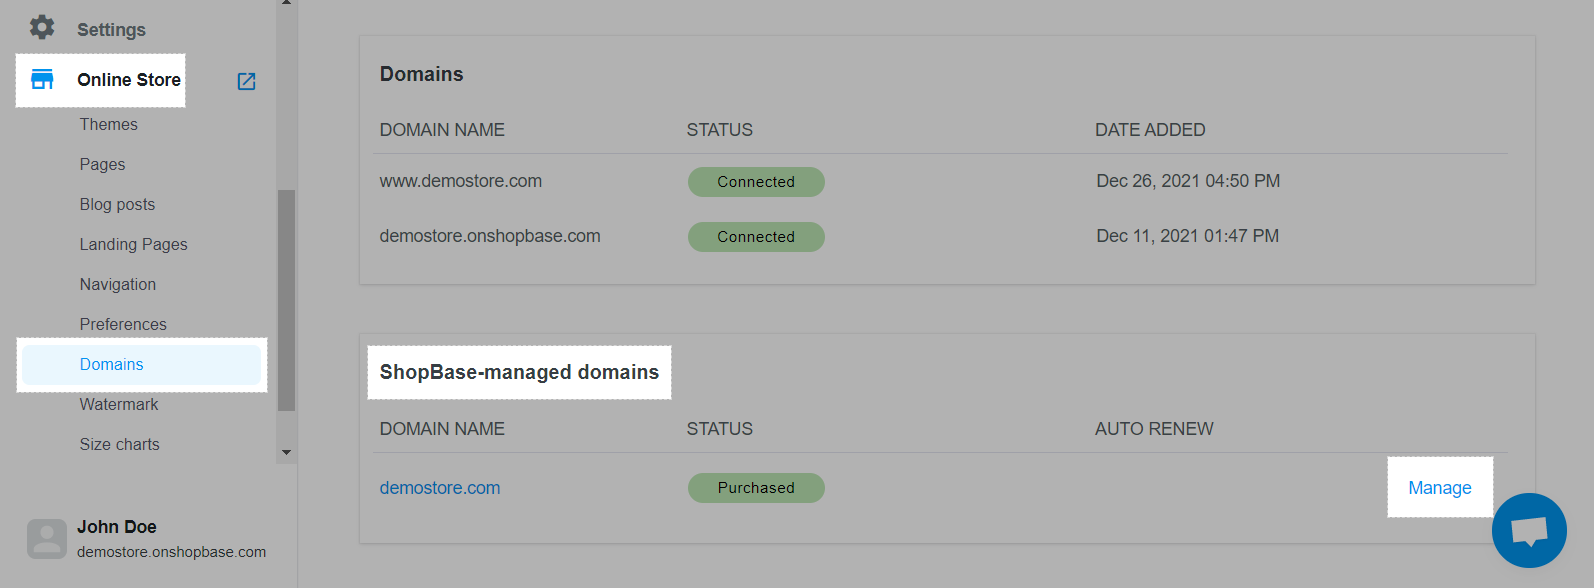
In your browser, open a new tab and go to Online store > Domains from your ShopBase admin site. In ShopBase-managed domains click Manage next to your corresponding domain.
Then, you will be directed to the admin dashboard of the domain. Here, select DNS Management > Manage DNS.

Click CNAME Records.

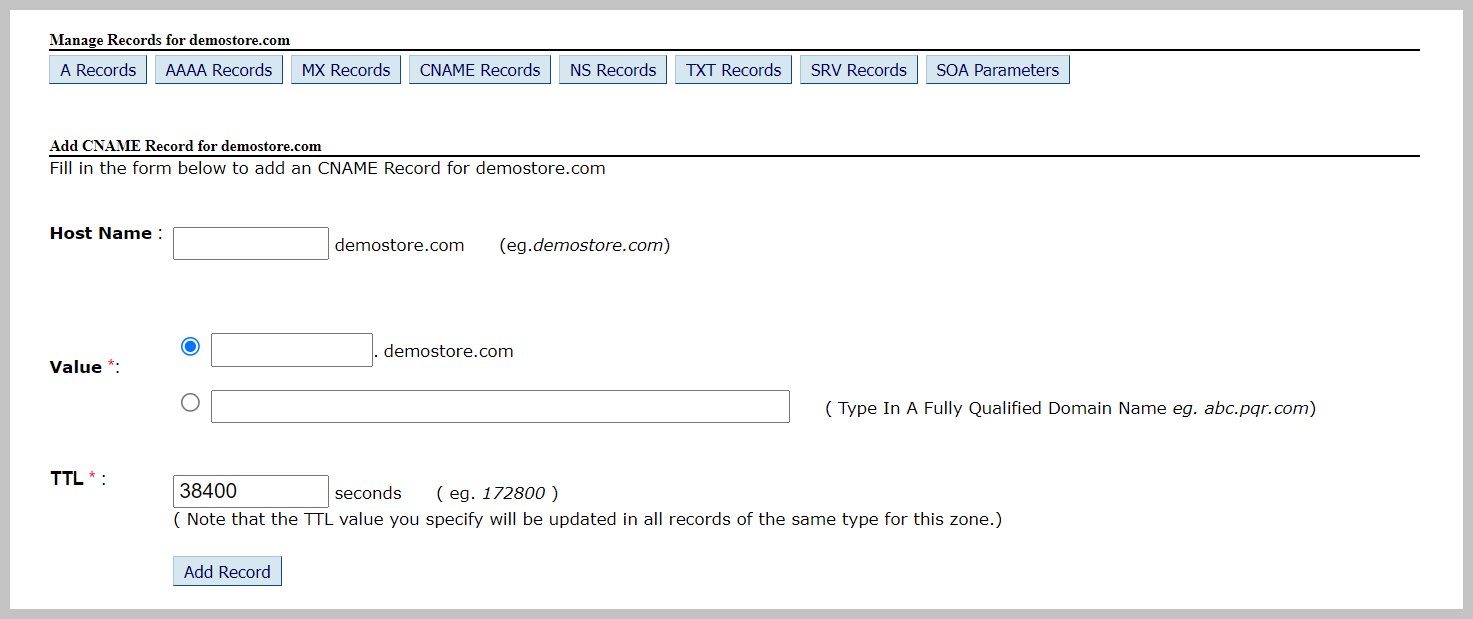
Click Add CNAME Record. Here, add your Host name (copy the value before
domain.com) and Value (copy the whole value) copied in step 4 to the corresponding fields. Then, click Add Record.
Repeat step 7 and 8 until all 3 above records are added to the admin dashboard. Once finished, proceed to step 13.
If your domain is purchased from another providers, please follow steps 10 to 12
In your browser, open a new tab and log into the admin dashboard of your domain provider.
Navigate to the DNS management page. This section may be referred to as a zone editor or cPanel depends on your domain provider. In case you cannot find this section, please contact your domain provider for more assistance.
In this DNS management page, create new CNAME records with the Host name (copy the value before
domain.com) and Value (copy the whole value) in step 4 and paste it to your DNS management page.After setting up the required records on your domain provider's admin dashboard, go back to the Customer Email page in your ShopBase admin site and click Authenticate now.
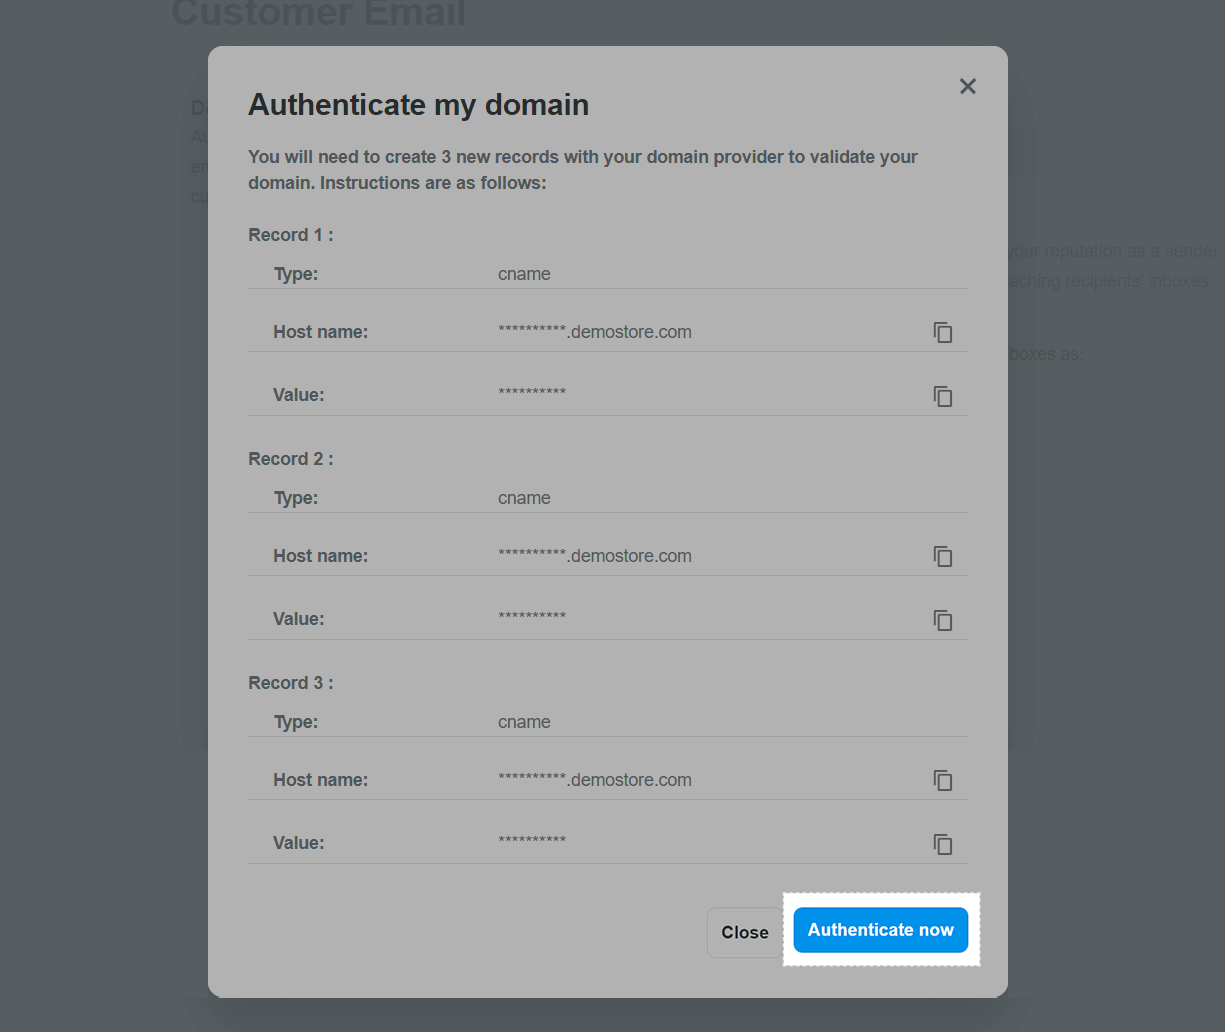
It may take up to 48 hours to process your domain authentication request.
Updated 8 months ago